Table of Contents
Advertisement
Quick Links
Advertisement
Table of Contents

Related Manuals for TP-Link TD-8810


Summary of Contents for TP-Link TD-8810
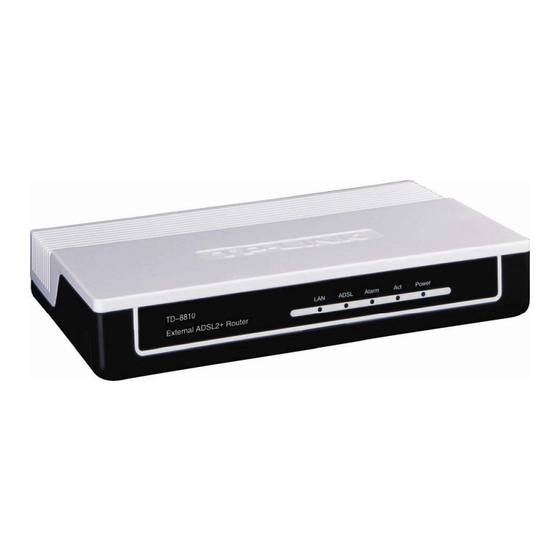
- Page 1 TD-8810 External ADSL2+ Router Rev: 1.1.2 1910010007...
- Page 2 COPYRIGHT & TRADEMARKS Specifications are subject to change without notice. is a registered trademark of TP-LINK TECHNOLOGIES CO., LTD. Other brands and product names are trademarks or registered trademarks of their respective holders. No part of the specifications may be reproduced in any form or by any means or used to make any derivative such as translation, transformation, or adaptation without permission from TP-LINK TECHNOLOGIES CO., LTD.
-
Page 3: Fcc Statement
FCC STATEMENT This equipment has been tested and found to comply with the limits for a Class B digital device, pursuant to part 15 of the FCC Rules. These limits are designed to provide reasonable protection against harmful interference in a residential installation. This equipment generates, uses and can radiate radio frequency energy and, if not installed and used in accordance with the instructions, may cause harmful interference to radio communications. -
Page 4: Package Contents
Package Contents The following items should be found in your package: One TD-8810 External ADSL2+ Router One AC power Adapter for TD-8810 External ADSL2+ Router One Resource CD for TD-8810 External ADSL2+ Router, including: • This Guide • Quick installation Guide Program •... -
Page 5: Table Of Contents
Chapter 1. Introduction ... 1 Product Overview ... 1 Main Features ... 1 Supporting protocol ... 1 Transmit data-rate ... 2 ATM property ... 2 System support ... 2 Working environment ... 2 Conventions ... 2 Chapter 2. Hardware Installation ... 4 System requirement ... -
Page 6: Chapter 1. Introduction
The TD-8810 is a complete plug-and-play solution. With standard Ethernet interface, it can be directly connected to any 10M/100M Ethernet devices, support Auto-MDIX. The TD-8810 not only uses html (web mode through Ethernet port) to configure the Router but also uses external utility software. You can download it from our website (http://www.tp-link.com). -
Page 7: Transmit Data-Rate
Support Auto-MDIX Working environment Operating temperature: 0 Storage temperature: -40 Humidity: 10%~90% (non-condensing) 1.8 Conventions The Router or TD-8810, or device mentioned in this User guide stands for TD-8810 External TD-8810 External ADSL2+ Router User Guide ℃ ℃ ℃ ℃... - Page 8 TD-8810 External ADSL2+ Router User Guide ADSL2+ Router without any explanations. Parameters provided in the pictures are just references for setting up the product, which may differ from the actual situation. You can set the parameters according to your demand.
-
Page 9: Chapter 2. Hardware Installation
Chapter 2. Hardware Installation The TD-8810 maintains three separate interfaces, one Ethernet, one ADSL and one power adapter interface. The Router should not be located where it will be exposed to moisture or excessive heat. Place the Router in a location where it can be safely connected to the various devices as well as to a power source. -
Page 10: Hardware Installation Procedures
The procedure to install the Router can be described in general terms in the following steps: Step 1: Connecting the MODEM port of Splitter with the TD-8810 ADSL Router LINE port by telephone line. While you need to use a telephone, please attach telephone line into the phone of Splitter. -
Page 11: Chapter 3. System Configuration
Network Neighbor -> Choose Properties -> Double-click TCP/IP. Users of Windows 2000/NT/XP can do the following: Right-click Network Neighbor -> Choose Properties -> Right-click Local Connection -> Choose Properties -> Double-click Internet Protocol (TCP/IP). TD-8810 External ADSL2+ Router User Guide Figure 3-1... -
Page 12: Login
If the screen looks like the following, the connection has failed. Please try again. 3.2 Login Startup Internet Explorer, and enter 192.168.1.1;then enter default user name(admin) 、 password(admin), When ADSL connection is OK, you will see the Figure 3-2. TD-8810 External ADSL2+ Router User Guide Figure 3-2 Figure 3-3... -
Page 13: Quick Setup
3.3 Quick Setup Figure 4 is the main page of the Router. Please select Quick Setup. Enter the VPI and VCI values provided by your Internet Service Provider and click Next. TD-8810 External ADSL2+ Router User Guide Figure 3-4 Figure 3-5... -
Page 14: Pppoa
Internet Service Provider and click Next. 3.3.1 PPPoA Select PPP over ATM (PPPoA) Connection Type, and click Next. Enter the Username and Password provided by your Internet Service Provider and click Next. TD-8810 External ADSL2+ Router User Guide Figure 3-6 Figure 3-7... - Page 15 Turn on the selected functions according to your demands. Clicking the next button to enter the next step. Click Save/Reboot. TD-8810 External ADSL2+ Router User Guide Figure 3-8 Figure 3-9...
-
Page 16: Pppoe
3.3.2 PPPoE Select PPP over Ethernet (PPPoE) Connection Type, and click Next. Enter the Username and Password provided by your Internet Service Provider and click Next. TD-8810 External ADSL2+ Router User Guide Figure 3-10 Figure 3-11... - Page 17 TD-8810 External ADSL2+ Router User Guide Figure 3-12 Click Save/Reboot. Figure 3-13...
-
Page 18: Mer
Note: The Router will restart when you complete the configuration, so you have to wait for a while until it restarts successfully. 3.3.3 MER Select MAC Encapsulation Routing (MER) Connection Type, and click Next. Enter the parameter and the way which is provided by your ISP, then click Next. - Page 19 Turn on the selected functions according to your needs. Click Next. Click Save/Reboot. TD-8810 External ADSL2+ Router User Guide Figure 3-14 Figure 3-15...
-
Page 20: Ipoa
3.3.4 IPoA Select IP over ATM (IPoA) Connection Type, and click Next. TD-8810 External ADSL2+ Router User Guide Figure 3-16 Figure 3-17... - Page 21 Enter the parameter and the way which is provided by your ISP, then click Next. Turn on the selected functions according to your needs. Click Next Click Save/Reboot. TD-8810 External ADSL2+ Router User Guide Figure 3-18 Figure 3-19...
-
Page 22: Bridging
3.3.5 Bridging Select Bridging Connection Type, and click Next. Click Save/Reboot. TD-8810 External ADSL2+ Router User Guide Figure 3-20 Figure 3-21... -
Page 23: Change Password
Note: After you complete any setup, the new setup must be saved and the Router must be restarted for the configuration to go into effect. Please click the Save/Reboot button to restart. 3.4 Change Password You will then see the Figure 3-23, which displays some information such as link rate and so on Default value of user name and password is “admin”;... -
Page 24: Web Setup
There are 7 PVC links in the WAN setup page, choose the appropriate PVC according to your need, and then click the edit button, you will enter the page of ATM PVC Configuration (See Figure 3-26) TD-8810 External ADSL2+ Router User Guide Figure 3-24... - Page 25 (Figure 3-27), So you should ask your ISP to acquire the local type of network protocol and Encapsulation mode. After choosing the proper protocol, enter the correct parameters supported by your ISP. Enable TD-8810 External ADSL2+ Router User Guide Figure 3-26...
- Page 26 TD-8810 External ADSL2+ Router User Guide the configurations, and then you will go to Internet. PPP over ATM (PPPoA) If you select the protocol of PPP over ATM (PPPoA), you will see the Figure 3-28, in which please enter the value of user name and password which is provided by your ISP. After selecting the other function (it’s recommended to keep the default setup), click Next to continue.
- Page 27 If you select the protocol of PPP over Ethernet (PPPoE), you will see the Figure 3-31, in which please enter the value of user name and password which is provided by your ISP. After selecting the other function (it’s recommended to keep the default setup), click the next button. TD-8810 External ADSL2+ Router User Guide Figure 3-29...
- Page 28 You will see the Figure 3-32, and then turn on the selected functions according to your needs. Clicking the next button to enter the next step, you will see the Figure 3-33, finally click save to complete the configuration. TD-8810 External ADSL2+ Router User Guide Figure 3-31...
- Page 29 You will see the Figure 3-35, and then turn on the selected functions according to your needs. Clicking the next button to enter the next step, you will see the Figure 3-36, finally click save to complete the configuration. TD-8810 External ADSL2+ Router User Guide Figure 3-33...
- Page 30 If you select the protocol of IP over ATM (IPoA), you will see the Figure 3-37, enter the parameter and the way which is provided by your ISP, then click the next button. TD-8810 External ADSL2+ Router User Guide Figure 3-35...
- Page 31 You will see the page (Figure 3-38), then turn on the selected functions according to your needs. Clicking the next button to enter the next step, you will see the Figure 3-39, finally click save to complete the configuration. TD-8810 External ADSL2+ Router User Guide Figure 3-37...
- Page 32 If you select the Bridging protocol, you just open the bridge service function options, you will see the Figure 3-40, then click the next button, you will see the Figure 3-41, finally click save to complete the configuration. TD-8810 External ADSL2+ Router User Guide Figure 3-39...
-
Page 33: Dhcp Ip Reservation
Note: After you complete any setup, the new setup must be saved and the Router must be restarted for the configuration to go into effect. Please click the Save/Reboot button to restart, referring to the Figure 3-42. Note: All of the above setup is under windows XP OS. - Page 34 Extension is selected. Choose “Advanced Setup”→“LAN”, and you will see the LAN screen, the section allows you to configure the Router’s LAN ports settings, and you can configure the DHCP IP Reservation function in this screen. 1. Click the Set Address Reservation button, and the Address Reservation screen pop up, as it showed below;...
- Page 35 The MAC Address and IP Address added in the text box used for illustrating. That may be different to your circs. 6. When you have saved the settings, the new entry will added to the Address Reservation screen showed below. TD-8810 External ADSL2+ Router User Guide Figure 3-26 Figure 3-27...
-
Page 36: Dns
7. Click Save/Reboot button to save the settings and reboot the router. Note: The function won't take effect until the router reboots. 3.5.2 When you select the connection type PPPoE, PPPoA, MER or IPoA for WAN configuration, you will see the DNS menu in the Web-based Utility (shown in Figure 3-29). It includes DNS Server and Dynamic DNS submenus. - Page 37 Dynamic DNS (shown in Figure 3-31). The Router offers a Dynamic Domain Name System (DDNS) feature. DDNS lets you assign a fixed host and domain name to a dynamic Internet IP Address. The Dynamic DNS service allows you to alias a dynamic IP address to a static hostname in any of the many domains, allowing your Router more easily accessed from various locations on the Internet.
- Page 38 (shown in Figure 3-32). Note: This page allows you to add a Dynamic DNS address from DynDNS.org,TZO or No-IP. 2. Select D-DNS provider (DynDNS.org,TZO or No-IP) in the drop-down list. TD-8810 External ADSL2+ Router User Guide Figure 3-31 Figure 3-32...
-
Page 39: Software Dial
5. Click the Save/Apply button to save the entry. 3.6 Software Dial If TD-8810 CPE work in bridged (RFC 1483 Bridged) mode when it connecting Internet. You must install dial software on your PC. There are some software working on WINDOWS in market, example for EnterNet3000、RASPPPoE、WinPeET. -
Page 40: Chapter 4. Advantage Management Setup
Modify the default IP address of the port of LAN(192.168.1.1) Modify the login password Configure DHCP Check the information of IP and the operation status Configure the NAT function Configure the DNS parameters Configure Security rule Configure DSL parameter TD-8810 External ADSL2+ Router User Guide... -
Page 41: Appendix A: Faq
Check the indicator of ADSL, it should be working in normally. Check the accuracy of parameter of value of VPI/VCI, Encapsulation mode of AAL5 and so on, whether you need to install the dial software, such as Winpoet, Enternet. TD-8810 External ADSL2+ Router User Guide... - Page 42 PPPoA or PPPoE, ADSL Modem will connect automatically. You can check whether your ADSL Modem succeeds in connection with PING command. TD-8810 External ADSL2+ Router User Guide so you will not need to use the dial...
-
Page 43: Appendix B: Default Config
TD-8810 External ADSL2+ Router User Guide Appendix B: Default Config admin User name Password admin 192.168.1.1 IP Address...
Need help?
Do you have a question about the TD-8810 and is the answer not in the manual?
Questions and answers