Table of Contents
Advertisement
Quick Links
Advertisement
Table of Contents

Related Manuals for Bosch CBG635B 3 Series


Summary of Contents for Bosch CBG635B 3 Series
- Page 1 Built-in oven CBG635B.3 [en] Instruction manual Built-in oven...
-
Page 3: Table Of Contents
Sabbath mode ......19 www.bosch-home.com and in the online shop Starting Sabbath mode ..... . . 19... -
Page 4: Intended Use
Intended use 8Intended use (Important safety information R ead these instructions carefully. Only then I n t e n d e d u s e will you be able to operate your appliance G eneral information safely and correctly. Retain the instruction I m p o r t a n t s a f e t y i n f o r m a t i o n manual and installation instructions for future Warning –... -
Page 5: Halogen Lamp
Important safety information Halogen lamp Warning – Risk of scalding! The accessible parts become hot during ■ Warning – Risk of burns! operation. Never touch the hot parts. Keep The bulbs in the cooking compartment children at a safe distance. become very hot. -
Page 6: Causes Of Damage
Causes of damage Appliance door as a seat, shelf or worktop: Do not ]Causes of damage ■ sit on the appliance door, or place or hang anything on it. Do not place any cookware or accessories on the appliance door. G eneral information C a u s e s o f d a m a g e Inserting accessories: depending on the appliance... -
Page 7: Environmental Protection
Environmental protection Open the appliance door as infrequently as possible 7Environmental protection ■ when the appliance is in use. Y our new appliance is particularly energy-efficient. E n v i r o n m e n t a l p r o t e c t i o n Here you can find tips on how to save even more energy when using the appliance, and how to dispose of your appliance properly. -
Page 8: Getting To Know Your Appliance
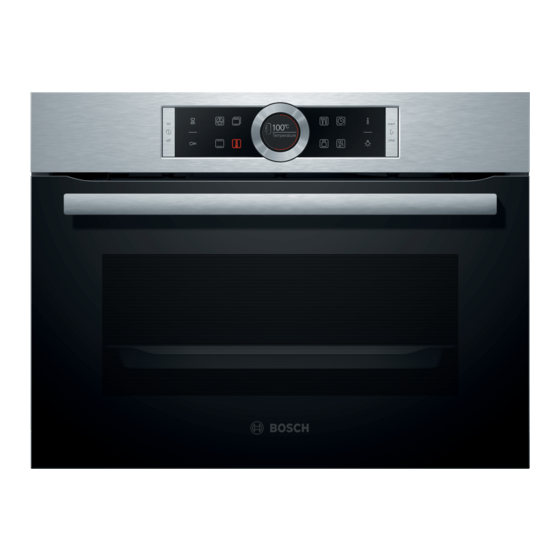
Getting to know your appliance Control panel *Getting to know your In the control panel, you can use the various buttons, appliance touch fields and the rotary selector to set the different appliance functions. The current settings are shown on the display. -
Page 9: Display
Getting to know your appliance Rotary selector Temperature display You can use the rotary selector to change the After the operation has started, the current cooking adjustment values shown on the display. compartment temperature is displayed graphically on the display. In most selection lists, such as the temperature, you have to turn the rotary selector back the other way if Heating line... -
Page 10: Types Of Heating
Getting to know your appliance Types of heating To make sure that you always use the right type of For temperature settings above 275 °C and grill heating to cook your food, we have explained the setting 3, the appliance reduces the temperature to differences and applications below. -
Page 11: Further Information
Accessories Further information _Accessories In most cases, the appliance provides notes and further information on the action just carried out. Y our appliance is accompanied by a range of A c c e s s o r i e s Touch the °... -
Page 12: Optional Accessories
Accessories Both availability and whether it is possible to order Locking function online differ between countries. Please see your sales The accessories can be pulled out approximately brochures for more details. halfway until they lock in place. The locking function prevents the accessories from tilting when they are Not all optional accessories are suitable for every Note:... -
Page 13: Before Using For The First Time
Before using for the first time Adjust the settings indicated. You can find out how to KBefore using for the first set the heating type and the temperature in the next time section. ~ "Operating the appliance" on page 14 Settings B efore you can use your new appliance, you must Heating type... -
Page 14: Operating The Appliance
Press the ÿ On/Off button to switch on the appliance. All touch fields light up red. The Bosch logo appears on Example in the picture: Hot air eco . at 195 °C. the display, and then the first heating type in the Set the type of heating using the rotary selector. -
Page 15: Rapid Heating
Operating the appliance Press the l Start/Stop button to start. Rapid heating The time on the display shows how long the With Rapid heating, you can shorten the heat-up time operation has already been running. for some heating types. The heating types suitable for Rapid heating are: <... -
Page 16: Time-Setting Options
Time-setting options Press the l Start/Stop button to start. OTime-setting options The cooking time counts down on the display. Y our appliance has different time-setting options. T i m e - s e t t i n g o p t i o n s Time-setting option Use Cooking time After the set cooking time has elapsed, the... -
Page 17: Setting The Timer
Time-setting options Set a later end time using the rotary selector. Setting the timer The timer runs alongside other settings. You can set it at any time, even if the appliance is switched off. It has its own audible signal so that you can tell whether it is the timer or a cooking time which has elapsed. -
Page 18: Childproof Lock
Childproof lock AChildproof lock QBasic settings Y our appliance is equipped with a childproof lock so T here are various settings available to you in order to C h i l d p r o o f l o c k B a s i c s e t t i n g s that children cannot switch it on accidentally or change help use your appliance effectively and simply. -
Page 19: Power Cut
Sabbath mode FSabbath mode Fan run-on time Recommended* Minimum Pull-out system Not retrofitted* (for rails and single pull- W ith the Sabbath mode, a cooking time of up to 74 S a b b a t h m o d e out system) hours can be set. -
Page 20: Cleaning
Cleaning DCleaning Door panels Hot soapy water: Clean with a dish cloth and then dry with a soft cloth. W ith good care and cleaning, your appliance will retain Do not use a glass scraper or a stainless steel C l e a n i n g its appearance and remain fully functioning for a long scouring pad. -
Page 21: Surfaces In The Cooking Compartment
Cleaning Surfaces in the cooking compartment Keeping the appliance clean The back wall in the cooking compartment is self- Always keep the appliance clean and remove dirt cleaning.You can tell this from the rough surface. immediately so that stubborn deposits of dirt do not build up. -
Page 22: Rails
Rails pRails W ith good care and cleaning, your appliance will retain R a i l s its appearance and remain fully functional for a long time to come. This will tell you how to remove the shelves and clean them. Detaching and refitting the rails Warning –... -
Page 23: Fitting And Removing The Glass Panels
Appliance door Detaching the appliance door Removing panels Open the appliance door fully. Press on the left- and right-hand sides of the cover Open the two locking levers on the left and right (fig.° (fig. Remove the cover (fig. " Close the appliance door fully ‚. - Page 24 Appliance door Refit the seal on the left and right (fig. Clean the panels with glass cleaner and a soft cloth. Wipe the condensate trough with a cloth and some hot Push in the inner glass panel. soapy water. Before sliding the panel in, make sure that the glossy side of the panel is on the outside and the Warning cut-outs on the left and right are at the top.
-
Page 25: Trouble Shooting
Trouble shooting Rectifying faults yourself 3Trouble shooting You can often easily rectify technical faults on the appliance yourself. I f a fault occurs, there is often a simple explanation. T r o u b l e s h o o t i n g If a dish does not turn out exactly as you wanted, you Before calling the after-sales service, please refer to the can find many tips and instructions for preparation at... -
Page 26: Replacing The Bulb In The Top Of The Cooking Compartment
Customer service Replacing the bulb in the top of the cooking 4Customer service compartment If the cooking compartment light bulb fails, it must be O ur after-sales service is there for you if your appliance replaced. Heat-resistant, 25 watt, 230 V halogen bulbs C u s t o m e r s e r v i c e needs to be repaired. -
Page 27: Dishes
Dishes Applying settings for dishes PDishes You will be guided through the entire setting process for your chosen food. W ith the “AutoCook” operating mode, you can cook a D i s h e s wide range of dishes. The appliance selects most Touch the % field. -
Page 28: Tested For You In Our Cooking Studio
Tested for you in our cooking studio By preparing several dishes at the same time, you can JTested for you in our make energy savings of up to 45 per cent. Position baking tins/dishes next to one another or offset and cooking studio vertically stacked in the cooking compartment. - Page 29 Tested for you in our cooking studio Types of heating used: % Top/bottom heating ■ < 4D hot air $ Pizza setting ■ ■ Dish Accessories/cookware Shelf posi- Heating Tempera- Cooking tion function ture in °C time in mins. Cakes in tins Sponge cake, simple Ring tin/cake tin 150-170...
- Page 30 Tested for you in our cooking studio Dish Accessories/cookware Shelf posi- Heating Tempera- Cooking tion function ture in °C time in mins. Biscuits Viennese whirls Baking tray 150-160** 25-40 Viennese whirls Baking tray 140-150** 25-40 < Whirls, 2 levels Universal pan + baking tray 140-150** 30-40 <...
-
Page 31: Bread And Rolls
Tested for you in our cooking studio Bread and rolls Recommended setting values The table lists the optimal heating type for various kinds Your appliance offers you a range of heating types for of bread and bread roll. The temperature and baking baking bread and rolls. -
Page 32: Pizza, Quiche And Savoury Cakes
Tested for you in our cooking studio Types of heating used: 7 Circulated air grilling ■ < 4D hot air ( Grill, large area ■ ■ % Top/bottom heating * Grill, small area ■ ■ Dish Accessories Shelf posi- Heating Tempera- Grill Cooking... - Page 33 Tested for you in our cooking studio result in more even browning. You can use a higher Universal pan or baking tray Slide the universal pan or the baking tray in carefully as setting next time if necessary. far as the limit stop with the bevelled edge facing the Baking times cannot be reduced by using higher Note: appliance door.
-
Page 34: Bakes And Soufflés
Tested for you in our cooking studio Bakes and soufflés Cookware Use wide, shallow cookware for bakes and gratins. In Your appliance offers a range of heating types for deep, narrow cookware, food requires more time to preparing bakes and soufflés. You can find the ideal cook, and the top will be darker. - Page 35 Tested for you in our cooking studio Roasting in cookware Recommended setting values Only use cookware which is suitable for use in an oven. In the table, you can find the ideal heating type for the Check whether the cookware fits in the cooking kind of poultry you are cooking.
-
Page 36: Meat
Tested for you in our cooking studio Dish Accessories/cookware Shelf posi- Type of Tempera- Grill Cooking tion heating ture in °C setting time in mins. Chicken goujons, nuggets, frozen Universal pan 200-220 10-20 Poulard, 1.5 kg Wire rack 200-220 70-90 Duck and goose Duck, 2 kg Wire rack... - Page 37 Tested for you in our cooking studio The setting values apply to chilled meat placed into the Grilling cold cooking compartment. By doing so, you can make Keep the appliance door closed when using the grill. energy savings of up to 20 per cent. If you preheat the Never grill with the appliance door open.
-
Page 38: Fish
Tested for you in our cooking studio Dish Accessories/cookware Shelf posi- Type of Tempera- Grill Cooking tion heating ture in °C setting time in mins. Veal Joint of veal, 1.5 kg Cookware, uncovered 160-170 100-120 Knuckle of veal, 1.5 kg Cookware, uncovered 200-210 100-110... - Page 39 Tested for you in our cooking studio Roasting and stewing in cookware Recommended setting values Only use cookware which is suitable for use in an oven. You can find the ideal heating type for your fish dishes Check whether the cookware fits in the cooking in the table.
-
Page 40: Vegetables And Side Dishes
Tested for you in our cooking studio Vegetables and side dishes Universal pan or baking tray Slide the universal pan or the baking tray in carefully as Here, you can find information for preparing grilled far as the limit stop with the bevelled edge facing the vegetables, potatoes and frozen potato products. -
Page 41: Eco Heating Functions
Tested for you in our cooking studio Eco heating functions Always place ovenware, tins and dishes on the wire rack. Hot air eco and Top/bottom heating eco are intelligent Universal pan or baking tray heating functions that allow you to gently cook meat, Slide the universal pan or the baking tray in carefully as fish and baked items. -
Page 42: Acrylamide In Foodstuffs
Tested for you in our cooking studio Dish Accessories/cookware Shelf posi- Type of Tempera- Cooking tion heating ture in °C time in mins. Small cakes Baking tray 150-160 25-35 Puff pastry Baking tray 170-190 25-50 Choux pastry Baking tray 200-220 35-45 Biscuits Baking tray... - Page 43 Tested for you in our cooking studio Sear the meat on the hotplate at a very high heat and Cookware for a sufficiently long time on all sides, even on the Use flat cookware, e.g. a glass/porcelain serving dish. ends. Place into the preheated cookware right away. Place the cookware into the cooking compartment to Place the cookware containing the meat into the preheat it.
-
Page 44: Drying
Tested for you in our cooking studio Drying Turn very juicy fruit and vegetables several times. After drying, remove the dried products from the paper With 4D hot air, you can dry foods with outstanding immediately. results. With this type of preserving, flavourings are concentrated by the dehydration. -
Page 45: Prove Dough
Tested for you in our cooking studio they may crack. Cover the preserving jars to protect Ending the preserving process them from draughts. Only remove the clamps once the Fruit jars are cold. After a short while, small bubbles will form at short intervals. -
Page 46: Defrosting
Tested for you in our cooking studio Defrosting Items which were frozen flat or portioned defrost Tip: faster than those frozen in a block. The defrost heating type is suitable for defrosting frozen fruit, vegetables and baked items. Poultry, meat and fish Remove frozen food from the packaging and place it in should ideally be defrosted in the refrigerator. -
Page 47: Test Dishes
Tested for you in our cooking studio Test dishes Notes The setting values apply to dishes placed into a cold ■ These tables have been produced for test institutes to cooking compartment. facilitate appliance testing. Please note the information in the tables about ■... - Page 48 *9001442961* 9001442961 990206...
Need help?
Do you have a question about the CBG635B 3 Series and is the answer not in the manual?
Questions and answers