Advertisement

Quick Links

Model No.
Thank you for purchasing this product.
Please read these instructions carefully before using this
product, and save this manual for future use.
Software (Firmware) Update
To support the latest features, it's very
important you install the latest updates
to maintain proper operation of your unit.
For details, refer to "Software
(Firmware) Update" (
https://panasonic.jp/support/global/cs/
(This site is in English only.)
EG
TQBS0166-1
Operating Instructions
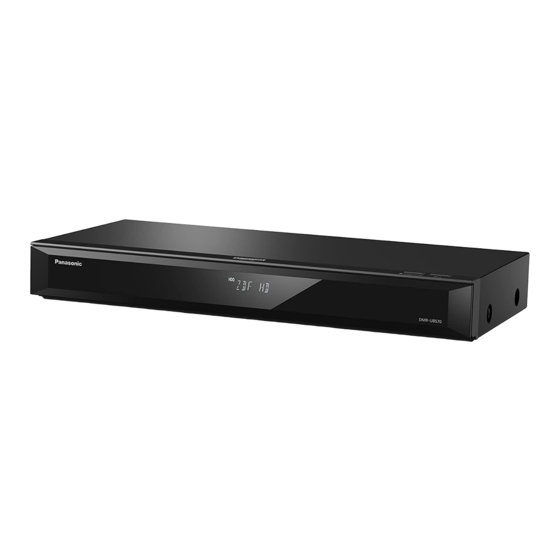
Blu-ray Disc™ Recorder
DMR-UBC70 DMR-UBS70
49) or
Getting started
Watching broadcasts
Recording
Playing back
Deleting/Editing
Copying
Network
Other functions
Setup
Reference

Advertisement

Table of Contents
loading

Summary of Contents for Panasonic ULTRAHD DMR-UBC70

  • Page 1 To support the latest features, it’s very Other functions important you install the latest updates to maintain proper operation of your unit. For details, refer to “Software Setup (Firmware) Update” ( 49) or https://panasonic.jp/support/global/cs/ (This site is in English only.) Reference TQBS0166-1...
  • Page 2: Safety Precautions

    Safety precautions CAUTION WARNING Unit Unit • This unit utilizes a laser. Use of controls or • To reduce the risk of fire, electric shock or adjustments or performance of procedures other product damage, than those specified herein may result in –...
  • Page 3: Supplied Accessories

    Supplied accessories Batteries • Danger of explosion if battery is incorrectly replaced. Replace only with the type Please check and identify the supplied recommended by the manufacturer. accessories. • Mishandling of batteries can cause electrolyte (Product numbers are correct as of March 2018. leakage and may cause a fire.
  • Page 4: Table Of Contents

    Table of contents Safety precautions ..... 2 Supplied accessories ....3 Getting started Other functions Unit and media care .
  • Page 5: Unit And Media Care

    Unit and media care Getting started HDD/USB HDD handling care Cleaning • The HDD is a high precision recording • Wipe with a soft, dry cloth. instrument and is easily susceptible to damage. • Never use alcohol, paint thinner, benzine or Therefore, be careful of the following points chemically treated cloth to clean this unit.
  • Page 6: Connection

    Connection The unit can be played back 4K contents when this unit is connected to a compatible TV. • Before making any connections, please disconnect all the units from AC power. (Connect the AC mains lead after making all connections.) •...
  • Page 7 [UBS70] Basic connections The following three connection methods are available. Choose a method suited to your environment. A Using a multi switcher: You can record two programmes simultaneously. • Connect both LNB IN 1 and LNB IN 2 to the satellite dish. B Using a single cable router: You can record two programmes simultaneously.
  • Page 8 Amplifier/receiver/sound bar connections ∫ Enjoying video with a 4K-compatible TV and audio with a 4K-compatible amplifier Amplifier/receiver/ sound bar (4K-compatible) HDMI OUT HDMI IN HDMI IN (ARC) (ARC) HDMI cable HDMI cable (18 Gbps) (18 Gbps) ∫ Enjoying 4K video by connecting a non-4K compatible amplifier 4K images can be played back when this unit is connected to a 4K compatible TV.
  • Page 9: Settings

    Settings According to your environment, select TV Signal Selection. Before use, perform the initial setup of the unit. • Digital Cable Channels Easy Setting • Digital Terrestrial Channels Preparation When selecting “Digital Cable Channels” Turn on the TV, then select the appropriate AV 1 Select the channel number allocation, then input to suit the connections to this unit.
  • Page 10 2 Make the settings of user band. When the following screen appears: • About the each settings refer to below. 4K(50p/60p) Output 3 Select “Start Auto Setup”, then press [OK]. Connection check is finished. Cannot connect with 4K. Please check if the HDMI connected •...
  • Page 11 Manufacturer and Code No. the Network Service Terms & Conditions and Privacy Policy (collectively, “Legal Notices”). Manufacturer Code Manufacturer Code Please review the Notices carefully. To confirm Panasonic 01/02/03/04 SHARP your understanding and acceptance of the GRUNDIG SONY 17/30/39/70 31/33/66/67/69 Notices, select “Agree”.
  • Page 12: Remote Control

    Remote Control Instructions for operations are generally described using the remote control. 1 Transmit the remote control signal  • Point it at remote control signal sensor on this unit. ( 2 Switch the unit from on to standby or vice ...
  • Page 13: Watching Broadcasts

    Watching broadcasts Watching Using channel information broadcasts While watching a programme Select the appropriate AV input on the TV. Press [STATUS Press [CH W X] to select the channel.  e.g., • You can also select the channel by the following operations.
  • Page 14 To show the Teletext REWIND LIVE TV/PAUSE LIVE TV You can rewind/pause the live TV programme you Press [TEXT are watching. • A maximum of 1.5 hours of TV programmes can Switching audio be saved temporary. Press [AUDIO]. REWIND LIVE TV If this unit requests a PIN 1 While watching TV Enter the PIN with the number buttons.
  • Page 15: Recording Tv Programmes

    Recording TV Recording To set the recording time programmes 1 Select “Recording Time” or “Continuous recording” in step 3 ( left). This unit can record two programmes being Recording Time: (30 mintes - 4 hours) broadcasted at the same time. •...
  • Page 16: Timer Recording

    Timer recording Operation during recording You can enter up to 32 programmes within a To check the recording programme month in advance. (Each daily or weekly programme is counted as one programme.) Press [STATUS This unit can record two programmes being e.g., While recording two programmes simultaneously broadcasted at the same time.
  • Page 17 TV Guide • Category may not be assigned correctly depending on the programme information. Press [GUIDE]. • “Keyword Search”, “Programme Type Search” and “Category Selection” search the first 250 channels on “All e.g. Landscape view DVB Channels”. Landscape TV Guide TUE 02.01.2018 8:05 Category: All DVB Channels To edit the timer recording...
  • Page 18 To confirm a timer programme Timer recording options (e.g., to delete or edit) e.g., 1 Press [PROG/CHECK]. TUE 02.01.2018 8:05 e.g., Timer Recording Time Remaining HD 75:33 / UHD 37:46 DR Signal Supported : OFF TUE 02.01.2018 8:05 Channel Day/Date Start Stop Mode...
  • Page 19 Screen icons Notes on recording • When the recording mode (picture quality) of a Red: Timer recording standby is programme recorded in DR mode is changed, activated. teletext recorded with the programme will be Grey: Timer recording standby is lost. deactivated.
  • Page 20: Function Menu

    Network Service ( – USB device Network Service allows you to access some – USB HDD specific websites supported by Panasonic, and enjoy Internet contents such as photos, videos, etc. from Network Service home screen. Copy Video The unit can copy programmes between the HDD, USB-HDDs, and discs.
  • Page 21: Keyword Recording

    Keyword Recording Keyword Recording conditions The unit can find programmes that include When a search brings up too many programmes, specified keywords from programme names and we recommend revising the “Search Conditions”. programme information on TV Guide, and record Search Conditions: the programmes automatically.
  • Page 22 Priority order of Keyword Recording To add/edit the Keyword Recording takes place in the following order of Select the keyword and press [OK], then make priority: required settings. • Refer to “Keyword Recording conditions” ( 1 A programme that is already being recorded 2 Timer Recording 3 Keyword Recording (programmes will be To delete the registered Keyword...
  • Page 23: Using The External Hdd (Usb Hdd)

    Using the external Connecting the USB HDD HDD (USB HDD) e.g., [UBC70] Connect a USB HDD to the unit and use it as This unit’s rear panel extended storage for the built-in HDD. If you intend to move recorded programmes to a USB HDD, the USB HDD must be registered to this unit first.
  • Page 24: Playing Back

    Playing contents on Playing Video Menu screen back the HDD e.g.,     Video Menu Grouped Programmes Time Remaining HD 73:33 / UHD 36:46 (DR) Keyword Record Not Viewed Movie Social/Economic AVCHD “For recorded programmes ( 75)” only §...
  • Page 25 • Encrypted programme Screen icons • Programme has failed to be decrypted. Currently recording programme (Red) – Press [STATUS ] to show the reason of the failure. Protected programme Programme cannot be played back, • Programme was not recorded due edited (except deleting) or copied.
  • Page 26 Showing Information Playing Keyword Recording programmes Select the programme, then press [STATUS Select “Keyword Record” tab. ( Showing grouped programmes Video Menu Time Remaining HD 73:33 / UHD 36:46 (DR) 1 Press [OPTION]. Keyword Record Not Viewed Movie Social/Economic AVCHD Programme will be deleted if not enough space on HDD.
  • Page 27 To copy Keyword Recording programmes Photo Menu screen If you select keywords before copying, you can Photos imported to the HDD ( 43, Selecting and copy all the programmes containing the copying the photos) are managed using folders. keywords. Folders and photos can be edited by pressing •...
  • Page 28: Playing Contents On The Media

    Playing contents on Menu screen the media Selecting screen for each operation is displayed when the media is inserted, and you can access the operation screen easily. e.g., [USB] USB Device Play / Copy Video “For data files ( 75)” only §...
  • Page 29: Playback (Skip, Manual Skip Etc.)

    Playback (Skip, Quick View Manual Skip etc.) Press and hold [1 a1.3]. • Press again to return to normal speed. Some operations may not work depending on the media and contents. • UHD programmes (4K), Ultra HD Blu-ray, MKV, MP4 and MPEG2: Quick View may not be available.
  • Page 30 To display menu Displaying the Teletext [HDD] [USB_HDD] (For recorded programmes) [BD-V] [DVD-V] 1 Press [OPTION]. [BD-RE] [BD-R] 2 Select “Playback Menu”, then press [OK]. Press [TEXT 3 Select “Top Menu”, “Pop-up Menu” or “Menu”, then press [OK]. • Teletext display mode is TOP (FLOF) only. •...
  • Page 31: 4K Networking

    4K Networking 3D video playback Preparation You can save 4K videos/photos recorded with Connect 3D compatible TV to this unit. digital cameras and other 4K-compatible devices to the HDD of this unit and play them back. Preparatory 3D settings 3D BD-Video Playback It is also possible to play back 3D discs in 2D (conventional video).
  • Page 32: Playback Menu (Repeat Play, Remaster Etc.)

    Playback menu Subtitle Settings § (Repeat Play, Turn the subtitle on/off, and change the Remaster etc.) language depending on the media. Subtitles Subtitle Style A variety of playback operations and settings can Subtitle Position be performed from this menu. Subtitle Luminance Available options differ depending on the playing contents and the condition of the unit.
  • Page 33 Progressive Switch “Set 1”, “Set 2” or “Standard” by using Select the method of conversion for [2, 1]. progressive output to suit the type of content • You can register desired settings to “Set 1” and being played. “Set 2”. Settings for BD Video playback and •...
  • Page 34: Deleting/Editing

    Deleting/Editing Deleting/Editin Editing recorded programmes contents If the programme is contents protected, you may not perform editing other than deleting. ( Once deleted, divided or partially deleted, content cannot be restored to its original On the Video Menu screen: state. Make certain before proceeding. Select the programme.
  • Page 35 Partial deleting Picture Quality Change (To be smaller the data size of recorded [HDD] [USB_HDD] [BD-RE] [BD-R] [RAM] programme) Select “Partial Delete”. [HDD] [USB_HDD] 1 Press [OK] at the start point and end point to The picture quality change function changes the delete.
  • Page 36 3 If you have selected “Now”: Programme Decryption Select “Start”, then press [OK]. [HDD] If you have selected “During standby”: Encrypted programmes ( ) can be decrypted Press [OK]. manually. • Picture quality change will be performed after Select “Programme Decryption”. the unit is switched to standby.
  • Page 37 Editing chapters Deleting video/music files on the HDD [HDD] [USB_HDD] [BD-RE] [BD-R] [RAM] On the video/music list screen: Creating chapters in your favourite scenes, you Select the file or folder. can easily reach the head of scene using skip • Multiple selection ( button.
  • Page 38: Copying

    Copying contents Copying • Other operation may not be possible while copying. The unit can copy programme between the HDD, • You cannot copy the following programmes. USB-HDDs, and discs. – [USB_HDD] Protected programmes – [USB_HDD] HD Video (AVCHD) • If you wish to choose the audio language, select the 1, 2, 3 language from “Multi Audio”...
  • Page 39 Setting the copying options Copying from media to HDD 1 Select the item in step 7 ( 38). [BD-RE] [BD-R] [RAM] [+RW] > [HDD] 2 Press [2, 1] to change the settings. Insert a disc. • Automatic Standby after Copy The Menu screen appears.
  • Page 40 Set the picture quality ( 76). • Programmes in the grouped programmes and other 1 Select “Picture Quality”, then press programmes cannot be registered simultaneously. [1] (right). 2 Set “Picture Quality”. To edit the copying list 3 Press [2]. 1 Select the programme after step 4-4 ( left).
  • Page 41 Notes for copying Copy (Keep Picture Quality) Copy (Change Picture Quality) The unit copies a programme while maintaining The unit changes the picture quality of a its original picture quality and recording time. This programme while copying it. Copying will take method can perform copying faster than Copy about the same amount of time as the actual (Change Picture Quality) can.
  • Page 42 Copying a finalised disc Copying a programme that is currently being played back [DVD-V] > [HDD] While playing a disc, the content being played is [HDD] > [BD-RE] [BD-R] [RAM] [DVD-R] [DVD-RW] copied to the HDD according to the set time. [+R] [+RW] Select “Copy Menu”.
  • Page 43 – 1080/50p or 1080/60p – Without the AVCHD information (video recorded with > [BD-RE] [BD-R] [RAM] [HDD] certain non-Panasonic equipment, video copied to the HDD after copying it to BD-R or BD-RE once, etc.) [BD-RE] [BD-R] [RAM] > [HDD] • 3D video may not be copied correctly.
  • Page 44 If the copying destination selection screen is Copying the HD Video (AVCHD) appeared: Select the copying destination, then press [BD-RE] [BD-R] > [HDD] [OK]. [RAM] [DVD-R] [+R] Select “Yes”, then press [OK]. [HDD] > [USB_HDD] [USB] Copying will start. [BD-RE] [BD-R] e.g., To stop copying Press and hold [RETURN...
  • Page 45: Network Service

    Press [INTERNET]. compatible equipment § • When a message is displayed, read it carefully and then press [OK]. SAT>IP Client device (e.g., Panasonic TV) or § smartphone etc., installed with a SAT>IP Select the item, then press [OK]. Client app...
  • Page 46: Home Networking (Dlna)

    Home Networking (DLNA) • The programmes with access restriction (e.g., copy restriction) are not available. • If video frames are dropped, change the following settings. Home Networking (DLNA) allows you to watch the – Conversion Setting for DLNA ( contents and broadcasts on Server equipment –...
  • Page 47 Format Example of file extension JPEG .jpg To exit .mpo §1, 2 Press [RETURN Only when the server is another Panasonic §1 Blu-ray Disc Recorder, etc. 2D playback only. §2 Audio Audio codec Example of file extension .mp3 .wav...
  • Page 48: Other Functions

    DLNA compatible equipment each other VIERA Link is a convenient function which will link directly without a wireless broadband router. the operations of this unit and a Panasonic TV (VIERA) or an amplifier/receiver. You can use this Connecting temporarily function by connecting the equipment with the HDMI cable.
  • Page 49: Software (Firmware) Update

    • You can also download the latest software (firmware) from before proceeding. the following website. https://panasonic.jp/support/global/cs/ • Do not disconnect the AC mains lead while formatting. This can cause the disc unusable. • The contents are deleted when you format a disc even if you have set protection.
  • Page 50 Top Menu HOLD function [DVD-R] [DVD-RW] [+R] [+RW] The HOLD function disables all controls on the You can select the background for remote control and the unit. DVD-Video Top Menu. Press and hold [OK] and [RETURN Auto-Play Select simultaneously until “X HOLD” appears on the [DVD-R] [DVD-RW] [+R] [+RW] front panel display.
  • Page 51: Basic Settings

    Basic Settings Setup • To delete channels: Select the channel, press [OK]. You can change the unit’s settings below. • Yellow: Delete all channels. Press [FUNCTION MENU]. • To change the name of the Favourites list: Select “Basic Settings” in “Setup”, then press 1 Press the red button.
  • Page 52 New Channel Message [DVB-C] Settings for DVB-C Channels Set whether to obtain the information [DVB-T] [DVB-T2] Settings for DVB-T Channels automatically when a new DVB channel is added. Channel List You can edit the channel list. Child Lock • To hide/reveal channels 1 Select the channel.
  • Page 53 Exchange Channel List Exports/Imports DVB-S Channel List settings Favourites Edit ( using the USB device to share the same settings with another Panasonic Recorder Auto Setup (Satellite) which has the same function. You can restart the Auto Setup. ( • Export Channel List/Import Channel List...
  • Page 54 Settings for Recording Preferred Language ( Audio Preference ( Timer Record Start Buffer This function sets the timer recording to start Audio Description ( earlier than the TV Guide time. HbbTV Setting ( Timer Record Stop Buffer This function sets the timer recording to stop HDD / Disc / USB HDD later than the TV Guide time.
  • Page 55 Chapter Creation Format USB HDD Set the Chapter Creation method. Formatting deletes all contents, and they cannot be restored. Check • Even if “Automatic” is selected, depending carefully before proceeding. on the programme to be recorded, the chapter may not be created correctly. Cancellation of all USB HDD Registrations Disc Speed for Copy This function cancels the registrations of all...
  • Page 56 Digital Audio Output Front Panel Display Changes the brightness of the front panel Dolby D / Dolby D + / Dolby TrueHD display. DTS / DTS-HD • If “Automatic” is selected, the display turns dark MPEG during play and disappears when the unit is in standby.
  • Page 57 HDMI Connection Settings HLG / PQ Conversion When this unit is connected to a TV that Video Format supports only HDR (PQ) format, set whether You can only select items compatible with the or not to convert in HLG format to PQ format. connected equipment.
  • Page 58 Proxy Server Settings Home Network Settings Check and set the connection to the Proxy You can set the DLNA (Server) function. server. • Press [OK] to show the respective setting. Home Network function You can switch between enable/disable of Network Service Settings the DLNA (Server) and DMR (Media Renderer) function.
  • Page 59 Others Remote device list • To register equipment manually Standby Settings 1 Select the device name or the MAC Address for the device you want to Quick Start register, then press [OK]. 2 Select “Yes”, then press [OK]. • On: It is possible to start quickly from standby.
  • Page 60 Change the remote control code on the main unit Software Update Now ( Broadcast ) ( and the remote control if you place other Software Update Now ( Internet ) ( Panasonic products close together. Software Licence • Use “BD 1”, the factory set code, under normal circumstances.
  • Page 61: Troubleshooting Guide

    Troubleshooting guide The remote control does not work. Reference • The remote control and main unit are using different codes. Change the code on the remote Before requesting service, make the following control. checks. If the problem still persists, consult your dealer for instructions.
  • Page 62 The screen changes automatically. Cannot output video in HDR quality (even when connected to an HDR-compatible TV). • If “Screen Saver” is set to “On”, the screen saver function will be activated when there is no • When connected to a TV or terminal that does operation for 5 minutes or more.
  • Page 63 A part or whole of a recorded programme has Play been lost. Cannot play back. • If there is a power failure or the AC mains lead is • The disc is dirty. ( disconnected from the household mains socket •...
  • Page 64 Digital broadcasts cannot be received. Network • To receive an encrypted broadcast, a CI module When using Wireless LAN connection, video valid for the broadcast is required. is not played back or video frames are [UBS70] dropped. • The dish may not be pointing in the direction of •...
  • Page 65 • Playback via DLNA compatible equipment may Photo not be performed when this unit is in the following conditions: Photos do not play back normally. – While playing back a BD-Video • The images that were edited on the PC, such as Progressive JPEG, etc., may not play back.
  • Page 66 PROG FULL • There are already 32 timer programmes. Delete Due to the current disc not having authorised copyright unnecessary timer programmes. ( information, video output is not performed. • You are trying to divide a programme when the maximum possible number of programmes is already stored on the media.
  • Page 67 Panasonic has screens may be changed with or without a prior notice. no authority to and does not grant you that permission and •...
  • Page 68: Main Unit

    Main unit Front        Pull to flip Ensure that it is down the front facing the right way panel. 1 Disc tray 5 CI slot ( 2 Display ( below) 6 Open/close disc tray 3 USB port ( DC 5 V 900 mA) 7 Standby/on switch (Í/I)
  • Page 69: Specifications

    Rear        1 AC IN ( ) terminal ( 6, 7) 5 LAN port (10BASE-T/100BASE-TX) 2 Cooling fan 6 HDMI AV OUT terminal ( 6, 7) 3 LNB IN 1/2 terminal ([UBS70]) ( 7 USB port ( DC 5 V 500 mA) •...
  • Page 70: Ci (Common Interface) Module

    CI (Common Interface) module An appropriate CI module is required to view or record encrypted programmes. You need a CI module, CAM (Conditional Access Module) together with a certified Smart Card, and a subscription with the corresponding broadcaster. • If not viewing/recording an encrypted broadcast, you do not need to insert the CI module. Insert the CI module into the CI slot of this unit.
  • Page 71 Encrypted programmes About CI Plus compatible broadcast Programmes recorded in encrypted form ( “CI Plus” is a technical specification that imposes contents protection, etc. have the following restrictions: – The encrypted programme can be played back, CI Plus contents protection but it does not mean that it is decrypted and saved in the decrypted form.
  • Page 72: Hdd And Media Information

    HDD and media information For more details, refer also to the specifications. ( Recordable/playable contents (–: Impossible) Media type Standard symbol Recordable contents Playable contents • Video • JPEG • DSD • AVCHD/AVCHD 3D • MPO • FLAC Built-in hard disk drive [HDD] •...
  • Page 73 It cannot be recorded directly. (Only compatible with copying from the built-in HDD) §1 Recorded with AVCHD format compatible devices (Panasonic video camera, etc.). It may not be §2 able to play back, add, or edit depending on the device.
  • Page 74 Information about contents About extension of files ∫ Broadcast Recordings Example of file File format Numbers of programmes that can be recorded: extension “.mkv” Maximum Media programmes (Subtitle text files) (Compression methods “.srt” 3000 Video: H.264, HEVC “.sub” Audio: AAC, PCM, Vorbis, BD-RE, BD-R FLAC) “.txt”...
  • Page 75 Notes for the USB device Notes for the disc You can use an external HDD (USB HDD) in the Region management information following two ways. (A single HDD cannot handle The unit can play back BD-Video/DVD-Video those two ways simultaneously.) discs of the following regions codes, including “ALL”: For recorded programmes...
  • Page 76 Recording mode (Picture Quality) Picture Quality HG/HX/HE/HL/HM XP/SP/LP/FR §1 Feature Programmes can be Recording can be done Recording can be done recorded in their original with reduced recording with reduced recording quality. volume in High definition volume in Standard (HD) quality definition (SD) quality.
  • Page 77 ∫ HG, HX, HE, HL, HM modes BD-RE, BD-R Recording Mode Single Layer Dual Layer (picture quality) (500 GB) (25 GB) (50 GB) 78 hours 4 hours 8 hours 117 hours 6 hours 12 hours 176 hours 9 hours 18 hours 235 hours 12 hours 24 hours...
  • Page 78: Licenses

    At least three (3) years from delivery of this product, “DVD Logo” is a trademark of DVD Format/Logo Licensing Panasonic will give to any third party who contacts us at the Corporation. contact information provided below, for a charge no more...
  • Page 79: Index

    Index 1 2 3... 4K ......6 Guide (TV Guide) ... 17 Recording .
  • Page 80 Directive for the chemical involved. Declaration of Conformity (DoC) Hereby, “Panasonic Entertainment & Communication Co., Ltd.” declares that this product is in compliance with the essential requirements and other relevant provisions of Directive 2014/53/EU. Customers can download a copy of the original DoC to our RE products from our DoC server: http://www.ptc.panasonic.eu...

This manual is also suitable for:

Ultrahd dmr-ubs70

Table of Contents