Advertisement
Quick Links
Seventh Circle Audio
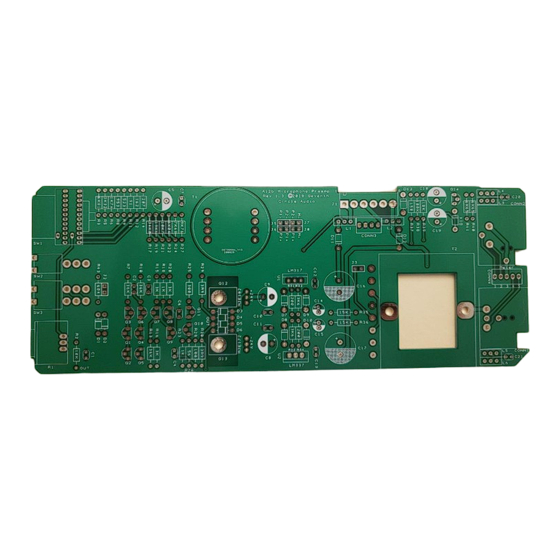
Based on classic American preamp designs of the late '60s and early '70s, the A12 delivers
the sound of rock. A simple, single stage, transformer-coupled preamp, the A12 produces an
aggressive midrange with pronounced transformer coloration. The A12 sounds fantastic with
rock drums and electric guitars,but is versatile enough to be used with just about any source.
Who Should Build This Kit?
The A12 is not difficult to build, but it is not intended for absolute beginners. You should have
built at least one project on a printed circuit board (PCB) before trying the A12. Sorry, but
soldering cables doesn't count. If you've never built an electronic project of any kind, this is
probably not the one to start with. To guarantee success make sure you have:
•
The ability to make basic voltage and resistance measurements using a digital
multimeter (DMM).
•
At least a rudimentary understanding of Ohm's Law and the relationship between
voltage, current, and resistance.
•
Some experience soldering on printed circuit boards.
•
The patience to follow instructions precisely and work carefully.
Essential Tools
Fine tipped 20-30 watt soldering iron w/ cleaning sponge (Hakko 936 or similar)
Eutectic (63/37) rosin core or "no clean" solder (.025" diameter is usually best)
Good-quality DMM
Small needle nose pliers
Small diagonal cutters
Wire stripper
Phillips screwdriver (#1)
Precision straight blade screwdriver (for adjusting potentiometers)
Highly Recommended Tools
Lead bender (Mouser 5166-801)
T-Handle wrench and 4-40 tap (Hanson 12001 and 8012)
MOLEX crimp tool (Waldom W-HT-1919 or equivalent)
Magnifying glass
Optional Tools
Panavise with circuit board head (PV-312, PV-300, and PV-315 or PV-366) 1/4"
nut driver
Oscilloscope
Signal generator
A12B Microphone Preamp
Page 1 of 9
Advertisement

Subscribe to Our Youtube Channel
Summary of Contents for Seventh Circle Audio A12B
- Page 1 Seventh Circle Audio A12B Microphone Preamp Based on classic American preamp designs of the late ‘60s and early ‘70s, the A12 delivers the sound of rock. A simple, single stage, transformer-coupled preamp, the A12 produces an aggressive midrange with pronounced transformer coloration. The A12 sounds fantastic with rock drums and electric guitars,but is versatile enough to be used with just about any source.
- Page 2 A12B Assembly Instructions Work Area Find a clean, flat, stable, well-lit surface on which to work. An anti-static mat is recommended for this project. If you’re in a dry, static-prone environment, it’s highly recommended. The importance of good lighting can’t be overstated. Component markings are tiny, and you’ll be deciphering a lot of them.
- Page 3 A12B Assembly Instructions Before installing the resistors, prepare the leads using small needle nose pliers or a lead- forming tool as shown below. Whatever you do, don’t bend the leads at the resistor body and force them into the board.
- Page 4 A12B Assembly Instructions Add the small yellow ceramic capacitors. These capacitors are not polarized and can be installed in either direction but pay close attention to the capacitor markings! These parts all look alike, but they are not interchangeable. Putting one in the wrong spot will not prevent the preamp from passing signal, but it can seriously impair its performance.
- Page 5 A12B Assembly Instructions Add dark blue aluminum electrolytic capacitors. Aluminum electrolytic capacitors are polarized and must be installed the right way around! Be absolutely sure to observe the correct polarity when installing this part. The negative lead of the capacitor is marked with a colored stripe.
- Page 6 A12B Assembly Instructions 12. Install C18 and C19, the phantom power filter caps. Aluminum electrolytic capacitors are polarized and must be installed the right way around! Again, be absolutely sure to observe the correct polarity when installing these parts. The negative leads of the electrolytic caps are marked with a colored stripe.
- Page 7 A12B Assembly Instructions 15. Add CONN1 and CONN2 to the board. Make sure they’re fully seated before soldering. The BLACK screws are for the XLR’s ONLY! 16. Attach the input transformer T1. Pin 1 on the transformer is clearly indicated with a red dot.
- Page 8 A12B Assembly Instructions Skip mounting the transformer if installing into a PC01 One Shot, but do attach the wires! 25 . Using two #4-40 x 1" screws, attach the output transformer to the board. Place a 1/8" spacer on each screw between the transformer and the circuit board.
- Page 9 Possible things to check are incorrectly installed diodes, backwards caps or shorts. 34. Set transformer jumpers like this: Add a jumper to J2 if you need 600 ohm output impedance. 35. Congratulations! You've built a A12B preamp! Page 9 of 9...


Need help?
Do you have a question about the A12B and is the answer not in the manual?
Questions and answers