Advertisement
Quick Links
Advertisement

Related Manuals for Henley Falcon Drop Rod

Summary of Contents for Henley Falcon Drop Rod
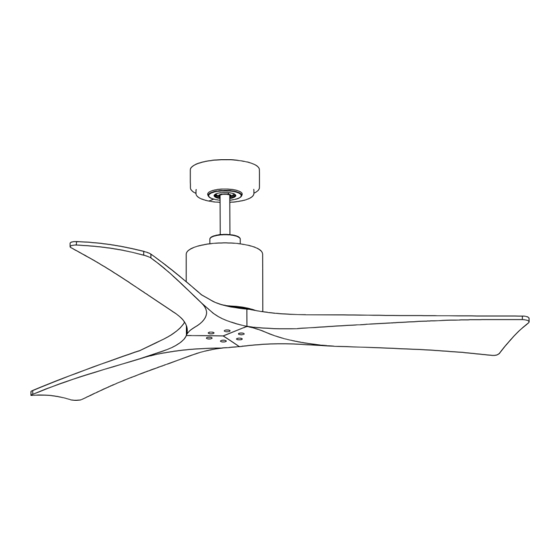
- Page 1 Henley Ceiling Fan Falcon Drop Rod...
- Page 2 SO WE’RE HERE IF YOU HAVE A QUESTION, NEED SOME HELP OR WANT TO CHAT ABOUT OUR PRODUCTS. SEND SUGGESTIONS OUR WAY TOO—WE’RE ALWAYS LOOKING TO MAKE YOUR EXPERIENCE WITH Henleyfan A POSITIVE ONE. Website: www. henleyfan.com > Tel: +44 1256 636 509 >...
-
Page 3: Table Of Contents
TABLE OF CONTENTS LIHGTING CONNCET GENERAL INSTALLATION & OPERATING INSTRUCTIONS REMOTE CONTROL SETTING AND OPERATION IMPORTANT SAFETY PRECAUTIONS SUMMER MODE AND WINTER MODE OPERATION TOOLS & MATERIALS REQUIRED CARE AND CLEANING &TROUBLESHOOTING UNPACKING YOUR FAN PREPARATION &INSTALLING THE HANGING BRACKET HANGING THE FAN INSTALLATION OF SAFETY CABLE SUPPPRT ELECTRICAL CONNECTIONS... - Page 4 To ensure the success of the installation, be sure to read the instructions and review the diagrams thoroughly before beginning. To avoid possible electric shock, be sure electricity is turned off at the main power box before wiring. All electrical connections must be made in accordance with local codes, ordinances and/or the National Electric Code.
-
Page 5: Important Safety Precautions
IMPORTANT SAFETY PRECAUTIONS WARNINGS: • Disconnect power by removing fuse or turning off circuit breaker before installing the fan and/or optional lighting. • Support directly from building structure. • To reduce the risk of fire, electric shock or personal injury, mount to outlet box marked "acceptable for fan support" and use mounting screws provided with the outlet box. -
Page 6: Unpacking Your Fan
UNPACKING YOUR FAN UNPACK YOUR FAN AND CHECK THE CONTENTS. • Do not discard the carton. If warranty replacement or repair is ever necessary, the fan should be returned in original packing. Remove all parts and hardware. Do not lay motor housing on its side, or the decorative housing may shift, be bent or damaged. •... - Page 7 PREPARATION PREPARATION: Canopy Verify you have all parts before beginning the installation. Check foam insert closely for Yoke Cover Downrod missing parts. Remove motor from packing. To avoid damage to finish, assemble motor Motor Housing on soft padded surface or use the original foam inset in motor box.
-
Page 8: Hanging The Fan
HANGING THE FAN Remove ball from downrod by loosening set screw in the side of the ball. Slide ball down and remove ball pin; remove Cross pin ball. (Fig. 1) Carefully support fan body (motor) in its styrofoam packing Hanger with the mounting collar (where the wires come out) facing ball upward. -
Page 9: Installation Of Safety Cable Suppprt
REMEMBER to turn off the power before you begin. To properly install your ceiling fan, follow the steps below. Slip the yoke cover, trim ring and canopy onto the downrod. (Fig. 3) Cross Pin Ground Wire Slide the hanger ball onto the downrod, insert the cross pin through Hanger ball the downrod and tighten. -
Page 10: Electrical Connections
ELECTRICAL CONNECTIONS Hanger bracket Receiver NOTE: One fan per power circuit. -
Page 11: Finishing The Installation
FINISHING THE INSTALLATION Tuck connections neatly into ceiling outlet box. Ceiling Fan Slide the canopy up to mounting bracket and allign the Outlet Box key hole on the canopy to the screw on the mounting bracket, turn canopy until it locks in place at the narrow Hanger section of the key holes. -
Page 12: Blade Attachment
BLADE ATTACHMENT NOTE: Remove any rubber supports that are installed for shipping. Assemble blade to motor with provided screws, lock washers and flat washers. Repeat procedure for all blades. Make sure screws are TIGHT! Loose motor screws can contribute to unnecessary wobble or fan noise. - Page 13 Forward / Reverse Fan ON/OFF Fan Speed 1-Lowest speed 6-Highest speed Timer Light ON/OFF Warning Natural wind...
- Page 14 Summer Mode and Winter Mode Operation Summer Mode (forward): A DOWNWARD airflow creates a cooling effect as shown in Figure 3. This allows you to set your air conditioner on a warmer setting without affecting your comfort. Winter Mode (Reverse): An UPWARD airflow moves warmer air off...
- Page 15 CARE AND CLEANING Periodically it may be necessary to re-tighten blade to blade arm screws or blade arm to motor screws to prevent clicking or humming sound during operation. This is especially true in climates with broad temperature and humidity ranges. When dusting the blades, you must support the blade to prevent bending - no pressure should be applied to the blades.
- Page 16 COMMITTED TO DESIGN, PERFORMANCE AND QUALITY, AND WHAT’S IMPORTANT TO YOU IS PARAMOUNT TO US. Website: www. henleyfan.com The Henley Fan Company Ltd, Unit 1, 22 Harrison Close, Twyford, Berkshire, RG10 0LL, England Tel: +44 1256 636 509 Website: www. henleyfan.com...
Need help?
Do you have a question about the Falcon Drop Rod and is the answer not in the manual?
Questions and answers