Advertisement
10 in.
15 A
254 mm
Professional
Tile Saw
Español página 20
ATTACH YOUR RECEIPT HERE
Serial Number
Questions, problems, missing parts? Before returning to your retailer, call our customer
service department at 1-877-876-7562, 8 a.m. - 5 p.m.,CST, Monday - Friday.
®
Purchase Date
# G02775
MNL_G02775_V02_20170328
Advertisement

Related Manuals for Goldblatt G02775


Summary of Contents for Goldblatt G02775
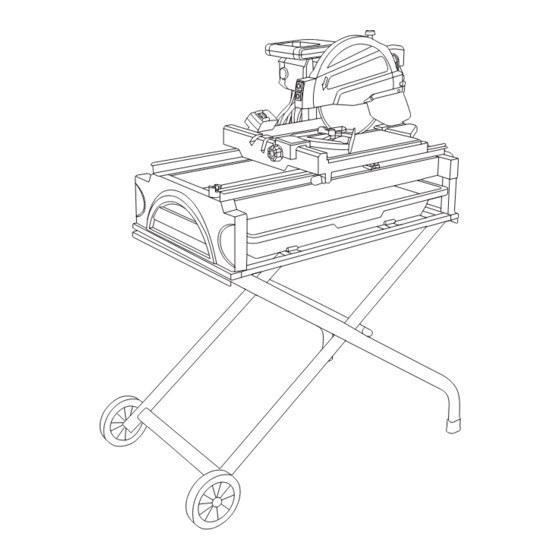
- Page 1 # G02775 ® 10 in. 15 A 254 mm Professional Tile Saw Español página 20 ATTACH YOUR RECEIPT HERE Serial Number Purchase Date MNL_G02775_V02_20170328 Questions, problems, missing parts? Before returning to your retailer, call our customer service department at 1-877-876-7562, 8 a.m. - 5 p.m.,CST, Monday - Friday.
-
Page 2: Table Of Contents
TABLE OF CONTENTS Important Safety Information.................. Safety Symbols..................... Specifications......................Setup........................Operation......................Maintenance......................Troubleshooting guide................... Warranty........................ -
Page 3: Important Safety Information
IMPORTANT SAFETY INFORMATION General Tool Safety Warnings WARNING Read all safety warnings and instructions. Failure to follow the warnings and instructions may result in electric shock, fire and/or serious injury. Save all warnings and instructions for future reference. 1. KEEP GUARDS IN PLACE and in working order. 2. - Page 4 GENERAL TOOL SAFETY WARNINGS Table A shows the correct size to use depending on cord length and nameplate ampere rating. If in doubt, use the next heavier gauge. The smaller the gauge number, the heavier the cord. 10. WEAR PROPER APPAREL. Do not wear loose clothing, gloves, neckties, rings, bracelets, or other jewelry which may get caught in moving parts.
- Page 5 GROUNDING INSTRUCTIONS WARNING To prevent electric shock and death from incorrect grounding wire connection read and follow these instructions: 110-120 V~ Grounded Tools: Tools with Three Prong Plugs 1. In the event of a malfunction or breakdown, grounding provides a path of least resistance for electric current to reduce the risk of electric shock.
- Page 6 TILE SAW SAFETY WARNINGS For Your Own Safety Read Instruction Manual Before Operating Saw 1. Wear eye protection. 2. Use saw-blade guard and spreader for every operation for which it can be used, including all through sawing. 3. Keep hands out of the line of saw blade. 4.
- Page 7 TILE SAW SAFETY WARNINGS • Support large workpieces along their entire length. Large workpieces tend to bend, grabbing the blade. • Maintain control of the workpiece. Do not allow the workpiece to rest against the moving blade without holding onto it. •...
- Page 8 EXTENSION CORDS Do not use damaged extension cords. Examine extension cord before using and replace if damaged. Do not abuse extension cords and do not yank on any cord to disconnect. Keep cord away from heat and sharp edges. Always disconnect the extension cord from the receptacle before disconnecting the product from the extension cord.
- Page 9 POSITION OF TILE SAW 29. WARNING: Some dust created by power sanding, sawing, grinding, drilling, and other construction activities, contains chemicals known [to the State of California] to cause cancer, birth defects or other reproductive harm. Some examples of these chemicals are: •...
-
Page 10: Safety Symbols
Risk of injury when instructions Wear gloves are not followed Waste electrical products should Wet conditions alert not be disposed of with household waste TECHNICAL SPECIFICATIONS Code G02775 Model TC250Va Voltage 120V~ 60Hz 15AMP No load speed 4000 RPM Insulation class Class I Dimensions of the diamond disc 10"... - Page 11 FUNCTIONS Depth Depth Stop Lock Guard Screw Bevel Lock Depth Lever Knob Blade Reset Button Miter Gauge Power Table Switch Lock Table & Key Lever Power Water Drain Table Water Tray Toggle Cord Tray Plug Stop Frame Table Stop Pump Power Cord Pump Outlet...
- Page 12 INSTALLING THE WATER TRAY FRAME TO THE LEG STAND 1. Lock the Toggle Table Stop by pulling Water Tray up on it and turning it until the slot in the Frame center of the Stop is horizontal (left to right). 2.
- Page 13 WATER TRAY AND PUMP SETUP 1. From the right side of the saw, place the Water Tray Frame Water Tray (drain plug end to the left) on the lip at the bottom of the Water Tray Frame. 2. Slide the Water Tray in under the Table until it rests in place within the tabs.
- Page 14 INSTALLING BLADE 1. Unplug the saw. Inner Outer Flange Flange 2. Loosen the Guard screw with screwdriver (not supplied). Spindle 3. Open the Guard to expose the Spindle. Blade 4. Loosen the Spindle Nut counterclockwise Figure I: Blade Assembly and remove the old Blade, if installed. Blade Spindle Guard...
- Page 15 BEVEL ADJUSTMENT 1. Slide the Table clear of the Blade to prevent blade damage. 2. Loosen the Bevel Lock Lever. 3. Adjust the Motor Head to the desired angle: 0º, 22.5º or 45º. Do not set bevel to any other setting, the slots in the table Bevel Lock Lever are designed only for these cuts.
-
Page 16: Operation
USING THE LASER GUIDE OR LED DANGER Laser radiation. Avoid direct eye contact with light source. WARNING ! Use of controls or adjustments or performance of procedures other than those specified herein could result in hazardous radiation exposure. • Press on the laser or LED switch button to turn on the laser or LED. -
Page 17: Maintenance
GENERAL OPERATING INSTRUCTIONS 6. Let the Blade build up to full speed before cutting. 7. Hold the material firmly against the rip guide and feed the material into the Blade. 8. When the cut is made, turn the Saw OFF. Wait for the Blade to come to a complete stop before removing any part of the workpiece. -
Page 18: Troubleshooting Guide
CLEANING, MAINTENANCE, AND LUBRICATION • Rails • Particle Tray (see page 12) • Water Tray (see page 13, empty out sediment and water) • Pump filter and housing (see page 13, can often be rinsed off without opening pump). 3. If Blade is out of alignment, Table does not slide smoothly or other issues interfere with smooth operation, have the saw serviced by a qualified technician before further use. -
Page 19: Warranty
TROUBLESHOOTING Problem Possible Causes Likely Solutions Overheating. 1. Forcing machine to work 1. Allow machine to work at its too fast. own rate. 2. Accessory misaligned. 2. Check and correct accessory to fence and/or table alignment. 3. Accessory dull or 3.
Need help?
Do you have a question about the G02775 and is the answer not in the manual?
Questions and answers