Table of Contents
Advertisement
Quick Links
Regular duty snowblower 48" & 56'' 3 point hitch
*ASSEMBLY
*OPERATION
READ & FOLLOW ALL SAFETY RULES & INSTRUCTIONS BEFORE
110150_EN
MAHINDRA
CAUTION:
OPERATING YOUR EQUIPMENT
01101500
OWNER'S MANUAL
Model number
BER3PTSB48R 48'' snowblower
BER3PTSB56R 56'' snowblower
*REPAIR PARTS
*MAINTENANCE
700981BER
R-10072022
Advertisement
Table of Contents

Subscribe to Our Youtube Channel
Related Manuals for Mahindra BER3PTSB48R


Summary of Contents for Mahindra BER3PTSB48R
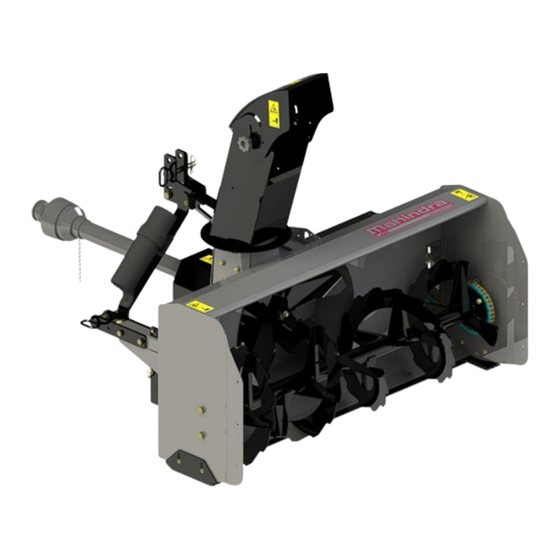
- Page 1 OWNER’S MANUAL Model number BER3PTSB48R 48’’ snowblower BER3PTSB56R 56’’ snowblower 700981BER MAHINDRA Regular duty snowblower 48" & 56’’ 3 point hitch *ASSEMBLY *REPAIR PARTS *OPERATION *MAINTENANCE CAUTION: READ & FOLLOW ALL SAFETY RULES & INSTRUCTIONS BEFORE OPERATING YOUR EQUIPMENT 01101500...
-
Page 2: Table Of Contents
Table of contents Table of contents Introduction ..............1 Snow removal ............16 Important safety information ........... 2 Clean a blockage ............ 17 Safety alert symbol/Signal words/Safety messages ..2 Adjustments ..............18 Safety decals ..............5 Parking stand on the snowblower ......18 Assembly &... -
Page 3: Introduction
Introduction Introduction To the purchaser This new accessory was carefully designed to give years of dependable service. This manual has been provided to assist in the safe operation and servicing of your attachment. All photographs, illustrations and information in the manual may not necessarily depict the actual models or attachments, but are intended for reference only and are based on the latest product information available at the time of publication. -
Page 4: Important Safety Information
Important safety information Important safety information Safety alert symbol/Signal words/Safety messages These are common practices that may or may not be applicable to the product described in this manual. SAFETY ALERT SYMBOL THIS SAFETY ALERT SYMBOL IDENTIFIES AN IMPORTANT SAFETY MESSAGE IN THIS MANUAL THAT HELPS YOU AND OTHERS AVOID PERSONAL INJURY OR EVEN DEATH. - Page 5 Important safety information • • Exercise extreme caution when operating on or Handle fuel with care, it is highly flammable and crossing gravel drives, walks or roads. Stay alert vapors are explosive. for hidden hazards such as traffic, fences, trees, a) Extinguish all cigarettes, cigars, pipes and other buildings, wires, etc.
- Page 6 Important safety information TRANSPORT Remove all tools and unused parts from equipment before operation. • • Review Transport Safety instructions in the Disconnect battery ground cable (-) before vehicle manual before moving or hauling. servicing or adjusting electrical systems or •...
-
Page 7: Safety Decals
Important safety information Safety decals Read and understand all instructions/explanations noted on decals or/and in the “Safety Decals” section • Keep the safety decals clean and visible • For decal location see part list section of this manual • Replace decals if decals are missing or illegible •... - Page 8 Important safety information #108554 To avoid serious injury: Keep people and clothing away. Do not operate without all driveline, tractor and equipment shields in place, or without the drivelines securely attached at both ends. #108557 To avoid serious injury or death from thrown objects: Keep people away from the discharge area during operation and keep others away.
-
Page 9: Assembly & Initial Set-Up
Assembly & initial set-up Assembly & initial set-up Vehicle requirements The snowblower is designed to be installed on a compact tractor only, equipped with a 3 point hitch, standard category 1 or quick hitch type. Tractor horsepower rating : 15-30 hp (48”) 15-35 hp (56”) Lift the snowblower off the base of the wooden box. -
Page 10: Accessory Assembly
Assembly & initial set-up Accessory assembly Preparation for eMax 20S only #110210 Install the parts from the mounting plates bag supplied with this kit. Installation of the kits for the rotation and the deflection of the chute: Installation of the hydraulic chute rotation kit PTO drive shaft installation #701011-1 Install the PTO driveshaft (item 1) on the snowblower... - Page 11 Assembly & initial set-up Determine the length of PTO drive shaft. Apply multi-purpose grease to the inside of the outer shaft and reassemble the driveline. Install the snowblower on your tractor (see Accessory Hook-up & Unhook section). The lenght of the drive shaft must be : Maximum length: Make sure that during all the movements of the accessory that the female part of the shaft does not...
-
Page 12: Assembly Options
Assembly & initial set-up Assembly options inner and outer drivelines to be sure universal joints are properly secured. Please see your dealer for a complete list of updated options. Hold inner and outer drivelines parallel to each other: Extended wings kit w/ drift cutters Make sure dimension “D”... -
Page 13: Accessory Hook-Up & Unhook
Accessory Hook-up & Unhook Accessory Hook-up & Unhook Hooking-Up the accessory OPTION A – to decrease the lift height and reduce the angle of the drive shaft: DANGER - Use B1 holes OPTION B – to maximize the lift height, but be To avoid serious injury or death : careful not to exceed the maximum 25 degrees of A Crushing Hazard exists when hooking-up equipment. - Page 14 Accessory Hook-up & Unhook Disengage the parking stand after installing the Connect the flexible hoses (item 1) for the snowblower’s chute rotation to the vehicle’s hydraulic system (item 2). accessory on the tractor Read all important following information on this page Remove the lock pin (item 1) then raise the parking stand before proceeding to the installation of the hoses.
- Page 15 Accessory Hook-up & Unhook Check interferences Repeat the following step for all possible adjustments of the accessory (see adjustment section) and all possible movement of any part of the accessory who affect the position of any part of the accessory relatively to the tractor.
- Page 16 Accessory Hook-up & Unhook Place transmission in park, set park brake, shut power equipment off, and remove switch key to avoid accidental starting. See “vehicle shutdown procedures” in the operation section Remove from 3pt Style Hitch: A. If needed, adjust length of upper center 3point link until hitch pin can be removed from hitch frame.
-
Page 17: Operating Instructions
Operating instructions Operating Instructions Safety precaution WARNING To avoid serious injury or death: DANGER Counterweight may be required. Refer to your loader and To avoid serious injury or death : tractor manual to determine if counterweight is needed. If loader and tractor manual do not have enough •... -
Page 18: Controls And Display
Operating instructions Unhooking the accessory Controls and display See the Accessory Hook-up and Unhook section of this CHUTE ROTATION: manual. Follow the instructions supplied with your rotation kit. To direct the snow when removing Use the chute controls to direct the snow. see subsection WARNING control and display of the operation section). -
Page 19: Clean A Blockage
Operating instructions Clean a blockage DANGER To avoid serious injury or death: Hand contact with the rotating impeller inside the discharge chute is the most common cause of injury associated with snowblowers. Never use your hand to clean out the discharge chute. •... -
Page 20: Adjustments
Adjustments Adjustments Parking stand on the snowblower shaft is installed on the tractor, the parking stand must always be raised. snowblower Raise the snowblower 2” from the ground. DANGER Stop the vehicle, see the procedure for stopping the vehicle in the operation section. To avoid serious injury or death : G. -
Page 21: Chute Rotation
Adjustments Chute Rotation See operation section - control and display Skid Shoe adjustment PAVED SURFACE: Adjust skid shoes to allow 3/16" to 1/4" or 5mm to 7mm clearance (A) between cutting edge and surface. UNEVEN OR GRAVEL SURFACE: Adjust skid shoes to allow 1/2"... -
Page 22: Troubleshooting
Troubleshooting Troubleshooting PROBLEM POSSIBLE CAUSES CORRECTIVE ACTION Snowblower vibrate Damaged auger Replace auger. abnormally noisy. Damaged drive shaft. Replace drive shaft. Damaged bearing. Replace bearing. Damaged fan. Dismount & repair or replace fan. Driveline is not well installed. Reinstall the driveline according to the instructions. Driveline angle is more than 35 Reduce the height of the accessory. - Page 23 Troubleshooting Snowblower digs into ground. Ground is not frozen or too soft. Adjust skid shoes lower so they may better support the snowblower. Snowblower does not raise Uneven tire pressure from one side Refer to the vehicle’s owner manual for tire evenly.
-
Page 24: Maintenance & Lubrication
Maintenance & Lubrication Maintenance & Lubrication WARNING Cutting edge maintenance To avoid serious injury or death : • Check the scraper bar wear from time to time to make sure Always follow all safety precautions in the important you do not use the bottom of the snowblower frame. The safety information section of this manual. -
Page 25: Chain
Maintenance & Lubrication Chain Lubricate when required with commercial chain lubricant (qty: as needed). Replacing shear bolts for the fan and auger: Shear bolts are to be considered a preventive measure and not an assured protection. Operator vigilance is required. Thoroughly inspect the areas where the snowblower is to be used and remove all foreign objects. -
Page 26: Storage And Transportation
Storage and transportation Storage and transportation Long-Term Storage Transportation Follow unhooking instruction in the section “Hook -up WARNING and Unhook Accessory” of this manual. To avoid serious injury or death : • Clean the accessory When travelling on public roads, use SMV sign, clean •... -
Page 27: Specifications
Specifications Specifications Specifications Model number BER3PTSB48R BER3PTSB56R Width 48” 56” Height (without chute) 27 1/2” 27 1/2” Height (chute lowered) 48 1/8” 48 1/8” Height (chute raised) 57 3/4” 57 3/4” Depth (overall) 42 1/4” 42 1/4” Weight 368 lbs (approx.) 392 lbs (approx.) -
Page 28: Part List And Parts Breakdown
Parts breakdown Part list and parts breakdown #BER3PTSB48R Principal accessory #BER3PTSB48R... - Page 29 Parts breakdown #BER3PTSB48R #BER3PTSB48R...
- Page 30 Parts breakdown #BER3PTSB56R #BER3PTSB56R...
- Page 31 Parts breakdown #BER3PTSB56R #BER3PTSB56R...
- Page 32 Parts breakdown...
- Page 33 Parts breakdown...
- Page 34 Parts breakdown...
- Page 35 Parts breakdown...
- Page 36 Parts breakdown...
- Page 37 Parts breakdown...
- Page 38 Parts breakdown...
- Page 39 Parts breakdown...
- Page 40 Parts breakdown...
- Page 41 Parts breakdown...
-
Page 42: Torque Specification Table
Torque specification table Torque specification table TO BE USED WHEN A TIGHTENING TORQUE IS NOT SPECIFIED IN THE TEXT • The following table shows the minimum torque requirement • Maximum is 15% more than the minimum (example: min100 Nm -> max is 115Nm) •... -
Page 43: Warranty
Instructions for Obtaining Warranty Services: Contact the Mahindra dealer where equipment was purchased or any other Mahindra service dealer to arrange service at their dealership. To locate a dealer convenient to you, access our website at Don't forget to bring your proof of purchase (sales receipt) to the Mahindra dealer. - Page 44 Mahindra USA, inc. 9020 Jackrabbit Road, Suite 600 Houston, TX 77095 USA www.mahindrausa.com www.mahindracanada.com IMPRIMÉ AU CANADA PRINTED IN CANADA...
Need help?
Do you have a question about the BER3PTSB48R and is the answer not in the manual?
Questions and answers