Advertisement
Available languages
Available languages
Quick Links
TWO SIDED GRILLS INSTALLATION INSTRUCTIONS
These symbols are intended to alert the
user to the presence of important operating
and maintenance instructions in the manual
accompanying the appliance.
www.star-mfg.com/scripts/manuals.aspx
to obtain this units installation & operations manual
Using any part other than genuine Star factory supplied parts
relieves the manufacturer of all liability.
Star reserves the right to change specifications and product
design without notice. Such revisions do not entitle the buyer to
corresponding changes, improvements, additions or replacements
for previously purchased equipment.
Due to periodic changes in designs, methods, procedures, policies
and regulations, the specifications contained in this sheet are subject
to change without notice. While Star Manufacturing exercises
good faith efforts to provide information that is accurate, we are
not responsible for errors or omissions in information provided
or conclusions reached as a result of using the specifications.
By using the information provided, the user assumes all risks in
connection with such use.
GENERAL SAFETY INFORMATION
CAUTION
This equipment is designed and sold for commercial use only by
personnel trained and experienced in its operation and is not sold
for consumer use in and around the home nor for use directly by
the general public in food service locations.
Before using your new equipment, read and understand all the
instructions & labels associated with the unit prior to putting it into
operation. Make sure all people associated with its use understand
the units operation & safety before they use the unit.
All shipping containers should be checked for freight damage both
visible and concealed. This unit has been tested and carefully
packaged to insure delivery of your unit in perfect condition.
If equipment is received in damaged condition, either apparent or
concealed, a claim must be made with the delivering carrier.
Concealed damage or loss - if damage or loss is not apparent until
after equipment is unpacked, a request for inspection of concealed
damage must be made with carrier within 15 days. Be certain to
retain all contents plus external and internal packaging materials
for inspection. The carrier will make an inspection and will supply
necessary claim forms.
Go to:
along with other documents.
NOTICE
Mechanical and Electronic Controls
GENERAL INSTALLATION INFORMATION
The unit time and temperature are preset by the factory to the
customer requirements. If adjustments are required, refer to the
time or temperature programming sections in this manual.
INSTALLATION
1. Plug unit into dedicated receptacle, see nameplate for voltage
requirements.
2. DO NOT plug into incorrect voltage line. Doing so will damage
the unit and void the warranty.
3. Each unit has been properly wired and inspected at the factory
for operation on the voltage specified on the nameplate.
4. DO NOT operate without burn guards (Certian units only).
DO NOT CONNECT TO ANY OTHER
TYPE OF CURRENT OR THE MACHINE
WARNING
WILL BE SERIOUSLY DAMAGED.
MAINTENANCE AND REPAIRS
Contact the factory, a service representative or a local
service company for service or required maintenance.
Go to www.star-mfg.com/scripts/manuals.aspx to find a service
agent near you. Replacement cord sets must be purchased from
Star Manufacturing International, Inc. or our authorized agents.
Should you need any assistance regarding the operation or
maintenance of any Star equipment; write, phone, fax or e-mail
our service department.
model number and the serial number of your unit, along with the
voltage.
Business Hours: 8 am to 4:30 p.m. Central Standard Time
Telephone:
(314) 678-6303
Fax:
(314) 781-2714
E-mail:
customerservice@star-mfg.com
Website:
www.star-mfg.com
Mailing Address: Star Manufacturing International Inc.
10 Sunnen Drive
St. Louis, MO 63143
U.S.A.
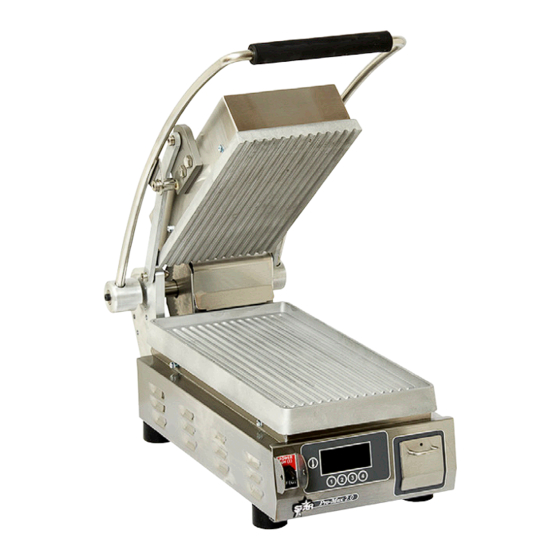
MODEL
Tabletop
Two-Sided Grills
In all correspondence mention the
2M-Z13092, Rev. A 9/27/11
®
Advertisement

Subscribe to Our Youtube Channel
Related Manuals for Star Manufacturing Pro-Max PSC28ITGT


Summary of Contents for Star Manufacturing Pro-Max PSC28ITGT
- Page 1 Contact the factory, a service representative or a local to change without notice. While Star Manufacturing exercises service company for service or required maintenance. good faith efforts to provide information that is accurate, we are Go to www.star-mfg.com/scripts/manuals.aspx to find a service...
-
Page 2: On/Off Switch
ALL UNITS MANUAL TEMP CONTROL OPERATION Initial Start Up Operating Instructions Level unit using the adjustable feet under the unit (approximately 1. Turn the unit on by placing the switch in the ON position. 1/2" adjustment). The HEAT ON indicator will be lit until it reaches operating temperature. - Page 3 Right Side (Timer only): ELECTRONIC TEMP CONTROL OPERATION 1. To change the time on right, Press and hold the TEMP button, Operating Instructions then press and hold any program button on the right for one 1. The program number and display will flash indicating the unit second.
- Page 4 DO NOT SPLASH FRONT CONTROL PANEL! DO NOT SPLASH FLEX CONDUIT CONNECTING TOP AND BOTTOM OF THE UNIT. STAR MANUFACTURING GROUP Star - Holman - Lang - Wells - Bloomfield - Toastmaster 10 Sunnen Drive, St. Louis, MO 63143 U.S.A.
-
Page 5: Instalación
Los repuestos del conjunto de cables su funcionamiento. No se vende para uso del cliente en el hogar, ni deben ser adquiridos a través de Star Manufacturing International, para el uso del público en general en locales de servicio de comidas. - Page 6 Cómo configurar la temperatura TODAS LAS UNIDADES La perilla del control del termostato se usa para configurar la Encendido inicial temperatura según sus requerimientos. El valor de referencia Nivele la unidad usando las patas ajustables que se encuentran en máximo es de 550 °F (288 °C), el valor de referencia mínimo la parte inferior de la unidad (un ajuste de 1/2”...
- Page 7 Lado derecho (solo temporizador): FUNCIONAMIENTO DEL CONTROL ELECTRÓNICO DE TEMP 1. Para cambiar el tiempo a la derecha, mantenga presionado Instrucciones de funcionamiento el botón TEMP, luego mantenga presionado cualquier botón 1. La visualización y el número de programa harán un destello de programa del lado derecho durante un segundo.
- Page 8 PRECAUCIÓN TODAS LAS UNIDADES NO SUMERJA O DEJE LA UNIDAD EN EL AGUA. Limpieza Comience el procedimiento de limpieza usando los procedimientos NO LAVE CON MANGUERA LA UNIDAD, LA MESA O de funcionamiento dentro de su organización, o siga los siguientes EL MOSTRADOR SI LA UNIDAD SEN ENCUENTRA EN pasos: LA MESA O EN EL MOSTRADOR.
- Page 9 ENDOMMAGERA GRAVEMENT LA MACHINE. cette fiche sont sujettes à des modifications sans préavis. Bien que Star Manufacturing déploie des efforts de bonne foi afin de fournir des ENTRETIEN ET RÉPARATIONS informations précises, nous ne sommes pas responsables des erreurs ou Contactez l’usine, un représentant de service ou une entreprise de...
-
Page 10: Instructions D'utilisation
Réglage de la température TOUS LES APPAREILS Le bouton de contrôle du thermostat est utilisé pour régler la Démarrage initial température selon vos exigences. Dans la plupart des modèles, Mettez l’appareil à niveau en utilisant les pieds réglables situés le point de consigne maximum est de 550 °F (288 °C) et le point en dessous (ajustement d’environ 1/2 po). - Page 11 Côté droit (minuteur uniquement) : FONCTIONNEMENT DU CONTRÔLE ÉLECTRONIQUE DE LA TEMPÉRATURE 1. Pour changer le temps à droite, appuyez sur le bouton TEMP Instructions d’utilisation et maintenez-le enfoncé, puis faites de même avec n’importe 1. Le numéro du programme et l’écran clignoteront pour indiquer quel bouton du programme situé...
- Page 12 ATTENTION TOUS LES APPAREILS N’IMMERGEZ PAS L’APPAREIL OU NE LE LAISSEZ Nettoyage PAS TREMPER DANS DE L’EAU. Commencez le nettoyage en utilisant les procédures opérationnelles au sein de votre organisation ou suivez les étapes ci-dessous : NE LAVEZ PAS L’APPAREIL AU JET NI LA TABLE/LE 1.
Need help?
Do you have a question about the Pro-Max PSC28ITGT and is the answer not in the manual?
Questions and answers