Craftsman 917.28945 Operator's Manual
26.0 hr* 54" mower electric start 6 speed transaxle
Hide thumbs
Also See for 917.28945:
- Operation manual (73 pages) ,
- Operator's manual (37 pages) ,
- Operator's manual (72 pages)
Table of Contents
Advertisement
Available languages
Available languages
Quick Links
Download this manual
See also:
Operating Manual
Operator's Manual
(RRFT$1ViRN °
GAR
TRACTO
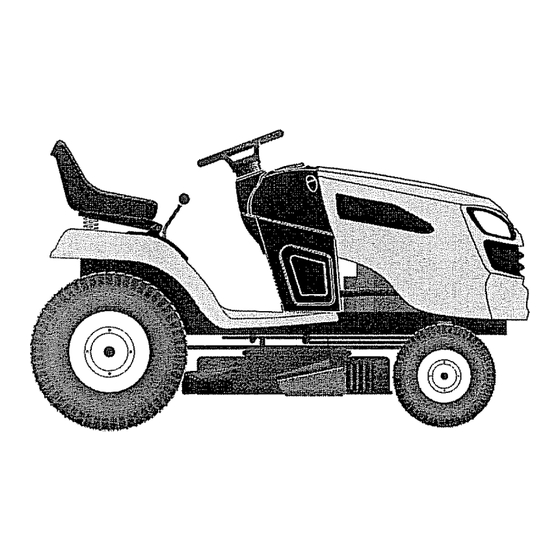
26.0 HR* 54" Mower
Electric Start
6 Speed Transaxle
Model No.
917.28945
, Espaflol, p. 36
This product has a low emission engine which operates
differently from previously built engines. Before you start the
engine, read and understand this Owner's Manual.
IMPORTANT:
Read and follow all Safety
Rules and Instructions before
operating this equipment.
For answers to your questions
about this product, Call:
1-800 =659-5917
Sears Craftsman Help Line
5 am
-
5 pm, Mon
-
Sat
SEARS,
ROEBUCK
AND COo, HOFFMAN
ESTATES,
IL 60179
U.S.A.
Visit our Craftsman website:www_sears.com/craftsman
*As rated by the engine manufacturer
426114
Rev. 1
Advertisement
Table of Contents

Related Manuals for Craftsman 917.28945


Summary of Contents for Craftsman 917.28945
- Page 1 IMPORTANT: Read and follow all Safety Rules and Instructions before operating this equipment. SEARS, ROEBUCK AND COo, HOFFMAN Visit our Craftsman website:www_sears.com/craftsman 426114 Rev. 1 TRACTO For answers to your questions about this product, Call: 1-800 =659-5917 Sears Craftsman Help Line...
- Page 2 Warranty Safety Rules ... Product Specifications ... 6 Assembly/Pre-Operation Operation Maintenance Schedule CRAFTSMAN FULL WARRANTY TWO YEARS ON RIDING When operated and maintained fails due to a defect in material or workmanship call 1-800-4-MY-HOME® Also, when operated and maintained also cover defects in material from the date of purchase This warranty covers ONLY defects in material and workmanship.
- Page 3 _IbDANGER: This cutting machine is capable of amputating throwing objects. Failure to observe the following safety instructions could result in serious injury or death, _WARNING" In order to prevent acciden- tal starting when setting up, transporting, adjusting or making repairs, always discon- nect spark plug wire and place wire where it cannot contact spark plug.
- Page 4 !1. SLOPE OPERATION Slopes are a major factor related to loss of control and tip-over accidents, result in severe injury or death. on all slopes requires extra caution. cannot back up the slope or if you feel uneasy on it, do not mow it. •...
-
Page 5: General Service
• Keep the nozzle in contact with the rim of the fuel tank or container all times until fueling is complete. use a nozzle lock-open ° iffuelisspilled on clothing, ing immediately. Never overfilt fuel tank. Replace gas cap and tighten securety_ GENERAL SERVICE Never... -
Page 6: Product Specifications
Sears set€ice center (See REPAIR RC12YC REPAIR .030") AGREEMENTS Congratulations Your new Craftsman@ and manufactured operation. But like all products, it may require repair from time to time. That's when having a Repair Protection Agreement money and aggravation. Purchase now and protect hassle and expense. - Page 7 (I) Wheel _1_'_ Mower Front Wheel (1) Locknut 3/8-16 (1) Shoulder Bolt (1) 1-1/40,D. Washer Mower _(t) Front Link (J_. (5) Large Retainer Springs - 7/1 6 (I) 314 O.Do Washers __j. (1) Anti-Swar (2) Small Retainer Springs - 5/16 (2) Rear Lift Link Assemblies (5) 1-3/16 O,Do Washers...
-
Page 8: Tools Required For Assembly
Your new tractor has been assembled unassembled for shipping all parts and hardware you assemble as necessary to insure proper tightness_ TOOLS REQUIRED FOR ASSEMBLY A socket wrench set will make assembly easier. Standard wrench (2) 7/16" wrenches Utility knife (1) 1/2"... - Page 9 _CAUTION: Lift lever Have a tight grip on lift lever, lower it slowly and engage in lowest position° located on left side of fender. Lift Lever ASSEMBLE FRONT (W) TO FRONT OF MOWER -® H. Front Mower Bracket W. Front Gauge Wheel Xo Shoulder Bolt ¥...
- Page 10 Mower Side Suspension Arms Qo Deflector Shield 5. INSTALLANTI-SWAY (IF EQUIPPED) Towards ANTI-SWAY Transaxle 90 ° End Integrated Washer End From right side of mower, 90 ° end of anti-sway bar (S) into hole in transaxte bracket (T), located rear tire in front of transaxle, T.
- Page 11 ar Lift Link(s) I/ D. Right Side Rear Mower Bracket [ 'U. Hole ATTACH FRONT LINK (E) • Turn steering wheel to position straight forccard. • From front of tractor, insert front tink (E) through front hole in tractor front suspension bracket •...
- Page 12 CHECK TIRE PRESSURE The tires on your tractor were over-inflated at the factory for shipping purposes. tire pressure is important performance. • Reduce tire pressure to PSt shown on tires. CHECK DECK LEVELNESS For best cutting results, should be properly leveled.
- Page 13 These symbols may appear on your tractor or in literature Learn and understand their meaning, REVERSE NEUTRAL HIGH ENGINE OFF REVERSE ENGINE ON OPERATION SYSTEM EROS) LIGHTS ON BATTERY FUEL ATTACHMENT ATTACHMENT CLLrrCH DISENGAGED CLUTCH ENGAGED FREE WHEEL (Autom,_tlc Models only) Failure to follow instructions could result in serious injury or death.
- Page 14 KNOW YOUR TRACTOR READ THIS OWNER'S MANUAL TRACTOR Compare the illustrations various controls and adjustments_ Our tractors conform to the applicable (A) ATTACHMENT LIFT LEVER raise and lower the mower or other attach- ments mounted to your tractor° (B) CLUTCH/BRAKE PEDAL- declutching braking...
- Page 15 The operation eyes, which can result in severe eye damage. or eye shields while operating or repairs. We recommend mask worn over spectacles. USE YOUR TRACTOR TO SET PARKING BRAKE Your tractor is equipped presence sensing switch, run ning, any attempt by the operator to leave the seat without first setting the parking b rake will shut off the engine.
- Page 16 TO MOVE FORWARD AND BACKWARD The direction and speed controlled by the gearshift 1, Start tractor with clutch/brake depressed and gearshift position. 2. Move gearshift lever to desired 3. Slowly release clutch/brake movement. IMPORTANT: Bringtractorto before shifting orchanging gears° Failure to do so will shorten the useful fife of your transaxle.
-
Page 17: Operation
REVERSE OPERATION SYSTEM (ROS) Your tractor is equipped Operation System (ROS). the operator to travel in the reverse direction with the attachment clutch engaged will shut off the engine unless ignition in the ROS "ON" position. • _WARNING: Backing tachment clutch engaged strongly discou raged, Turning the ROS "ON",... - Page 18 ADD GASOLINE " Fill fuel tank to bottom not overfill, Use fresh, unleaded gasoline with 87 octane° (Use of leaded gasoline increase carbon and lead oxide deposits and reduce valve life)_ Do not mix oil with gasoline. Purchase fuel in quantities can be used within 30 days to assure fuel freshness.
- Page 19 NOTE; If at a high altitude feet) or in cold temperatures the carburetor fuel mixture adjusted for best engine performance. "TO ADJUST CARBURETOR" and Adjustments section MOWING TIPS , Tire chains cannot be used mower housing is attached • Mowershould be properly leveled for best mowing performance_...
-
Page 20: Maintenance
MAINTENANCE SCHEDULE Check Brake Operation Check T_ro P,eosoro T Cheek Operator P resence &ROSsystems ! Check/Replace Mower Blades ... Lubrication Chart 0 Check B.fie,_. LeVe, Clean Batlery andTermi,nals Clean Debris Off Steering Plate Check Transaxfe Cooling Check Mower Levelness Check V-Bells Check Eng!ne O!! Leve! Change Engine... - Page 21 TRACTOR Always observe safety rules when performing any maintenance, BRAKE OPERATION if tractor requires more than five (5) feet to stop at highest speed in highest level, dry concrete or paved brake must be serviced. BRAKE" in the Service section of this manual).
- Page 22 TO CLEANBATTERYANDTERMINALS Corrosionand dirt onthe batteryandtermi- nals cancausethe batteryto "leak"power. 1o Removeterminalguard. 2. DisconnectBLACK battery cable first then RED battery cable and remove batteryfromtractor° 3. Rinse thebatterywithplainwateranddry. 4. Cleanterminalsand batterycable ends withwire brushuntil bright. 5. Coatterminalswithgreaseor petroleum jelly. 6o Reinstall battery (See "REPLACING BATTERY"in the SERVICEAND AD- JUSTMENTS sectionof this manual).
-
Page 23: In-Line Fuel Filter
4. Cleanall air cleanercomponentsof any accumulateddirt or foreign material, Prevent any dirt from entering of carburetor. Install cleaned or new element base and secure with latch. Close and latch the door, CLEAN AIR SCREEN Air screen must be kept free of dirt and chaff to prevent engine damage from overheating, Clean with a wire brush or compressed remove dirt and stubborn... - Page 24 DECK WASHOUT PORT '(our tractor's deck is equipped washout port on its surface deck wash system+ It should ter each use. Drive the tractor to a level, clear spot on your lawn, near enough spigot for your garden IMPORTANT: Make certain discharge chute is directed AWAY from your...
- Page 25 WARNING: TO AVOID SERVICE OR ADJUSTMENTS: Depress clutch/brake Place gearshift Place attachment 4. Turn ignition key to "STOP" 5, Make sure the blades 6o Disconnect spark plug wire from spark plug and place wire where come in contact with plugo TO REMOVE MOWER 1.
- Page 26 TO LEVEL MOWER Make sure tires are properly PSI shown on tires. If tires are over or under inflated, it may affect the appearance lawn and lead you to think the mower is not adjusted properly. VISUAL SIDE-TO-SIDE ADJUSTMENT 1. With al! tires properly inflated and if your lawn appears unevenly...
- Page 27 TO REPLACE MOWER DRIVE MOWER DRIVE BELT REMOVAL Park tractor on a level surface, parking brake, 2, Lower attachment lift lever to its lowest position. Disengage belt tension rod (K) from lock bCracket (L), AUTION: Belt tension rod is spring load- ed, Have afirm grip on rod and release slowly, Remove screws...
- Page 28 TRANSAXLE GEAR SHIFT TRAL ADJUSTMENT The transaxle should be in neutral when the gear shift lever is in neutral position, adjustment factory; however, if adjustment proceed as follows: Make sure transaxle is in neutral NOTE: When the tractor rear wheels freely, the transaxle is in neutral Loosen...
- Page 29 REPLACING BATTERY ,_WARNING: Do notshort by allowing a wrench or any other object to contact both terminals at the same time. Before connecting battery, bracelets, wristwatch bands, Positive terminal must be connected prevent sparking from accidental 1. Lift hood to raised position. 2o Disconnect BLACK battery cable (A) then RED battery cable and carefully...
- Page 30 Immediately prepare your tractor for storage at the end of the season or if the tractor will t be used for 30 days or more° WARNING: Never store the tractor gasoline in the tank inside a building where fumes may reach an open flame or spark. Allow the engine to cool before any enclosure_...
-
Page 31: Troubleshooting
TROUBLESHOOTING See appropriate section in manual unless directed to Sears service center ! ..Will not start Hard to start Engine will not turn over CHART: Out of fuel,, Engine not "CHOKED" properly, Engine flooded. Bad spark plugo Dirty air filter_ Dirty fuel filter,, Water in fuel. - Page 32 TROUBLESHOOTING See appropriate section in manual unless directed to Sears service center PROBLEM Engine clicks but will not start Loss of power Excessive vibration Engine continues to run when operator leaves seat with attachment clutch engaged CHART: CAUSE Weak or dead battery+ Corroded battery terminals_ Loose or damaged wiring+ Faulty solenoid or starter+...
- Page 33 TROUBLESHOOTING See appropriate section in manual unless directed IPROBLEM Poor cut - uneven cutting Mower blades will not rotate Poor grass discharge Headlight(s) working (if so equipped) CHART: CAUSE Worn, bent or loose blade, Mower deck not level,, Buildup of grass, leaves, and trash under mower.
-
Page 34: Need More Help
TROUBLESHOOTING See appropriate section in manual unless directed PROBLEM Battery will not charge Loss of drive Engine "backfires" when turning engine "OFF" Engine dies when tractor is shifted into reverse NEED MORE HELP? You'll find the answer - Find this and a[t your other product manuats on[ineo , Get answers from our team of home experts. - Page 35 "0 "rl "0...
- Page 36 Co., Hoffman Programa de Mantenimiento ... 54 Servicio y Ajustes ... 59 Almacenamiento ... Identificaci6n de Problemas ... 65 Servicio Sears ... DE CRAFTSMAN TRACTOR defectos de material y mano de obra. Sears NO Estates, IL 60179 Contratapa para solicitar la reparaciSn gratuitao...
- Page 37 _PELIGRO: Esta Maquina cortadora es capaz de amputar las manosy los pies y de lanzar objetos, si no se observan las instrucciones lesiones graves o ta muerte. _DVERTENCIA: Siempre desconecte el alam- bre de la bujia y p6ngalo donde no pueda entrar en contacto con la bujia, para evitar el arranque por accidente, durante la preparaci6n, el trans- porte, el ajuste o cuando se hacen reparaciones_...
- Page 38 • Escoger u navelocidad de marchabajade mode quenoseanecesario pararse o cambiar estando enunapendiente° • Nocortarta hierba mojada. Lasruedas p ueden perder t racciSno Poner s iempre unamarcha cuando se est#, enpendientes_ Noponer enpunto muerto cuesta abajo. • Evitar arrancar, pararse o girar en una pendi- ente_ Si las ruedas pierden tracci6n, desconec- tar las cuchillas y preceder despacio cuesta abajo en la pendiente.
- Page 39 o Mantener la m&quina libre de hierba, hojas u otros residuos acumulados_ salpicaduras de aceite o carburante y quitar cualquier cosa mojada con carburante. Dejar que la m_quina se enfrle antes de guardarla, • Si se golpea un objeto ajeno, hay que pararse e inspeccionar ta m_.quina.
-
Page 40: Especificaciones
Repuesto en el manual Ingles del due5oo) ACUERDOS LA REPARACION Congratulaciones por su buena compra. 1,0/1.6 Su nuevo producto Craftsman® est& diseSado 1o4/2.3 y fabricado para funcionar de modo fiable por 2ol/3,,4 muchos aSoso Pero como todos los productos, &1/5ot puede necesitar alguna reparaci6n de tanto 4_0/6.4... - Page 41 Rueda (5) Resorte de Retenci6n (2) Resorte (5) 1-3/t 60.D. Arandela (2) Llaves (1) Tubo de desag_e delantera de la segadore (1) 1-1/40.D. Arandela Segadora (1) 3/40.D. Arandela de Retenci6n (1) Tuerca Seguridad 3/8-16 I) Barra AntioscilaciOn (1) Montaje de la pieza de uniSn deantera (2) Rear Lift Link Assemblies...
- Page 42 Su tractor nuevo ha side montado en la f&brica con ta excepciSn de aquellas pades que no se han mon- tado por razones de envioo Para asegurarse que su tractor funcione en forma adecuada y segura todas las partes y los artfculos de ferreteria que se monten tienen que ser apretados en forma segura. Use fas herramientas correctas, seg6n sea necesario, para asegurarse de que est6n apretados en forma segura_ HERRAMIENTAS NECESARIAS...
- Page 43 _,_PRECAUCl0N: Lapatanca d elevantamiento est_.accionadapor resorte_ Sost_ngalafirmemente apretada, b_jela tentamente y eng&nchela enla posici6n m&s b aja,Lapalancade levantamiento encuentra e nelladoizquierdo d eladefense, Palanca De 2. ARME LARUEDA CALIBRADORA TERA(W)ENLA PARTE DELANTERA DE LACORTADORA DECESPED H Escuadra D eLaCortadora D eC6sped Delantera W.
- Page 44 Brazos De Suspensi6n Lateral De La Cortadora De C#sped Blindaje Deflector SI LA TIENE, INSTALE LA BARRA ANTIBALANCEO BARRA ANTIBALANCEO Hacia E! Hacia La Plataforma Transeie De La Cortadora _1_ Extremo En 90 ° Arandela Integrada • Desde el lado derecho de la cortadora de c_sped, inserte primero el extremo en 90 °...
- Page 45 • Levante la esquina trasera de la cortadora de c6sped y ubique la ranura en el conjunto de es- labones sobre lachavetaen la escuadratrasera de la cortadora (D); asegure con una arandela grande y un resorte de retenci6n grandeo ° Repita en el lado opuesto deltractor, INSTALE EL ESLABON DELANTERO (E) °...
- Page 46 REVISION LA PRESION LLANTAS Las Ilantas en su unidad fueron infladas de- masiado en la f&brica por razones de envio. La presi6n de las llantas correctas es imporlante para obtener el mejor rendimiento en el corte. . Reduzca la presibn de los neum&ticos a ta PSI que se indica en estos, REVISION LA NIVELAClON...
- Page 47 Estos simbolos pueden aparecer sobre su tractor o en la literatura proporcionada con el producto. Aprenda y comprenda sus significados. MARCHA ATRAS NEUTRO " MOTOR StSTEMA APAGADO FUNCIONAMIENTO ATRAS (ROS) LUCES COMBUSTIBLE EHSENDIDAS ACCESORtO ACCESORIO EMBRAGUE EMBRAGUE ENGANCHADO DESENGANCHAOO RUEDA LIBRE (Solamente para los...
- Page 48 FAMILIARICESE CON SU TRACTOR LEA ESTE MANUAL DEL DUEllO ¥ LAS REGLAS DE SEGURIDAD ANTES DE OPERAR SU TRACTOR Compare las ilustraciones con su tractor para famitiarizarse con las ubicaciones de los diversos controles y ajusteso Guarde este manual para referencia en eEfuturo,_ Nuestros tractores cumpfen con los est&ndares de seguridad del (A) PALANCA DEL LEVANTAMIENTO DELAC- CESORIO - Se usa para levantar, bajar y ajustar...
- Page 49 La operaci6n de cualquier tractor puede hacer que salten objetos extraSos dentro de sus ojos, Io que puede producir dal_os graves en 6stoso Siempre use anteojos de seguridad o protecciones para los ojos mientras opere su tractor o cuando haga ajustes o reparaciones. Recomendamos galas de seguridad o una m&scara de visiSn amplia de seguridad usada sobre las galas.
- Page 50 PARA MOVERSE HACIA ADELANTE Y HACtA ATRAS La direcciSn y la velocidad del movimiento son controladas por medio de la palanca de cambio (J)o Haga arrancar el tractor con el pedal del embrague/freno presionado y con ta palanca de cambio en la posiciSn de neutro. 2_ Mueva la palanca de cambio a la posiciSn deseadao Lentamente...
- Page 51 FUNCIONAMIENTO ATR/_S Tu tractor est#, equipado con el Sistema de Funcionamiento Arras (ROS), Cualquier tenta- tiva del operador de viajar marcha atr&s con el embrague puesto apagar& el motor a rnenos que la Ilave de ignbi6n se ponga en la posici6n de "ON"...
- Page 52 AGREGUE GASOLINA • Llene el estanque de combustible° hasta la parte inferior del cuello de retleno det estanque de gasotina. No 1oIfene demasiado° Use gasolina regular, sin plomo, nueva y limpia con el minimo de 87 octanes. (E! use de gasoli- na con plomo aumentar&...
-
Page 53: Consejos Para Segar
, Los accesorios pueden ser utilizados durante el periodo del recalentamiento pueden requerir que el control de la estrangu- laci6n sea estirado un poco. AVlSO: Si se encuentra a mucha altura (sobre 3000 pies) o en clima frio (por debaio de 32°F [0°C]), la mezcla del combustible del carburador debe ser ajustada para el mejor rendimiento det motor.. - Page 54 MANTENIMIENTO ROv#;at b opemc_n do! lmno Revi_r b pre_i6n de l_,s tI_ntas T '_'_';ili_,., command° de presence d'op_mlaur B la _istgm_ d ROS Alibt/¢_mbi_r I_ ouch}Ires de la segttdom 0 n_vi_a_ _r _,ivol Revism' e[ enPinmionlo dol _tnnseje _=== Cum_ruebo Lt_ NIvt_bt:f_n °of Ct_t_z=_pudo_ In;p_:c{eno...
- Page 55 TRACTOR Siempre observe las reglas de seguridad cuando d6 mantenimiento. OPERACION DEL FRENO Si el tractor necesita m_s de cinco (5) pies para detenerse a la m&xima velocidad al cambio m&s alto en una superficie nivetada, de hormigSn o pavimentada, hay que hacerle el servicio atfreno. Ver "PARA VERtF1CAR SI FUNCIONA BIEN EL FRENO"...
- Page 56 PARA LIMPIAR BATERiA Y LOS TERMfNALES La corrosiSn y ta mugre de la bateria y de los terminales pueden producir"escapes" de potencia en la baterfa_ 1. Remueva la protecci6n de los terminales. Desconecte el cable de la bateria NEGRO primero y luego el cable de la bateria ROJO y remueva la bateria del tractor°...
- Page 57 3, Gelpee {igeramente el elemento de papel para desalojar la suciedad. Limpie todos las partes del filtro de aire de cualquier suciedad o material acumulada_ Evite que cualquier suciedad abertura del carburador. Instale el elemento limpiado o nuevo en fa base y asegOreio con el cierre.
- Page 58 PUERTO DE LAVADO DE LA CUBIERTA La cubierta de su tractor est& equipada con un puerto de tavado sobre la superficie que forma parte del sistema de lavado de la cubierta. Se de* beria utilizarcada vez que se haya usado el tractor Lleve et tractor a un tugar horizontal despejado de su c6sped, Io bastante cerca...
- Page 59 ADVERTENCIA:PARA VtCIO O DE HACER AJUSTES: 1_ Presione el pedal del embrague/freno compietamente y aplique el freno de estacionamiento. Ponga ]a palanca de cambios en la posici6n de neutroo Ponga el embrague del accesorio en la posici6n desenganchado (DISENGAGED). 4o Ponga la llave de ignici6n en la posici6n de apagado (STOP) y remu6vala. Aseg_rese que las cuchillas y que todas las partes movibles se hayan detenido completa- mente.
- Page 60 PARA NIVELAR LA SEGADORA Asegt_rese de que los neum&ticos est6n inflados a la PSI que se indica en estos. Si est&n demasiado inflados o poco inflados, el c_sped no le quedar& bien cortado, lo cual podr& ilevarlo a pensar que la SEGADORA no est,.
- Page 61 PARA REEMPLAZAR LA CORREA DE LA CUCHtLLA DE LA SEGADORA DESMONTAJE DE LA CORREA DE LA SEGA- DORA 1. Estacione el tractor en una superficie nive- ladao Ponga el freno de mano. Baje la palanca elevadora a la posici6n de m&s abajoo Retire la barra de tensi6n de la correa (K) de la barra de sujeci6n (L).
- Page 62 REGULACION DELA PALANCA DE VELOCI- DADES NEUTRO DEL CAMBIO CON DIFERENCIAL Y TRACCI6N ANTERIOR El cambio mec&nico con diferencial y tracci6n an- terior tiene que estar en posici6n neutro cuando la relativa palanca est& en posici6n (cierre met&IF co° La regulaciSn ya est& predefinida per la Casa constructora, pero si es necesario efectuar m&s regulaciones, preceder de la siguiente manera:...
- Page 63 REEMPLAZAR LA BATERIA _Z_,DVERTENCIA: No haga cortocircuito con los terminales de la bateria al permitir que una Ilave de tuerca o cualquier otro objeto entre en contacto con ambes terminales a la misma vezo Antes de instalar la bateria remueva las putseras de metal, los relojes de pulsera de metal, los anillos, etc, El terminal positive tiene que conectarse primero para evitar tas chispas debido a la conexi6n a...
- Page 64 lnmediatamente prepare su tractor para e! al- macenamiento al final de la temporada o si el tractor no se va a usar por 30 dias o m_.s.. • #_,DVERTENCIA: Nunca almacene el tractor con gasotina en el estanque dentro de un edificio en donde los gases pueden alcanzar una llama expuesta ouna chispa.
-
Page 65: Identificacion De Problemas
IDENTIFICACION DE PROBLEMAS: Yea la secci6n apropiada en el manual a menos que est_ dirigido a un centro de servicio Sears. PROBLEMA CAUSA Sin combustible No arranca Motor sin la "ESTRANGULACI(_N" (CHOKE) adecuada. Motor ahogado,, Bujia male., Filtro de aire sucio, Filtro de combustible sucio, Agua en el combustible. - Page 66 1DENTIFICACION DE PROBLEMAS: Yea la secci6n apropiada en el manual a menos qua est_ dirigido a un centre de servicio Sears, PROBLEMA CAUSA P_rdtda de Agua en elcombustible_ fuerza (sigue) Alambrado de la buj[a suelto. Rejilla!aletas de aire del motor suclaso Silenciador suctoitaponadoo Alambrado suelto o dafiado, Carburador dasajustado.
- Page 67 IDENTIFICACION DE PROBLEMAS: Vea la secci6n apropiada en el manual a menos que est_ dirigido a un centro de servicio Sears. PROBLEMA CAUSA Los iuz 1',' '"''E'i"_in'terruptor est& '_PAGADO"(OFF),, (cos)de Bombilla(s) o l&mpara(s) quemada(s) _ lantera(s) no funcio- tnterruptor de latuz fa!lado. nando Alambrado suelto o daSado.
- Page 71 o_"_m _ _-° _'_°o "o r" €3)
- Page 72 NEEDMORE HELP? You'll find the answel and mo_e on managemyhome.com • Findthis and at[ yourother productmanuals on[ineo • Getanswers from our team of homeexperts • Geta personalized maintenance plan Foryour home° •Find information andtoo{s t ohelp w ithhomeprojects° manage brought For repair - in your home - of all major brand appliances, lawn and garden equipment, or heating and cooling systems, no matter who made it, no matter who sold itl...
Need help?
Do you have a question about the 917.28945 and is the answer not in the manual?
Questions and answers