Table of Contents
Advertisement
Available languages
Available languages
Operator's
Manual
CRRFTSMRII°
LAW
TRACTO
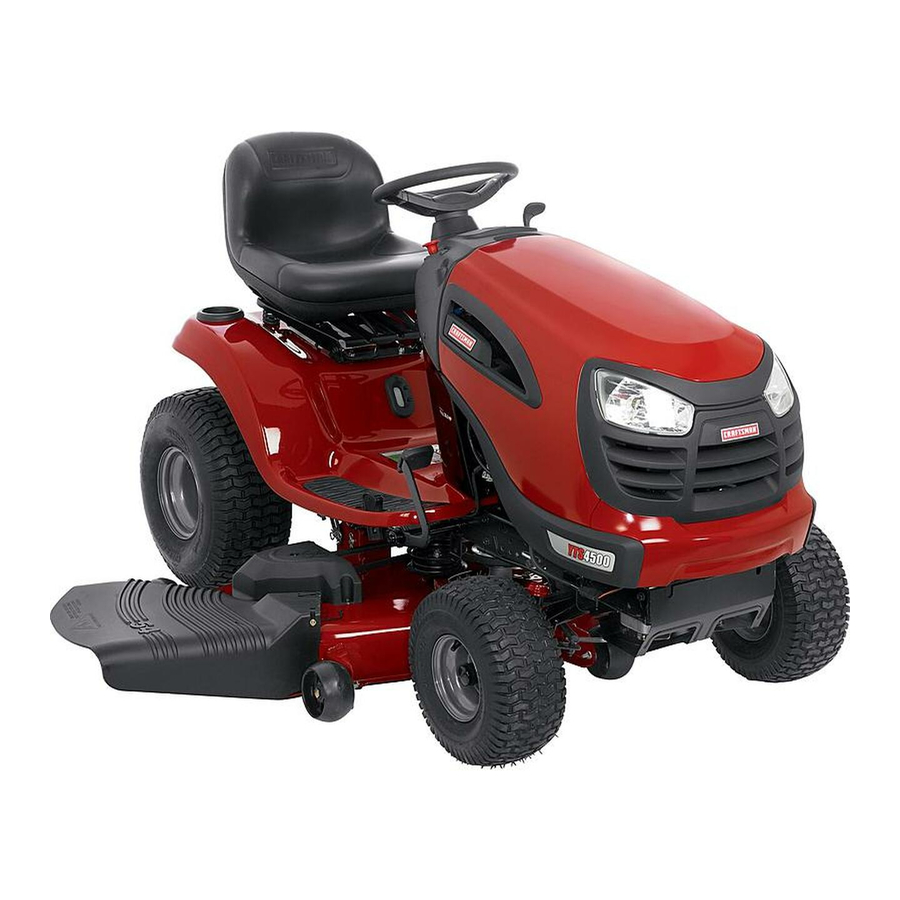
26.0 HP,*54" Mower
Electric Start
Automatic
Transmission
Model No.
917.28990
• EspaSol,
p. 37
03070
This product has a low emission
engine
which
operates
differently
from
previously
built
engines.
Before
you start the
engine,
read and understand
this Owner's
Manual.
IMPORTANT:
Read and follow all Safety
Rules and Instructions before
operating
this equipment.
For answers to your questions
about this product, Call:
1-800-659-5917
Sears Craftsman Help Line
5 am - 5 pm, Mon - Sat
SEARS,
ROEBUCKAND
CO., HOFFMAN
ESTATES,
IL 60179
U.S.A.
Visit our Craftsman
website:www.sears.com/craftsman
*As rated
by the engine
manufacturer
426266 Rev. 2
Advertisement
Table of Contents

Related Manuals for Craftsman 917.28990


Summary of Contents for Craftsman 917.28990
- Page 1 Manual. IMPORTANT: For answers to your questions about this product, Call: Read and follow all Safety 1-800-659-5917 Rules and Instructions before Sears Craftsman Help Line operating this equipment. 5 am - 5 pm, Mon - Sat SEARS, ROEBUCKAND CO., HOFFMAN...
- Page 2 Troubleshooting ........Sears Service ......Back Cover Operation ..........Maintenance Schedule ......CRAFTSMAN FULL WARRANTY TWO YEARS ON RiDiNG EQUIPMENT When operated and maintained according to all supplied instructions, if this riding equipment fails due to a defect in material...
-
Page 3: General Operation
,_DANGER: This cutting machine is capable of amputating hands and feet and throwing objects. Failure to observe the following safety instructions could result in serious injury or death. _,WARNING: In order to prevent acciden- • Never direct discharged materialtoward tal starting when setting up, transporting, anyone. -
Page 4: Slope Operation
li. SLOPE OPERATION • Never carry children, even with the blades shut off. They may fall off and Slopes are a major factor related to loss of be seriously injured or interfere with safe control and tip-over accidents, which machine operation. Children who have result in severe... - Page 5 • Keep the nozzle in contact with the rim • If you strike a foreign object, stop of the fuel tank or container opening inspectthe machine. Repair, if necessary, all times until fueling is complete. Do not before restarting. use a nozzle lock-open device.
-
Page 6: Product Specifications
SPECIFICATIONS REPAIR PROTECTION AGREEMENTS Gasoline Capacity 3 Gallons Congratulations on making a smart purchase. and Type: Unleaded Regular Your new Craftsman® product is designed Oil Type SAE 10W30(above 32°F) and manufactured for years of dependable (API-SG-SL): SAE 5W30(below 32°F) operation. - Page 7 Mower Front Wheel (1) Wheel (1) Locknut 3/8-16 (1) 1-1/40.D. Washer (1) Front Link Large Retainer Springs - 7/16 (1) 3/40.D. Washers ¢3Y (1) Anti-Swar Bar Small Retainer Springs - 5/16 (2) Rear Lift Link Assemblies (5) 1-3/16 O.D. Washers Slope Sheet (2) Keys (1) Oil Drain Tube...
- Page 8 Your tractor has been assembled at the factory with exception of those parts left unassembled for shipping purposes. To ensure safe and proper operation of your tractor all parts and hardware you assemble must be tightened securely. Use the correct tools as necessary to ensure...
- Page 9 TO INSTALL MOWER Assemble front gauge wheel (W) to front of mower. 1. Set Parking Brake Lever (P)And Lower Attachment Lift Lever (N). • Depress clutch/brake pedal all the way down and hold. Pull parking brake lever (P) up and hold, release pressure from clutch/brake...
- Page 10 4. Slide mower under tractor. • Pivot the integrated washer end of anti- sway bar (S) towards mower deck bracket • Bring belt forward check belt for on right side of mower. Insert integrated proper routing in all mower pulley grooves. washer end of bar into hole in rear mower NOTE:...
- Page 11 install Belt On Engine Clutch Pulley (M) • Disengage belt tension (K) from locking bracket (L). • Install belt onto engine clutch pulley (M). IMPORTANT: Check belt for proper rout- ing in all mower pulley grooves and under mandrel covers. C.
- Page 12 _fCHECKLIST Before operate your tractor, wish to assure that receive best performance satisfaction from this Quality Product. Please review the following checklist: _" All assembly instructions have been completed. _" No remaining loose parts in carton. _/'Battery properly prepared charged. _/"...
- Page 13 These symbols may appear on your tractor or in literature supplied with the product. Learn and understand their meaning. REVERSE NEUTRAL HiGH CHOKE FAST SLOW IGNITION SWITCH ,¢, ENGINE OFF REVERSE ENGINE ENGINE START PARKING BRAKE MOWER HEIGHT MOWER LIFT OPERATION SYSTEM (ROS)
-
Page 14: Know Your Tractor
KNOW YOUR TRACTOR READ THIS OWNER'S MANUAL SAFETY RULES BEFORE OPERATING YOUR TRACTOR Compare the illustrations with your tractor to familiarize yourself with the locations various controls and adjustments. Save this manual for future reference. Our tractors conform to the applicable safety standards of the... -
Page 15: To Use Throttle Control
The operation of any tractor can result in foreign objects thrown into the eyes, which can result in severe eye damage. Always wear safety glasses or eye shields while operating your tractor or performing adjustments or repairs. We recommend standard safety glasses or a wide vision safety mask worn over spectacles. - Page 16 MOVE FORWARD AND BACKWARD The cutting height range is approximately 1" to 4". heights are measured from the direction and speed of movement ground to the blade tip with the engine not run- controlled by the forward and reverse drive ning.
- Page 17 TO STOP MOWER BLADES TO OPERATE ON HILLS • Disengage attachment clutch control. _L, WARNING: Do not drive up or down CAUTION: Do not operate the mower hills with slopes greater than 15 ° and do not without either the entire grass catcher, drive across...
- Page 18 SERVICE REMINDER/HOUR METER CAUTION: Alcohol blended fuels (called Service reminder shows the total number gasohol or using ethanol or methanol) of hours the engine has run and flashes attract moisture which leads to separation indicate that the engine or mower needs ser- and formation of acids during storage.
-
Page 19: Mowing Tips
COLD WEATHER STARTING (50°F/10°C Disengage transmission placing and below) freewheel control in disengaged position (See "TO TRANSPORT" in this section When engine starts, slowly push choke of manual). control in until the engine begins to run Sitting in the tractor seat, start engine. - Page 20 • If grass is extremely tall, it should mowed twice to reduce load and possible fire hazard from dried clippings. Make first cut relatively high; the second to the desired height. • Do not mow grass when it is wet. grass will plug mower and leave undesir- able...
-
Page 21: Before Each Use
MAINTENANCE BEFORE EVERY EVERY EVERY EVERY EVERY BEFORE SCHEDULE EACH SEASON STORAGE HOURS HOURS HOURS HOURS Check Brake Operation Check Tire Pressure RT Check Operator Presence & ROS Systems Check for Loose Fasteners Check/Replace Mower Blades Lubrication Chart Check Battery Level Clean Battery and Terminals Clean... - Page 22 TRACTOR CHECK REVERSE OPERATION (ROS) SYSTEM Always observe safety rules when per- • When the engine is running with the forming any maintenance. BRAKE OPERATION ignition switch in the engine "ON" posi- tion and the attachment clutch engaged, If tractor requires more than five (5) feet to any attempt...
- Page 23 TO CHANGE ENGINE OIL NOTE: original equipment battery your tractor is maintenance free. Determine temperature range expected attempt to open or remove caps or covers. before oil change. All oil must meet AP( Adding or checking level of electrolyte service classification SG-SL.
-
Page 24: Air Filter
AIR FILTER CLEAN AIR SCREEN Your engine will not run properly using a Air screen must be kept free of dirt and chaff dirty air filter. Service paper cartridge every to prevent engine damage from overheating. two months or every 25 hours of operation, Clean with a wire brush or compressed airto whicheveroccurs first. - Page 25 CLEANING Pull back the lock collar of the nozzle adapter and push the adapter onto the • Clean engine, battery, seat, finish, etc. deck washout port at the left end of the of all foreign matter. mower deck. Release the lock collar to •...
- Page 26 & WARNING: TO AVOID SERIOUS iNJURY, BEFORE PERFORMING ANY SERVICE OR ADJUSTMENTS: Depress clutch/brake pedal fully and set parking brake. Place attachment clutch in "DISENGAGED" position. Turn ignition key to "STOP" and remove key. Make sure the blades and all moving parts have completely stopped.
- Page 27 TO LEVEL MOWER HOUSING Check adjustment on right side of tractor. Adjust the mower while tractor is parked Position any blade so the tip is pointing on level ground or driveway. Make sure straight forward. Measure distance "B" at tires are properly inflated (See "PROD- front and rear tip of blade UCT SPECIFICATIONS"...
- Page 28 TO REPLACE MOWER DRIVE BELT TO REPLACE MOTION DRIVE BELT Park the tractor on level surface. Engage MOWER DRIVE BELT REMOVAL parking brake. For assistance, there is a Park tractor on a level surface. Engage belt installation guide decal on bottom side parking brake.
-
Page 29: Maintenance
TO CHECK BRAKE TO START ENGINE WITH A WEAK BAT- TERY If tractor requires more than five (5) feet to stop at highest speed in highest gear on a _,WARNING: Lead-acid batteries gener- level, dry concrete or paved surface, then ate explosive gases. - Page 30 REPLACING BATTERY REMOVE HOOD GRILL SEMBLY _WARNING: Do not short batteryterminals Raise hood. by allowing a wrench or any other object to Unsnap headlight wire connector. contact both terminals at the same time. Stand in front of tractor. Grasp hood at Before connecting battery,...
- Page 31 ENGINE Immediately prepare your tractor for storage at the end of the season or if the tractor will FUEL SYSTEM not be used for 30 days or more. IMPORTANT: It is important prevent WARNING: Never store the tractor with gum deposits from forming in essential fuel...
-
Page 32: Troubleshooting
TROUBLESHOOTING CHART: See appropriate section in manual unless directed to Sears service center PROBLEM CAUSE CORRECTION Will not start Out of fuel. Fill fuel tank. See "TO START ENGINE" Engine not "CHOKED" properly. Operation section. Wait several minutes before Engine flooded. attempting to start. - Page 33 TROUBLESHOOTING CHART: See appropriate section in manual unless directed to Sears service center PROBLEM CAUSE CORRECTION Loss of power Cutting too much grass/too fast. Raise cutting height/reducespeed Throttle in "CHOKE" position. Adjust throttle control. Clean underside of mower Build-up of grass, leaves and trash under mower.
- Page 34 TROUBLESHOOTING CHART: See appropriate section in manual unless directed to Sears service center PROBLEM CAUSE CORRECTION Poor grass Engine speed too slow. Place throttle control in "FAST" discharge position. Travel speed too fast. Shift to slower speed. Wet grass. Allow grass to dry before mowing. Mower deck not level.
- Page 35 OU _[_fir@ answer and, more mar_agemyhomeo{om - for free! o Findthisand at[ your other productmanuaB ontine. o Get answers from our team of home experts. o Get a personalized maintenance plan for your home. Findinformation and tootsto hetpwith home projects. I 8_8ge_ b_.oo_at to you b y so_=...
- Page 36 .< IILI LI.. .< LI.. IILI ...I "t" LI,. IILI...
- Page 37 Servicio Sears ........Contratapa Mantenimiento ..........GARANTIA COMPLETA DE CRAFTSMAN DOS AltOS PARA EL EQUiPO TRACTOR Cuando se opera y mantiene de acuerdo con todas las instrucciones que se suministran, si este equipo tractor falla debido a un defecto de material o mano de obra dentro de los dos ahos posteriores a la fecha de compra, Ilame al telefono 1-800-4-MY-HOME®...
- Page 38 _I_,PELIGRO: Esta Maquina cortadora es capaz de amputar las manosy los pies y de lanzar objetos, si no se observan las instrucciones de seguridad siguientes se pueden producir lesiones graves o la muerte. • No maneje la m&quina si no tiene la trampa _DVERTENCIA: Siempre desconecte el alam- para cesped completa, la canaleta de descarga...
- Page 39 • Escoger una velocidad de marcha baja de • Nunca permitir que niflos u otras personas modo que no sea necesario pararse o cambiar esten dentro del equipo por remolcar. estando en una pendiente. • En pendientes, el peso del equipo remolcado •...
- Page 40 • Mantener la maquina libre de hierba, hojas • Las cuchillas del cortacesped son afiladas. u otros residuos acumulados. Limpiar Envolver la cuchilla, ponerse guantes y poner salpicaduras de aceite o carburante y quitar la maxima atenci6n cuando se hacen opera- ciones en elias.
- Page 41 LA REPARACION Bujia: Champion RC12YC Abertura: .030" (76 mm) Congratulaciones por su buena compra. Su nuevo producto Craftsman® est& diseSado Velocidad Delante: 5.2/8,4 y fabricado para funcionar de modo fiable por (mph/kph): Marcha Atr&s: 2.9/4,7 muchos aSos. Pero como todos los productos,...
- Page 42 Rueda delantera de la segadore (1) Rueda (1) Tuerca Seguridad 3/8-16 11) Perno con Resalto (1) 1-1/40.D. Arandela Segadora 1) Barra Antioscilaci6n (5) Resorte de Retenci6n (1) 3/40.D. Arandela (1) Montaje de la pieza (2) Resorte de Retenci6n de uni6n deantera (2) Rear Lift Link Assemblies (5) 1-3/16...
- Page 43 Su tractor nuevo ha sido montado en la f&brica con la excepci6n de aquellas partes que no se han mon- tado por razones de envio. Para asegurarse que su tractor funcione en forma adecuada y segura todas las partes y los articulos de ferreteria que se monten tienen que set apretados en forma segura. Use las herramientas correctas, segOn sea necesario, para asegurarse de que esten apretados en forma segura.
- Page 44 INSTALE LA SEGADORA Y LA CORREA DE TRANSMISION Accione la palanca del freno de estaciona- miento (P) y la palanca de levantamiento del accesorio inferior (N). Presione el pedal de embrague/freno completamente hasta abajo y mant@galo apretado. Tire y mantenga la palanca del freno de esta- H.
- Page 45 • Deslice la cortadora de cesped debajo del • Haga oscilar el extremo con la arandela tractor hasta que se encuentre centrada integrada de la barra antibalanceo (S) hacia debajo del tractor. la escuadra de la plataforma de la cortadora de cesped en el lado derecho de la cortadora.
- Page 46 Instale la correa en la polea del embrague del motor (M) • Desenganche la varilla tensora de la correa (K) de la escuadra de bloqueo (L). (Vea el diagrama completo en la pagina 1 .) • Instale la correa en la polea del embrague del motor (M) IMPORTANTE: Verifique...
- Page 47 REVISION DEL SISTEMA DE FRENOS Una vez que usted haya aprendido a manejar su tractor, verifique que el freno funcione correcta- mente. Ver "PARA VERIFICAR Sl FUNCIONA BIEN EL FRENO" en el capitulo de servicio y ajustes de este manual. REVISION ,/LISTA Antes de operar y de disfrutar de su tractor nuevo,...
- Page 48 Estos simbolos pueden aparecer sobre su tractor o en la literatura proporcionada con el producto. Aprenda y comprenda sus significados. MARCHA ATR,_S NEUTRO ALTO BAJO ESTRANGU- R,_,PIDO LENTO LACION (@) -@ MOTOR MOTOR MOTOR LEVANTAMIENTO FRENO ALTURA DE LA SISTEMA ENCENDIDO EN MARCHA DE LA SEGADORA...
- Page 49 FAMILIARICESE CON SU TRACTOR LEA ESTE MANUAL DEL DUEllO Y LAS REGLAS DE SEGURIDAD ANTES DE OPERAR SU TRACTOR Compare las ilustraciones con su tractor para familiarizarse con las ubicaciones de los diversos controles y ajustes. Guarde este manual para referencia en el futuro. 03079 Nuestros tractores cumplen con los est&ndares de seguridad del American...
- Page 50 La operaci6n de cualquier tractor puede hacer que salten objetos extraflos dentro de sus ojos, Io que puede producir daflos graves en estos. Siempre use anteojos SEGURIDAD de seguridad o protecciones para los ojos mientras opere su tractor o cuando haga ajustes o reparaciones.
- Page 51 MOVERSE HACIA ADELANTE Y HACIA La gama de la altura de corte es de aproxima- ATRAS damente 1 a 4 pulgadas. Las alturas se miden desde el suelo a la punta de la cuchilla cuando La direcci6n y la velocidad de movimientos est_.n el motor no est&...
- Page 52 PARA OPERAR LA SEGADORA FUNClONAMIENTO ATRAS Su tractor viene equipada con un interruptor Tu tractor est& equipado con el Sistema de sensor que exige la presencia del operador. Si Funcionamiento Atr&s (ROS). Cualquier tenta- el motor est& funcionando y el embrague del ac- tiva del operador de viajar marcha atr&s con el cesorio est&...
- Page 53 PARA TRANSPORTAR ANTES HACER ARRANCAR Cuando empuje o arrastre su tractor asegOrese EL MOTOR de desenganchar la transmisi6n poniendo REVISE EL NIVEL DE ACEITE DEL MOTOR el control de la rueda libre en la posici6n de El motor en su tractor ha sido enviado desde la marcha de rueda libre.
- Page 54 PARA HACER ARRANCAR EL MOTOR CALENTAMIENTO PARA LA TRANSMISION AUTOMATICA AI hacer arrancar el motor por la primera vez o si se ha acabado el combustible del motor, se Antes de conducir la unidad en un tiempo frio, la necesitar& tiempo para el arranque extra para transmisi6n debe ser calentada como las instruc-...
-
Page 55: Consejos Para Segar
6. Enganche latransmisi6n p oniendo el control • Si el cesped est& demasiado alto, se debe derueda libreenlaposici6n deconducir ( Vea segar dos veces para reducir la carga y los "PARA TRANSPORTAR" enestasecci6n del posibles peligros de incendio debido a los manual). -
Page 56: Antes De Cada Uso
PROGRAMA ANTES CADA CADA CADA CADA CADA MANTENIMIENTO CADA USO TEMPORADA ALMACENAMIENTO HORAS HORAS HORAS HORAS Revisar la operaci6n del freno Revisar la presi6n de las Ilantas Verifi6z la commande de presence d'operateur et le sistema d ROS Revisar si hay sujetadores sueltos Afilar/cambiar las cuchillas... - Page 57 Cuando el motor esta en marcha con el inte- TRACTOR rruptor de Ilave del sistema de funcionamiento Siempre observe las reglas de seguridad cuando de mantenimiento. atras (ROS) en la posici6n "ON" y el embrague del accesorio conectado, cualquier tentativa del OPERAClON DEL FRENO operador de viajar marcha atras, NO apagara...
- Page 58 PARA LIMPIAR LA BATERiA Y LOS TERMI- Quite el casquillo amarillo de la parte inferior NALES de la valvula de desagOe e instale el tubo de desagOe sobre la guarnici6n. La corrosi6n y la mugre de la bateria y de los terminales pueden producir "escapes"...
- Page 59 AVlSO: No lave el cartucho de papel o use sire AVlSO: Si se opera la maquina con una rejilla del cesped bloqueada, sucJa, o con las aletas a presi6n, pues esto daflara el cartucho. de enfriamiento taponadas, y/o las tapas de Abra la puerta (A) en la caja del ventilador enfriamiento removidas se producir&...
- Page 60 LIMPIEZA Eche hacia atras la abrazadera de cierre del adaptador de la boquilla y empuje este en el • Limpie todo material extraflo del motor, la puerto de lavado de la cubierta en el extremo bateria, el asiento, el pulido, etc. izquierdo de la cubierta de la segadora.
- Page 61 ADVERTENCIA:PARA EVITAR LESIONES SERIAS, ANTES DE DAR CUALQUIER SERVI. CIO O DE HACER AJUSTES: Presione el pedal del embrague/freno completamente y aplique el freno de estacionamiento. Ponga la palanca de control de movimiento en la posici6n de neutro. Ponga el embrague del accesorio en la posici6n desenganchado (DISENGAGED).
- Page 62 PARA NIVELAR LA CAJA DE LA SEGADORA PRECAUClON: Las cuchillas son cor- Ajuste la segadora con el tractor estacionado tantes. Protegerse las manos con guantes y/o en terreno nivelado o en una entrada de envolver la cuchilla con una tela pesada. autom6viles.
- Page 63 PARA REEMPLAZAR LA CORREA DE LA NOTE: Observe toda la correa de impulsi6n de CUCHILLA DE LA SEGADORA movimiento y la posici6n de todas las guias y DESMONTAJE DE LA CORREA DE LA SE- guardacorreas. GADORA Desconecte el arnes del cable del embrague (A). Quite la pieza de uni6n anti-rotaci6n Estacione el tractor en una superficie nive-...
- Page 64 PARA HACER ARRANCAR EL MOTOR CON VERIFIQUE EL FRENO UNA BATERiA BAJA Si el tractor exige m&s de cinco (5) pies para pararse a una velocidad m&s alta en el cambio _DVERTENCiA: Las baterias de &cido-plo- m&s alto en una superficie nivelada de hormig6n mo generan gases explosivos.
- Page 65 PARA CAMBIAR EL FUSIBLE REEMPLAZAR LA BATERIA C&mbielo pot un fusible tipo enchufable de 30 _,DVERTENCIA: No haga cortocircuito con los amps, tipo automotriz. El sujetador del fusible terminales de la bateria al permitir que una Ilave est& ubicado detr&s del tablero. de tuerca o cualquier otro objeto entre en contacto con ambos terminales a la misma vez.
- Page 66 Inmediatamente prepare su tractor para el al- duce a la separaci6n y a la formaci6n de acudos durante elalmacenamiento. La gasolina acidica macenamiento a! final de la temporada o si el puede daflar el sistema de combustible de un tractor no se va a usar por 30 dias o m&s. motor durante el periodo de almacenamiento.
- Page 67 IDENTIFICACK_N DE PROBLEMAS: Yea la secci6n apropiada en el manual a menos que este dirigido a un centro de servicio Sears. PROBLEMA CAUSA CORRECCK_N Sin combustible. arral3ca Llene et estanque de combustible. Motor sin la"ESTRANGULACION" Vea"PARA HACER ARRANCAR EL MO- (CHOKE) adecuada.
- Page 68 IDENTIFICACION DE PROBLEMAS: Yea la secci6n apropiada en el manual a menos que este dirigido a un centro de servicio Sears. PROBLEMA CAUSA CORRECCION P_rdida de Agua en el combustible. Vaciar et estanque de combustible y et car- burador, vuetvaatlenaretestanquecon gaso- fuerza lina nueva y cambie etfiltro de combustible.
- Page 69 IDENTIFICACION DE PROBLEMAS: Yea la secci6n apropiada en el manual a menos que este dirigido a un centro de servicio Sears. PROBLEMA CAUSA CORRECCION de lantera(s) Bombilla(s) o IAmpara(s) quemada(s). Oambie la bombilla(s) 0 I_.mpara(s). no funcio- nando Interruptor de la luz fallado. Revise/cambie el interruptor de la luz.
- Page 71 L.-,; O o ¢D _._o_...
- Page 72 Your Home For repair - in your home - of all major brand appliances, lawn and garden equipment, or heating and cooling systems, no matter who made it, no matter who sold it! For the replacement parts, accessories owner's manuals that you need to do-it-yourself. For Sears professional installation of home appliances...
Need help?
Do you have a question about the 917.28990 and is the answer not in the manual?
Questions and answers
I need to see where the belt keeper is installed