Table of Contents
Advertisement
Available languages
Available languages
Operator's
Manual
GA
E
TRACTO
26.0 HP,* 54" Mower
Electric Start
Automatic Transmission
Model No.
917.28947
• EspaSol,#.36
This product has a tow emission
engine which operates
differently from previously built engines. Before you start the
engine, read and understand this Owner's Manual,
IMPORTANT:
Read and follow all Safety
Rules and Instructions before
operating this equipment.
For answers to your questions
about this product, Call:
1-800-659-5917
Sears Craftsman Help Line
5 am
-
5 pm, Mon
-
Sat
SEARS,
ROEBUCK
AND COo, HOFFMAN
ESTATES,
IL 60179
U.SoA.
Visit our Craftsman website:wwwosears,com/oraftsman
*As rated by' the engine manufacturer
425987
Rev. 2
Advertisement
Table of Contents

Related Manuals for Craftsman 917.28947


Summary of Contents for Craftsman 917.28947
- Page 1 Owner's Manual, IMPORTANT: Read and follow all Safety Rules and Instructions before operating this equipment. SEARS, ROEBUCK AND COo, HOFFMAN Visit our Craftsman website:wwwosears,com/oraftsman 425987 Rev. 2 TRACTO engine which operates For answers to your questions about this product, Call: 1-800-659-5917...
- Page 2 Safety Rules ... Product Specifications Assembly!P re-Operation Operation Maintenance Schedule CRAFTSMAN FULL WARRANTY TWO YEARS ON RIDING When oPerated and maintained fails due to a defect in material call 1-800-4-MY-HOME® Also, when operated and maintained also cover defects in material and workmanship...
- Page 3 _DANGER: This cutting machine is capable of amputating hands and feet and throwing objects. Failure to observe the following safety instructions could result m serious injury or death, ,_WARNING: in order to prevent acciden- tal starting when setting adjusting or making repairs, always discon- nect spark plug wire and place wire where it cannot contact spark plug.
-
Page 4: Slope Operation
g. SLOPE OPERATION Slopes are a major factor control and tip-over accidents, result in severe injury or death. on all slopes requires extra caution. cannot back up the slope or if you feel uneasy on it, do not mow it. •... -
Page 5: General Service
• Keepthe nozzlein contactwiththe rim of the fuel tank or containeropeningat alltimesuntilfuelingis complete.Do not use a nozzlelock-opendevice. lffuel isspilledonclothing,changecloth- ing immediately. • Neveroverfillfueltank.Replacegascap andtightensecurely. GENERALSERVICE • Never operate machine area. • Keep all nuts and boltstight equipment is in safe working •... - Page 6 Sears service center (See REPAIR PARTS manual). REPAIR AGREEMENTS Congratulations Your new Craftsman@ and manufactured 32°F) operation. But like all products, it may require repair from time to time. That's when having 64 oz a Repair Protection Agreement money and aggravation.
- Page 7 (1) Wheel (1) Shoulder (5) Large Retainer Springs o_ 7/16 (5) 1-3/1 60.D. Washers (1) Oil Drain Tube For Future Use Mower Front Wheel B0lt_ (1) t-1/40_D, Mower (t) 3/40.Do Washers (2) Small Retainer Springs - 5/!6 (2) Keys 411111 (1) Locknut 3/8416 Washer...
- Page 8 Your new tractor has been assembled unassembled for shipping all parts and hardware you assemble as necessary to ensure proper tightness_ TOOLS REQUIRED FOR ASSEMBLY A socket wrench set will make assembly easier. Standard wrench (2) 7/16" wrenches Utility knife (1) 1/2"...
- Page 9 ,_CAUTION: Lift lever is spring Have a tight grip on lift lever, lower it slowly and engage in lowest position. located on left side of fender. Lever 2o ASSEMBLE FRONT GAUGE (W) TO FRONT OF MOWER -® H, Front Mower Bracket Wo Front Gauge Wheel X,, Shoulder Bolt Y'.
- Page 10 Mower Side Suspension Arms Q. Deflector Shield 5, INSTALL ANTI-SWAY (IF EQUIPPED) ANTI-SWAY Towards Transaxle 90 ° End Integrated Washer End • From right side of mower, 90 ° end of anti-sway bar (S) into hole in transaxle bracket (T), located rear tire in front of transaxle.
- Page 11 C, Rear Lift Link(s) V D, Righ _ D, Right Side Rear Mower Bracket I 'U. Hole ATTACH FRONT LINK (E) • Turn steering wheel to position straight forward, From front of tractor, front link (E) through front hole in tractor front suspension bracket •...
-
Page 12: Check Tire Pressure
PRESSURE CHECK TIRE The tires on your tractor were over-inflated at the factory for shipping tire pressure is important for best cutting performance° • Reducetire pressure to PS1 shown ontires, CHECK DECK LEVELNESS For best cutting results, should be properly leveled. - Page 13 These symbols may appear on your tractor or in literature Learn and understand their meaning° REVERSE NEUTRAL ENGINE REVERSE ENGINE OPERATION SYSTEM (ROS) LIGHTS ON FUEL BATTERY A]TACHMENT ATTACHMENT CLUTCH DISENGAGED CLUTCH ENGAGED Failure to follow instructions could result in serious injury or death.
-
Page 14: Operation
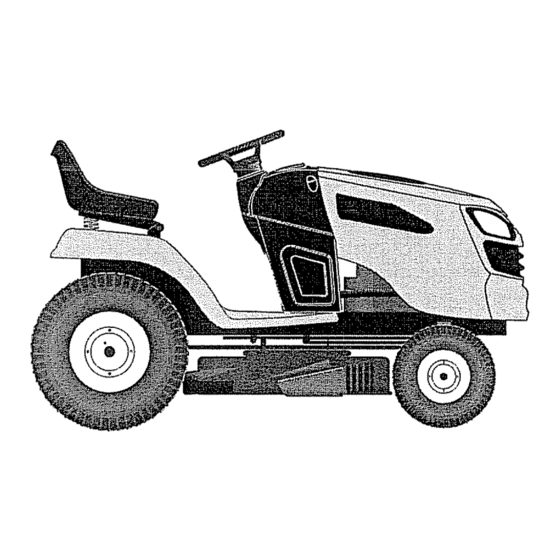
KNOW YOUR TRACTOR READ THIS OWNER'S MANUAL TRACTOR Compare the illustrations various controls and adjustments, (A) ATTACHMENT LIFT LEVER - Used to raise and lower the mower or other attach- ments mounted to your tractor. (B) BRAKE PEDAL - Used for braking the tractor and starting the engine. - Page 15 The operation eyes, which can result in severe or eye shields while operating or repairs° We recommend mask worn over spectacles° TO USE YOUR TO SET PARKING BRAKE Your tractor is equipped presence sensing switch. running, any attempt bythe operator to leave the seat without first setting the parking brake will shut off the engine.
- Page 16 TO MOVE FORWARD AND BACKWARD The direction and speed controlled by the forward and reverse pedals. Start tractor release brake. Slowly depress forward(K) drive pedal to begin movemenL speed increases the further pedal is depressed,, TO USE CRUISE CONTROL The cruise control feature forward travel onlyo SYSTEM...
- Page 17 TO STOP MOWER BLADES Disengage attachment clutch control. _CAUTION: Do not operate without either the entire mowers so equipped, or the deflector (S) in place. REVERSE OPERATION SYSTEM Your tractor is equipped Operation System (ROS). Any attempt the operator to travel in the reverse direction with the attachment clutch engaged off the engine unless...
- Page 18 SERVICE REMINDER/HOUR Service reminder shows of hours the engine has run and flashes indicate that the engine or mower needs ser- vicing. When service is required, reminder will flash for two hours. To service engine and mower, see the Maintenance section of this manual.
- Page 19 6o Insert key into ignition clockwise to start position key as soon as engine starts. Do not run starter continuously for more than fifteen seconds per minute, if the engine does not start after several choke control in, wait a few minutes try again, tf engine still does not start, pull the choke control out and retry, WARM...
-
Page 20: Mowing Tips
MOWING TiPS * Tire chains cannot be mower housing is attached Mower should be properly mowing performance. MOWER HOUSING" in the Service Adjustments section of this manual. left hand side of mower used for trimming. Drive so that clippings are discharged the area that has already the cut area to the right of the tractor. - Page 21 MAINTENANCE SCHEDULE Check Brake Operation Check T!re Pressure Ros sy_!em_ T CheckOpFra_or,Presence & Check for Loose Fasleners ChecldRepbce Mower Blades Lubrication Chart Check Battery Level R 'CleanB'ai'tery andTerminal, Clean Debris ofi Steering Piate Check Transaxle Cooling Check Mower Levelness Check V-Bells Check Enqine Oil Level Change...
- Page 22 TRACTOR Always observe safety rules when performing any maintenance_ BRAKE OPERATION If tractor requires more than five (5) feet to stop at highest speed in highest level, dry concrete or paved brake must be serviced. BRAKE" in the Service section of this manual)_ TIRES •...
- Page 23 TO CLEANBATTERY AND TERMINALS Corrosionanddirt on the batteryandtermi- nalscan causethe batteryto "leak"power. 1. Removeterminalguard,, 2. DisconnectBLACK battery cable first then RED battery cable and remove batteryfromtractor_ 3. Rinsethebatterywith plainwateranddry. 4. Cleanterminalsandbatterycableends with wire brushuntilbright, 5. Coatterminalswithgreaseor petroleum jelly. 6. Reinstall battery (See "REPLACING BATTERY"in the SERVICEAND AD- JUSTMENTSsectionof this manual).
- Page 24 AIR FILTER Your engine will not run properly dirty air filter. Service paper cartridge two months or every 25 hours of operation, whichever occurs first. Service paper cartridge dusty conditions. Replace the paper cartridge annually, or after every 100 hours of operation, TO SERVICE CARTRIDGE •...
- Page 25 CLEANING ° Clean engine, battery, seat, finish, etc. of all foreign matter. ° Clean debris from steering Debris can restrict clutch/brake shaft movement, causing loss of driver A CAUTION: Avoid all pinch movable parts • Keep finished surfaces free of all gasoline, oil, etc.
- Page 26 WARNING; TO AVOID SERIOUS INJURY, BEFORE PERFORMING ANY SERVICE OR ADJUSTMENTS: Depress clutch/brake Place attachment clutch Turn ignition key to "STOP" Make sure the blades and all moving Disconnect spark plug wire from spark plug and place wire where it cannot in contact with plug.
- Page 27 TO LEVEL MOWER Make sure tires are properly PS! shown on tires_ If tires are over or under inflated, it may affect the appearance lawn and lead you to think the mower is not adjusted properly, VISUAL StDE-TO.-SIDE ADJUSTMENT 1. With all tires properly inflated and if your lawn appears unevenly...
- Page 28 REPLACE MOWER MOWER DRIVE BELT REMOVAL Park tractor on a level surface° parking brake. 2o Lower attachment lift lever to its lowest position° Disengage belt tension bracket (L). AUTION= Belttension ed. Have a firm grip on rod and release slowly. 4.
- Page 29 TO CHECK BRAKE If tractor requires more than five (5) feet to stop at highest speed in highest level, dry concrete or paved brake must be serviced. You may also check brake by: !o Park tractor on a level, dry concrete paved surface, depress the way down and engage parking brake.
- Page 30 REPLACING BATTERY _,WA R NING: Do not short battery terminals by allowing a wrench or any other object to contact both terminals at the same time. Before connecting battery, bracelets, wristwatch bands, Positive terminal must be connected prevent sparking from accidental Lift hood to raised position.
- Page 31 Immediately pre pare your tracto r for sto rage at the end of the season or if the tractor will ,_t be used for 30 days or more. WARNING: Never store the tractor with gasoline in the tank inside a building where fumes may reach an open flame or spark, Allow...
-
Page 32: Troubleshooting
TROUBLESHOOTING See appropriate section in manual unless directed to Sears service center P,OBLEM- -] ... Will not start Hard to start Engine will not turn over CHART: ICAUSE Out of fuel. Engine not "CHOKED" properly. Engine flooded° Bad spark plug. Didy air filter_ Dirty fuel filter. - Page 33 TROUBLESHOOTING See appropriate section in manual unless directed to Sears service center PROBLEM Engine clicks but will not start Loss of power Excessive vibration Engine continues to run when operator leaves seat with atta- chment clutch engaged CHART: CAUSE Weak or dead battery. Corroded battery terminals°...
- Page 34 TROUBLESHOOTING See appropriate section in manual unless directed to Sears service center PROBLEM Poor cut - uneven cutting Mower blades will not rotate Poor grass :discharge Headlight(s) not working (if so equipped) CHART: CAUSE Worn, bent or loose blade,. Mower dock not level. Buildup of grass, leaves, and trash under mower, Bent blade mandrel.
-
Page 35: Need More Help
TROUBLESHOOTING See appropriate section in manual unless directed to Sears service center P.ooL o i--] I'T/'°;;5 b _,_;;,,y a_atter ,i-]l not 1144 Faulty alternator, Loss of drtve | 1/ /"DISENGAGED"posit!one 12/Debris / /equipped).. IS/Motion ! | or b rokeo, I I shipment orservicing_ Engine-baCkfires,, when turning engine... - Page 36 I,I= ILl..
- Page 37 Montaje/Pre Operaci6n ... 43 Operaci6n ... 48 Mantenimiento ... GARANTiA COMPLETA DE CRAFTSMAN DOS ANOS PARA EL EQUIPO TRACTOR Cuando se opera y mantiene de acuerdo con todas las instrucciones que se suministran, si este equipo tractor falla debido a un defecto de material o mano de obra dentro de los dos aBos posteriores a la fecha de compra, Ilame al tel6fono 1-800-4-MY-HOME®...
- Page 38 _PELIGRO: Esta Maquina cortadora es capaz de amputar las manosy los pies y de lanzar objetos, sl no se observ'an las tnstrucciones de segurtdad siguientes se pueden producir lesiones graves o la muerte. _ADVERTENCIA: Siempre desconecte el alam- bre de la bujia y p6ngalo donde no pueda entrar en contacto con la bujia, pare evitar el arranque por accidente, durante la preparaciSn, el trans- porte, el ajuste o cuando se hacen reparaciones.
- Page 39 . Escoger una velocidad de marcha baja de modo que no sea necesario pararse o cambiar estando en una pendienteo • No cortar la hierba mojada, Las ruedas pueden perder tracciSn. Poner siempre una marcha cuando se est& en pendientes. No porter en punto muerto e ir cuesta abajo.
- Page 40 • Mantener la m&quina libre de hierba, hojas u otros residuos acumutados° salpicaduras de aceite o carburante y quitar cualquier cosa mojada con carburanteo Dejar que la m&quina se enfrfe antes de guardarla_ • Si se golpea un objeto ajeno, hay que pararse e inspeccionar la mgLquina.
-
Page 41: Especificaciones
ESPECIFICACIONES DEL PRODUCTO Capacidad y Tipo 4 Galones (15.14 L) de Gasoline Reqular Sin P!omo Tipo de Aceite SAE 30 (Sobre 32°F/0%) API-SG-SL): SAE5W30 (Deabajo32°F/0°C) 64 oz. Capacidad de Aceite: Bujia: Champion RC12YC (Abertura: .030") Velocidad de Marcha Adetante: 0-7o8/12.5 Recarrido(rnphikph): Marcha Arras: Sistema de Carga: t5 Amps@3600 RPM Bateria:... - Page 42 esal_tO li Pemo ion R (5) Resorte de Retenci6n __-__ (2) Resorte (5) 1-3/16 O°D. Arandela (1) Tubo de desagLie _11_1,1 (1) 1-1/40.D. Arandela sogodora (1) 3/40.D. Arandela de Retenci6n iiii ilull (1) Tuerca Seguridad 3/8-16 scilaci6n (1) Montaje de la pieza _,",_,,_., de uni6n deantera ,_-_...
- Page 43 Su tractor nuevo ha sido montado en la f&brica con la excepci6n de aquetlas partes que no se hart mon- tado por razones de envio. Para asegurarse que su tractor funcione en forma adecuada y segura todas las partes y los articulos de ferreteria que se monten tienen que ser apretados en forma segurao Use las herramientas correctas, seg_n sea necesario, para asegurarse de que est_n apretados en forma segura.
- Page 44 _,, PRECAUCiON: Lapalanca d elevantamiento est& accionada porresorteo Sost_ngatafirmemente apretada, b&jela lentamente y eng&nchela enla posici6n m&s baja. L apalanca d elevantamiento encuentra e nel ladoizquierdo d eladefensao Palanca D e ARME LA RUEDA CALIBRADORA DELAN- TERA (W) EN LA PART E DELANTERA DE LA CORTADORA DE CESPED H.
- Page 45 Brazos De Suspensi6n Lateral De La Cortadora De C6sped Q, Blindaje Deflector 5._ SI LA TIENE, INSTALE LA BARRA ANTIBALANCEO BARRA ANTIBALANCEO Hacia La Plataforma De La Cortadora Extremo En 90 ° Arandela lntegrada • Desde el lado derecho de la cortadora de c_sped, inserte primero el extremo en 90 °...
- Page 46 • Levante l aesquinatrasera delacortadorade c6sped y ubique l aranura enelconjunto d ees- labones sobre lachaveta enlaescuadratrasera delacodadora ( D); a segure c onuna arandela grande y un resorte deretenci6n grandee Repita enel ladeopuesto deltractor. 8. INSTALE E LESLABON DELANTERO ( E) •...
- Page 47 REVIS16N DE I.A PRESION LLANTAS Las Ilantas en su unidad fueron infladas de- masiado en la f&brica por razones de envio. La presi6n de las llantas correctas es importante para obtener el mejor rendimiento en el code. • Reduzca la presi6n de los neum&ticos a la PSI que se indica en estoso REVISION LA NIVELACION...
- Page 48 Estos simbolos pueden aparecer sobre su tractor o en la literatura proporcionada con el producto Aprenda y comprenda sus significadoso MARCHA ATR/_S NEUTRO " MOTOR SISTEMA APAGADO FUNCtQNAMIENTO ARRAS (ROS) LUCES ENSEND]DAS COMBUSTIBLE ACCESORIQ ACCESORIO EMBRAGUE EMBRAGUE ENGANCHADO DE£ENGANCF{ADO RUEDA LIBRE (Solamente para los modelos...
- Page 49 FAMILIARICESE CON SU TRACTOR LEA ESTE MANUAL DEL DUEI_IO Y LAS REGLAS DE SEGURIDAD ANTES DE OPERAR SU TRACTOR Compare las ilustraciones con su tractor para familiarizarse con las ubicaciones de los diversos controles y ajusteso Guarde este manual para referencia en et futuroo Nuestros tractores cumplen con los est&ndares de seguridad del (A) PALANCA DEL LEVANTAMIENTO...
- Page 50 La operaci6n de cuafquier tractor puede hacer que salten objetos extrafios dentro de sus ojos, Io que puede producir dafios graves en 6stos. Siempre use anteojos de seguridad o protecciones para los ojos mientras opere su tractor o cuando haga ajustes o reparaciones+ Recomendamos gafas de seguridad o una m&scara de visi6n amplia de segufidad usada sobre las gafaso COMO USAR SU TRACTOR...
- Page 51 MOVERS E HACIA ADELANTE Y HACIA ATR._,S La direcci6n y la velocidad de mevimientos est&n controlados per los peda]es de marcha adelante y atr_.so Poner en marcha et tractor y quitar el freno de mane. 2o Apretar lentamente el pedal marcha adelante (K) y atr&s (L) para iniciar el movimiento.
- Page 52 1. Etija aqu_altura cortar& elc6sped pormedio dela palanca elevadorao 2. Haga arrancar l ascuchiltas d e tasegadora enganchando e l controlde!ernbrague d el accesorio. PARA PARAR LAS CUCHILLAS SEGADORA Desenganche el control del embrague del ac- cesorio. _PRECAUCI6N: No opere la segadora sin, ya sea, el recogedor de c_sped completo en las segadoras asi equipadas o con la protecci6n...
- Page 53 MECAI;,IISMO DE AVISO CRONOMETRO Et mecanismo de aviso de servicio muestra el n_mero total de horas que ha estado en fun- cionamiento el motor, y se enciende y se apaga de manera intermitente cuando el motor o la cortadora necesitan servicio. Cuando se requiere servicio, el mecanismo de aviso de servicio se enciende y se apaga intermitentemente lapso de dos horas,.
- Page 54 6o inserte la llave en fa ignici6n y gire la lfave en et sentido que giran las manillas del reloj a la posici6n de arranque start, y suelte ta !lave tan pronto como arranque el motor. No haga funcionar el arrancador amente pot m&s de quince segundos por minuto, Si el motor no arranca...
-
Page 55: Consejos Para Segar
CONSEJOS PARA SEGAR " No se pueden usar las cadenas para las Ilantas cuando la caja de la segadora est#, adjunta al tractor, • La segadora debe estar nivelada en forma adecuada para obtener el mejor rendimiento al segan Vea "PARA NIVELAR LA CAJA DE LA SEGADOR/_' en la secciSn de Servicio y Ajustes de este manual,, •... -
Page 56: Antes De Cada Uso
PR01GRAMA DE MANTENIMIENTO i Reviser la operaci6nde}fmno Rev,,_,'f[t LD,8,1611 d8 ,BS ,}.tl_q5 V6rili6Z lacc, mmrmde de pr6_ence E! a i d'oD6tateu_- o! !o ._i_femn d ROS IA .o+_, , ,..y..jo,..,eo o +,oo IIAf_t_d'cambtnr las cuchlIlas de _ eegad=rn Tabla d_ }ubticI_c_6r_ Revi_[_ret t_et Revival' e! enIdttmlsnlo dol lranselo... - Page 57 TRACTOR Siempre observe tas reglas de seguridad cuando d6 mantenimiento. OPERAClON DEL FRENO Si el tractor necesita m#.s de cinco (5) pies para detenerse a la m&xima velocidad at cambio m&s alto en una supefficie nivelada, de hormig6n o pavimentada, hay que hacerle el servicio al freno_ Ver "PARA VERIFICAR SI FUNCIONA BtEN EL FRENO"...
- Page 58 PARA LtMPIAR LA BATERiA Y LOS TERMt- NALES La corrosi6n y la mugre de la bateda y de los terminales pueden producir "escapes" de potencta en la baterfa, 1o Remueva la protecci6n de los terminales. Desconecte el cable de la bateria NEGRO primero y luego el cable de la bateria ROJO y remueva la bateria del tractor, Enjuague la bateria con agua corriente y...
- Page 59 FILTRO DEACEITE DEL MOTOR Cambie el filtro de aceite def motor cada tempo- rada ovez por medic que cambie el aceite, si el tractor se usa m&s de 100 horas en un aSo. FILTRO DE AIRE Su motor no va a funcionar en forma adecuada si usa un filtro sucio.
- Page 60 LIMPIEZA • Limpie todo material extraS.o del motor, la bateria, el asiento, el pulido, etc. Limp[e los desechos de la placa guia. desechos pueden limitar el movimiento del eje del pedal del frenoiembrague, Io que har& que patine la correa y que se pierda la tracci6n. _PRECAUOI6N: Evite todos los puntos de enganche y las piezas m6viles..
- Page 61 ADVERTENCIA:PARA CIO O DE HACER AJUSTES: Presione el pedal del embrague/freno completamente y aplique el freno de estacionamientoo Ponga la palanca de control de movimiento en la posici6n de neutro. Ponga el embrague del accesorio en la posiciSn desenganchado (DISENGAGED)° 4o Ponga la llave de igniciSn en la posici6n de apagado (STOP) y remu6vala.
- Page 62 PARA NiVlELAR LA SEGADORA Aseg_rese de que los neum#.ticos est6n inflados a la PSI que se indica en estos. Si est&n demasiado inftados o poco inflados, el c6sped no le quedar& bien cortado, Io cual podr#, Ilevarlo a pensar que ta SEGADORA no est,.
- Page 63 PARA REEMPLAZAR LA CORREA DE LA CUCH1LLA DE LA SEGADORA DESMONTAJE DE LA CORREA 1o Estacione el tractor en una superficie nive- lad& Ponga el freno de manoo Baje la palanca elevadora a la posiciOn de m&s abajo. Retire la barra de tension de la correa (K) de la barra de sujeciOn (L)o ni, CUIDADO: La barra de tension funciona a resorter SujOtela con fuerza y su_ltela despacio.
- Page 64 VERIFIQUE EL FRENO Si e! tractor exige m_s de cinco (5) pies pare pararse a una velocidad m&s alta en el cambio m&s alto en una superficie nivelada de hormig6n seco o pavimentada, entonces se debe controlar y ajustar el frenoo CONTROL DEL FRENO 1.
- Page 65 REEMPLAZAR LA BATERIA _zkDVERTENCIA: No haga cortocircuito con los terminales de la bateria al permitir que una Ilave de tuerca o cuatquier otro objeto entre en contacto con ambos terminales a la misma vezo Antes de instalar la bateria remueva las pulseras de metal, los relojes de pulsera de metal, los anillos, etc_ El terminal positivo tiene que conectarse primero para evitar las chispas debido a la conexi6n a...
- Page 66 inmediatamente prepare su tractor para el al- macenamiento al final de la temporada o si el tractor no se va a usar por 30 dias o m_s. _,AIDVERTENOIA: Nunca almacene el tractor con gasolina en el estanque dentro de un edificio en donde los gases pueden atcanzar una llama expuesta o una chispa.
- Page 67 tDENTIFICACION DE PROBLEMAS: Vea la seccibn apropiada en el manual a menos que est6 dirigido a un centro de servicio Sears. Sin combustible., No arranca Motor sin la "ESTRANGULACION" (CHOKE) adecuada+ Motor ahogado. Bujia mala+ Filtro de aire sucio, Fillro de combustible sucio, Agua en el combustible+ Atambrado suetlo 0 da_Sado Carburador desajustado,...
-
Page 68: Identificacion De Problemas
IDENTIFICACION DE PROBLEMAS: Vea la secci6n apropiada en el manual a menos que est_ dirigido a un centro de servicio Sears. PROBLEMA I CAUSA P_rdida de Corta mucho c6sped, muy r&pido fuerza Aceleraci6n en la posici6n de "ESTRAN- GULACION" (CHOKE). 3_ Acumulaci6n de c_sped, hojas y basura debajo de la segadora Filtro de aire sucio,,... - Page 69 IDENTIFICACI6N DE PROBLEMAS: Vea la seccibn apropiada en el manual a menos que est(_ dirigido a un centro de servicio Sears. PROBLEMA CAUSA Mala des- Velecidad del motor muy lenta,, carga del c_sped Velocidadderecorridodemasiado C_sped mojado 4_ El conjunto segador no est#4nivel_ Presi6n de aire de las llantas baja o dispareja, Cuchitla desgastada, doblada 0 suetla,,...
- Page 71 O. _ "_mgmN _.° _° o_" mE" C) z I-" < >...
- Page 72 NEED MORE HELP? You'll find l:he answeT and mo_e on managemyhome.com - Find this and all your other product manuaL_ online, - Get answers from our team of home experts, • Get a personalized maintenance plan for your home • Find information and tools to help with home projects, manage brou_hl to yolt by Sears...
Need help?
Do you have a question about the 917.28947 and is the answer not in the manual?
Questions and answers
Choke is sticking open and leaking fuel.