Table of Contents
Advertisement
Available languages
Available languages
Operator's
Manual
CRRFrSMR#°
LAW
24.0 HR*
TRACTO
46" Mower
Electric Start
Automatic
Transmission
Model No.
28928
• EspaSol, p. 34
This product has a low emission
engine
which
operates
differently
from
previously
built
engines.
Before
you start the
engine,
read and understand
this Owner's
Manual.
IMPORTANT:
Read and follow all Safety
Rules and Instructions
before
operating
this equipment.
For answers to your questions
about this product, Call:
1-800-659-5917
Sears Craftsman Help Line
5 am - 5 pm, Mon - Sat
SEARS,
ROEBUCKAND
CO., HOFFMAN
ESTATES,
IL 60179
U.S.A.
Visit our Craftsman
website:www.sears.com/craftsman
*As rated by the engine manufacturer
Advertisement
Table of Contents

Related Manuals for Craftsman 917.289281


Summary of Contents for Craftsman 917.289281
- Page 1 Owner's For answers to your questions about this product, Call: 1-800-659-5917 before Sears Craftsman Help Line 5 am - 5 pm, Mon - Sat CO., HOFFMAN ESTATES, which operates Before you start the Manual. IL 60179 U.S.A.
- Page 2 Warranty Safety Rules ... Product Specifications Assembly/Pre-Operation Operation Maintenance Schedule CRAFTSMAN LIMITED WARRANTY TWO YEARS ON TRACTOR When operated and maintained due to a defect in material or workmanship call 1-800-4-MY-HOME® to arrange During the first year of purchase, For your convenience,...
- Page 3 _DANGER: This cutting machine is capable of amputating throwing objects. Failure to observe the following in serious injury or death. _I, WARNING: In order to prevent acciden- tal starting when setting up, transporting, adjusting or making repairs, always discon- nect spark plug wire and place wire where it cannot contact spark plug.
- Page 4 li. SLOPE OPERATION Slopes are a major factor related control and tip-over accidents, result in severe injury or death. tion on all slopes requires extra caution. you cannot back up the slope uneasy on it, do not mow it. • Mow up and down slopes, •...
- Page 5 • Remove gas-powered equipment the truck or trailer and refuel ground. If this is not possible, refuel such equipment with a portable container, rather than from a gasoline dispenser nozzle. • Keep the nozzle in contact of the fuel tank or container all times until fueling is complete.
- Page 6 REPAIR PARTS 60 oz. REPAIR PROTECTION QC12YC AGREEMENTS Congratulations 0 - 5.2 chase. Your new Craftsman@ 0 - 2.9 designed and manufactured dependable operation. it may require repair from time to time. That's when having a Repair can save you money and aggravation.
- Page 7 Keys (2) Keys Your new tractor has been assembled unassembled for shipping purposes. TOOLS REQUIRED FOR ASSEMBLY A socket wrench set will make assembly easier. Standard wrench sizes are listed. (1) 1/2" wrench Tire pressure gauge (2) 7/16" wrenches Utility knife Pliers When right or left hand is mentioned manual, itmeans when you are in the operating...
- Page 8 NOTE: You may now roll your tractor skid. Followthe appropriate instruction to remove the tractor from the skid. _l_ WARNING: Before starting, derstand and follow all instructions Operation section of this manual. tractor is in a well-ventilated area. the area in front of tractor is clear people...
- Page 9 These symbols may appear on your tractor or in literature supplied with the product. Learn and understand their meaning. REVERSE NEUTRAL HIGH ENGINE OFF REVERSE ENGINE ON OPERATION SYSTEM (ROS) LIGHTS ON FUEL BATTERY ATTACH M ENT ATTACHMENT CLUTCH DISENGAGED CLUTCH ENGAGED FREE WHEEL...
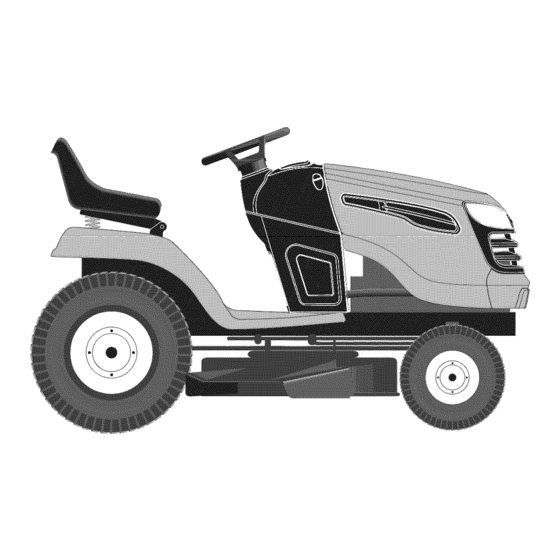
- Page 10 KNOW YOUR TRACTOR READ THIS OWNER'S MANUAL TRACTOR Compare the illustrations with your tractor various controls and adjustments. ® Our tractors conform American (A) ATTACHMENT LIFT LEVER raise and lower the mower or other ments mounted to your tractor. (B) BRAKE PEDAL - Used for braking the tractor and starting the engine.
- Page 11 The operation of any tractor the eyes, which can result in severe eye damage. glasses or eye shields while operating your tractor adjustments or repairs. wide vision safety mask worn over spectacles. HOW TO USE YOUR TRACTOR TO SET PARKING BRAKE Your tractor is equipped...
- Page 12 TO USE CRUISE CONTROL The cruise control feature can be used for forward travel only. SYSTEM CHARACTERISTICS The cruise control should only be used while mowing or transporting smooth, straight surfaces. Other tions such as trimming at slow speeds may cause the cruise control gage.
- Page 13 TO STOP MOWER BLADES disengage attachment clutch _IbCAUTION: Do not operate without either the entire grass on mowers so equipped, or the deflector shield (S) in place. REVERSE OPERATION SYSTEM Your tractor is equipped with a Reverse Operation System (ROS). Any attempt the operator to travel...
- Page 14 TOWING CARTS OTHER MENTS Tow only the attachments that are recom- mended by and comply with specifications of the manufacturer of your tractor. common sense when towing. of a load, while on a slope, is dangerous. Tires can lose traction with the ground cause you to lose control...
- Page 15 COLD WEATHER STARTING C and below) When engine starts, leave control in choke position until engine warms up and begins to run roughly. Once rough running begins, ately move the throttle control fast position. Engine warm-up take from several seconds minutes (the colder the temperature,...
- Page 16 MOWING TIPS • Tire chains cannot be used when mower housing is attached • Mower should be properly leveled best mowing performance. LEVEL MOWER HOUSING" Service and Adjustments section manual. • The left hand side of mower used for trimming. •...
- Page 17 MAINTENANCE SCHEDULE Check Brake Operation Check Tire Pressure Check Operator Presence & ROS Systems A Check for Loose Fasteners C ChecWReplace Mower Blades T Lubrication Chart 0 Check Battery Level R Clean Battery and Terminals Check Transaxle Cooling Check Mower Levelness Check V-Belts Check En,qine Oil Level Change Engine Oil (with oil filter)
- Page 18 TRACTOR Always observe safety rules when forming any maintenance. BRAKE OPERATION If tractor requires more than five (5) feet to stop at highest speed in highest level, dry concrete or paved surface, brake must be serviced. (See "TO CHECK BRAKE" in the Service and Adjustments section...
- Page 19 TO CLEAN BATTERY AND TERMINALS Corrosion and dirt on the battery nals can cause the battery to "leak" power. Disconnect BLACK battery then battery cable and remove battery from tractor. Rinse the battery with plain water dry. Clean terminals and battery with wire brush until bright.
- Page 20 Remove the drain tube and replace cap onto the end of the drain valve. Refill engine with oil through stick tube. Pour slowly. Do not overfill. For approximate capacity UCT SPECIFICATIONS" section manual. Use gauge on oil fill cap/dipstick checking level.
- Page 21 SERVICE WARNING: OR ADJUSTMENTS: TO AVOID Depress brake pedal fully and set parking Place attachment clutch Turn ignition key to "STOP" Make sure the blades Disconnect spark plug wire from spark come in contact with plug. TO REMOVE MOWER Place attachment clutch GAGED"...
- Page 22 ATTACH MOWER SIDE SUSPENSION ARMS (A) TO CHASSIS - Position in arm over pin (B) on outside chassis and secure with retainer Repeat on opposite side of tractor. ATTACH REAR LIFT LINKS rear corner of mower and position in link assembly over mower bracket...
- Page 23 TO LEVEL MOWER Make sure tires are properly inflated to the PSI shown on tires. Iftires are over or under inflated, it may affect the appearance lawn and lead you to think the mower adjusted properly. VISUAL SIDE-TO-SIDE ADJUSTMENT With all tires properly inflated and if your lawn appears...
- Page 24 TO REPLACE MOWER BLADE BELT The mower blade drive belt may be replaced without tools. Park the tractor face. Engage parking brake. BELT REMOVAL- 1. Remove mowerfrom tractor (See"TO RE- MOVE MOWER"inthissection 2. Work belt off both mandrel pulleys and idler pulleys.
- Page 25 TO CHECK BRAKE If tractor requires more than five (5) feet to stop at highest speed in highest level, dry concrete or paved surface, brake must be serviced. You may also check brake Park tractor on a level, dry concrete paved surface, depress...
- Page 26 REPLACING BATTERY _WARNING: Do not short battery terminals by allowing a wrench other object to contact both terminals the same time. Before connecting remove metal bracelets, wristwatch rings, etc. Positive terminal must be connected first to prevent sparking from accidental grounding.
- Page 27 Immediately prepare your tractor age at the end of the season or if the trac- _i_ will not be used for 30 days or more. WARNING: Never store the tractor with gasoline in the tank inside where fumes may reach an open flame or spark.
- Page 28 TROUBLESHOOTING CHART: See appropriate section in manual unless directed to Sears service center PROBLEM CAUSE Will not start Out of fuel. Engine not "CHOKED" Engineflooded. Bad spark plug. Dirty air filter. Dirty fuel filter. Water in fuel. Loose or damaged Carburetor Engine valves out of adjustment.
- Page 29 TROUBLESHOOTING CHART: See appropriate section in manual unless directed to Sears service center PROBLEM CAUSE Engine clicks but Weak or dead battery. will not start Corroded Loose or damaged Faulty solenoid Loss of power Cutting too much grass/too Throttle Build-up trash under mower.
- Page 30 TROUBLESHOOTING CHART: See appropriate section in manual unless directed to Sears service center PROBLEM CAUSE Poor cut = uneven Worn, bent or loose blade. cutting Mower deck not level. Buildup of grass, leaves, and trash under mower. Bent blade mandrel. Clogged build-up trash around mandrels.
- Page 31 TROUBLESHOOTING CHART: See appropriate section in manual unless directed to Sears service center PROBLEM CAUSE Battery will not Bad battery cell(s). charge Poor cable connections. Faulty regulator Faulty alternator. Loss of drive Freewheel position. Motion or broken. Air trapped during shipment Engine "backfires"...
- Page 33 SUGGESTED GUIDE FOR SIGHTING ONLY RIDE UP AND DOWN HILL, NOT ACROSS HILL down the face of slopes, never across the face. Do not mow ARNING: To avoid serious injury, operate your tractor up and slopes greater than 15 degrees. Make turns gradually to prevent tipping or loss of control.
- Page 34 Operaci6n ... Operaci6n ... Mantenimiento GARANTiA LIMITADA DE CRAFTSMAN DOS ANOS PARA TRACTORES Si opera y mantiene este tractor segOn todas las instrucciones debido a defectos del material o de la mano de obra dentro de los dos a_os posteriores compra, comuniquese al 1-800-4-MY-HOME®...
- Page 35 _,PELIGRO: Esta Maquina cortadora objetos, si no se observan las instrucciones lesiones graves o la muerte. _,ADVERTENCIA: Siempre desconecte alambre de la bujia y p6ngalo donde no pueda entrar en contacto con la buj{a, para evitar el arranque por accidente, durante la preparaci6n, el transporte, el ajuste o cuando...
- Page 36 • Escoger una velocidad de marcha modo que no sea necesario pararse o cambiar estando en una pendiente. • No cortar la hierba mojada. Las ruedas pueden perder tracci6n. Poner siempre una marcha cuando se est& en pendientes. No poner en punto muerto e ir cuesta abajo.
- Page 37 • Mantener la maquina libre de hierba, u otros residuos acumulados. salpicaduras de aceite o carburante cualquier cosa mojada con carburante. que la mgtquina se enfrie antes de guardarla. • Si se golpea un objeto ajeno, hay que pararse e inspeccionar la m_,quina.
- Page 38 (Vea la secci6n de Partes de Repuesto en el manual Ingles del dueflo.) ACUERDOS DE PROTECCION REPARACION Congratulaciones Su nuevo producto Craftsman® y fabricado para funcionar muchos aflos. Pero como todos los productos, puede necesitar 64 oz.
- Page 39 Llaves (2) Llaves Su tractor nuevo ha sido montado en la fabrica con la excepci6n de aquellas partes que no se han montado por razones de envio. HERRAMIENTAS NECESARIAS EL MONTAJE Un juego de Ilaves de tubo facilitara el montaje. A continuaci6n se enumeran los tamaflos de las Ilaves estandar.
- Page 40 AVISO: Ahora puede rodar o conducir su tractor fuera de la corredera. Siga las siguientes instruc- ciones para remover el tractor de la corredera. _DVERTENClA: Antes de empezar, leer, en- tender y seguir todas las instrucciones en la secci6n de Operaciones de este manual.
- Page 41 Estos simbolos pueden aparecer sobre su tractor o en la literatura proporcionada Aprenda y comprenda sus significados. MARCHA ATRAS NEUTRO ALTO MOTOR MOTOR APAGADO SISTEMA ENCENDIDO FUNCIONAMIENTO ATRAS (ROS) LUCES BATERIA MARCHA COMBUSTIBLE ENSENDIDAS ACCESORIO ACCESORIO EMBRAGUE EMBRAGUE ENGANCHADO DESENGANCHADO RUEDA LIBRE (Solamente...
- Page 42 FAMILIARICESE CON SU TRACTOR LEA ESTE MANUAL DEL DUEllO Y LAS REGLAS SU TRACTOR Compare las ilustraciones con su tractor para familiarizarse controles y ajustes. Guarde este manual para referencia en el futuro. ® Nuestros tractores cumplen con los est&ndares de seguridad del American National Standard Institute. (A) PALANCA DEL LEVANTAMIENTO CESORIO - Se usa para levantar, bajar y ajustar...
- Page 43 La operaci6n de cualquier dentro de sus ojos, Io que puede producir da_os graves en estos. Siempre use anteojos de seguridad o protecciones o cuando haga ajustes una rnascara de visi6n arnplia de seguridad COMO USAR SU TRACTOR PARA AJUSTAR EL FRENO DE ESTACIONA= MIENTO Su tractor viene equipado con un interruptor...
- Page 44 UTILIZAR EL MANDO CRUCERO El mando crucero se puede utilizar s61o durante la marcha hacia adelante. CARACTERiSTICAS T#CNICAS El control de velocidad crucero s61o debe usarse mientras el tractor este en labores de siega o transportaci6n, moviendose superficies que esten relativamente rectas.
- Page 45 FUNCIONAMIENTO ATRAS Tu tractor est& equipado con el Sistema de Funcionamiento Atr&s (ROS). Cualquier tenta- tiva del operador de viajar marcha atr&s con el embrague puesto apagar& el motor a menos que la Ilave de ignici6n se ponga en la posici6n de "ON"...
- Page 46 ANTES DE HACER ARRANCAR EL MOTOR REVISE EL NIVEL DE ACEITE DEL MOTOR El motor en su tractor ha sido enviado desde la f&brica Ileno con aceite de calidad para verano. Revise el aceite del motor con el tractor en terreno nivelado.
- Page 47 • Los accesorios pueden ser utilizados durante el periodo del recalentamiento del motor despues que la transmisi6n halla sJdo calentada. AVlSO: Si se encuentra a mucha altura (sobre 3000 pies) o en clima frio (por debajo de 32°F [0°C]), la mezcla del combustible debe ser ajustada para el mejor rendimiento motor.
- Page 48 PROGRAMA DE ANTES CADA USO MANTENIMBENTO Revisar la operaci6n del freno Revisar la presi6n de las Ilantas verifiez la commande de presence d'operateur et le sistema d ROS Revisar si hay sujetadores sueltos Afilar/cambiar las cuchillas de la segadora Tabla de lubricaci6n Revisar el nivel Limpiar la bater[ay...
- Page 49 TRACTOR Siempre observe las reglas de seguridad cuando de mantenimiento. OPERAClON DEL FRENO Si el tractor necesita m&s de cinco (5) pies para detenerse a la m&xima velocidad al cambio m&s alto en una superficie nivelada, de hormig6n o pavimentada, hay que hacerle el servicio al freno. Vet "PARA VERIFICAR Sl FUNCIONA BIEN EL FRENO"...
- Page 50 Cubra los terminales con grasa o parafina. Reinstale la bateria (Yea "Reemplazar Bateria" en la secci6n de Servicio y ajustes de este manual). ENFRIAMIENTO DEL TRANSEJE Las aletas de enfriamiento y el ventilador de la transmisi6n tienen que mantenerse para asegurar el enfriamiento adecuado.
- Page 51 FILTRO DEL AIRE Su motor puede sufrir averias y funcionar de manera incorrecta con un filtro del aire sucio. Dele servicio al filtro de aire m&s a menudo si se usa en condiciones polvorosas. manual de la motor. FILTRO DE ACEITE DEL MOTOR Cambie el filtro de aceite del motor cada tempo- rada ovez por medio que cambie el aceite, si el tractor se usa m&s de 100 horas en un aflo.
- Page 52 ADVERTENCIA:PARA EVITAR LESI6NES SERVICIO O DE HACER AJUSTES: Presione el pedal de freno completamente Ponga el embrague del accesorio Ponga la Ilave de ignici6n en la posici6n de apagado (STOP) y remuevala. AsegOrese que las cuchillas y que todas las partes movibles se hayan detenido comple- tamente.
- Page 53 Realice el mismo procedimiento lado del tractor. FIJE LAS PIEZAS DE PROPULSION TERIORES (C) - Levante la parte posterior de la cortadora, ubique la ranura de la pieza de uni6n (D) por encima de la clavija que hay en la barra posterior de la cortadora y fijela con una arandela y un resorte de contenci6n.
- Page 54 PARA NIVELAR LA SEGADORA Aseg0rese de que los neum&ticos esten inflados a la PSI que se indica en estos. masiado inflados o poco inflados, el cesped no le quedar& bien cortado, Io cual podr& Ilevarlo a pen- sar que la S EGADORA no est&...
- Page 55 PARA CAMBIAR LA CORREA DE IMPULSION DE LA CUCHILLA SEGADORA La correa de impulsi6n de la cuchilla segadora se puede cambiar sin herramientas. tractor en una superficie nivelada. Enganche freno de estacionamiento. REMOCION DE LA CORREA Remueva la segadora del tractor (Vea "PARA REMOVER LA SEGADOR,_' de esta secci6n de este manual).
- Page 56 CONTROLAR Y AJUSTAR EL FRENO Si eltractorexigem&sdecinco(5)piespara pararse a unavelocidad m&saltaenel cambio m&saltoenunasuperficie nivelada de hor- mig6nsecoo pavimentada, entonces se debe controlar y ajustarelfreno. CONTROL DELFRENO 1. Aparcar e l tractoren unasuperficie nivelada de hormig6n secoo pavimentada, presionar el pedaldelfrenohastaelfondoy accionar el frenode estacionamiento.
- Page 57 REEMPLAZAR LA BATERIA ,_ADVERTENCIA: No haga cortocircuito los terminales de la bateria al permitir que una Ilave de tuerca o cualquier otro objeto entre en contacto con ambos terminales vez. Antes de instalar la bateria remueva las pulseras de metal, los relojes de pulsera de metal, los anillos, etc.
- Page 58 Inmediatamente prepare su tractor para el almacenamiento al final de la temporada tractor no se va a usar por 30 dias o m&s. __ADVERTENCIA: Nunca almacene el trac- tor con gasolina en el estanque dentro de un edificio en donde los gases pueden alcanzar una llama expuesta o una chispa.
- Page 59 IDENTiFICACION DE PROBLEMAS: Yea la secci6n apropiada en el manual a menos que est@ dirigido PROBLEMA CAUSA No arranca Sin combustible. Motor sin la "ESTRANGULACION" adecuada. Motor ahogado. Bujia mala. 5. Bateria baja o descargada 6. Filtro de aire sucio. 7.
- Page 60 IDENTIFICACION DE PROBLEMAS: Yea la secci6n apropiada en el manual a menos que este dirigido PROBLEMA CAUSA Perdida de fuerza 3. Acumulaci6n (continuado) basura debajo de la segadora. 4. Filtro de aire sucio. 5. Nivel de aceite bajo/aceite 6. Bujia fallada. 7.
- Page 61 IDENTIFICACION DE PROBLEMAS: Yea la secci6n apropiada en el manual a menos que este dirigido CAUSA PROBLEMA Las cuchillas 1. Obstrucci6n segadoras no rotan del embrague. 2. La correa de impulsi6n de la segadora est,. desgastada/dahada. 3. Polea de guia atascada 4.
- Page 63 GUiA SUGERIDA PARA lVlEDiR LAS PENDIENTES CON LA VISTA PARA UNA OPERACION SEGURA SOLAMENTE ANDE CUESTA ARRiBA O CUESTA ABAJO Y NO ATRAVIESE EL CERRO 15 GRADOS MAX. ADVERTENCIA: Para evitar daRos graves, haga funcionar su tractor arriba I y abajo de las pendientes, nunca transversalmente pendientes.
- Page 64 For repair - in your lawn and garden equipment, no matter who made it, no matter who sold it! For the replacement owner's manuals that you need to do-it-yourself. For Sears professional and items like garage door openers and water heaters. 1-800-4-1VlY-HOME ®...
Need help?
Do you have a question about the 917.289281 and is the answer not in the manual?
Questions and answers