Advertisement
Technical Specifications
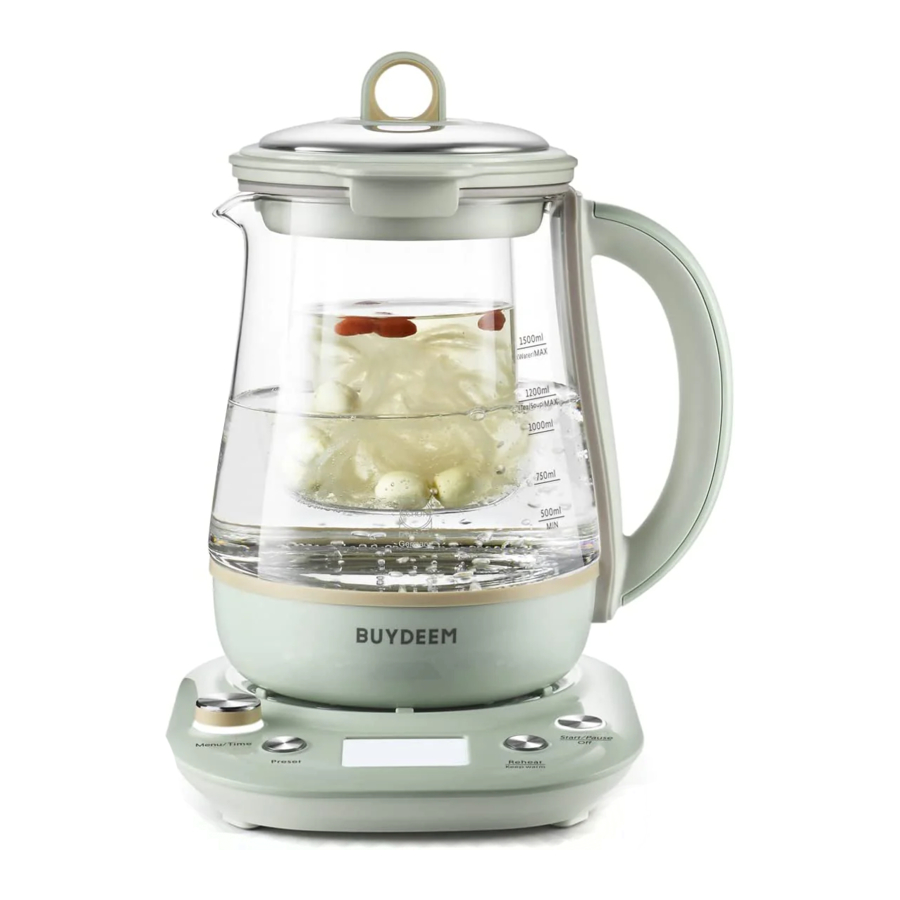
| Product Name | BUYDEEM Beverage Maker | Model | K2763 | ||
| Product power | 1000W | Maximum capacIty | 150 | Voltage | 120V, 60Hz. |
Food grade material including SUS316 and 304 stainless steel, Glass(German Schott), Polypropylene ![]() PP plastic, Silicone for food contact.
PP plastic, Silicone for food contact.
Product Structure

- Spill-proof lid
- Lid
- Pot body SCHOTT glass
- Handle
- Power base
- Stew pot cover
- Lid of glass stew pot SCHOTT glass
- Glass stew pot German SCHOTT glass
- Stew pot holder
- Water filter mat
- Stew pot storage rack
Understanding Product
Function introduction

| Function Type | Name | Time or Temp. Range (Knob) | Operation Mode | Keep warm (Manual Start) |
| Basic functions | Boiling water | Six temperature adjust: 40/50/60/70/85/100° C | Quickly boil water to the target temperature and stop. Note: Please do not use this function to heat soup/liquid except water, otherwise | Keep warm at 70° C after boiling, keep at other temperature for 2H. |
| Keep warm/ Long press to reheat (70° C/2H) | / |
| 70°C,2H | |
| Cooking | Soup (default 1H) | 30min-25H | After boiling water, soup mode work for 1H, enter keep warm mode manually. | 70°C,2H |
| Tea (default 10min) | 5~20min | After boiling water tea mode work for 10 min, enter keep warm mode manually. | 70°C,2H | |
| Stew mode (use with stew pot) | Bird's nest (default 30min) | 20~45min | After boiling water, bird's nest mode work tor 30min, enter keep warm mode manually, | 70°C,2H |
| Congee (default 1H) | 30min-2H | After boiling water, congeemode work for 1H, enter keep warm mode manually. | 70°C,2H | |
| Yogurt (default 8H/40°C) | 8~9.5H | Heat the water in pot to 40°C, keep this temperature in yogurt mode for 8 hours. If temperature of water in pot is too high, when select "yoghurt" mode, the display shows E1 beverage maker will automatically stop afterthe alarm sounds. | / | |
| Milk (default 10min 160°C) | 5~20min | Heat the water in pot to 60°C, milk mode work for 10min, no keep warm mode. | / | |
| Steaming mode (use with steamer) | Steaming (default 15min) | 5min~1H | After boiling water, steaming mode work for 5 min, enter keep warm mode manually. | 70°C, 2H |
| Preset | Preset | 30min-18H | Press this button to enter preset mode. Based on preset time setting, after time countdown, it will enter the selected cooking mode automatically. Tip: If in preset mode, the displayed preset time does not include the cooking time. | / |
| Others | Start/Pause | / | Press this button to start/pause product. Press and hold for 2 seconds to enter the standby state. | / |
Note!
- Must use K2763 beverage maker body and K2763 power base. Do not mix other brands of beverage maker or other models of BUYDEEM beverage maker with K2763. Otherwise, it may not be able to be used normally and there may even be dangers of short circuit and electric shock
- The above cooking time starts after water is boiled, not include water boiling time.
Component design
Spill-proof lid design
- In accordance with the daily usage habits of users, a unique design of two spill-proof lid nested with each other is added,
- When the Beverage maker is working normally, the user can unscrew the spill-proof Iid at any time to observe the food cooking status, so as to choose various operations such as addition or seasoning.
- If excessive foam is generated during food cooking, it is recommended to open the spill-proof Iid to prevent spillage.
- Installation of spill-proof lid:
- Hold the handle against the lid and turn clockwise to tighten.

- Hold the handle against the lid and turn clockwise to tighten.
- Removal of spill-proof lid:
- Hold the handle against the lid and turn counterclockwise to unscrew.

- Hold the handle against the lid and turn counterclockwise to unscrew.


Introduction to Glass stew pot
Note:
- Do not pour water after installing the stew pot in the beverage maker to prevent the risk of burns
![]() caused by the stew pot and the bracket falling.
caused by the stew pot and the bracket falling. - Do not directly heat the glass stew pot,
- Do not put the glass stew pot in the oven or microwave to heat it.
- The effective maximum capacity of the stew pot is 500m ( about 70% of the height of the stew pot), please do not exceed the maximum capacity when using it, so as to avoid burns caused by the overflowing of ingredients during use.
![]()

- GIass stew pot installation:
- Place the stew pot in the rack;
![]()
- Lift the stand together with the stew pot;
![]()
- Install on the beverage maker and cover it with a large lid. Pay attention to align the triangle mark of the bracket with the triangle mark of the pot handle.
![]()
- Place the stew pot in the rack;
- Disassembly of glass stew pot:
- Lift the stand and take out the stew pot together.
![]()
- Gently lower the stand;
![]()
- Remove the lid of the stand and take out the stew pot.
![]()
- Lift the stand and take out the stew pot together.


Stew pot storage design
- In order to facilitate users to store and dry the stew pot, the unique design of the stew pot storage rack is added to the beverage maker.
- The user can put the stew pot in the storage rack to dry after using it; after drying, the stew pot can be placed in the storage rack for storage.
- Dry the stew pot:
- After washing the stew pot, first put the glass
![]() inner cover into the storage rack;
inner cover into the storage rack;
![]()
- Inverted glass stew pot;
![]()
- Put down the stew pot bracket and the stew pot bracket cover in turn;
![]()
![]()
- Place the stew pot and stew stand as shown in the picture until dry.
![]()
- After washing the stew pot, first put the glass
- Storage stew pot:
- Put the stew pot into the rack;
![]()
- Put the rack and stew pot together into the storage rack, and then put into the rack cover.
![]()
- Put the stew pot into the rack;


Steamer design
- The steamer is not included in the product standard and must be purchased separately.
- This product must be used with BUYDEEM beverage maker. Select the steaming function when using,
![]() and the water volume in the pot should be controlled between 750ml and 1500ml to avoid accidents such as dry burning or overflowing the pot.
and the water volume in the pot should be controlled between 750ml and 1500ml to avoid accidents such as dry burning or overflowing the pot. - Due to the nature of the food or the adhesion of dirt, it is easier to deposit the dirt on the bottom of the beverage maker when using the steaming function, causing scale or stains. It is recommended to use pure water for cooking and clean the heating plate regularly. Refer to cleaning to prevent the heating plate from malfunctioning due to excessive scale.
- When opening the upper cover, please pay attention to steam to prevent burns.
- Do not use the steaming function while cooking food in the pot.
- Do not cover the steam port with cloth, etc., to avoid accidents or damage to the product.
![]()
![]()
- Do not heat directly with an open flame or put it in a microwave oven or oven.
![]()
- During use, be sure to move the cage body and lid within the range of the anti-scald handle, and pay attention to steam to avoid the risk of burns, slipping, etc.
- When using, please make sure that the bottom hole in the cage is not blocked to prevent steam from entering the steamer and affecting the cooking effect.
- Steamer installation:
- Place the steamer above the beverage maker;
![]()
- Just align the filter port and the handle and put it in.
![]()
- Place the steamer above the beverage maker;
- Steamer disassembly:
- Take the steamer handle with both hands and take out the steamer. Pay attention to the steam to avoid scalding;
![]()
- Place the steamer on a flat surface.
![]()
- Take the steamer handle with both hands and take out the steamer. Pay attention to the steam to avoid scalding;


Filter tea basket design
- The filter tea basket is not included in the product standard and must be purchased separately.
- In order to facilitate users to filter inedible ingredients / tea leaves, the unique design of the beverage maker is added with a handle-type tea basket.
- During the cooking process, users can put inedible ingredients into the tea basket; if they are concerned about the strong taste, they can open the tea basket cover during the cooking process and remove the tea basket.
- FiIter tea basket installation:
![]()
- Grasp the handle of the tea basket and put the tea basket into the hollow part of the lid;
![]()
- Tighten the tea basket cover clockwiise. When a slight "tick" sound is heard, it means that it has been tightened;
![]()
- Put the entire lid into the beverage maker and install it on the mouth of the pot, align the strainer with the spout, and press gently to make the pot lid tight.
![]()
- Grasp the handle of the tea basket and put the tea basket into the hollow part of the lid;
- Disassembly of filter tea basket:
- Unscrew the tea basket cover counterclockwise;
![]()
- Grasp the tea basket handle and raise the tea basket.
![]()
- Unscrew the tea basket cover counterclockwise;


Tea-cup design
- In order to facilitate the user to place and store the tea basket, the unique design of the tea pot is added to the beverage maker.
- When the tea basket is taken out from the beverage maker, it can be placed in the cup to prevent the tea basket from dripping water to the table.
![]()

Using Product
Initial use
- Remove all packaging, labels and accessories from inside and outside the beverage maker. Before using the product for the first time, we recommend that you do a boiling point test.
![]()
- The first 2-3 times of boiling water should be poured out for cleaning, and then wipe the outside of the health pot parts with a damp cloth (please note that the electrical connectors on the bottom and base of the pot should not touch the water).
![]()


Fast installation
- Adjust the length of the power cord through the winding device of the base.
![]()
- Place the beverage maker on the base.
![]()


Guidelines for users
Cooking function
- Open the lid
- Tighten the handle of the spill-proof lid, and pull upward to remove the lid
![]()
- Tighten the handle of the spill-proof lid, and pull upward to remove the lid
- Add ingredients
![]()
- Add appropriate amount of purified water
- Do not add water when the beverage maker is on the base.
![]()
- Do not add water and ingredients above the maximum water level or below the minimum water level.
- If the water is too full, water may splash when boiling.
- Please note that it is recommended to add water to the water level of 1200ml
![]() for ingredients that are easy to foam, such as white fungus, astragalus, black tea,
for ingredients that are easy to foam, such as white fungus, astragalus, black tea, ![]() etc. Just use the line and open the lid of the spill-proof lid while cooking.
etc. Just use the line and open the lid of the spill-proof lid while cooking.
![]()
- Do not add water when the beverage maker is on the base.
- Close the lid tightly
- Place the lid on the pot as shown in the figure. Make sure the spout filter 's aligned with the spout. Press lightly to make the lid tightly closed. Lift it gently with your hand. If it cannot be lifted, it means the lid is tightly closed.
- If the cover is not assembled properly, the cover will fall off easily when pouring water.
![]()
- Place the beverage maker on the base
- Please wipe the water on the bottom and base of the pot.
- The base must be placed on a flat, clean heat-resistant table.
- The body of the beverage maker must use an exclusive base.
- Do not use when there is no water in the beverage maker.
![]()
- Plug in the power
- When the beverage maker is powered on, the buzzer sounds, and the button light flashes after the light is off, indicating that it enters the stand by state and can start to select functions.
![]()
![]()
- When the beverage maker is powered on, the buzzer sounds, and the button light flashes after the light is off, indicating that it enters the stand by state and can start to select functions.


Stew function
- Add ingredients to the glass Stew function
- Put the food into the stew pot, add the appropriate amount of water, and install the stew pot as shown in instruction.
![]()
![]()
- Put the food into the stew pot, add the appropriate amount of water, and install the stew pot as shown in instruction.
- Add appropriate amount of purified water
- Add water to the scale of the beverage maker 1000m (l water level before the cup).
- Do not add water when the beverage maker is on the base.
![]()
- Install the lid
- Lift the stand with the stew pot and install it on the beverage maker.
- Please note! Please make sure that the triangle mark on the bracket is aligned with the triangle mark on the handle of the beverage maker body, otherwise the stew pot
The bracket is not installed properly.
![]()
- Place the beverage maker on the base
- Please wipe the water on the bottom and base of the beverage maker.
- The base must be placed on a flat, clean heat-resistant table.
- The body of the beverage maker must use an exclusive base.
![]()
- Do not use when there is no water in the beverage maker.
![]()
- Plug in the power
- When the beverage maker is powered on, the buzzer sounds, and the button light flashes and the light goes out, indicating that it has entered the standby state and can start selecting functions.
![]()
- When the beverage maker is powered on, the buzzer sounds, and the button light flashes and the light goes out, indicating that it has entered the standby state and can start selecting functions.


Function mode usage guidelines
Step 1: Function selection.
Use the knob to rotate left and right to select any cooking function mode. The button of the selected function will be flashings and the ![]() default duration of the current function will appear at the upper right of the screen. Like tea mode it is cooked for 10 minutes by default.
default duration of the current function will appear at the upper right of the screen. Like tea mode it is cooked for 10 minutes by default.

Step 2: Temperature / time adjustment.![]()
In boil mode, press the knob to enter the boiling water temperature adjustment interface. In other function modes, press the knob to enter the cooking time adjustment interface. If you choose tea mode, turn the knob to adjust the cooking time to 15 minutes. If you do not need to adjust the boiling water temperature or cooking time, you can skip to step 3 directly.

Step 3: Confirm the function and start.
![]()
![]() Press the "Start/ Pause" button to enter the cooking phase.
Press the "Start/ Pause" button to enter the cooking phase.

Step 4: Cooking process.
When the cooking starts, the display shows in stages, taking tea mode as an example, they are:
- The machine first heats the pot water to the specified temperature, the display shows the pot water temperature at that time
![]()
- When entering the low fire frequency conversion and slow cooking, the specified temperature is displayed, and the display shows the current pot cooking time countdown
![]()
- After the cooking is completed, if the keep warm mode is turned on, the keep warm mode countdown is displayed
![]()


Tip: If it is boil mode the display always shows the current pot water temperature, and does not display the countdown.
Guidelines for using the keep warm function
When you select any function, press the keep "warm" button, the light circle will light up, and the machine will ![]() automatically enter 70° C after the function is completed, and keep warm for 2 hours.
automatically enter 70° C after the function is completed, and keep warm for 2 hours.
Tip: Due to the particularity of the ingredients, the "Yogurt" and "milk" functions cannot be turned on for automatic keep warm.
Long press Reheat function user guide
Step 1: Press and hold the ''reheat" button for 2 seconds, the ![]() screen will display "heating" and "70° C".
screen will display "heating" and "70° C".
Note: The reheat function cannot be entered in preset and cooking modes.

Step 2: Press the "Start / Pause" button, the machine starts the reheat function. That is, heat the soup to 70° C for 2 hours.
Tip: Stir the soup before starting the reheat function to prevent ![]() the ingredients from sinking and bottoming.
the ingredients from sinking and bottoming.![]()

Guidelines for using the preset function
Step 1: Preparation for preset.
Press the "preset" button to enter the preset time selection interface, you can use the knob to adjust the preset time. If you choose the soup mode for 1H, make an appointment for 8H.

Step 2: Preset modification
In the preset preparation stage, you can press the knob at any time to switch between the three ![]() major interfaces: preset time function selection-cooking time. The current interface flashes, and any function or time can be adjusted by turning the knob.
major interfaces: preset time function selection-cooking time. The current interface flashes, and any function or time can be adjusted by turning the knob.
Step 3: Confirm the preset.
After selecting the preset time, function and cooking duration, press the "Start/ Pause" button to enter the countdown. The progress light runs.

Step 4: The preset is canceled or suspended,
If you are in the preset preparation stage, you can press the "preset" button at any time to exit the preset mode; if you have entered the preset countdown, you can first press the "Start / Pause" button, press the button to pause the program, then press the "preset" button to cancel. Make an appointment and exit the appointment interface. Reminder: Due to the particularity of the ingredients, there is no preset mode for the "Yogurt" and "milk" functions.
Boiling point detection
Boiling point detection memory program
- Because in non-zero altitude areas, the water cannot reach 100° C when boiling, which will cause the normal beverage maker to not work properly (the trip is too slow or even normal trip).
- BUYDEEM recommends that you perform a boiling point detection operation for the first time. After the test is completed, the chip will record the accurate boiling point data and use it again without repeating the test.
- After the boiling point detection, the beverage maker can work more accurately (the performance is better than the factory setting).
- If you are in a city with an altitude higher than 250m, be sure to perform boiling point detection before
![]() use.
use.
Start boiling point detection
- Add water to the 1200mI water level line. If the amount of water is insufficient or excessive, it will affect the test results.
![]()
- Put in the wire base and do not power on first
![]()
- Simultaneously press and hold the "keep warm" and "Start / Pause" buttons, press firmly, and then insert the power plug into the power supply. After hearing a short beep, the screen displays "H1", and then you can release your finger.

- "Start / Pause" light circle flashes, click "Start / Pause" to start detection
After starting the test, the screen continues to display "H1" while the progress bar runs. After the detection is completed, a shutdown sound will sound, and the work will be automatically ended and enter the standby state.


Factory reset of boiling point
![]() The machine has the function of boiling point restoration to factory settings.
The machine has the function of boiling point restoration to factory settings.![]() The key lamp is displayed once in a cycle, then the shutdown sound sounds, and it automatically enters the sleep mode* and the boiling point is restored to the factory setting of 100° C.
The key lamp is displayed once in a cycle, then the shutdown sound sounds, and it automatically enters the sleep mode* and the boiling point is restored to the factory setting of 100° C.
Simultaneously hold down the knob and the "reservation" button, insert the power plug, and keep pressing the button for 2 seconds, the machine enters the boiling point recovery factory setting mode, at this time, the 4 button lights are displayed once, then the shutdown sound will automatically enter the sleep mode, and the boiling point recovery the factory setting is 100° C.

Features
Beverage maker pause memory function
When the beverage maker works according to the program, it can be suspended by lifting the pot or ![]() pressing "Start / Pause". Within 1 hour, the pot will be started by placing the pot or pressing 'Start/ Pause". The beverage maker will perform a pause before the unfinished program time, the function program will not be executed again.
pressing "Start / Pause". Within 1 hour, the pot will be started by placing the pot or pressing 'Start/ Pause". The beverage maker will perform a pause before the unfinished program time, the function program will not be executed again.
Avoid misuse
Within 1 minute of the start of the beverage maker, you can press the knob to switch the mode at will. After switching the mode or time, press the "Start/ Pause" button again to enter the cooking state. In order to avoid mis-operationt the function cannot be switched at will after the health pot starts working for 1 minute. If you need to switch functions, you need to press the "Start / Pause" button first, then "Start/ Pause" button flashes and select the program to be switched.
Cold water protection
When the beverage maker is working, if you add cold water in the middle of cooking, the health pot will automatically boil the water and then perform the unfinished program, without worrying about the hidden danger of cold.
Cleaning & Maintaining
Cleaning of beverage maker
- Unplug the power plug.
- After the kettle cools, clean the inside of the beverage maker with a wet sponge.
Note: Do not immerse the beverage maker, base, power cord or plug in water (the bottom of the pot and the electronic connectors on the base must not touch water}. - After each use, in order to avoid food deterioration, please clean it in time.
Display maintenance
To avoid scratches and damage to the display, wipe the surface gently with a soft, dry cloth.
Descaling
The beverage maker needs to be descaled regularly, at least once a month, and the number ![]() should be increased if the water quality is poor. If there are spots on the heating plate, this is scale, which is a normal phenomenon. It can be cleaned by scrubbing with a scouring pad, If the situation is more serious, the following methods can be used for descaling.
should be increased if the water quality is poor. If there are spots on the heating plate, this is scale, which is a normal phenomenon. It can be cleaned by scrubbing with a scouring pad, If the situation is more serious, the following methods can be used for descaling.
Tips for descaling of beverage maker
Use white vinegar:
- Add 100ml of white vinegar to the beverage maker.
- Fill the beverage maker with water to the 500mI mark.
![]()
- Activate the "water boillng" mode.
- After the procedure, let it stand for 1 hour, then wipe the bottom of the pot with a scouring pad.
Use citric acid:
- Add 500mI of water to the beverage maker.
- Add 10g of citric acid.
- Activate the "boil water" mode.
- After automatic power off, let stand for 5-10 minutes. (If there is a lot of scale, you can extend the standing time)
- Finally, pour out the water in the pot and wipe the bottom of the pot with a scouring pad.
Simple Troubleshooting
| Failure phenomenon | Cause analysis | Troubleshooting |
| After installation, there is no prompt sound and the button light is off | No power supply | Check if the socket is plugged in |
| The pot and the base are not connected in place | After the pot s placed on the line base, you can rotate or adjust the position to confirm that it is connected in place | |
| Wire seat failure | Suggest for sending to service point for repair | |
| The beep sounds continuously | Dry burn protection (general button lights are on) | After cooling for a few minutes, pour cold water to continue to use |
| NTC abnormal | It is recommended to send to the service point for repair | |
| The pot stops working after heating for 10 seconds, and it will automatically shut down after 3 short beeps | Tips for high temperature of water in the pot | Generally this situation will occur in functions such as heat preservation, yogurt, warm milk, etc. The water temperature in the pot is higher than the temperature set by the program, add cold water and continue to work |
| Water smells | Unused new beverage maker | It is recommended to boil the water several times before use. If the situation persists, fill the water to the highest level and add two teaspoons of soda. Ater boiling, pour out and clean the beverage maker |
Correspondence table of display fault codes
| Display code | Cause of issue | Solution |
| E1 | Over temperature warning | Use pure water below target temperature |
| E2 | Dry roasting | After cooling for a few minutes, pour cold water and continue to use |
| E3 | The pot body and the base model are inconsistent | Use the same type of pot body and base |
List of Environmental Protection
The names and contents of poisonous and hazardous substances or elements in the product
| Parts name | Hazardous substance | |||||
| Plumbum (Pb) | Mercury (Hg) | Cadmium (Cd) | Chromium VI (Cr (VI)) | Polybrominated biphenyls (PBB) | Polybrominated diphenyl ethers (PBDE) | |
| Kettle lid components |  | | | | | |
| Kettle body components | | | | | | |
| Base components | | | | | | |
| Heating plate components |  | | | | | |
| Circuit board components | | | | | | |
| Power cord | | | | | | |
: Means the content of hazardous substance in all homogeneous materials of the component is below the limit specified in GB/T 26572.
: Means that the content of the toxic and hazardous substances at least in a homogeneous material of the component exceeds the limit specified in GB/T 26572.
Environment-friendly use period of 10 years: Means the hazardous substances contained in the product will not be leaked or mutated, and the normal use of product by user under the circumstances described in the product manual will not cause serious pollution to the environment or cause serious damage to the person or property of the user.
Arrow circulation mark: Means the product can be recycled. It should not be thrown away at will after exceeding the service life or being unable to work properly after maintenance. Please send to the formal recycling channels and enterprises with the qualification of disposing waste electrical and electronic products for treatment, For the correct treatment method, please refét to the national or local regulations on the disposal of old electrical and electronic products.
The above marks shall be implemented according to the administrative measures for restricting the use of hazardous substances in China and the supporting standards SJ/T 11364

Documents / ResourcesDownload manual
Here you can download full pdf version of manual, it may contain additional safety instructions, warranty information, FCC rules, etc.
Download Buydeem K2763 - 1.5L Beverage Maker with Glass Stew Pot Manual
Advertisement


Need help?
Do you have a question about the K2763 and is the answer not in the manual?
Questions and answers