Table of Contents
Advertisement
Available languages
Available languages
Quick Links
OWNER'S MANUAL
WASHING MACHINE
Before beginning installation, read these instructions carefully. This will simplify
installation and ensure that the washer is installed correctly and safely.
Leave these instructions near the washer after installation for future reference.
WM3470HVA
WM3470HWA
P/No.: MFL67360466
www.lg.com
Advertisement
Table of Contents

Related Manuals for LG WM3470HVA


Summary of Contents for LG WM3470HVA
- Page 1 OWNER’S MANUAL WASHING MACHINE Before beginning installation, read these instructions carefully. This will simplify installation and ensure that the washer is installed correctly and safely. Leave these instructions near the washer after installation for future reference. WM3470HVA WM3470HWA www.lg.com P/No.: MFL67360466...
-
Page 2: Product Features
The four-compartment dispenser drawer makes it easy to separate the pre-wash detergent, the main laundry detergent, liquid bleach, and fabric softener into different compartments. HIGH-EFFICIENCY STEAM CYCLES During LG’s unique high-efficiency STEAM cycles, with hot steam a gently removes tough stains. -
Page 3: Important Safety Instructions
IMPORTANT SAFETY INSTRUCTIONS IMPORTANT SAFETY INSTRUCTIONS READ ALL INSTRUCTIONS BEFORE USE WARNING For your safety, the information in this manual must be followed to minimize the risk of fire or explosion, electric shock, or to prevent property damage, injury to persons, or death. Your Safety and the safety of others are very important. - Page 4 IMPORTANT SAFETY INSTRUCTIONS IMPORTANT SAFETY INSTRUCTIONS READ ALL INSTRUCTIONS BEFORE USE WARNING For your safety, the information in this manual must be followed to minimize the risk of fire or explosion, electric shock, or to prevent property damage, injury to persons, or death. GROUNDING INSTRUCTIONS This appliance must be grounded.
- Page 5 IMPORTANT SAFETY INSTRUCTIONS IMPORTANT SAFETY INSTRUCTIONS READ ALL INSTRUCTIONS BEFORE USE WARNING For your safety, the information in this manual must be followed to minimize the risk of fire or explosion, electric shock, or to prevent property damage, injury to persons, or death. SAFETY INSTRUCTIONS FOR INSTALLATION WARNING To reduce the risk of fire, electric shock, or injury to persons when using this appliance, follow basic precautions, including the...
- Page 6 IMPORTANT SAFETY INSTRUCTIONS IMPORTANT SAFETY INSTRUCTIONS READ ALL INSTRUCTIONS BEFORE USE WARNING For your safety, the information in this manual must be followed to minimize the risk of fire or explosion, electric shock, or to prevent property damage, injury to persons, or death. SAFETY INSTRUCTIONS FOR USE, CARE, CLEANING, AND DISPOSAL WARNING To reduce the risk of fire, electric shock, or injury to persons when using this appliance, follow basic precautions, including the...
-
Page 7: Table Of Contents
TABLE OF CONTENTS TABLE OF CONTENTS Cycle setting buttons PRODUCT FEATURES Setting options before cycle - Setting the water temperature, WASH TEMP. IMPORTANT SAFETY INSTRUCTIONS - Setting spin speed, SPIN SPEED - Setting soil level of laundry, SOIL LEVEL BASIC SAFETY PRECAUTIONS - Adjusts the melody and button tones, SIGNAL GROUNDING INSTRUCTIONS - Prewashing, PRE-WASH... -
Page 8: Introducing Your Washing Machine
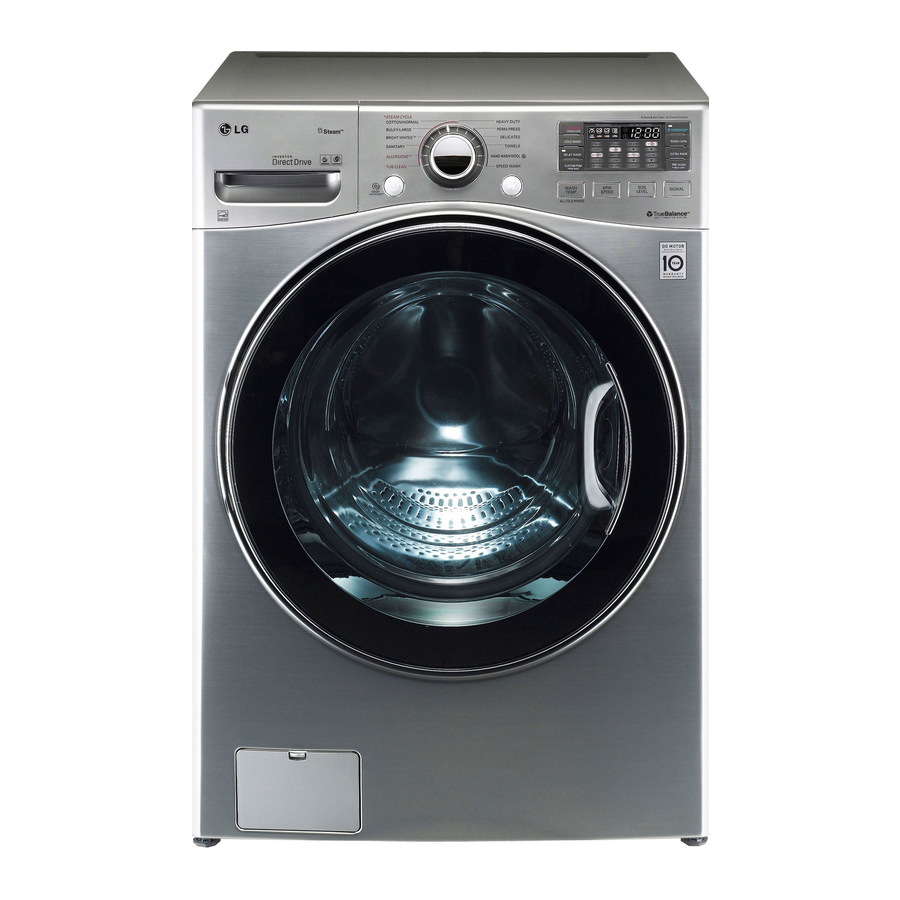
INTRODUCING YOUR WASHING MACHINE INTRODUCING YOUR WASHING MACHINE Parts and Accessories Parts Detergent dispenser drawer Water inlets (See page 20) Control panel (See page 9) TurboWash™ Upper Nozzle Door Shipping Power cord Door bolts seal Magnet Door Drain hose Plunger (see page 2) Leveling feet... -
Page 9: Control Panel Features
INTRODUCING YOUR WASHING MACHINE Control panel features Cycle selector Operation Display Power Start/ Water Spin Soil Signal Speed Level Sound Button Pause Temperature Selection Selection Selection Button Selection Operation Button Button Button Button Button Description y Turns the washing machine on and off. y (During the wash cycle) stops operation, and cancels the settings. - Page 10 INTRODUCING YOUR WASHING MACHINE Operation (continued) Button Description y (Press before wash cycle) Pre-wash heavily soiled laundry (See page. 26). y (Press and hold during wash cycle) Lock/Unlock the button (See page. 27). y Use this option to save time (See page.27). y Add extra rinse cycle to the selected one (See page.
-
Page 11: Installation Instructions
INSTALLATION INSTRUCTIONS INSTALLATION INSTRUCTIONS Preview installation order Checking and choosing the Unpacking and removing Connecting the water line proper location shipping bolts Connecting the drain line Leveling the washing Plugging in the power cord machine and grounding Test run WARNING y Washer is heavy! Two or more people are required when moving and unpacking the washer. -
Page 12: Checking And Choosing The Proper Location
INSTALLATION INSTRUCTIONS Checking and choosing the proper NOTE location y The floor must be strong and rigid enough to support the weight of the washer, when fully loaded, without Install the washing machine on a solid floor that is strong and flexing or bouncing. -
Page 13: Unpacking And Removing Shipping Bolts
INSTALLATION INSTRUCTIONS Unpacking and removing shipping bolts Remove the bottom two shipping bolts with the wrench (included) to fully loosen all four shipping bolts by turning them counterclockwise and then pulling them out. When removing the washer from the carton base, be sure to remove the foam drum support in the middle of the carton Retainer base. -
Page 14: Connecting The Water Lines
Use new hoses when you install the washing machine. Do not reuse old hoses. Use only the inlet hoses provided with the washer. LG does not recommend the use of aftermarket hoses. y Periodically check the hoses for cracks, leaks and wear, and replace the hoses every 5 years. -
Page 15: Connecting The Drain Line
INSTALLATION INSTRUCTIONS Using a laundry tub Connecting the drain line Clip the end of the hose into the elbow bracket. Secure the drain hose in place to prevent moving and leaking. - Connect the elbow bracket within 4 inches (10 cm) from the end of the drain hose. -
Page 16: Leveling The Washing Machine
INSTALLATION INSTRUCTIONS Leveling the washing machine Check the washing machine’s level again. - Push or rock the top edges of the washing machine The washer tub of your new washing machine spins at very gently to make sure that the washing machine does not high speeds. -
Page 17: Plugging In The Power Cord And Grounding
INSTALLATION INSTRUCTIONS Plugging in the power cord and Test run grounding Check if the washing machine is properly installed and run a test cycle. Make sure to ground the washing machine to prevent a short circuit or an electric shock when plugging in. Load the washing machine with 6 pounds of laundry. -
Page 18: Preparation
PREPARATION PREPARATION Sorting wash loads Precautions for fabric care before wash cycle Read and observe the following to prevent shrinkage or damage to clothes. u Check all pockets to make sure that they are empty. u Brush heavy soil, dust, or hair off fabrics before washing. -Items such as clips, matches, pens, coins, and keys can - Laundry may not wash clean if there is dirt or sand on damage both your washer and your clothes. -
Page 19: Fabric Care Labels
PREPARATION Fabric care labels Most articles of clothing feature fabric care labels that include instructions for proper care. Category Label Directions Hand Wash Machine Wash, Normal Cycle Use Permanent Press/Wrinkle Resistant washing machine setting (which has a cool down or cold spray before the reduced spin) Use Gentle/Delicate washing... -
Page 20: Using Detergent/Fabric Softener
PREPARATION Using detergent/fabric softener Loading the dispenser The detergent dispenser drawer of the washing machine has Recommended detergent a dispenser compartment for each detergent type. Add the appropriate detergents into its respective compartments. Low sudsing detergent is recommended for this washer. Use the manufacturer's recommended amount. - Page 21 USING YOUR WASHING MACHINE Pre-wash Detergent Compartment Liquid Bleach Compartment Add liquid or powdered detergent to this compartment when This compartment holds liquid chlorine bleach, which will be using the pre-wash option. dispensed automatically at the proper time during the wash cycle.
-
Page 22: Using Your Washing Machine
USING YOUR WASHING MACHINE USING YOUR WASHING MACHINE Basic operation Load the laundry into the washing machine and close the door. Press - The lights around the cycle selector knob will illuminate and a chime will sound. Turn to the desired cycle. - The proper default option is automatically set according to the wash cycle. -
Page 23: Cycle Guide
USING YOUR WASHING MACHINE Cycle guide The cycle guide below shows the options and recommended fabric types for each cycle. ● = Available option RECOMMENDED LOADS BASIC OPTION ( =DEFAULT) ADDITIONAL OPTIONS DISPLAY Maximum CYCLE FABRIC TYPE WASH SPIN SOIL PRE- EXTRA... -
Page 24: Main Cycle
USING YOUR WASHING MACHINE Main cycle HEAVY DUTY Heavy soiled items, This cycle is for washing heavily soiled laundry though more You can wash laundry items more thoroughly by selecting powerful tub rotation. the wash cycle that best suits the type of items to be washed. -
Page 25: Cycle Setting Buttons
USING YOUR WASHING MACHINE Cycle setting buttons Setting spin speed, SPIN SPEED You can set the desired spin speed. Each cycle has preset settings that are selected Use this feature properly according to the characteristics of automatically. You may also customize the settings using the load. -
Page 26: Adjusts The Melody And Button Tones, Signal
USING YOUR WASHING MACHINE Adjusts the melody and button tones, Adding extra rinse cycle, EXTRA RINSE SIGNAL You can add an extra rinse cycle to the default rinse cycle. The washing machine plays a melody when the wash cycle Press and turn to the desired cycle. -
Page 27: Saving Energy, Cold Wash
USING YOUR WASHING MACHINE NOTE Setting options during cycle y The steam option cannot be used with all cycles. You can add the desired options during the wash cycle. y Steam may not be clearly visible during the steam cycles. This is normal. Too much steam could damage clothing. -
Page 28: Selecting Your Customized Cycle, Custom
MAINTENANCE Selecting your customized cycle, CUSTOM PGM You can recall the customized wash cycle you had previously saved. To recall cycle Press after then press Press Tumbles clothes to prevent wrinkles, FRESH CARE Use this function when you are not able to take out your clothes as soon as the wash cycle ends. -
Page 29: Maintenance
MAINTENANCE MAINTENANCE Care Press to turn off the washing machine and pull out the power plug. Care after wash 9 Dry the tub interior of the washer tub with a soft cloth, and close the door. After the cycle is finished, wipe the door and the inside of the door seal to remove any moisture. -
Page 30: Cleaning
TROUBLESHOOTING Cleaning When the Drain Line is Frozen Pour hot water in the washer tub and close the door. Periodically clean the washing machine to help maintain its - Leave it for 10 minutes. performance and to minimize the chance of malfunction. Press after 10 minutes. -
Page 31: Cleaning The Detergent Dispenser Drawer
TROUBLESHOOTING Automatic alert for cleaning washing machine Cleaning the detergent dispenser drawer When the power is on and the O message blinks, it Leaving detergent in the detergent dispenser drawer for an means the washer tub needs cleaning. Use TUB CLEAN extended period of time or using the washing machine for a to clean the washer tub. -
Page 32: Cleaning The Water Inlet Filters
Press to turn off the washing machine and pull out the plug. Contact your nearest LG customer service center if the inlet filter is not clean or is missing. 2 Turn off the faucets connected with the water inlets. NOTE 3 Remove the water inlets. -
Page 33: Cleaning The Drain Pump Filter
TROUBLESHOOTING Cleaning the drain pump filter Recap the plug onto the drain hose and reattach the drain hose. The washing machine fails to drain if the drain pump filter is clogged. Periodically clean the drain filter to prevent clogging with foreign objects. Press to turn off the washing machine and pull out the plug. -
Page 34: Cleaning The Door Seal
TROUBLESHOOTING Cleaning the door seal Clean the door seal once a month to prevent build-up of dirt in the door seal. Wear rubber gloves and protective goggles. Dilute 3/4 cup (177 ml) of liquid chlorine bleach in 1 gallon (3.8 L) of water. 3 Soak a sponge or a soft cloth in this diluted solution and wipe down all around the door seal. -
Page 35: Troubleshooting
Control Error. y Unplug the power cord and contact your nearest LG service center. The water supply does not stop y Unplug the power cord and contact your nearest LG... -
Page 36: Before Calling For Service
Unplug the power cord and contact your nearest LG service center if the noise persists. Thumping sound y Is the washing machine overloaded? y This sound is normal and occurs when the y Is the load out of balance? load is out of balance. -
Page 37: Specifications
Has the incorrect detergent been used? y See page 30, clean the inside and outside of y Did you clean the tub periodically? the washing machine periodically. SPECIFICATIONS Model WM3470HVA / WM3470HWA Description Front loading washing machine Electrical requirements 120 V~, 60 Hz Dimensions 686 mm(W)×756 mm(D)×983 mm(H) / 1295 mm (D, door open) -
Page 38: Using Smartdiagnosis
USING SMARTDIAGNOSIS™ USING SMARTDIAGNOSIS ™ • Only use this feature when instructed to do so by the call center. The transmission sounds similar to a fax machine, and so has no meaning except to the call center. • SmartDiagnosis™ cannot be activated if the washer does not power up. If this happens, then troubleshooting must be done without SmartDiagnosis™. - Page 39 Antes de comenzar la instalación, lea atentamente estas instrucciones. Esto simplificará la instalación y asegurará que la lavadora está instalada en forma correcta y segura. Conserve estas instrucciones cerca de la lavadora luego de la instalación para futuras consultas. WM3470HVA WM3470HWA www.lg.com P/No.: MFL67360466...
- Page 40 El cajón dispensador de cuatro compartimentos facilita la separación del detergente de prelavado, detergente de lavado principal, blanqueador líquido, y suavizante en compartimentos diferentes. CICLOS DE VAPOR DE ALTA EFICIENCIA Durante los ciclos de VAPOR de alta eficiencia unicos de LG, vapor caliente ayuda a eliminar suavemente las manchas mas dificiles.
- Page 41 INSTRUCCIONES IMPORTANTES DE SEGURIDAD INSTRUCCIONES IMPORTANTES DE SEGURIDAD LEA TODAS LAS INSTRUCCIONES ANTES DE USAR ADVERTENCIA Por su seguridad, debe seguir la informacion indicada en este manual para minimizar el riesgo de incendio o explosion, descarga electrica, o para prevenir danos a la propiedad, lesiones personales o muerte. Su seguridad y la de otros es muy importante.
- Page 42 INSTRUCCIONES IMPORTANTES DE SEGURIDAD INSTRUCCIONES IMPORTANTES DE SEGURIDAD LEA TODAS LAS INSTRUCCIONES ANTES DE USAR ADVERTENCIA Por su seguridad, se debe seguir la informacion indicada en este manual para minimizar el riesgo de incendio o explosion, descarga electrica, o para prevenir danos a la propiedad, lesiones personales, o muerte. INSTRUCCIONES PARA LA CONEXIÓN A TIERRA Este aparato debe ser conectado a tierra.
- Page 43 INSTRUCCIONES IMPORTANTES DE SEGURIDAD INSTRUCCIONES IMPORTANTES DE SEGURIDAD LEA TODAS LAS INSTRUCCIONES ANTES DE USAR ADVERTENCIA Por su seguridad, se debe seguir la informacion indicada en este manual para minimizar el riesgo de incendio o explosion, descarga electrica, o para prevenir danos a la propiedad, lesiones personales o muerte. INSTRUCCIONES DE SEGURIDAD PARA LA INSTALACIÓN ADVERTENCIA Para minimizar el riesgo de incendio o explosion, descarga electrica, o para prevenir lesiones personales cuando use...
- Page 44 INSTRUCCIONES IMPORTANTES DE SEGURIDAD INSTRUCCIONES IMPORTANTES DE SEGURIDAD LEA TODAS LAS INSTRUCCIONES ANTES DE USAR ADVERTENCIA Por su seguridad, se debe seguir la informacion indicada en este manual para minimizar el riesgo de incendio o explosion, descarga electrica, o para prevenir danos a la propiedad, lesiones personales o muerte. INSTRUCCIONES DE SEGURIDAD PARA LA UTILIZACIÓN, CUIDADO Y LIMPIEZA, Y LA ELIMINACIÓN ADVERTENCIA Para minimizar el riesgo de incendio o explosion, descarga electrica, o para prevenir lesiones personales cuando use...
- Page 45 ÍNDICE ÍNDICE - Para toallas, TOALLAS CARACTERÍSTICAS DEL PRODUCTO - Prendas de lana, LAVADO A MANO/LANA - Lavado rápido, LAVADO RAPIDO INSTRUCCIONES IMPORTANTES DE Botones de ajuste de ciclo SEGURIDAD Opciones de ajuste antes del ciclo - Ajuste de la temperatura del agua, TEMP. LAVADO PRECAUCIONES BÁSICAS DE SEGURIDAD - Ajuste de la velocidad de centrifugado, VELOCIDAD INSTRUCCIONES PARA LA CONEXIÓN A TIERRA...
- Page 46 INTRODUCCIÓN A LA LAVADORA INTRODUCCIÓN A LA LAVADORA Partes y Accesorios Partes Cajón dispensador de detergente (véase página Entradas de agua Panel de control (Véase página 9). TurboWash™ Boquilla superior Puerta Tornillos de Cable de Sello de goma transporte alimentación de la puerta RETENEDOR DE Tambor...
- Page 47 INTRODUCCIÓN A LA LAVADORA Características del panel de control Selector de Ciclos Funcionamiento Pantalla Botón de Inicio/ Botón de Encendido Botón de Selección de Botón de Selección de Botón de Selección de Sonido de la señal de Pausa Temperatura de Agua Velocidad de Centrifugado Nivel de Suciedad selección del botón...
- Page 48 INTRODUCCIÓN A LA LAVADORA Funcionamiento (continuación) Botón Descripción y (Seleccione antes del ciclo de lavado) Prelavar prendas bien sucias (Véase página 26). y (Durante el ciclo de lavado, mantenga pulsado) Bloquear / Desbloquear el botón (Véase página 27). y Utilice esta opción para ahorrar tiempo (Véase página 27). y Añade un ciclo de enjuague adicional al seleccionado (Véase página 26).
- Page 49 INSTRUCCIONES DE INSTALACIÓN INSTRUCCIONES DE INSTALACIÓN Vista previa del orden de instalación Comprobación y elección de Desembalaje y retiro de los Conexión de los tubos de la ubicación adecuada tornillos de transporte agua Conexión del tubo de Nivelación de la lavadora Conexión del enchufe y la toma desagüe de tierra...
- Page 50 INSTRUCCIONES DE INSTALACIÓN Comprobación y elección de la ubicación NOTA adecuada y El suelo debe ser lo suficientemente fuerte y rígido como para soportar el peso de la lavadora cuando Instale la lavadora sobre un suelo con la resistencia y rigidez esté...
- Page 51 INSTRUCCIONES DE INSTALACIÓN Desempaque y retiro de los tornillos de Quite los dos pernos de transporte de la parte inferior transporte con la llave inglesa (incluida) para soltar por completo los cuatro pernos de transporte, girándolos en el sentido Al retirar la lavadora de la base de cartón, asegúrese de quitar opuesto al de las agujas del reloj y después tirando de el soporte del tambor de foam colocado en la mitad de la ellos.
- Page 52 Utilice mangueras nuevas para la instalación de la lavadora. No vuelva a utilizar mangueras viejas. Utilice únicamente las mangueras suministradas con la lavadora. LG no recomienda el uso de otras mangueras adquiridas en los comercios. y Revise periódicamente las mangueras por si hubiera grietas, fugas y desgaste, y sustitúyalas cada 5 años.
- Page 53 INSTRUCCIONES DE INSTALACIÓN Conexión del tubo de desagüe Utilización de una tina de lavado Fije el extremo de la manguera en el soporte de codo. Fije el tubo de desagüe para evitar que se mueva y que se - Conecte el codo a una distancia no superior a 4 pulgadas produzcan fugas.
- Page 54 INSTRUCCIONES DE INSTALACIÓN Nivelación de la lavadora Compruebe de nuevo que la lavadora esté nivelada. - Empuje o sacuda los extremos superiores de la lavadora El tambor de su nueva lavadora gira a alta velocidad . suavemente para asegurarse que la máquina no esté Para reducir las vibraciones, el ruido y los movimientos meciéndose.
- Page 55 INSTRUCCIONES DE INSTALACIÓN Conexión del enchufe y la toma de tierra Prueba de funcionamiento Conecte a tierra la lavadora para evitar un cortocircuito o Compruebe si la lavadora ha sido instalado correctamente y descargas eléctricas durante la conexión. realice una prueba de funcionamiento. Cargue la lavadora con 6 libras (3 kg) de ropa.
- Page 56 PREPARACIÓN PREPARACIÓN Clasificación de las cargas de lavado Precauciones para el cuidado de los tejidos antes del ciclo de lavado Lea y cumpla con las siguientes instrucciones para evitar que la ropa se encoja o se dañe. u Revise todos los bolsillos para asegurarse de que esten u Cepille la suciedad, polvo o cabello de los tejidos antes del vacios.
- Page 57 PREPARACIÓN Etiquetas de cuidado de las telas La mayoria de las prendas de vestir tienen etiquetas de cuidado de las telas para lograr un cuidado adecuado. Categoría Etiqueta Instrucciones Lavado a mano Lavado a máquina, ciclo normal Utilice el ajuste de planchado permanente/ resistente a las arrugas (la cual tiene un enfriado o rociado con agua fría...
- Page 58 PREPARACIÓN Utilización de detergente/suavizante Cargando el dispensador El cajón dispensador de detergente de la lavadora tiene un Detergente recomendado compartimiento dispensador para cada tipo de detergente. Añada los detergentes adecuados en sus compartimentos Para esta lavadora se recomienda un detergente poco respectivos espumoso.
- Page 59 PREPARACIÓN Compartimiento de detergente para prelavado Compartimiento de blanqueador líquido Agregue el detergente liquido o en polvo a este Este compartimiento alberga blanqueador liquido, que se compartimiento cuando se usa la opcion de Prewash dispensará automáticamente en el momento adecuado del (prelavado).
- Page 60 UTILIZACIÓN DE LA LAVADORA UTILIZACIÓN DE LA LAVADORA Funcionamiento básico Cargue la ropa en la lavadora y cierre la puerta. Pulse - Las luces alrededor del dial selector de ciclos se iluminarán y sonará una señal acústica. Gire al ciclo deseado. - Se selecciona automáticamente la opción por defecto según el ciclo de lavado.
- Page 61 UTILIZACIÓN DE LA LAVADORA Guía de ciclos La guía de ciclos indicada más abajo muestra las opciones y tipos de telas recomendadas para cada ciclo. ● = Opcion disponible CARGAS RECOMENDADAS OPCIÓN BÁSICA( =DEFECTO) OPCION ADICIONAL TIEMPO Carga CICLO TIPO DE TEJIDO` DESPLEGADO TEMP.
- Page 62 UTILIZACIÓN DE LA LAVADORA Ciclo principal CARGA PESADA Muy sucias de algodón, Puede lavar la ropa de forma más intensiva seleccionando el Este ciclo es para lavado de ropa muy sucia, a través de ciclo de lavado más adecuado para el tipo de prendas que se rotación más potente del tambor.
- Page 63 UTILIZACIÓN DE LA LAVADORA Botones de ajuste de ciclo Ajuste de la velocidad de centrifugado, VELOCIDAD DE CENTRIFUGADO Cada ciclo tiene ajustes preprogramables que se seleccionan Puede seleccionar la velocidad de centrifugado que desee. automaticamente. Tambien puede personalizar los ajustes Utilice esta función correctamente, según las características utilizando los botones de programacion de ciclos.
- Page 64 UTILIZACIÓN DE LA LAVADORA Ajuste la melodía y los tonos de los ñadiendo ciclo de enjuague extra, botones, ALARMA ENJUAGUE EXTRA La lavadora reproduce una melodía cuando ha terminado el Puede añadir un ciclo de enjuague extra al ciclo de enjuague ciclo de lavado.
- Page 65 UTILIZACIÓN DE LA LAVADORA Ahorro de tiempo, TURBOWASH™ ADVERTENCIA y No toque la compuerta durante los ciclos de vapor. La La opción de TurboWash™ reduce el tiempo del ciclo y logra superficie de la compuerta puede estar muy caliente. un buen rendimiento en el ciclo normal.Con TurboWash™ se Permita que el seguro de la compuerta se libere antes puede ahorrar tiempo sin sacrificar los resultados.
- Page 66 UTILIZACIÓN DE LA LAVADORA Como guardar ciclo personalizado, Gira la ropa para evitar arrugas, GUARDAR PROGRAMA FRESH CARE Puede guardar un ciclo con todos los ajustes y opciones que Utilice esta función cuando no pueda retirar la ropa de la usted utilice con mayor frecuencia.
- Page 67 MANTENIMIENTO MANTENIMIENTO Cuidados Pulse para apagar la lavadora y desconecte el enchufe. Cuidados tras el lavado 9 Seque el interior del tambor con un trapo suave y cierre la puerta. Una vez finalizado el ciclo, limpie la puerta y el interior de la junta hermética de la puerta para eliminar la humedad.
- Page 68 MANTENIMIENTO Limpieza Cuando se congela el tubo de desagüe Vierta agua caliente en el tambor de la lavadora y cierre la Periódicamente limpie su lavadora para ayudar a mantener puerta. su rendimiento y para minimizar las posibilidades de - Deje el agua adentro durante 10 minutos. funcionamiento defectuoso.
- Page 69 MANTENIMIENTO Alerta automática para la limpieza de la lavadora Limpieza del cajón dispensador de detergente Cuando se enciende la lavadora y se parpadea el mensaje tcL, significa que el tambor de la lavadora necesita ser Si deja detergente en el cajón dispensador durante un limpiado.
- Page 70 Póngase en contacto con el servicio de atención al Pulse para apagar la lavadora y desconecte el enchufe. cliente de LG si no se puede limpiar correctamente el filtro o se ha perdido. 2 Cierre las llaves de paso conectadas a las mangueras de agua.
- Page 71 MANTENIMIENTO Limpieza del filtro de la bomba de Vuelva a colocar el tapón de la manguera e introdúzcala desagüe en el alojamiento. La lavadora no se vaciará correctamente si el filtro de la bomba de desagüe está obstruido. Limpie periódicamente el filtro para evitar obstrucciones por objetos extraños.
- Page 72 MANTENIMIENTO Limpieza de la junta de la puerta Limpie la junta hermética de la puerta una vez al mes para evitar la acumulación de suciedad. Utilice guantes de goma y gafas de protección. Diluya 3/4 de taza (177 mL) de blanqueador líquido con lejía en 1 galón (3,8 litros) de agua.
- Page 73 • contacto con el servicio técnico de LG más cercano. La lavadora vacía el agua con lentitud o no lo hace y Baje la manguera de desagüe hasta 3 pies por debajo del y ¿Se ha instalado la manguera de desagüe a más de 1...
- Page 74 Desconecte el enchufe y póngase en contacto con el servicio técnico de LG más cercano. Sonido de golpes y ¿Está sobrecargada la lavadora? y Este sonido es normal y se produce cuando y ¿Está...
- Page 75 Consulte la página 30, limpie el interior y el tambor detergente? exterior de la lavadora periódicamente. y ¿Se limpia el tambor periódicamente? ESPECIFICACIONES Modelo WM3470HVA / WM3470HWA Descripción Lavadora de carga frontal Requisitos eléctricos 120 V~ 60 Hz Medidas...
- Page 76 UTILIZACIÓN DEL DIAGNÓSTICOINTELIGENTE™ UTILIZACIÓN DEL DIAGNÓSTICOINTELIGENTE ™ • Utilice esta función sólo cuando así se lo indique el agente del Centro de Atención al Cliente. La transmisión tiene un sonido similar al de un fax, y no tiene ningún significado, excepto para el Centro de Atención al Cliente. •...
- Page 77 MEMO...
- Page 78 MEMO...
- Page 79 MEMO...
- Page 80 Made in Korea...
Need help?
Do you have a question about the WM3470HVA and is the answer not in the manual?
Questions and answers