Table of Contents
Advertisement
Quick Links
SEC.
적용모델
WORK
25
VS86*****
148
8
7
6
5
4
3
2
1
REV. NO.
REVISION DESCRIPTION
REF. NO.
기호
변경 사항
시방 번호
재
질
인쇄방법
모조지 80g OFFSET 인쇄
OFFSET 인쇄
DATE
PREPARED
APPROVED
년/월/일
시방자
승인자
인 쇄 도 수
PAGE
표 지
내 지
32, A5
1도
1도
<< 주기 >>
1. 재질, 인쇄방법, 인쇄도수, 외곽치수등은 작업표에 준한다.
2. 인쇄내용, 문자크기 및 형상, 선의 굵기 등은 설계에서 제시된 도면에 준함.
3. 외곽치수는 절단후 치수임.
4. 양산전에 설계 한도를 득할 것.
5. 본 부품에 금지물질이 포함되지 않도록 하고, 상세내용은 LG(63)-A-5501-34
를 만족할 것.
<< NOTES >>
1. Material, printing and exterier size are refer to work tables.
2. Printing, text size and line are based on LG design drawing.
3. Exterier size on the drawing is cutting line.
4. Before product controlled by criteria sample.
5. The part should not contain prohibited substances(Pb,Cd,Hg,Cr+6,PBB,
PBDE) and details should comply with LG standard of LG(63)-A-5501-34
TRIG.
UNIT
mm
MODELING
DESIGNED
REVIEWED
CHECKED APPROVED
신 주 은
장 성 우
16.06.09
16.06.09
LG 전자
(주)
LG Electronics Inc.
REMARK
북미향
English
PDF
ILLUSTRATOR
SCALE 1
1
MANUAL,OWNER'S
T
I
T
김 현 석
L
Cloud-I MOP 북미향
E
16.06.10
MFL67983125
RELATED DWG.
DWG.
No.
RELEASING THIS DRAWING
WITHOUT PERMISSION LG
Electronics SHOULD BE
ACCUSED ACCORDING TO THE
LAWS AND COMPANY RULES.
이 도면은 LG전자의 자산으로 불법
유출시 관계법과 회사규정에 의해 처벌됨.
DR COMPLETED
도면 DR 완료
완료일 :
1/1
Advertisement
Table of Contents

Related Manuals for LG VS8600SWM


Summary of Contents for LG VS8600SWM
- Page 1 << NOTES >> 1. Material, printing and exterier size are refer to work tables. 2. Printing, text size and line are based on LG design drawing. 3. Exterier size on the drawing is cutting line. 4. Before product controlled by criteria sample.
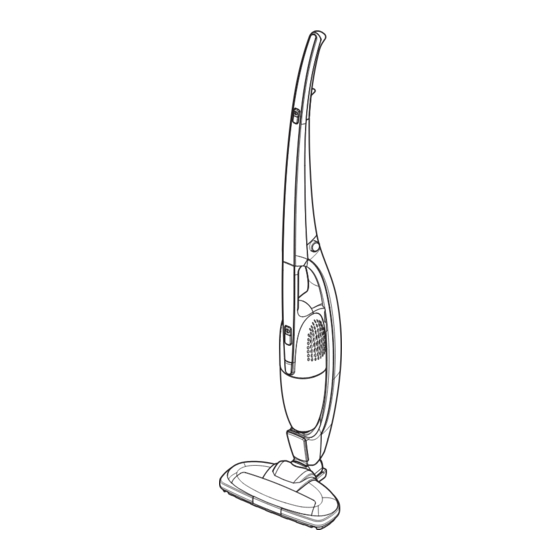
- Page 2 OWNER’S MANUAL LG CORDLESS HANDY-STICK CLEANER Before using, carefully read the Safety Precautions pages to allow for safe operation of the product. After reading this manual, keep it in an easily accessible location. VS86***** www.lg.com MFL67983125...
-
Page 3: Table Of Contents
Cleaning Instructions for Various WARRANTY Situations Charging the Battery LG Handy-Stick Cleaner WARRANTY How to Store the Water Reservoir How to Attach/Detach the Water Reservoir Gasket WARNING: This product contains chemicals known to the State of California to cause cancer and birth... -
Page 4: Safety Precautions
2. Children should be supervised to ensure that they do not play with the appliance. 3. If the supply cord is damaged, it must be replaced by an LG Electronics Service Agent in order to avoid a potential hazard. 4. This appliance can be used by children aged 8 years... - Page 5 Do not use harsh or abrasive turn off the power switch of the main body, pull cleaners. out the power plug, and contact an LG Electronics Failure to follow this warning can cause electrical Service Agent to avoid hazard.
- Page 6 • Do not use without filter in place. • If any liquid leaks from the batteries, avoid • Use only LG recommended accessories and bringing liquid into contact with the skin or replacement parts.
- Page 7 SAFETY PRECAUTIONS CAUTION • Static Electricity may be generated at main • If a foreign object is attached to the bottom body during cleaning. surface of dust bin, remove it before using the product. If vacuum cleaner malfunctions due to electrostatic energy, disconnect from the wall It could compromise the suction motor and outlet and plug in again.
-
Page 8: Included With Product
INCLUDED WITH PRODUCT Charging Stand Handy-Stick Cleaner (models vary) Fixing screw Filter (Spare) Owner’s Manual Battery* (Spare) Adapter Water reservoir Wet mop Dry mop *Available on some models. - Page 9 PARTS - HANDY-STICK CLEANER Power ON/OFF button Finger rest - Place finger here for comfortable use. Speed control button Handy release buttons Main body Handy power button Battery indicator Built-in brush Dust bin release button Charging stand (models vary) Charging indicator (on some models) Brush LED lighting...
- Page 10 PARTS – CHARGING STATION / DUST BIN Charging Stand (models vary) Dust Bin Dust bin cover Inner filter (non mesh side) Dust bin Dust separator...
-
Page 11: Assembling Handy-Stick Cleaner
ASSEMBLING HANDY-STICK CLEANER Tools Required: Phillips screwdriver Upper body part Lower body part ➊ Assemble the upper and lower body parts. ➋ Fasten the fixing screw. Attach the upper body part to the lower body part Locate the hole for the fixing screw on as shown. -
Page 12: Assembling Charging Stand
ASSEMBLING CHARGING STAND (models vary) Insert the upper part of the charging stand into the base until it clicks. -
Page 13: How To Mount And Detach The Water Reservoir
HOW TO MOUNT AND DETACH THE WATER RESERVOIR ➊ How to mount the water reservoir ➋ How to detach the water reservoir Place the water reservoir on the floor and Placing one foot on the water reservoir, insert the nozzle of the cleaner into the push the cleaner forward. -
Page 14: How To Attach The Wet Mop
HOW TO ATTACH THE WET MOP ① ② ③ ① Please wet the mop prior to use. ② Be sure to squeeze the wet mop sufficiently before use to remove excess moisture. ③ With the Velcro side of the wet mop facing up, attach to the water reservoir. -
Page 15: How To Replenish Water
HOW TO REPLENISH WATER ① ② ③ ① Open the cap on the water reservoir as shown in the illustration. ② As shown in the illustration, fill the water reservoir up to the “Max” line marked on the side. ③ After filling with water, securely close the cap on the water reservoir. -
Page 16: How To Use The Dry Mop
HOW TO USE THE DRY MOP Dry mop handle ① ② When attaching to the water reservoir prior to use When using as a hand mop ① With the Velcro side of the dry mop facing up, attach to Place your hand on the handle the water reservoir. -
Page 17: Using The Product
USING THE PRODUCT Power ON/OFF button Battery Projection indicator Speed control button (Power or Regular) Vacuum power button Battery indicator Groove Make sure the vacuum body has docked correctly. Press the power button to turn on the Place the rear bottom of the main product. - Page 18 USING THE PRODUCT The brush is ideal for cleaning short-pile carpet or a normal wood floor surface. ① It is not recommended for vacuuming deep-pile carpet. ② Deep-pile carpets may cause the brush to stop rotating. – If a motor overload stops the brush from rotating, turn the vacuum cleaner off. Remove tangled threads or fibers if necessary.
-
Page 19: Cleaning Instructions For Various Situations
CLEANING INSTRUCTIONS FOR VARIOUS SITUATIONS Attach wet mop Attach a mop to the stick cleaner to remove dust and wipe at the same time. When cleaning with the wet mop Precautions before use • Do not draw liquid such as water into the cleaner. - This may cause the product to malfunction. - Page 20 CLEANING INSTRUCTIONS FOR VARIOUS SITUATIONS Pre-use checks • When using the wet mop, wet the mop prior to attaching to the main body for use. - To maximize cleaning performance, please wet the mop before using. • After you are finished with cleaning, please empty the water reservoir. - Water that is stagnant in the water reservoir for prolonged periods may become contaminated and give off a foul odor.
-
Page 21: Charging The Battery
CHARGING THE BATTERY Battery indicator Charging indicator ➊ If the voltage gets low during ➋ The charging time may vary depending on the battery operation, the power is condition. automatically turned off to protect When the minimum amount of charge is left, it takes the battery. -
Page 22: How To Store The Water Reservoir
HOW TO STORE THE WATER RESERVOIR To remove all moisture within the water reservoir effectively, detach the gasket attached to the bottom of the water reservoir and store upside down. Shake the water reservoir to remove any residual moisture. Helpful tip •... -
Page 23: How To Attach/Detach The Water Reservoir Gasket
HOW TO ATTACH/DETACH THE WATER RESERVOIR GASKET ① Spout Spout gasket ② How to detach the water reservoir gasket How to attach the water reservoir gasket Lightly press on the center of the gasket, and then ① Push the spout assembled to the gasket pull the end. -
Page 24: Cleaning The Dust Bin
CLEANING THE DUST BIN Dust bin release button ③ Filter cover ① ② Dust bin Inner filter Dust separator Inner filter ④ (non mesh side) ⑤ Clean and dry Fig.1 ① To detach the dust bin, push and hold the WARNING release button and pull it in the direction shown. -
Page 25: Assembling The Dust Bin
ASSEMBLING THE DUST BIN Filter cover Inner filter Dust separator ① ② ③ ① Attach the inner filter back onto the filter cover. ② Put the dust separator back into the dust bin. ③ Assemble the filter cover back onto the dust separator in the direction indicated by the arrow. -
Page 26: Cleaning The Nozzle
CLEANING THE NOZZLE Brush* Hook Gear Belt ➊ Turn off the vacuum ➋ Lift the brush and ➌ Remove any tangled hair cleaner and remove the detach it from the drive or threads from the brush. hand-held vacuum. belt. - Use another vacuum Press the hook to cleaner to remove the hair release the brush... -
Page 27: Removing Clogs
REMOVING CLOGS ① ② ④ ③ If you notice a loss in suction, first check the filters as described on page 23. If the filters are clean, There may be a clog. The arrows show areas where clogs are most likely to occur. To check for clogs : Unplug and turn off the vacuum cleaner. -
Page 28: Troubleshooting
• Check if battery level is low. • Follow proper instructions for use in this manual. If product is still not working, call the LG Customer Information Center for service. Vacuum emits odors. • Some odors are normal when the product is first operated and will diminish within 3 months of normal operation. -
Page 29: Product Specifications
Manufacturer Neonix (Battery Cell : LG Chem) ※ This equipment is a Class B digital device that complies with 47 CFR Parts 2 and 15 of the FCC Rules. Operation is subject to the following two conditions: (1) This device may not cause harmful interference, and (2) this device must accept any interference received, including interference that may cause undesired operation. -
Page 30: Lg Handy-Stick Cleaner Warranty
LG HANDY-STICK CLEANER WARRANTY LG Electronics Inc. will repair or replace your product, at LG’s option, if it proves to be defective in material or workmanship under personal household use, during the warranty period set forth below, effective from the date of original consumer purchase of the product. This limited warranty is good only to the original purchaser of the product and effective only when used in U.S.A. - Page 31 MEMO...
- Page 32 MEMO...
- Page 33 LG Customer Information Center For inquiries or comments, visit www.lg.com or call: 1-800-243-0000 USA, Consumer User Register your product Online! www.lg.com Made in Korea...
Need help?
Do you have a question about the VS8600SWM and is the answer not in the manual?
Questions and answers