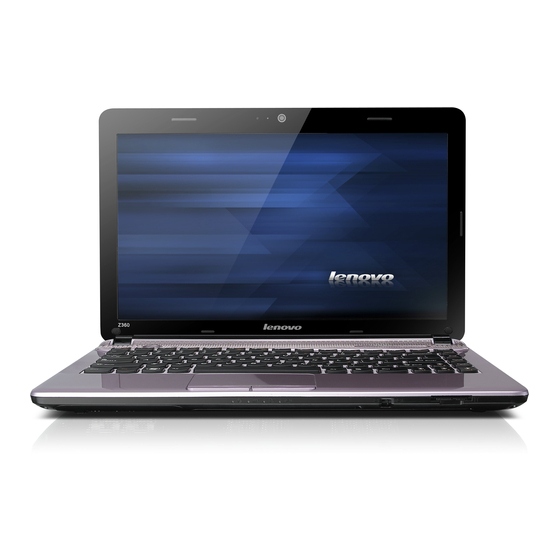
Lenovo IdeaPad Z360 User Manual
Hide thumbs
Also See for IdeaPad Z360:
- Hardware maintenance manual (89 pages) ,
- Brugervejledning (64 pages) ,
- Handbok (64 pages)

Related Manuals for Lenovo IdeaPad Z360


Summary of Contents for Lenovo IdeaPad Z360
- Page 1 IdeaPad Z360 User Guide V1.0 Read the safety notices and important tips in the included manuals before using your computer.
- Page 2 First Edition (April 2010) © Copyright Lenovo 2010. LENOVO products, data, computer software, and services have been developed exclusively at private expense and are sold to governmental entities as commercial items as defined by 48 C.F.R. 2.101 with limited and restricted rights to use, reproduction and disclosure. LIMITED AND RESTRICTED RIGHTS NOTICE: If products, data, computer software, or services are delivered pursuant a General Services Administration “GSA”...
-
Page 3: Table Of Contents
Replacing the battery ... 35 Replacing the hard disk drive... 36 Replacing memory... 40 Removing the optical drive ... 44 Appendix B. Lenovo limited warranty ...45 Warranty information ... 51 Appendix C. Product specific Notices ...54 Energy star information... 54 Electronic emissions notices... -
Page 5: Chapter 1. Getting To Know Your Computer
Chapter 1. Getting to know your computer Top view - - - - - - - - - - - - - - - - - - - - - - - - - - - - - - - - - - - - - - - - - - - - - - - - - - - - - - - - - - - - - - - - - - - - - - - - - - - - - - - - - - - - - - - - - - - - - - - - - - - Note: The illustrations in this manual may differ from the actual product. - Page 6 Chapter 1. Getting to know your computer Wireless module antennas (Select models only) Built-in microphone Integrated camera Computer display Speakers System status indicators Touchpad Note: For details, see “Using the touchpad” on page 14. Power button OneKey Rescue system button Note: For details, see “OneKey Rescue system”...
- Page 7 Chapter 1. Getting to know your computer Energy Touch this button to launch Lenovo Energy Management. Management button Note: For details, see “Energy Management button” on page 22.
-
Page 8: Left-Side View
Chapter 1. Getting to know your computer Left-side view Kensington slot Note: For details, see “Attaching a security lock (not supplied)” on page 24. Fan louvers Note: Make sure that none of the fan louvers are blocked or else overheating of the computer may occur. -
Page 9: Right-Side View
Right-side view Microphone jack Headphone jack Attention: • Listening to music at high volume over extended periods of time may damage your hearing. Optical drive USB port Note: For details, see “Connecting a universal serial bus (USB) device” on page 18. Chapter 1. -
Page 10: Front View
Chapter 1. Getting to know your computer Front view - - - - - - - - - - - - - - - - - - - - - - - - - - - - - - - - - - - - - - - - - - - - - - - - - - - - - - - - - - - - - - - - - - - - - - - - - - - - - - - - - - - - - - - - - - - - - - - System status indicators Integrated... -
Page 11: Rear View
Chapter 1. Getting to know your computer Rear view - - - - - - - - - - - - - - - - - - - - - - - - - - - - - - - - - - - - - - - - - - - - - - - - - - - - - - - - - - - - - - - - - - - - - - - - - - - - - - - - - - - - - - - - - - - - - - - - Connect the AC adapter here. -
Page 12: Bottom View
Chapter 1. Getting to know your computer Bottom view Battery latch - manual Battery pack SIM card slot (Select models only) Notes: In order to be able to insert a SIM card into this slot, you must first disconnect the AC •... - Page 13 Battery latch - spring loaded Memory/CPU (Central processing unit) compartment Chapter 1. Getting to know your computer The spring-loaded battery latch keeps the battery pack secured in place.
-
Page 14: Chapter 2. Learning The Basics
Chapter 2. Learning the basics First use - - - - - - - - - - - - - - - - - - - - - - - - - - - - - - - - - - - - - - - - - - - - - - - - - - - - - - - - - - - - - - - - - - - - - - - - - - - - - - - - - - - - - - - - - - - - - - - - - - - - - - - Reading the manuals Read the supplied manuals before using your computer. -
Page 15: Putting Your Computer Into Sleep State Or Shutting It Down
Putting your computer into sleep state or shutting it down When you finish working with your computer, you can put it into sleep state or shut it down. Putting your computer into sleep state If you will be away from your computer for only a short time, put the computer into sleep state. -
Page 16: Using Ac Adapter And Battery
Chapter 2. Learning the basics Using AC adapter and battery Checking battery status You can determine the percentage of battery power remaining by checking the battery icon in the notification area. Note: As each computer user has different habits and needs, it is difficult to predict how long a battery charge will last. - Page 17 If you are not going to use the computer for an extended period of time, or if you need to send your computer to Lenovo for service, etc. remove the battery pack from the computer. Before removing the battery pack, make sure the computer has been shut down.
-
Page 18: Using The Touchpad
Chapter 2. Learning the basics Using the touchpad Touchpad Left click button Right click button Notes: • You can enable/disable the touchpad using Fn+F6. • When the touchpad indicator is lit, the touchpad is disabled. - - - - - - - - - - - - - - - - - - - - - - - - - - - - - - - - - - - - - - - - - - - - - - - - - - - - - - - - - - - - - - - - - - - - - - - - - - - - - - - To move the cursor on the screen, slide your fingertip over the pad in the direction in which you want the cursor to move. -
Page 19: Using The Keyboard
Chapter 2. Learning the basics Using the keyboard - - - - - - - - - - - - - - - - - - - - - - - - - - - - - - - - - - - - - - - - - - - - - - - - - - - - - - - - - - - - - - - - - - - - - - - - - - - - - - - Your computer has a numeric keypad and function keys incorporated in its standard keyboard. - Page 20 Chapter 2. Learning the basics The following describes the features of each function key. Fn + Esc: Fn + F1: Fn + F2: Fn + F3: Fn + F4: Fn + F5: Fn + F6: Fn + F8: Fn + F9: Fn + F10: Fn + F11: Fn + F12:...
-
Page 21: Connecting External Devices
Connecting external devices Your computer has a wide range of built-in features and connection capabilities. Using memory cards (not supplied) Your computer supports the following types of memory cards: • Secure Digital (SD) card • MultiMediaCard (MMC) • Secure Digital High Capacity (SDHC) card •... -
Page 22: Connecting A Universal Serial Bus (Usb) Device
Chapter 2. Learning the basics Connecting a universal serial bus (USB) device Your computer comes with two USB ports and an eSATA/USB port compatible with USB devices or three USB ports compatible with USB devices. Note: When using a high power consumption USB device such as USB ODD, use the external device’s power adapter. -
Page 23: Special Keys And Buttons
• When the computer is powered-off, press this button to enter the OneKey Rescue system if Lenovo OneKey Rescue system has been preinstalled. • In Windows operating system, press this button to start Lenovo OneKey Recovery. Note: For details, see “OneKey Rescue system” on page 33. - Page 24 These modes are preset enhancements by Lenovo to improve visual and aural experiences via your computer in different usage scenarios. You can manually choose between normal, movie and intelligent mode.
- Page 25 Smart noise control button Smart noise control button enables you to control fan speed during computer operation. You can choose between normal or silent mode by a touch of this button; you can also activate the dust cleaning feature by touching and holding this button for three seconds.
- Page 26 You can cancel dust cleaning at any time by touching the touch-sensitive button when it is flashing. Energy Management button Lenovo Energy Management provides you control over the performance and power consumption for each component of your notebook through the collaboration of software and hardware, thus extends battery life and improves battery runtime.
-
Page 27: System Status Indicators
System status indicators These indicators inform you of the computer status. Caps lock indicator Num lock indicator Power status indicator Battery status indicator Hard disk drive indicator Wireless communication indicator Touchpad indicator - - - - - - - - - - - - - - - - - - - - - - - - - - - - - - - - - - - - - - - - - - - - - - - - - - - - - - - - - - - - - - - - - - - - Chapter 2. -
Page 28: Securing Your Computer
• You are responsible for evaluating, selecting, and implementing the locking devices and security features. Lenovo offers no comment judgement or warranty regarding the function, quality or performance of locking devices and security features. Using VeriFace™ VeriFace is a face recognition software which takes a digital snapshot, extracts key features of your face, and creates a digital map that becomes the system’s “password”. -
Page 29: Using Passwords
For details about how to set the password, see the Help to the right of the screen in BIOS setup utility. Note: To enter BIOS setup utility, press F2 when the Lenovo logo appears on the screen while the computer is starting up. -
Page 30: Chapter 3. Connecting To The Internet
Chapter 3. Connecting to the Internet As a global network, the Internet connects computers worldwide, providing services such as e-mailing, information searching, electronic commerce, Web browsing and entertainment. You can connect the computer to the Internet in the following ways: Wired connection: use physical wiring to connect. -
Page 31: Software Configuration
Hardware connection: Cable TV cable Splitter * Cable modem * * Not supplied. Note: The above diagrams are for reference only. Actual connection method may vary. Software configuration Consult your Internet Service Provider (ISP) for details on how to configure your computer. -
Page 32: Wireless Connection
Chapter 3. Connecting to the Internet Wireless connection Wireless connections provide mobile access to the Internet, allowing you to stay online anywhere the wireless signal covers. Divided by the signal scales, wireless connection to the Internet can be built based on the following standards. Wi-Fi WiMAX Mobile Broadband... - Page 33 Chapter 3. Connecting to the Internet Using Wi-Fi/WiMAX (Select models only) Enabling wireless connection To enable wireless communications, do the following: 1 Slide the integrated wireless device switch from 2 Press Fn + F5 to make configuration. Hardware connection Wi-Fi/WiMAX network Access point * * Not supplied Software configuration...
- Page 34 Notes: • Various standards are in use by mobile operators to provide Mobile Broadband services. The Lenovo Mobile Broadband module may support one or more of the following standards: GSM (Global System for Mobile Communications) TD-SCDMA (Time Division-Synchronous Code Division Multiple Access)
- Page 35 Inserting the SIM card To insert the SIM card: 1 Turn off the computer; then disconnect the AC adapter and all cables from the computer. 2 Close the computer display and turn it over. 3 Remove the battery. 4 Insert the SIM card in the card slot until it clicks into place as shown in the illustration.
- Page 36 Chapter 3. Connecting to the Internet Removing the SIM card To remove the SIM card: 1 Turn off the computer, then disconnect the AC adapter and all cables from the computer. 2 Close the computer display and turn it over. 3 Remove the battery.
-
Page 37: Chapter 4. Onekey Rescue System
OneKey Rescue system Introduction The Lenovo OneKey Rescue system is an easy-to-use application that can be used to back up the data on your system partition (C drive) for easy restore when required. You can run Lenovo OneKey Recovery under the Windows operating system, and the OneKey Rescue system without starting the Windows operating system. - Page 38 Chapter 4. OneKey Rescue system Using Lenovo OneKey Rescue system (without Windows operating system) In the event that the operating system cannot be loaded, follow the steps below to access OneKey Rescue system. • Shut down your computer. • Press the key to launch OneKey Rescue system.
-
Page 39: Appendix A. Cru Instructions
Appendix A. CRU instructions Replacing the battery Note: Use only the battery provided by Lenovo. Any other battery could ignite or explode. To replace the battery, do the following: 1 Turn off the computer, or enter hibernation mode. Disconnect the AC adapter and all cables from the computer. -
Page 40: Replacing The Hard Disk Drive
You can increase the storage capacity of your computer by replacing the hard disk drive with one of greater capacity. You can purchase a new hard disk drive from your reseller or Lenovo marketing representative. Notes: Replace the hard disk drive only if you upgrade it or have it repaired. The connectors and •... - Page 41 To replace the hard disk drive, do the following: 1 Turn off the computer; then disconnect the AC adapter and all cables from the computer. 2 Close the computer display, and then turn the computer over. 3 Remove the battery pack. 4 Remove the Hard disk drive (HDD)/Mini PCI Express Card slot compartment cover.
- Page 42 Appendix A. CRU instructions 5 Remove the frame fixing screws 6 Carefully pull the tab to remove the hard disk drive (secured in the metal frame) from the compartment Note: Be sure to remove the hard disk (secured in the metal frame) gently to avoid breaking the connection to the SATA receptacle connector.
- Page 43 7 Hold the SATA receptacle connector with one hand and pull the hard disk drive (secured in the metal frame) in the direction shown below to detach the connectors 8 Remove the screws and detach the metal frame from the hard disk drive. 9 Attach the metal frame to a new hard disk drive and tighten the screws.
-
Page 44: Replacing Memory
Appendix A. CRU instructions Replacing memory You can increase the amount of memory in your computer by installing a double-data-rate three synchronous dynamic random access memory (DDR3 SDRAM)-available as an option-in the memory slot of your computer. DDR3 SDRAMs are available in various capacities. Note: Use only the memory types supported by your computer. - Page 45 Appendix A. CRU instructions 5 Remove the Memory/CPU (Central processing unit) compartment cover. a.Loosen the screws that secure the compartment cover b.Remove the compartment cover...
- Page 46 Appendix A. CRU instructions 6 If two DDR3 SDRAMs are already installed in the memory slot, remove one of them to make room for the new one by pressing out on the latches on both edges of the socket at the same time. Be sure to save the old DDR3 SDRAM for future use.
-
Page 47: Turn The Computer On
Note: If only one DDR3 SDRAM is used on the computer you are servicing, the card must be installed in SLOT-0 ( To make sure that the DDR3 SDRAM is installed correctly, do as follows: 1 Turn the computer on. 2 Hold F2 during startup. -
Page 48: Removing The Optical Drive
Appendix A. CRU instructions Removing the optical drive To remove the optical drive, do the following: 1 Remove the screw shown in the illustration 2 Gently pull the optical drive out The following table provides a list of CRUs (Customer Replaceable Units) for your computer, and informs you of where to find replacement instructions. -
Page 49: Appendix B. Lenovo Limited Warranty
What this warranty covers Lenovo warrants that each hardware product that you purchase is free from defects in materials and workmanship under normal use during the warranty period. The warranty period for the product starts on the original date of purchase specified on your sales receipt or invoice unless Lenovo informs you otherwise in writing. -
Page 50: How To Obtain Warranty Service
How to obtain warranty service If the product does not function as warranted during the warranty period, you may obtain warranty service by contacting Lenovo or an approved service provider. Each of them is referred to as a “Service Provider.” A list of Service Providers and their telephone numbers is available at www.lenovo.com/support/phone. - Page 51 Only unaltered Lenovo products and parts are eligible for replacement. The replacement product or part provided by Lenovo may not be new, but it will be in good working order and at least functionally equivalent to the original product or part. The replacement product or part shall be warranted for the balance of the period remaining on the original product.
- Page 52 Appendix B. Lenovo limited warranty Use of personal information If you obtain service under this warranty, Lenovo will store, use and process information about your warranty service and your contact information, including name, phone numbers, address, and e-mail address. Lenovo will use this information to perform service under this warranty and to improve our business relationship with you.
- Page 53 Appendix B. Lenovo limited warranty Limitation of liability Lenovo is responsible for loss or damage to your product only while it is: 1) in your Service Provider’s possession; or 2) in transit in those cases where the Service Provider is responsible for the transportation.
-
Page 54: Dispute Resolution
WAIVED OR LIMITED BY CONTRACT. European Economic Area (EEA) Customers in the EEA may contact Lenovo at the following address: EMEA Service Organisation, Lenovo (International) B.V., Floor 2, Einsteinova 21, 851 01, Bratislava, Slovakia. Service under this warranty for Lenovo hardware products purchased in EEA countries may be obtained in any EEA country in which the product has been announced and made available by Lenovo. -
Page 55: Warranty Information
Appendix B. Lenovo limited warranty - - - - - - - - - - - - - - - - - - - - - - - - - - - - - - - - - - - - - - - - - - - - - - - - - - - - - - - - - - - - - - - - - - - - - - - - - - - - - - - - - - - -... - Page 56 Under CRU Service, your Service Provider will ship CRUs to you for installation by you. CRU information and replacement instructions are shipped with your product and are available from Lenovo at any time upon request. CRUs that are easily installed by you are called Self-service CRUs, while Optional-service CRUs may require some technical skill and tools.
- Page 57 You may be charged for the replacement product if Lenovo does not receive the failed product within thirty (30) days of your receipt of the replacement product.
-
Page 58: Appendix C. Product Specific Notices
For more information about ENERGY STAR, visit http://www.energystar.gov. Lenovo encourages you to make efficient use of energy an integral part of your day-to-day operations. To help in this endeavor, Lenovo has preset the following power-management features to take effect when your computer has... - Page 59 Table 1. ENERGY STAR power-management features ® Windows Power plan: Energy Star • Turn off the display: After 10 minutes • Put the computer to sleep: After 25 minutes • Advanced power settings: - Turn off hard disks: After 20 minutes - Hibernate: After 1 hour To awaken your computer from a Sleep mode, press any key on your keyboard.
-
Page 60: Electronic Emissions Notices
Properly shielded and grounded cables and connectors must be used in order to meet FCC emission limits. Proper cables and connectors are available from Lenovo authorized dealers. Lenovo is not responsible for any radio or television interference caused by using other than recommended cables or connectors or by unauthorized changes or modifications to this equipment. - Page 61 Um dieses sicherzustellen, sind die Geräte wie in den Handbüchern beschrieben zu installieren und zu betreiben. Des Weiteren dürfen auch nur von der Lenovo empfohlene Kabel angeschlossen werden. Lenovo übernimmt keine Verantwortung für die Einhaltung der Schutzanforderungen, wenn das Produkt ohne Zustimmung der Lenovo verändert bzw. wenn Erweiterungskomponenten von Fremdherstellern ohne Empfehlung der Lenovo gesteckt/eingebaut werden.
- Page 62 Dieses Gerät ist berechtigt, in Übereinstimmung mit dem Deutschen EMVG das EG-Konformitätszeichen - CE - zu führen. Verantwortlich für die Konformitätserklärung nach Paragraf 5 des EMVG ist die Lenovo (Deutschland) GmbH, Gropiusplatz 10, D-70563 Stuttgart. Informationen in Hinsicht EMVG Paragraf 4 Abs. (1) 4: Das Gerät erfüllt die Schutzanforderungen nach EN 55024 und EN 55022...
- Page 63 TV communications and to other electrical or electronic equipment. Such cables and connectors are available from Lenovo authorized dealers. Lenovo cannot accept responsibility for any interference caused by using other than...
-
Page 64: Appendix D. Specifications
Appendix D. Specifications Model Name: IdeaPad Z360 Note: The following specifications may contain technical inaccuracies or typographical errors. Lenovo reserves the right to improve and/or change specifications at any time without notice. Form Factor Size Weight System Memory Keyboard Integrated Camera... -
Page 65: Trademarks
Trademarks The following terms are trademarks or registered trademarks of Lenovo in the United States, other countries, or both. Lenovo IdeaPad OneKey VeriFace Microsoft and Windows are trademarks of Microsoft Corporation in the United States, other countries, or both. NVIDIA and Optimus are trademarks and/or registered trademarks of NVIDIA Corporation in the United States and other countries. -
Page 66: Index
Index AC adapter Using Battery Charging Bluetooth Connecting Camera Function key combinations Keyboard Using Lenovo Limited Warranty Meomory card reader Microphone Built-in Notice Electronic emissions NVIDA using OneKey Rescue system button Password Using Security SIM card Touchpad USB port VeriFace... - Page 67 For technical assistance, contact a Lenovo support specialist 24 hours a day by calling toll free 1-877-4 LENOVO (1-877-453-6686). Additionally, you can find support information and updates on the Lenovo Web site located at http://consumersupport.lenovo.com. * Only for the users from the United States.
- Page 68 New World. New Thinking. www.lenovo.com P/N: 147003276 Printed in China...
Need help?
Do you have a question about the IdeaPad Z360 and is the answer not in the manual?
Questions and answers