Table of Contents
Advertisement
Quick Links
Advertisement
Table of Contents

Related Manuals for Peugeot Motorcycles PM-03


Summary of Contents for Peugeot Motorcycles PM-03
- Page 1 PM-01 PM-03 Notice d'utilisation User's manual...
- Page 3 Owner’s manual...
-
Page 5: Table Of Contents
TABLE OF CONTENTS Inspection before setting off........18 Starting the engine............19 Information..............1 Driving.................19 Safety advice..............1 Braking systems............19 Characteristics..............2 Stopping the vehicle and parking......20 Vehicle identification............6 Running in the engine..........20 Products to use............6 Fuel supply..............20 Information about the instructions......6 Description of the vehicle..........8 Opening the fuel tank cap........ -
Page 7: Information
INFORMATION SAFETY ADVICE Parking in the sun: The reflection of the sun's rays on the windshield can, at certain times of the day, You have just bought a Peugeot vehicle. A inexperienced motorcyclist should make himself create a high temperature on the dashboard. This completely familiar with his vehicle before going out We would like to thank you for purchasing one of can lead to warping. To prevent this, do not park the... -
Page 8: Characteristics
CHARACTERISTICS PM-01 PM-03 125 cc 300 cc Official type-approval code Weight in kg Unladen weight In working order Authorised maximum. Total weight of the vehicle, the user, the passenger, the accessories and luggage. Dimensions in mm 2/30... - Page 9 PM-01 PM-03 125 cc 300 cc Official type-approval code Engine Identification PM154MI-4C PM178MN-A Engine type 4-stroke single-cylinder. 4-stroke single-cylinder. Overhead camshaft. 4 valves. Dual overhead camshaft. 4 valves. Cubic capacity 125 cc 300 cc Bore x stroke in mm 54 x 54.5 mm 78 x 61.2 mm Maximum power 11 kW at 9500 rpm 21.5 kW at 9000 rpm...
- Page 10 PM-01 PM-03 125 cc 300 cc Official type-approval code Capacities in litres Engine oil • Without oil filter replacement • With oil filter replacement Coolant Fuel tank 12.5 Fork oil 0.3 / per tube Tyre dimensions Front 110/70 - R17 Standard load index and speed rating...
- Page 11 PM-01 PM-03 125 cc 300 cc Official type-approval code Suspension Front Inverted telescopic fork Ø41 mm Travel: 125 mm Rear 1 combined adjustable spring hydraulic shock absorber Travel: 60 mm Brakes Front 1 Ø280 mm disk Rear 1 Ø240 mm disk Electrical equipment Headlights "Side light" bulbs Indicator bulbs Rear light Number plate light...
-
Page 12: Vehicle Identification
VEHICLE IDENTIFICATION INFORMATION ABOUT THE INSTRUCTIONS Products to use Specific information is indicated by the following Fuel Exclusively: symbols: Unleaded E5 or E10 Möbius band Recyclable. Means that the product or the package can be recycled. 4 stroke SAE 15W50 100% synthetic engine oil Minimum grade API SN/SM/SL JASO : Explosive MA2 T903 The product may explode upon contact with... - Page 13 Toxic or fatal The product can rapidly be fatal. It poisons rapidly, even at low doses. Wear protective equipment. Avoid any contact (oral, skin, inhalation) with the product and wash all exposed areas carefully after use. Harmful for the environment The product pollutes. It has a harmful effect (in the short and/or long term) on organisms in aquatic environments. ...
-
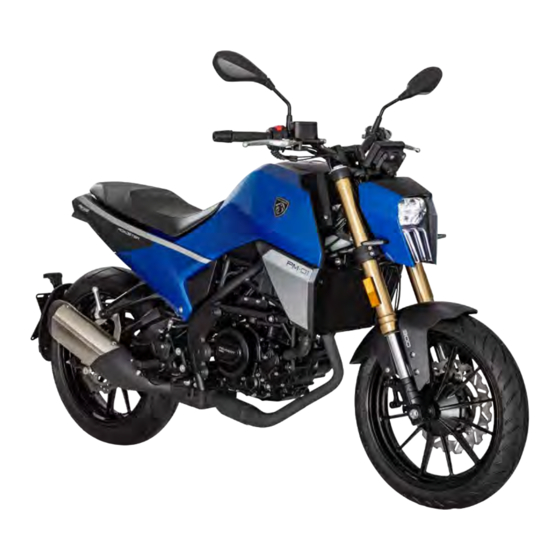
Page 14: Description Of The Vehicle
DESCRIPTION OF THE VEHICLE 1. Instrument panel. 2. Ignition switch. 3. Locking fuel filler flap. 4. Saddle lock. 5. Diabolos for paddock stand. 6. Passenger footrests. 7. Lateral stand. 8. Rider footrest. 9. Speed selector 10. Expansion tank / Coolant level. 11. Clutch lever. ... -
Page 15: Controls
CONTROLS Right controls 5. Indicator light switch. To indicate a change of direction, press the Left controls switch: • Either to the right. • Or to the left. To stop the indicators flashing, press the switch. 6. Horn switch. Press this button to sound the horn. 7. -
Page 16: Clutch Lever
Clutch lever Speed selector Front brake lever The clutch lever is found on the left handle of the The selector is located on the left side of the The brake lever is found on the right handle of the handlebar. To disengage the clutch, pull the lever motorcycle and is used together with the clutch lever handlebar. To activate the front brake, pull the lever towards the handle. To put into gear, release the... -
Page 17: Rear Brake Pedal
INSTRUMENTS Rear brake pedal 1 - Fuel gauge. The brake pedal is found on the right side of the Digital display The fuel gauge indicates the quantity motorcycle. Press the brake pedal to activate the There are two colour options for changing the colour of fuel available in the tank. ... -
Page 18: Indicator Lights And Warning Lights
Indicator lights and warning lights 3 - Clock. 9 - Engine temperature gauge. Setting the clock(See chapter: Settings and The warning lights inform the driver of the start-up custom menu page 14 ). A high temperature reading is of a system or appearance of a malfunction. indicated by a red warning light (t). ... -
Page 19: Description Of The Indicators
DESCRIPTION OF THE INDICATORS Indicator Status Cause Actions / Observations Left indicators Flashing The indicator control is activated to the left. If the warning light flashes quickly, there is a fault in the direction indicators. Right indicators Flashing The indicator control is activated to the If the warning light flashes quickly, there is a fault in the direction right. ... -
Page 20: Settings And Custom Menu
SETTINGS AND CUSTOM MENU Menu Button action Sub-menu Comments ENTER < 1s TRIP Daily counter reset. • TRIP1 • TRIP2 • EXIT Clock • Hours/Minutes/12/24 • Set by pressing briefly on the "SELECT" button. (CLOCK) • Press "ENTER" briefly to switch between hours and minutes. •... -
Page 21: Smartphone Connection
SMARTPHONE CONNECTION KEY-OPERATED IGNITION SWITCH 2. Activate the Bluetooth function on your FUNCTIONS smartphone. Selecting the mobile operating system 3. Select the name of the system from the list of A. Engine off position. devices detected. 1. Turn on the ignition. The engine is off. Power to the electrical circuit is 2. ... -
Page 22: Equipments
EQUIPMENTS Lateral stand The lateral kickstand is fitted with an ingition cut-out Accessory socket (USB) which prevents the engine from being started while Installed at handlebar level, an accessories the stand is down. socket, which is powered when the ignition is This system reminds the driver to lift the stand switched on, enables you to connect portable before starting the engine (See... -
Page 23: Damper Preload Setting
CHECKS TO PERFORM BEFORE USE Damper preload setting Removal of the saddle The vehicle is delivered from the factory with the The saddle can be removed to access: The user must personally ensure that his vehicle is in good condition. Certain safety elements may suspension set for one person only. ... -
Page 24: Advice For Starting Up And Driving
ADVICE FOR STARTING UP AND DRIVING Driving on flooded roads Inspection before setting off Component Checks Warning You are strongly advised not to drive on flooded roads as this may seriously damage Fuel • Check the fuel level in the tank. Before using the vehicle for the first time, make the engine, transmission and electrical sure you are familiar with all the controls and... -
Page 25: Starting The Engine
Driving Component Checks Starting off Lighting, • Check operation. signalling, After having started up the engine: • Correct if necessary. indicators, • To declutch, pull the left clutch lever towards the horn handlebar. • Engage first gear by pushing the gear selector Starting the engine downwards with your left foot. ... -
Page 26: Stopping The Vehicle And Parking
From 0 to1000 km: Opening the fuel tank cap The ABS system is not active when the Do not hold the throttle handle open at more than vehicle speed is less than or equal to • Lift the lock cover of the tank cap. approximately 5 km/h. ... -
Page 27: Filling
SERVICE OPERATIONS Filling Do not use high pressure cleaners which may cause water to infiltrate • Insert the petrol pump nozzle into the filling Maintenance advice the following parts: seals, bearings and orifice. Make sure the nozzle is correctly inserted hinges, electrical components such as into the filling pipe. ... -
Page 28: Checking The Engine Oil Level
• Measure the electrode gap (A) and correct it if sump. necessary. PM-03 • Check the coolant level through the oil-contect window. It is essential to use a resistive spark • The oil level shall be between the minimum and suppressor and a resistive spark plug maximum level marks without exceeding the... -
Page 29: Changing The Engine Oil
PM-01 PM-03 Too much oil will noticeably restrict the vehicle's performance. • Place the vehicle on a level surface. • Place the vehicle on a level surface. • Hold the vehicle so that it is upright (Use a • Hold the vehicle so that it is upright (Use a Changing the engine oil paddock stand). ... -
Page 30: Replacing The Oil Filter
Replacing the oil filter PM-03 We advise you to go to a registered dealer for draining. Oil contains substances which are harmful to the environment. Your dealer is equipped to dispose of used oil without endangering the environment and in compliance with current standards. ... -
Page 31: Replacing The Air Filter
Replacing the air filter Secondary transmission • Remove the saddle. • Regularly check the tension and lubrication of the transmission. • Remove the air intake retaining legs (1). • Clean and grease the drive belt every 500 km. • Check regularly for transmission component wear. •... - Page 32 1. Rear wheel spindle. 2. Locknut. 3. Setting nut. 4. Chain tensioner / Centring graduations. An over-tensioned chain leads to premature wear of the gearbox output shaft bearing, the rear wheel bearings, the chain and the sprockets. 26/30...
-
Page 33: Throttle Grip
Throttle grip • Adjust the lever grip using the adjustment wheel. If the wear limit on the tread is reached ((A)), you are advised to go to a registered dealer to change the Regularly check the throttle grip, and adjust it if tyres. ... -
Page 34: Battery
Front brake pads If the level is close to the minimum mark, A. Wear indicators Rear brake pads you are advised to take the vehicle to an approved dealer to have the brake system Brake fluid checked, or topped up as needed. The brake fluid levels must be checked regularly through the braking unit inspection window (C). ... - Page 35 • Remove the retention strap. A battery produces explosive gases. To avoid any risk of destruction of an electrical component, you are strongly • Disconnect the negative terminal of the battery (1). Keep the battery away from sparks, flames, advised not to use a booster charger to cigarettes, etc.
-
Page 36: Adjusting The Headlight Beam
ADJUSTING THE HEADLIGHT BEAM FUSES Fuse allocation The headlight beam is adjusted using a screw on the The electrical installation is protected by fuses F1 30A Battery positive power right side of the vehicle. located under the saddle (fuses from F2 to F7). F2 15A General supply Fuse F1: The supply and battery fuse is located F3 15A... - Page 37 Peugeot Motocycles recommends Peugeot Motocycles SA Rue du 17 Novembre F-25350 Mandeure Tél. +33(0)3 81 36 80 00 Fax +33(0)3 81 36 80 80 RCS Belfort B 875 550 667 www.peugeot-motocycles.fr www.peugeot-motocycles.com ISO 9001 (Édition 2015) / N°SQ/1956 0 800 007 216 Dans un souci constant d’amélioration Peugeot Motocycles se réserve le droit de supprimer, modifier ou ajouter toutes références citées.
- Page 38 11.805699.00 09/23.v2 Guide d’utilisation en ligne Online user’s guide Crédits photo : Photographe Benjamin Dauchez...
Need help?
Do you have a question about the PM-03 and is the answer not in the manual?
Questions and answers