Table of Contents
Advertisement
Quick Links
Advertisement
Table of Contents

Related Manuals for Peugeot Motorcycles XP400 2023


Summary of Contents for Peugeot Motorcycles XP400 2023
- Page 1 XP400 Notice d'utilisation User's manual...
- Page 3 Owner’s manual...
-
Page 5: Table Of Contents
TABLE OF CONTENTS Luggage carrier............31 Accessory socket (USB)..........31 Information..............1 Lateral stand...............31 Safety advice..............1 Damper preload setting..........32 Characteristics..............2 Checks to perform before use........33 Vehicle identification............6 Advice for starting up and driving......33 Products to use............6 Warning..............33 Information about the instructions...... -
Page 7: Information
INFORMATION SAFETY ADVICE Parking in the sun: The reflection of the sun's rays on the windshield can, at certain times of the day, You have just bought a Peugeot vehicle. A inexperienced motorcyclist should make himself create a high temperature on the dashboard. This completely familiar with his vehicle before going out We would like to thank you for purchasing one of can lead to warping. To prevent this, do not park the... -
Page 8: Characteristics
CHARACTERISTICS XP 400 Official type-approval code Dimensions in mm Low windshield / Tall windshield (*Optional) Weight in kg Unladen weight. In working order. Authorised maximum. Total weight of the vehicle, the user, the passenger, the accessories and luggage. 2/44... - Page 9 XP 400 Official type-approval code Engine Identification. Engine type. 4-stroke single-cylinder. Cubic capacity. 400 cc Bore x stroke in mm. 84 x 72 mm Maximum power. 26.5 kW at 8150 rpm Maximum torque. 38.1 Nm at 5400 rpm Cooling. Fluid cooling system Fuel supply. Indirect electronic injection Spark plug. NGK CPR8EB-9 Lubrication. ...
- Page 10 XP 400 Official type-approval code Capacities in litres Engine oil. • Without oil filter replacement • With oil filter replacement Relay box oil 0.25 Coolant Fuel tank 13.5 Fork oil 490 / per tube Tyre dimensions Front. 110/70 - 17 Minimum load index and speed rating Rear. ...
- Page 11 XP 400 Official type-approval code Suspension Front. 41 mm Ø telescopic front fork Travel: 140 mm Rear. 1 combined adjustable spring hydraulic shock absorber. Travel: 60 mm Brakes Front. 2 floating discs Ø295 mm Rear. 1 Ø240 mm disk Electrical equipment Headlights. "Side light" bulbs. Indicator bulbs. Rear light. Number plate light. Battery. ...
-
Page 12: Vehicle Identification
VEHICLE IDENTIFICATION Products to use Fuel Exclusively: Unleaded E5 or E10 4 stroke SAE 5W40 100% synthetic engine oil Minimum grade API SL Relay box SAE 80W90 API GL4 Fork oil Hydraulic oil. SAE10W Grease High-temperature grease Multi-use grease A. Manufacturer's plate. Brake fluid Brake fluid DOT 5.1 B. Vehicle identification number (V.I.N.). Coolant Coolant: Motul type C C. -
Page 13: Information About The Instructions
INFORMATION ABOUT THE INSTRUCTIONS It poisons rapidly, even at low doses. Wear protective equipment. Specific information is indicated by the following Avoid any contact (oral, skin, inhalation) symbols: with the product and wash all exposed Möbius band areas carefully after use. Recyclable. ... -
Page 14: Description Of The Vehicle
DESCRIPTION OF THE VEHICLE Instrument panel Light button 1 Instrument panel "SELECT" control 2 Brake fluid level Right brake lever 3 Left brake lever Throttle 4 Locking fuel filler flap Hazard warning light switch 5 Storage compartment Starter switch / Emergency stop button 6 Rider saddle / Storage compartment smart key key 7 Passenger backseat / Storage... -
Page 15: Controls
CONTROLS Left controls 3. Hazard warning light switch. The hazard lights can be switched on by moving Right controls the switch to the "ON" position. The hazard warning lights are switched off automatically 1 hour after the ignition was switched off, to preserve the battery. •... - Page 16 7. Indicators switch. To indicate a change of direction, press the switch: • Either to the right. • Or to the left. To stop the indicators flashing, press the switch. 8. Horn switch. 10/44...
-
Page 17: Instruments
INSTRUMENTS For further information concerning the indicator The presence of mist on the inside of the lights, please consult the table in the relevant instrument panel is normal. It disappears a section. few minutes after the lights are switched on. Warning lights The warning lights inform the driver of the start-up of a system or appearance of a malfunction. ... -
Page 18: Description Of The Indicators
Description of the indicators Indicator Status Cause Actions / Observations Left indicators Flashing The indicator control is activated to the If the warning light flashes quickly, there is a fault in the direction indicators. left. Right indicators Flashing The indicator control is activated to the If the warning light flashes quickly, there is a fault in the direction indicators. ... -
Page 19: Digital Display
DIGITAL DISPLAY 3 - Fuel gauge. 6 - Engine lubrication warning light. The fuel gauge indicates When the engine is running, the warning You can change the appearance of the handset by the quantity of fuel light is indicative of a failure of the engine selecting: ... -
Page 20: Personalisation - Configuration" Menu
"Personalisation - Configuration" menu 11 - Autonomy indicator. • The number of kilometres can be This menu can be used to access the following calculated from the remaining fuel in the settings: tank (depending on the average consumption • Instrument panel personalisation. of last kilometres travelled). ... - Page 21 The functions which can be accessed via the configuration menu are described in detail in the table below. Menu Button action Sub-menu Comments EXIT > 2S SELECT > 2S +Validation TRIP SELECT Daily counter reset. • Trip reset • Quick procedure: Reset the tripmeter by pressing the "SELECT" and "OK" buttons simultaneously for 3 seconds. ...
- Page 22 Menu Button action Sub-menu Comments EXIT > 2S SELECT > 2S +Validation Language SELECT Language selection. • Français • English • Deutsch • Español • Italiano EXIT Setting Maintenance indicator reset. • Maintenance • Reset Choice of maintenance interval (Consult the maintenance manual). •...
- Page 23 Menu Button action Sub-menu Comments EXIT > 2S SELECT > 2S +Validation Preference SELECT Measurement unit selection: • Units • Metric If the distance unit is kilometres, the outside temperature is displayed in °C. The • Imperial autonomy indicator is in L/100 km. If the distance unit is miles, the outside temperature is displayed in °F. The autonomy indicator is in MPG. ...
-
Page 24: Connectivity" Menu (I-Connect)
"CONNECTIVITY" MENU (I-CONNECT) The functions which can be accessed via the connectivity menu are set out in the table below. Download the PEUGEOT MOTOCYCLES app Menu Comments from the store corresponding to your Bluetooth function activation/ Bluetooth ® smartphone. deactivation. This menu accesses the following functions: Call Incoming calls display activation/ ®... -
Page 25: Pair A Bluetooth ® Telephone
Digital display Pair a Bluetooth ® telephone Overview of the digital display with all of the For safety reasons and because the functions activated. driver's full attention is required, using a smartphone while driving is prohibited. Enable mobile Internet data on your smartphone (or wifi). ... -
Page 26: Mobile App
MOBILE APP The app is available in 5 languages: Forgotten password French / English / Deutsch / Italian / Español. To recover their password, the Telephones (models, operating system The native language of the user must first enter their versions) each have their own specific telephone is used when the email address and then click on features which may affect the pairing app is installed. ... -
Page 27: Pair A Bluetooth ® Telephone
Pair a Bluetooth ® telephone 5. From the Settings tab, press "Scooters" and then If download fails, check (impossible to enter "ADD A NEW SCOOTER". the pairing code, etc.): Telephones (models, operating system - Shut down versions) each have their own specific the PEUGEOT MOTOCYCLES app features which may affect the pairing completely (check it is not running in the process. ... -
Page 28: Homepage
Homepage Profile All the fields except for the "Email" field can be modified. 1. Profile access The home address and work address 2. Vehicle information reminder information is duplicated in the navigation 3. Tripmeter / Maintenance / Position of the vehicle. tab. 4. Button to save vehicle position. 22/44... -
Page 29: Navigation" Page
"NAVIGATION" page Preview of the trip By pressing on the icon (A) you can change or adapt the navigation options as needed. • When choosing to start navigation, the app checks • Map supplier: HERE MAPS if the vehicle has sufficient autonomy to complete •... -
Page 30: Dashboard" Page
"DASHBOARD" page 2. TRIP tab. 3. DIAG tab. Information concerning: Non-functional tab / Under development. 1. LIVE tab. • The journey distance. Information in real time concerning: • The tripmeter. • Vehicle speed. • The fuel level. • The engine speed. • The autonomy. • The outdoor temperature. •... -
Page 31: Settings" Page
"Settings" page 1. List of scooters linked to the account. • When adding a new vehicle to the app, you have to go through the app and enter the • Possibility to manage the vehicle in the list as 1. Scooters. pairing code indicated by the instrument panel. ... - Page 32 2. Instrument panel configuration 3. Mapping When the app is launched for the first Possibility to install or uninstall the desired • Changing the parameters from the app is time, there is a shortcut to get to this region to navigate in the region of your choice. performed in real time on the instrument page in the homepage under the photo panel (When the connection is active). ...
-
Page 33: Smart Key Key, Rotating Knob And Openings
SMART KEY KEY, ROTATING KNOB AND B. On/start position. To avoid any risk of accident of theft, never OPENINGS leave the smart key key near the vehicle or Power to the electrical circuit is on. The engine in one of the storage compartments. can be started. SMART KEY key Electrical disturbances With the ignition on, the circuit is... -
Page 34: No Smart Key Recognition
No SMART KEY recognition Changing the battery If the battery is worn out, the lighted surround on Possible causes of non-recognition: the rotating knob flashes slowly when the ignition is • Low battery or incorrectly positioned. switched on. • Radio disturbance. • Damaged smart key. You are advised to change the battery every 2 years. ... -
Page 35: Openings
Openings Opening the front storage compartment Do not store items that are too bulky in the compartment, as you risk damaging the With the smart key present, press on the saddle Opening the fuel flap items or the seat and its hinge. opening button for 1 second. ... -
Page 36: Equipments
EQUIPMENTS • Fit the handle. • First tighten the screws on the uppermost part of the flanges (H) (Tightening torque: 25 Nm). • Fit the upper flanges (The upper flanges must also Adjusting the handlebar be turned 180° to match the brackets). • Then tighten the other screws (Tightening The handlebar can be adjusted in 2 ways: ... -
Page 37: Adjusting The Brake Lever Position
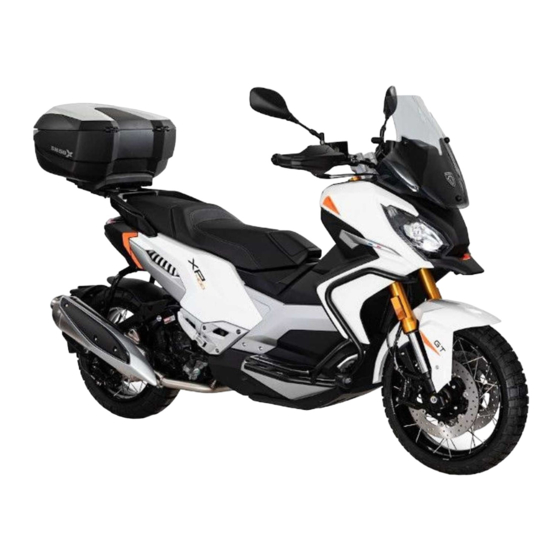
Adjusting the brake lever position Luggage carrier Accessory socket (USB) The brake levers are equipped with a position An accessories socket placed in the rear storage The rear luggage carrier can bear a adjustment knob. compartment and powered when the ignition is maximum load of 7 kg. ... -
Page 38: Damper Preload Setting
Damper preload setting The vehicle is delivered from the factory with the suspension set for one person only. The damper preload setting can be modified according to the vehicle load. You are advised to take the vehicle to an approved dealer, who has the necessary tools to adjust the damper. ... -
Page 39: Checks To Perform Before Use
CHECKS TO PERFORM BEFORE USE ADVICE FOR STARTING UP AND DRIVING Driving on flooded roads The user must personally ensure that his vehicle Warning You are strongly advised not to drive on is in good condition. Certain safety elements may flooded roads as this may seriously damage Before using the vehicle for the first time, make show signs of damage even when the vehicle is the engine, transmission and electrical... -
Page 40: Inspection Before Setting Off
Inspection before setting off Starting the engine • Squeeze the brake lever with your left hand, grip the grab handle with your right hand and push the Component Checks In certain conditions, the smart key key vehicle forwards to fold up the central stand. Fuel may not function if the vehicle is located in •... -
Page 41: Switching Off The Engine And Parking
Use of the brakes Any fuel containing up to 10% ethanol can be During the running-in period, you are advised not to used (E5, E10). overload the engine and to avoid exceeding a higher • Close the throttle. than normal operating temperature. An ethanol content of more than 10% by volume is •... -
Page 42: Service Operations
SERVICE OPERATIONS Cleaning the vehicle The engine must be cold. • Remove the left footboard. The bodywork is made of plastic parts that Maintenance advice can be painted or are shiny. Do not use A table of maintenance plan checks is included in the solvents or cleaning products that are too welcome and maintenance booklet;... -
Page 43: Checking The Engine Oil Level
• Measure the electrode gap (A) and correct it if • To correctly measure the oil level, place the vehicle • If the oil level is close to the minimum mark necessary. on the centre stand on flat ground. or lower, you are advised to immediately top up the level to 3/4 in small amounts using the oil •... -
Page 44: Replacing The Oil Filter
The engine must be drained when it is warm to Replacing the oil filter The coolant level must be checked when the allow the oil to run easier. engine is cold. We advise you to go to a registered dealer •... -
Page 45: Replacing The Air Filter
Adjust the level as follows if it is equal to or less Throttle cable play We recommend that you take the vehicle to than the minimum level marked: an approved dealer to replace the coolant. Throttle play must be between 3 and 5 mm at the •... -
Page 46: Spoked Wheels
Inspecting the tyres The wheel must be balanced after replacing Rear brake pad wear a tyre. If the wear limit on the tread is reached (U), you are After replacing a tyre, avoid driving at high advised to go to a registered dealer to change the speeds until the tyre is broken in. ... -
Page 47: Battery
dealer as soon as possible to check the If the vehicle is not used for a period of 1 month or Removal of the battery brake system and refill it if necessary. longer, the battery charge must be preserved. To prevent any risk of short circuit when •... -
Page 48: Adjusting The Headlight Beam
ADJUSTING THE HEADLIGHT BEAM FUSES Installing the battery • Fit the battery into its housing. The headlights are adjusted using one setting screw The electrical system is protected by fuses placed per headlight. near the battery. Connect the batter in the following order: •... -
Page 49: Fuse Allocation
Fuse allocation F1 10A OBD socket F2 3A Instrument panel F3 30A Battery charge circuit F4 30A F5 10A Rotating knob Smart Key F6 3A Connectivity F7 5A Injection system Starter motor relay Ignition F8 10A Lighting Direction indicators F9 20A Various equipment If a fuse often blows this is usually a sign of a short F10 10A... - Page 50 44/44...
- Page 51 Peugeot Motocycles recommends Peugeot Motocycles SA Rue du 17 Novembre F-25350 Mandeure Tél. +33(0)3 81 36 80 00 Fax +33(0)3 81 36 80 80 RCS Belfort B 875 550 667 www.peugeot-motocycles.fr www.peugeot-motocycles.com ISO 9001 (Édition 2008) / N°SQ/1956 0 800 007 216 Dans un souci constant d’amélioration Peugeot Motocycles se réserve le droit de supprimer, modifier ou ajouter toutes références citées.
- Page 52 11.805124.00 02/23 v1 Guide d’utilisation en ligne i-Connect® : application Peugeot Motocycles disponible sur Online user’s guide i-Connect® : Peugeot Motocycles app available on Crédits photo : Photographe Jean-François Muguet / Agence : 87seconds...
Need help?
Do you have a question about the XP400 2023 and is the answer not in the manual?
Questions and answers