RADEMACHER RolloTube CLIS Translation Of The Original Operating And Assembly Manual
Tubular motors
Source: rademacher.de
Table of Contents
Advertisement
Quick Links
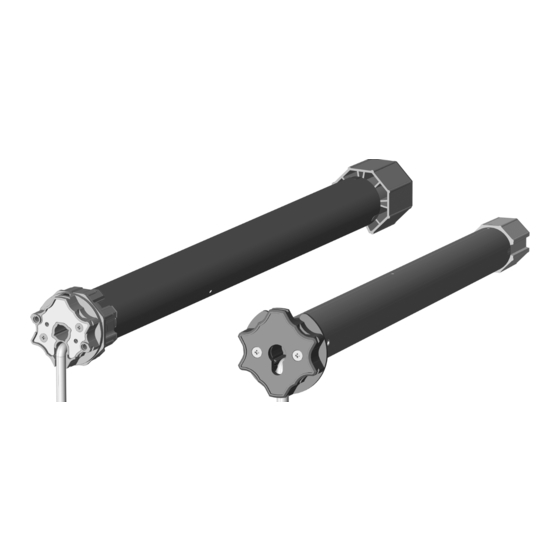
RolloTube C-line Tubular Motors
EN
Translation of the Original Operating and Assembly Manual
Applicable for the following series: RolloTube C-line Small (CLIS) /Medium (CLIM)
Item numbers: 2240 06 56 / 2240 10 56 / 2260 10 56 / 2260 20 56 / 2260 30 56 / 2260 40 56 / 2260 50 56
Please note:
Site of installation:
..................................................................................................................
Serial number:
..................................................................................................................
VBD 671-02 (01.23)
Advertisement
Table of Contents

Subscribe to Our Youtube Channel
Related Manuals for RADEMACHER RolloTube CLIS


Summary of Contents for RADEMACHER RolloTube CLIS
- Page 1 RolloTube C-line Tubular Motors Translation of the Original Operating and Assembly Manual Applicable for the following series: RolloTube C-line Small (CLIS) /Medium (CLIM) Item numbers: 2240 06 56 / 2240 10 56 / 2260 10 56 / 2260 20 56 / 2260 30 56 / 2260 40 56 / 2260 50 56 Please note: Site of installation: ........................
-
Page 2: Table Of Contents
13. Technical specifications ......25 Determining the length of the winding shaft (5) ........11 14. Configuration of KNX/EIB Venetian blind Mounting / dismantling the actuators for RADEMACHER tubular adapter (10)..........12 motors ............25 Mounting /dismantling the drive 15. Simplified EU declaration of adapter (8) ............12... -
Page 3: This Manual
1. This manual... ◆ ...serves to describe the installation, electrical ◆ When passing the tubular motor on to any connection and operation of RADEMACHER future owners, this manual must be passed on tubular motors of the RolloTube C-line Small as well. -
Page 4: Safety Instructions
3. Safety instructions Risk of fatal electric shock when Incorrect use leads to an increased risk of injury. touching electrical components. ◆ Train all personnel to safely use the tubular motor. ◆ The electrical connection for the tubular motor ◆ Do not allow children to play with the fixed and all work on the electrical systems may only be controllers and keep remote controls away from undertaken by an authorised qualified electrician... -
Page 5: Intended Use / Operational Conditions
◆ Consult a specialist dealer when selecting a tubular motor and observe the corresponding tractive force specifications on our website: www.rademacher.de 3.2 Improper use Using the RolloTube C-line for purposes other than Never use the tubular motor in continuous opera- previously mentioned is impermissible. -
Page 6: Glossary - Definition
Roller shutter box The tubular motor is installed in an existing or retrofitted roller shutter box above the window. Cord-switch setting unit RADEMACHER accessory for the specialist roller shutter firm to set the end points. -
Page 7: Scope Of Delivery For Rollotube C-Line Small/Medium
4. Scope of delivery for RolloTube C-line Small/Medium Included in delivery RolloTube C-line Small Medium Tubular motor, including connecting cable (2,5 m) Adapter Drive adapter, incl. retaining clip Click universal drive bearing Click ready box support Please note: Customer-specific scope of delivery After unpacking please check the following: Check that the package contents matches the scope of delivery listed on the package. -
Page 8: General View Of The Rollotube C-Line For Small/Medium
(14) Motor cable (15) Controller (z.B. Troll Comfort) * (16) Roller shutter (17) The necessary accessories and all tubular motor controllers for this type of tubular motor incl. the technical information and manuals can be found on our website. www.rademacher.de... -
Page 9: Functional Description
6. Functional description The RADEMACHER RolloTube C-line series of tubular Overview of functions: motors are designed for opening and closing roller ◆ Self-learning mode with a soft stop at both end shutters and awnings. positions, see page 21. The RolloTube C-line tubular motors are self-learning ◆... -
Page 10: Important Assembly Instructions
7.1 Installation of the tubular motor The following installation instructions apply to Required minimum width for the roller shutter standard installation situations in combination with box: RADEMACHER tubular motors and accessories. The drive head (12) of the motor can be installed Tubular motor Small Medium... -
Page 11: Mounting The Bearings
7.2 Mounting the bearings First determine the position of the drive (13) and ATTENTION! counter bearing (1) in the roller shutter box. A roller shutter wound at an angle can block the Wind the roller shutter casing fully onto the winding drive and cause damage. -
Page 12: Mounting / Dismantling The
7.4 Mounting / dismantling the adapter (10) Mounting the adapter (10) Slide the adapter (10) over the magnetic ring (18) on the drive head until it engages. In doing so, check the correct positioning of the groove in the adapter (18) (10) (original factory settings). -
Page 13: Sliding The Tubular Motor (9) Into The Winding Shaft
7.6 Sliding the tubular motor (9) into the winding shaft ATTENTION! Inserting the tubular motor (9) forcibly into the winding shaft (5) will cause serious damage. ◆ Never knock the tubular motor (9) with force into the winding shaft (5). First slide the drive adapter (8) into the winding shaft (5). - Page 14 7.7 Preparation for use of the precision tubes Saw a groove in the end of the precision tube 1 RolloTube C-line Small in order that the cam of the adapter (10) can be completely pressed into the tube. ◆...
-
Page 15: Mounting The Roller Capsule (4)
7.8 Mounting the roller capsule (4) Slide the roller capsule (4) into the winding shaft (5) and subsequently place the ball bearing (2) onto the axle pin (3) of the roller capsule. 7.9 Mounting the motor into the bearing 7.9.1 Mounting into the drive bearing as a click bearing (13) Press the drive head (12) lightly into the click bear- ing (13) until it engages. -
Page 16: Mounting Into The Counter Bearing (1)
(2) into the counter bearing (1). In the event that you are using a different bearing than the RADEMACHER click bearing (13), you may need to secure the drive with a secondary cotter pin. Correct any slight inaccuracies in size by means of sliding the roller capsule (4) in or out. - Page 17 7.10 Mounting the roller shutter (17) Mount the shaft connectors (6) at the winding shaft (5). In order to do so, follow the information provided in the operating manual for shaft connectors. Slide the retainer profile for each shaft connector (6) onto the uppermost slat of the roller shutter (17).
-
Page 18: Safety Information Regarding The Electrical Connection
8. Safety information regarding the electrical connection DANGER! WARNING! WARNING! Risk of fatal electric shock when Risk of short-circuit resulting from damaged touching electrical components. cable. ◆ Carry out all installation and connection work only ◆ Lay all cables in the roller shutter box so that they in an isolated, de-energised state. -
Page 19: Electrical Connection Of The Tubular Motor
This avoids the motor experiencing sources of interference or excess voltages. 8.2.2 Parallel connection of several motors It is possible to connect numerous RADEMACHER Installation example tubular motors in parallel. The number of motors to be connected in parallel is dependent on the capacity of the switchgear and circuit-breakers. -
Page 20: Connection Of The Universal Setting Cable For Manual End Point Setting
8.3 Connection of the universal setting cable for manual end point setting Open the terminal contacts by pressing the plung- (21) ers and connect all of the wires of the motor cable (15) with the same colours and corresponding to their functions, see also figure [ 23 ]. -
Page 21: Self-Learning Mode With Soft Stop
9. Self-learning mode with soft stop The RolloTube C-line is delivered from the factory Switch on the mains power supply. in self-learning mode with a soft stop and can be The RolloTube C-line is ready for operation imme- put into operation immediately after the electrical diately. - Page 22 10. Manual adjustment of end points With the set button on the With the universal With the cord-switch tubular motor setting unit setting cable Move the roller shut- Direction Direction of travel 1 of travel 1 ters in the desired direction.
-
Page 23: Test Run / Modifying The End Points
10.1 Test run / modifying the end points Check the direction of travel of the motor. Switch ATTENTION! the lines for the direction of rotation if required, see The tubular motors are designed for transient connection diagram [ 24 ] on page 19. operation (approx. -
Page 24: What To Do If
12. What to do if... ? ...the motor fails to start? ...The roller shutter stops during upward or downward travel? Possible cause: Possible cause: ◆ The mains voltage is not available. ◆ Iced-up/jammed roller shutter or obstacle on Solution: the guide rail. ◆... -
Page 25: Technical Specifications
RADEMACHER tubular motors in order to ensure trouble-free operation of If transient operation cannot be deactivated RADEMACHER tubular motors with KNX/EIB from within the software application... Venetian blind actuators, the following parameters ...then you must ensure that the time between... -
Page 26: Simplified Eu Declaration Of Conformity
15. Simplified EU declaration of conformity RADEMACHER Geräte-Elektronik GmbH hereby de- The full text of the EU declaration of conformity is clares that the tubular motors in the RolloTube C-line included with the product and is kept on file by the Small and Medium series comply with the Directives manufacturer. - Page 28 RADEMACHER Geräte-Elektronik GmbH Buschkamp 7 46414 Rhede (Germany)
Need help?
Do you have a question about the RolloTube CLIS and is the answer not in the manual?
Questions and answers