GE SmartWater GXWH35F Installation Instructions Manual
Heavy-duty water filtration system
Hide thumbs
Also See for SmartWater GXWH35F:
- Specification (2 pages) ,
- Installation instructions manual (13 pages)
Table of Contents
Advertisement
Available languages
Available languages
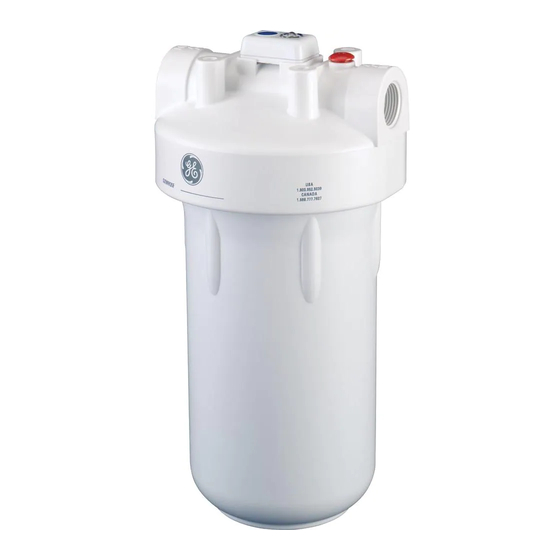
Heavy-Duty Water Filtration System—GXWH35F (filters not included)
■
Check with your state and local public works department for
plumbing and sanitation codes. You must follow these guidelines
as you install the Heavy-Duty Water Filtration System. Using a
qualified installer is recommended.
■
Be sure the water supply conforms with the Performance Data.
If the water supply conditions are unknown, contact your
municipal water company.
This Heavy-Duty Water Filtration System must be properly installed and located in accordance with the Installation Instructions
before it is used.
■
Check with your local public works department for plumbing codes.
You must follow their guides as you install the Heavy-Duty Water
Filtration System.
■
Use the Heavy-Duty Water Filtration System on a potable, safe-to-
drink, home COLD water supply only. The filter cartridge will not
purify water or make unsafe water safe to drink. DO NOT use on HOT
water (100
F max).
°
■
Protect the Heavy-Duty Water Filtration System and piping from
freezing. Water freezing in the system will damage it.
■
Your Heavy-Duty Water Filtration System will withstand up to 100 psi
water pressure. If your house water supply pressure is higher than
100 psi during the day (it may reach higher levels at night), install
a pressure-reducing valve before the system is installed.
REQUIRED TOOLS AND ACCESSORIES
FOR INSTALLATION
■ 2 Adjustable wrenches
■ Pipe cutter
■ Ruler or tape measure
■ Cordless drill
■ File
■ Emery paper
■ Screwdriver
■ Additional installation parts may be required:
• 2 fittings to connect household plumbing to 1" female NPTF
threads on filter housing.
• UL-approved grounding clamps and 6-gauge copper
grounding wire.
• Teflon tape
GE SmartWater
INSTALLATION INSTRUCTIONS
SAFETY PRECAUTIONS
PROPER INSTALLATION
184D1061P002
GENERAL ELECTRIC COMPANY, Appliance Park, Louisville, KY 40225
™
WARNING:
microbiologically unsafe or of unknown quality without adequate
disinfection before or after the system.
■
It is highly recommended that a water shut-off valve be placed
directly upstream of your household filter.
■
Do not install on HOT WATER. The temperature of the water
supply to the Heavy-Duty Water Filtration System must be
between the minimum of 40°F. and the maximum of 100°F.
See the Performance Data section.
■
Do not install the Heavy-Duty Water Filtration System using
copper solder fittings. The heat from the soldering process
will damage the unit.
WARNING:
material after installation. Small parts remaining after installation
could be a choke hazard.
■
Do not install filter in an outside location or anywhere it will be
exposed to sunlight.
Optional accessories are available (Visa, MasterCard or Discover cards
accepted) by visiting our Website at GEAppliances.com or from Parts and
Accessories, call 800.626.2002 (U.S.) or 800.663.6060 (Canada).
CONTENTS INCLUDED WITH PRODUCT
■ Filter housing and head
■ Product literature
■ Canister wrench
■ Timer and batteries
■ Mounting bracket
■ 4 Hex-head screws and 4 Hex washer-head screws
GXWH35F is Tested and Certified by NSF International
against NSF/ANSI Standard 42 with cartridge FXHTC
for the reduction of Chlorine, Taste and Odor.
49-50201-5
(06--09 JR)
GEAppliances.com
1
Do not use with water that is
Discard all unused parts and packaging
Advertisement
Table of Contents

Related Manuals for GE SmartWater GXWH35F


Summary of Contents for GE SmartWater GXWH35F
-
Page 1: Safety Precautions
• UL-approved grounding clamps and 6-gauge copper grounding wire. • Teflon tape GENERAL ELECTRIC COMPANY, Appliance Park, Louisville, KY 40225 GE SmartWater INSTALLATION INSTRUCTIONS SAFETY PRECAUTIONS WARNING: microbiologically unsafe or of unknown quality without adequate disinfection before or after the system. -
Page 2: Cartridge Specifications
Do not use harsh cleaners or hot water. Inspect the filter canister O-ring. Make sure it is lightly lubricated with clean food-grade silicone grease (silicone grease is available through GE Parts and Service: 1.800.626.2002, part number WS60S10005). Be sure the O-ring is seated in the groove. -
Page 3: Select Location
Select Location Select a location for the filter that is: ■ protected from freezing. Cut Water Line WARNING: A copper or galvanized cold water pipe may be used to ground electrical outlets in the home. Failure to maintain this ground path may result in an electric shock hazard. If the cold water pipe is used to ground electrical outlets, please refer to the Installing the Ground Wire section before cutting the pipe. -
Page 4: Timer Installation And Reset Instructions
Timer Installation and Reset Instructions Blue reset button Timer battery installation and change Insert coin or screwdriver in the slot between timer Timer cap cap and base. Gently pry them open and separate timer base from cap. Install or change 2 new AAA 2 AAA batteries 1.5-volt batteries. -
Page 5: Instructions D'installation
• Attaches de mise à la masse homologuées UL et fil de mise à la masse en cuivre de calibre 6. • Ruban en Téflon GENERAL ELECTRIC COMPANY, Appliance Park, Louisville, KY 40225 GE SmartWater INSTRUCTIONS D’INSTALLATION MESURES DE SÉCURITÉ AVERTISSEMENT : de l’eau microbiologiquement polluée ou de qualité... -
Page 6: Spécifications De Cartouche
(vous trouverez la graisse de silicone au service de pièces et d’entretien GE, en téléphonant au 1.800.626.2002, numéro de pièce WS60S10005). Assurez-vous que le joint torique repose bien dans le sillon. Remplacer le joint torique s’il est endommagé. -
Page 7: Installation Du Filtre
à la terre des prises électriques de la maison. Cette mise à la masse vous protège contre les chocs électriques et cette liaison à la terre peut voir été neutralisée par le logement du filtre d’eau. Pour rétablir la connexion, montez un fil en cuivre de 18 po et de calibre 6 le long du... -
Page 8: Liste Des Pièces
Installation de la minuterie et instructions de réglage Installation et remplacement de la pile de la minuterie Bouton bleu de remise à zéro Insérez une pièce ou un tournevis entre le capuchon Capuchon de de minuterie et sa base. Ouvrez doucement en faisant la minuterie levier et séparez la base de la minuterie de son 2 piles AAA... -
Page 9: Instrucciones De Instalacion
• Abrazaderas de toma de tierra aprobadas por UL y cable de toma de tierra de cobre calibre 6. • Cinta de teflón GENERAL ELECTRIC COMPANY, Appliance Park, Louisville, KY 40225 GE SmartWater PRECAUCIONES DE SEGURIDAD ADVERTENCIA: bacteriológicamente insegura o de calidad desconocida sin una desinfección adecuada antes o después del sistema. -
Page 10: Instrucciones De Instalacion Paso A Paso
(la grasa de silicona está disponible a través del departamento de Partes y Servicio de GE llamando al 1.800.626.2002, número de parte WS60S10005). Cerciórese de que el aro tórico es asentado en la ranura. Se recomienda que cambie el anillo si está... - Page 11 INSTRUCCIONES DE INSTALACION PASO A PASO (cont.) Seleccione la ubicación Seleccione una ubicación para el filtro que esté: ■ protegida de la congelación. ■ que no esté expuesta a la luz directa del sol. Corte de la línea de agua ADVERTENCIA: Se pueden usar tubos para agua fría en cobre o galvanizados para conectar a tierra las salidas eléctricas de la casa.
-
Page 12: Lista De Partes
Instalacion del cronometro e instrucciones de reinicialización Instalación y cambio de las baterías del cronómetro Botón de reajuste azul Inserte una moneda o un destornillador en la ranura entre la tapa y la base del sincronizador. Con gentileza Tapa del cronómetro haga palanca entre ellos y separe la base de tiempo de la tapa.