Table of Contents
Advertisement
Quick Links
Advertisement
Table of Contents

Related Manuals for BEMIS S5000E 000


Summary of Contents for BEMIS S5000E 000
- Page 1 SANCTUARY 5000 OWNER’S MANUAL...
-
Page 3: Table Of Contents
TABLE OF CONTENTS PRODUCT INFORMATION Functions & Settings...........4 Parts..................8 Diagram................9 Product Information..........10 PRODUCT INSTALLATION Seat Installation............11 Water Connection............12 Remote Installation...........13 Installing & Replacing Battery Box....14 Testing..................15 PRODUCT OPERATION How To Use..............17 Maintenance..............21 Specifications..............23 Warnings & Safety............24 Troubleshooting............30 WARRANTY Warranty................34... -
Page 4: Functions & Settings
FUNCTIONS & SETTINGS OPEN/CLOSE LID Press to open or close the lid. OPEN/CLOSE SEAT Press to open or close the seat. SOUND ON/OFF Press to turn the beeping sound on/off. - Page 5 FLUSH Activates flush. The seat must be unoccupied. FRONT Press to activate the oscillating front wash. Press again to turn off oscillation. REAR Press to activate the oscillating rear wash. Press again to turn off oscillation. STOP Press to stop any operations. DRYER Press to activate the warm air dryer.
- Page 6 FUNCTIONS & SETTINGS (CONT.) DYNAMIC STREAM Press during a wash to quickly alternate between hot and cold water. This feature assists in stimulating bowel movements. NIGHT LIGHT Press to turn the night light on/off. NOZZLE CLEAN Press to extend the nozzle for manual cleaning. This feature can only be activated when the seat is not occupied.
- Page 7 ULTRAVIOLET STERILIZATION This feature automatically activates after a wash cycle. The seat cannot be used during this time. This feature can only be activated when the seat is not occupied. POWER/STOP BUTTON Short press to power on or long press to enter standby mode. Short press while powered on to stop any operations.
-
Page 8: Parts
PARTS Intelligent Toilet T-Valve with CR2032 Button Floor conversion nut Battery (2pc) installation template Wax Ring (1pc) 2 Water Supply Floor flange (1pc) Remote Control Hoses Washer (8pcs) (holder 1pc, screw 2pc) Hexagon bolt (4pcs) Required Tools Drill (Dia. 0.24in) Silicone Gun Teflon Tape Knife... -
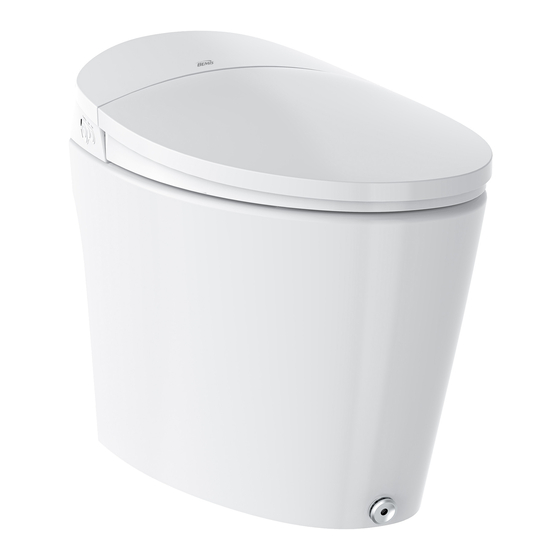
Page 9: Diagram
DIAGRAM Side Buttons Power Cord Warm Air Dryer Nozzle Heated Seat T-Valve Water Supply Valve Toilet Base Hose Kick Control... -
Page 10: Product Information
PRODUCT INFORMATION Unit: Inches Side View Front View Top View Check Your Water Supply The lowest acceptable water pressure is 0.14 MPa. The highest acceptable water pressure is 0.75MPa. The toilet cannot reach full cleaning functionality if the water pressure cannot reach 0.14MPa. -
Page 11: Seat Installation
SEAT INSTALLATION 1. Open the box right side 4. Place the wax ring and toilet up. Remove the accessories base and position the wax first, then remove the unit ring on the flange. Remove from the top as shown in the access covers and cap the diagrams above. -
Page 12: Water Connection
WATER CONNECTION 1. Attach the toilet hose to the 2. Attach the bidet hose T-valve and Sanctuary 5000. to the T-valve and Sanctuary 5000. 3. Connect the T-Valve to the water supply valve. -
Page 13: Remote Installation
REMOTE INSTALLATION Wall anchor 2. Install the wall anchors in the 1. Drill two 6mm holes on the newly drilled holes. wall that line up with the remote bracket. Remote Control Screws Bracket 3. Place the remote bracket over 4. Use the provided screws to the wall anchors. -
Page 14: Installing & Replacing Battery Box
Do not forcefully connect them. Doing so may damage the product. If you have any questions, please call Bemis at 920.467.4621. Replacing The Battery Box 1. Loosen the battery box screws and remove the cover. Remove the battery and safely discard it. -
Page 15: Testing
TESTING Testing the Water Flow 1. Open the water supply valve. 2. Check each connection for leaks 3. If leaks occur, turn off the water supply valve and re-connect the leaking components. Connecting Power 1. Plug in the power cord. 2. - Page 16 TESTING (CONT.) Matching Your Remote Control Code Your remote control will be matched with a code at the time of delivery. In the case that your remote control malfunctions, match the codes as per the following method. 1. Unplug your product. Press and hold the stop key until the level indicators flicker.
-
Page 17: How To Use
HOW TO USE Power on/off Button Push the button to power on. Push and hold the button to power off. Press during a wash to stop all operations. Auto Rear Wash NOTE: After 24 hours, product Press the auto rear wash button. will automatically go into power When seated, press the auto rear saving mode and all functions will... - Page 18 HOW TO USE (CONT.) Blackout Flush Auto Flush When the product is unplugged, When the seat sensor no longer press the Power/Stop button. If detects a user, it will automatically the toilet is not flushing properly, flush. The toilet will only replace the battery.
- Page 19 Kick Open/Close the Lid and Seat Tap the “Kick Button” with your foot to raise your toilet seat/lid. Tap the kick button once: Lid opens. Tap the kick button twice: Seat raises. Tap the kick button three times: Seat and Lid will close and the toilet will flush.
- Page 20 HOW TO USE (CONT.) User-Friendly Design 1. Slow -closing lid/seat. Preserve your toilet’s life and allows you to close the lid/seat silently. 2. Water purification. Equipped with dedicated filter to ensure your bidet will only spray clean, filtered water. 3. 8 Layers of Safety. 8 different built-in safety features to protect the user and product.
-
Page 21: Maintenance
MAINTENANCE Regular Maintenance Is Required To Ensure Normal Use. Note: Cut off the power and water supply before maintenance. Direct water wash to the entire product is prohibited. Maintenance Of Product Surface and Ceramics 1. Wipe dust or stains with a soft wet cloth. 2. - Page 22 MAINTENANCE (CONT.) Warning Do not spray water or detergents on the toilet, remote control or the power cord. Doing so may cause electric shock or fire. Maintenance During Winter Season During winter season, the water inside may freeze after long periods of storage and non-usage.
-
Page 23: Specifications
SPECIFICATIONS Rated voltage 120V Frequency 60Hz Rated power input 1050W (When inlet water temp in 59°F) Seat and dryer 93.2°F~104°F temperature range Water temperature range 39.4°F~ 95°F Water supply hose type DN15 (G1/2”) 14.5 psi (Maximum flowing speed: 17L/min) Water Maximum Pressure Inlet 108.78 psi (static state) -
Page 24: Warnings & Safety
WARNINGS & SAFETY Please Read Thoroughly First of all, thank you for purchasing our product. To ensure proper and safe use of this product, carefully read this section prior to any usage. Afterwards, store this manual in a safe place for any needed future reference. The hazards and warnings listed herein are important to our user’s safety. - Page 25 • • Regularly pull out the power For cleaning or maintenance plug and wipe off any dust on of plastic parts, do not use the power plug using a clean any harsh cleaning agents. dry cloth. Risk of fire. (These include, but are not limited to products such •...
- Page 26 WARNINGS & SAFETY (CONT.) • Do not install product in a humid environment or a soak room. Do not spray or soak this product with any form of liquid to prevent any damage to the product. Risk of fire and/or electric shock.
- Page 27 Read the following for proper When the battery is battery usage. in use, do not do the following operations. 1. Properly install the • battery according to its Do not hold or store with correct polarity. metal objects (such as necklace or watch).
- Page 28 WARNINGS & SAFETY (CONT.) ATTENTION • Do not use the heated seat • Do not supply electricity or warm dryer temperature with an external switch. ie: for an extended amount of connecting the universal part time. Extended use may to a timer switch. Run the risk result in burns.
-
Page 30: Troubleshooting
TROUBLESHOOTING Experiencing Issues With Your Product? If you experience any issues, please consult the troubleshooting guide below. If the problem persists, contact Bemis support. Power/Stop Issue Diagnosis Solutions Check if the power Please check the circuit. cord is loose. Product is not working Check if the product is Press “Power/Stop”... - Page 31 The water temperature Check the water Increase the water is not warm enough. temperature settings. temperature settings. Water is leaking from Solenoid valve no longer Bemis Contact Support. the nozzle. has any effect. The cleaning function is Seat sensor malfunction. Bemis Contact Support.
- Page 32 Diagnosis Solutions The toilet seat/toilet Slow close damper Contact Bio Bidet by cover opens or closes is not functioning. Bemis Support. too fast. Unplug the unit for one Kick Button is Slow close damper minute before plugging it not functioning.
-
Page 34: Warranty
WARRANTY 2 Year Preferred Warranty Coverage Bio Bidet Innovation LLC warrants the Sanctuary 5000 to be free from manufacturing defects under normal use for a period of 2 years from the date of purchase. Our obligation to you under this warranty is limited to repair or replace, at our option, of defective products or parts, provided the products were properly installed and used in accordance with the instructions. - Page 35 WARNING! We are not responsible for liable for any failure of, or damage to, this plumbing product or product component caused by in-tank bowl cleaners containing chlorine (calcium hypochlorite). NOTE: The use of high concentration chlorine related products can damage the product fittings. This damage can cause leakage and serious property damage.
- Page 36 Thank You 300 Mill Street Sheboygan Falls, WI 53085 T: 920.467.4621 Bidets@Bemismfg.com ToiletSeats.com Updated 09.05.23...
Need help?
Do you have a question about the S5000E 000 and is the answer not in the manual?
Questions and answers
My bidet isn't flushing clean, why is this
The BEMIS S5000E 000 bidet may not be flushing clean due to a flush valve breakdown or an issue with the inlet pipe. The inlet pipe must be straight to ensure proper flushing. If the hose is bent, it should be reconfigured to a smoother connection.
This answer is automatically generated
Why is my Bemis 5000 is not flushing properly ?
The BEMIS S5000E 000 is not flushing properly due to a flush valve breakdown or an inlet pipe that is not straight. The hose may also be bent and needs to be reconfigured for a smoother connection.
This answer is automatically generated