Table of Contents
Advertisement
Quick Links
Advertisement
Table of Contents

Subscribe to Our Youtube Channel
Related Manuals for BEMIS SANCTUARY 5000


Summary of Contents for BEMIS SANCTUARY 5000
- Page 1 SANCTUARY 5000 S5000E...
-
Page 2: Table Of Contents
TABLE OF CONTENTS Important Safeguards . . . . . . . . . . . . . . . . 3 - 4 Product Diagram . -
Page 3: Important Safeguards
IMPORTANT SAFEGUARDS PLEASE OBSERVE THE FOLLOWING PRECAUTIONS AND INSTRUCTIONS BEFORE INSTALLATION AND USE. DANGER - To reduce the risk of electrocution: Do not place or store product where it can fall or be pulled into a tub or sink . Do not place in or drop into water or other liquid . - Page 4 IMPORTANT SAFEGUARDS (cont .) • Do not plug in the power cord before connecting the water supply hose . • Install in an area with adequate ventilation to avoid high levels of humidity which can damage the electronic components . •...
-
Page 5: Product Diagram
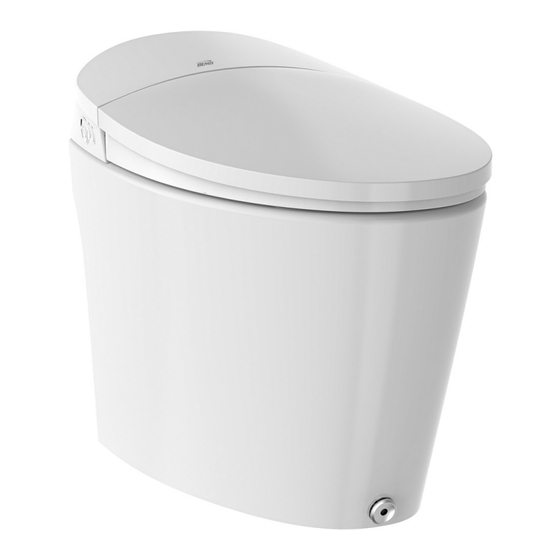
PRODUCT DIAGRAM Side Buttons Power Cord Warm Air Dryer Nozzle Heated Seat T-Valve Water Supply Valve Toilet Base Hose Kick Control... -
Page 6: Parts & Hardware
PARTS & HARDWARE Toilet T-Valve with CR2032 Button Floor Installation conversion nut Battery (2pc) Template Wax Ring (1pc) 2 Water Supply Floor Flange (1 pc) Remote Control Hoses Washer (8 pcs) (holder 1pc, Hexagon bolt (4 pcs) screw 2pc) REQUIRED TOOLS Drill (Dia . -
Page 7: Product Information
PRODUCT INFORMATION Unit: Inches Side View Front View Top View CHECK WATER SUPPLY The lowest acceptable water pressure is 0 .14 MPa . The highest acceptable water pressure is 0 .75MPa . The toilet cannot reach full cleaning functionality if the water pressure cannot reach 0 .14MPa . -
Page 8: Toilet Installation
TOILET INSTALLATION 1 . Open box right side up . Remove accessories first, then remove unit from the top as shown in the diagrams . 2 . Prepare for installation by removing existing toilet and cleaning area near the flange . 3 . - Page 9 TOILET INSTALLATION (cont .) 4 . Place wax ring and toilet base and position wax ring on the flange . Remove access covers and cap from the water inlet on the back of the toilet . Align toilet over flange and bolts . Carefully lower toilet into flange .
-
Page 10: Water Connection
WATER CONNECTION 1 . Attach toilet hose to T-valve and Sanctuary 5000 . 2 . Attach bidet hose to the T-valve and Sanctuary 5000 . 3 . Connect T-Valve to water supply valve . -
Page 11: Installing & Replacing Battery Box
. Do not forcefully connect them . Doing so may damage the product . If you have any questions, please call Bemis Customer Service . REPLACING BATTERY BOX 1 . Loosen battery box screws and remove cover . Remove battery and safely discard . -
Page 12: Testing
TESTING TESTING WATER FLOW 1 . Open water supply valve . 2 . Check each connection for leaks 3 . If leaks occur, turn off water supply valve and reconnect leaking components . CONNECTING POWER 1 . Plug in power cord . 2 . -
Page 13: Remote Pairing
TESTING (cont .) REMOTE PAIRING If remote isn't communicating with toilet, remote control will need to be paired with your Sanctuary toilet before use. 1 . Unplug product . 2 . Press and hold stop button until red indicator lights flash . 3 . -
Page 14: How To Use
HOW TO USE POWER ON/OFF BUTTON Push the button to power on . Push and hold the button to power off . Press during a wash to stop all operations . NOTE: After 24 hours, product will AUTO REAR WASH automatically go into power saving mode and all functions will shut off . -
Page 15: Auto Flush
HOW TO USE (cont .) BLACKOUT FLUSH When the product is unplugged, press the Power/Stop button . If the toilet is not flushing properly, replace the battery . DRYER FLUSH Press the “Dryer” button . The warm air function is activated and a flush is performed. -
Page 16: User-Friendly Design
HOW TO USE (cont .) KICK OPEN/CLOSE LID & SEAT Tap “Kick Button” with foot to raise toilet seat/lid . Tap kick button once: Lid opens . Tap kick button twice: Seat raises . Tap kick button three times: seat and lid will close; toilet will flush. USER-FRIENDLY DESIGN 1 . -
Page 17: Maintenance
MAINTENANCE REGULAR MAINTENANCE IS REQUIRED TO ENSURE NORMAL USE . Note: Cut off power and water supply before maintenance . Direct water wash to the entire product is prohibited . SURFACE & CERAMICS MAINTENANCE 1 . Wipe dust or stains with a soft wet cloth . 2 . -
Page 18: Maintenance (Cont .)
MAINTENANCE (cont .) WARNING Do not spray water or detergents on the toilet, remote control or the power cord . Doing so may cause electric shock or fire. MAINTENANCE DURING WINTER During winter season, water inside may freeze after long periods of storage and non-usage . - Page 19 MAINTENANCE (cont .) CLEANING THE MESH FILTERS To clean the mesh filters, the bidet top will need come off. 3 mesh filters Turn off the water supply and unplug the power cord . Unscrew the wing nut behind the bidet . Lift the lid and seat up .
-
Page 20: Remote Installation
REMOTE INSTALLATION Wall anchor 2 . Install wall anchors in 1 . Drill two 6 mm holes on wall that newly drilled holes . line up with remote bracket . Remote Control Screws Bracket 3 . Place remote bracket over 4 . -
Page 21: Functions & Settings
FUNCTIONS & SETTINGS OPEN/CLOSE LID Press to open or close the lid . OPEN/CLOSE SEAT Press to open or close the seat . SOUND ON/OFF Press to turn the beeping sound on/off . - Page 22 FUNCTIONS & SETTINGS (cont .) FLUSH Activates flush. The seat must be unoccupied. FRONT Press to activate the oscillating front wash . Press again to turn off oscillation . REAR Press to activate the oscillating rear wash . Press again to turn off oscillation . STOP Press to stop any operations .
-
Page 23: Night Light
FUNCTIONS & SETTINGS (cont .) DYNAMIC STREAM Press during a wash to quickly alternate between hot and cold water . This feature assists in stimulating bowel movements . NIGHT LIGHT Press to turn night light on/off . NOZZLE CLEAN Press to extend nozzle for manual cleaning . This feature can only be activated when seat is not occupied . -
Page 24: Warnings & Safety
WARNINGS & SAFETY PLEASE READ THOROUGHLY First of all, thank you for purchasing our product . To ensure proper and safe use of this product, carefully read this section prior to any usage . Afterwards, store this manual in a safe place for any needed future reference . - Page 25 This product is not a toy . Advise children not to play with product . Risk of injury . • Do not dismantle, repair or alter this product on your own . Contact Bemis for assistance . Risk of fire, electric shock, and/or other accident that may lead to injury .
- Page 26 WARNINGS & SAFETY (cont .) READ THE FOLLOWING FOR PROPER BATTERY USAGE . 1 . Properly install the battery according to its correct polarity . 2 . Remove the battery during long periods without use . 3 . Replace the battery before it reaches the end of its usage . Failure to do so may result in interrupted control signals .
- Page 27 WARNINGS & SAFETY (cont .) ATTENTION • Do not use the heated seat or warm dryer temperature for an extended amount of time . Extended use may result in burns . • While using this product, make sure that the skin is in contact with the seat sensor area .
-
Page 28: Troubleshooting
TROUBLESHOOTING EXPERIENCING ISSUES? If you experience any issues, please consult troubleshooting guide below . If the problem persists, contact Bemis Customer Service . Power/Stop Issue Diagnosis Solutions Check if the power Please check the circuit . cord is loose . - Page 29 Increase the water not warm enough . settings . temperature settings . Water is leaking from the Solenoid valve no longer has Contact Bemis nozzle . any effect . Customer Service . The cleaning function is not Contact Bemis Seat sensor malfunction .
- Page 30 . Soft-Close Feature Issue Diagnosis Solutions The toilet seat/toilet cover Slow close damper Contact Bemis opens or closes too fast . is not functioning . Customer Service . Kick Button is Slow close damper Unplug the unit for one min- not functioning .
-
Page 31: Specifications
SPECIFICATIONS Rated voltage 120V Frequency 60Hz Rated power input 1050W (When inlet water temp in 59°F) Seat and dryer 93 .2°F~104°F temperature range Water temperature range 39 .4°F~ 95°F Water supply hose type DN15 (G1/2”) 14.5 psi (Maximum flowing speed: 17L/min) Water Maximum Pressure Inlet... -
Page 32: Warranty
Product’s purchase price (less shipping, if applicable), at Bemis’s option . Bemis may, at its option, require the return of any Product for inspection and testing before honoring any defect claim . This Limited Warranty excludes component parts... - Page 34 Thank you for your Bemis bidet ® toilet purchase! Bemis Manufacturing Co . Sheboygan Falls, Wisconsin U .S .A . 888 .722 .6488 | Corp@BemisMfg .com ToiletSeats .com 071724...
Need help?
Do you have a question about the SANCTUARY 5000 and is the answer not in the manual?
Questions and answers