Table of Contents
Advertisement
Quick Links
Advertisement
Table of Contents

Related Manuals for ROKAE xMate ER3 Pro


Summary of Contents for ROKAE xMate ER3 Pro
- Page 1 ER3 Pro Hardware Installation Manual...
- Page 3 ER3 Pro Hardware Installation Manual With Control System/Control Cabinet Document ID: 202207272114 Document Version: V0.1 Copyright © ROKAE 2015-2022. All rights reserved.
- Page 4 This manual is originally written in Simplified Chinese. Other language versions are translated. Copyright © ROKAE 2015-2022. All rights reserved. ROKAE (Shandong) Intelligent Technology Co., Ltd. Shandong, China...
-
Page 5: Table Of Contents
202207272114/V0.1 Contents 1 Manual Overview ......................3 1.1 About this manual ............................3 1.2 Target group..............................3 1.3 How to read the product manual ......................3 1.4 Illustrations in this manual ........................3 1.5 Related product documents ........................3 1.6 Contact ................................. 3 2 Safety ..........................4 2.1 Introduction .............................. - Page 6 202207272114/V0.1 4.2.1 Model ............................14 4.2.2 Nameplate ........................... 14 4.3 Specifications ............................14 4.3.1 Data sheet............................ 14 4.4 Working space ............................16 5 Unpacking and Installation ..................17 5.1 Introduction .............................. 17 5.2 Installation flow chart ..........................17 5.3 Environmental conditions ........................17 5.4 Unpacking and hardware installation ....................
- Page 7 202207272114/V0.1 7.2 Maintenance safety ........................... 40 7.3 Maintenance outline ..........................40 7.3.1 Battery replacement ........................40 7.4 Maintenance schedule ..........................43 7.5 Check ................................43 7.6 Cleaning ..............................43 8 Zero Calibration ......................45 8.1 Introduction ............................... 45 8.1.1 Overview ............................45 8.1.2 What is a mechanical zero? .......................
- Page 9 1 Manual Overview 202207272114/V0.1 xMate ER3 ProHardware Installation Manual...
-
Page 11: Manual Overview
Also, figures of other models may be used to describe some general information. 1.5 Related product documents This document is the product manual for the xMate ER3 Pro robot and is intended to be used with the following documents: xCore Control System User Manual ⚫... -
Page 12: Safety
In addition to the safety section, this document contains further safety instructions. 2.1.2 Intended use The xMate ER3 Pro robots should be used in accordance with local laws and regulations, and must not be used for any purpose that violates such laws and regulations. -
Page 13: Safety Notice
If you are unsure about the risks during the use of the robot, please contact ROKAE ⚫... -
Page 14: Enabling Switch
2 Safety 202207272114/V0.1 button 2.3.2 Enabling switch 2.3.2.1 Enabling device The enabling device is a special switch with two contacts and three positions, and is also called a three-position enabling switch (hereinafter referred to as "enabling switch"). It is used to power on/off the joints in Manual mode to enable robot motions. The robot will be powered on and able to move only after the enabling switch is pressed and held in the middle position. -
Page 15: Emergency Stop
STOP1: The robot comes to a controlled stop. Then the motor power is switched off ⚫ and brakes are engaged. For the xMate ER3 Pro robots, STOP0 is used for collision detection in the case of external control with RCI and handheld emergency stop signal processing. 2.5 Safety precautions 2.5.1 Operating safety... -
Page 16: Safety Precautions In Automatic Mode
2 Safety 202207272114/V0.1 workstation. 2.5.3.2 Speed limit in Manual mode In Manual mode, the speed of the robot's end effector is limited to 250 mm/s. This means that the maximum speed of the robot will not exceed 250 mm/s whether you jog the robot or execute a program, regardless of the speed set in the program. - Page 17 2 Safety 202207272114/V0.1 connected. Test that all connected safety inputs and outputs are functioning. To do this, you must: Test that the emergency stop button on the handheld emergency stop and enabling ⚫ device can stop the robot and engage brakes. Test that the robot can switch between Manual and Automatic mode.
-
Page 18: Product Overview
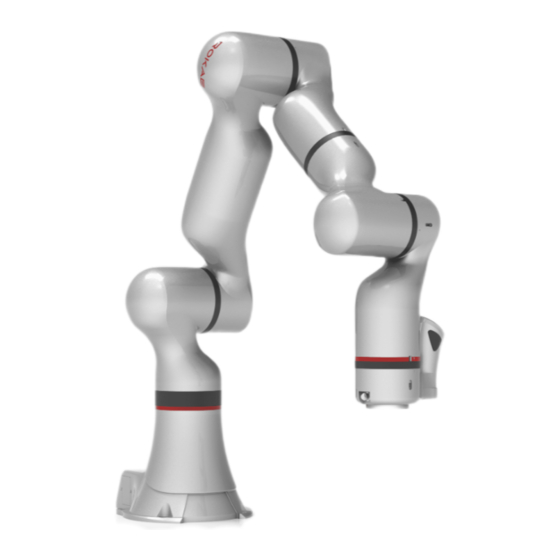
3 Product Overview 202207272114/V0.1 3 Product Overview 3.1 Introduction xMate ER3 Pro is a new generation of flexible collaborative robot that boosts industrial productivity with highly sensitive force sensing and highly dynamic force control. 3.2 Robot 3.2.1 Overview The basic configuration of xMate ER3 Pro:... -
Page 19: Definitions Of Rotation Directions And Coordinate Systems
3 Product Overview 202207272114/V0.1 Name xMate ER3 Pro robot system Handheld safety protection device Power adapter and cables Other interfaces and accessories 3.2.3 Definitions of rotation directions and coordinate systems The flexible collaborative robot features 6 degrees of freedom, or 6 joints or axes (see Figure 4 for details). -
Page 20: Symbols And Labels
3 Product Overview 202207272114/V0.1 法兰坐标系 基坐标系 Figure 4. Definitions of robot rotation directions and coordinate systems 3.3 Symbols and labels xMate ER3 ProHardware Installation Manual... - Page 21 3 Product Overview 202207272114/V0.1 Figure 5. Symbols and labels Position Label type Remarks Arm body logo Product nameplate Indicates product model and other product information. Electrical hazard Do not touch the electrical symbol components inside a live robot to avoid the risk of electric shock. xMate ER3 ProHardware Installation Manual...
-
Page 22: Technical Specifications
4 Technical Specifications 202207272114/V0.1 4 Technical Specifications 4.1 Introduction This section describes the performance parameters of the xMate ER3 Pro flexible collaborative robot. 4.2 Model and nameplate 4.2.1 Model Figure 6. Model description 4.2.2 Nameplate Figure 7. Nameplate 4.3 Specifications 4.3.1 Data sheet... - Page 23 4 Technical Specifications 202207272114/V0.1 Axis 4 ±120° Axis 5 ±170° Axis 6 ±120° Axis 7 ±360° Axis 1 180°/s Axis 2 180°/s Axis 3 180°/s Maximum speed Axis 4 180°/s Axis 5 225°/s Axis 6 225°/s Axis 7 225°/s Operating temperature 0°C to +40°C Storage temperature -10°C to +55°C...
-
Page 24: Working Space
4 Technical Specifications 202207272114/V0.1 4.4 Working space The working space of xMate ER3 Pro is shown in the figure below. Figure 8. The working space of xMate ER3 Pro xMate ER3 ProHardware Installation Manual... -
Page 25: Unpacking And Installation
202207272114/V0.1 5 Unpacking and Installation 5.1 Introduction This section contains instructions for unpacking and installing the xMate ER3 Pro flexible collaborative robot. 5.2 Installation flow chart The installation flow chart is used to check the robot installation progress. Put a check mark in the "Completed"... - Page 26 5 Unpacking and Installation 202207272114/V0.1 Avoid exposure to sunlight. Keep away from dust, soot, salt, iron chips, etc. Keep away from flammable and corrosive liquids and gases. Do not bring into contact with water. Protect from shock and vibration. Keep away from sources of electrical interference. Warning Never place or use the robot in any explosive environment! Notes...
-
Page 27: Unpacking And Hardware Installation
DC 48V 5M Servo debug cable LS18E2-A01-225 USB drive Rokae 32G Mechanical zero xMate ER3 Pro calibration block calibration block Interface adapter 9992250008 M8 With wrist flange interface xMate ER3 Pro Hardware Electronic Installation Manual documents are xMate ER3 ProHardware Installation Manual... -
Page 28: Robot Angle And Force Application Points During Transportation
USB User Manual flash drive Top liners TY0180101 Power adapter xMate-PW1000-01 xMate ER3 Pro Handheld emergency With cables stop & enabling device Bottom liners TY0180102 ② Step 2: Take out the parts from the box in order Keep the above parts and accessories properly and handle items such as power adapters and cables with care. -
Page 29: Check Before Installation
5 Unpacking and Installation 202207272114/V0.1 Improper operations and force application points may damage the robot. 5.4.3 Check before installation Personnel who install and operate the robot must have the necessary knowledge for installation, maintenance, and repair of mechanical and electronic equipment, and must comply with all the relevant national and local regulations. - Page 30 5 Unpacking and Installation 202207272114/V0.1 Part name Description Bracket Foundation installation installation ✔ ✔ Socket head cap screw 4-M8x20 (Grade 12.9) ✔ Expansion bolt 4-M16 (Grade 4.8 or (chemical bolt) higher) ✔ Robot fixing plate Thickness: At least 15 ✔ Mounting seat Mounting plate thickness: At least 15...
- Page 31 The concrete foundation must be able to support the force that may appear and ensure a minimal footprint. Figure 13. Reference foundation fixing method Description Robot fixing plate xMate ER3 Pro base Expansion bolt (chemical bolt) 4-M16 Concrete foundation Socket head cap screw 4-M8 x...
-
Page 32: Flange
The location must meet the following conditions: With good ventilation and heat dissipation conditions; Outside the range of motions of xMate ER3 Pro; The power switch is easy to access for operators. xMate ER3 ProHardware Installation Manual... -
Page 33: Electrical Connections
The network interfaces are used to connect the robot to an external network or to a pad or PC that has the xMate ER3 Pro software installed for control and debugging of the robot. -
Page 34: Robot Base
202207272114/V0.1 enabling device Notes For information on how to control and use the xMate ER3 Pro robot, see the user manual of the robot software. 6.2 Robot base This section describes all the inbound and outbound interfaces on the robot base. -
Page 35: Robot Power Supply
The robot's power supply interface is an M23 special-purpose socket (pin-type). It works with the xMate ER3 Pro power cord that has a special-purpose plug (hole-type) to supply power to the robot. The electrical specifications of the power supply of the robot are shown below. -
Page 36: General-Purpose Dido
Figure 18. Handheld emergency stops and enabling device interface 6.2.4 General-purpose DIDO xMate ER3 Pro provides 4 digital input and 4 digital output channels on terminal connector J8. Users must connect to the corresponding channel using a cable with the E0308 pin-type cold-pressed terminal in order to use the DIO function. - Page 37 6 Electrical Connections 202207272114/V0.1 DO_03 6.2.4.1 General-purpose DI Digital inputs can be configured as PNP or NPN inputs. The user-input electrical specifications supported in the two modes are listed below. Typical Unit Input voltage range The electrical principles in the two modes are shown below. PNP input ⚫...
- Page 38 6 Electrical Connections 202207272114/V0.1 6.2.4.2 General-purpose DO Digital outputs can be configured as PNP or NPN outputs. The user-output electrical parameter specifications supported in the two modes are listed below. Typical Unit Load voltage range Continuous —— load current If the continuous load current exceeds the limit, an additional relay will be required to drive the system.
-
Page 39: Safety Dio
Figure 23. PNP output wiring diagram 6.2.5 Safety DIO xMate ER3 Pro supports dedicated safety inputs such as external emergency stop and safeguard stop (for example, the safety gate), and dedicated safety outputs such as safety status feedback. The channels are located on terminal connector J7. Users must connect to the corresponding channel using a cable with the E0308 pin-type cold-pressed terminal in order to use this safety DIO function. - Page 40 6 Electrical Connections 202207272114/V0.1 EX-STOP+ External Robot emergency stop VCC24 VCC24 EXSTOP1 EXSTOP2 Figure 24. External emergency stop interface S-GATE+ 安全门 机器人端 Safety gate Robot VCC24 VCC24 SGATE1 SGATE2 Figure 25. Safety gate interface External emergency stop Safeguard stop (safety gate) Applicatio For emergency stop...
-
Page 41: Extended Ethernet Interface
6 Electrical Connections 202207272114/V0.1 Frequency Infrequent Infrequent of use Warning All safety-related I/Os are constructed redundantly (two ⚫ independent channels). Keep the two channels separate so that a fault on one channel will not cause the failure of the safety function. -
Page 42: Ethercat Servo Drive Debug Interface
J1 and J2 are standard RJ45 interfaces that can be connected by a standard network cable. They support EtherNet and Modbus TCP/IP communication protocols, with a maximum communication speed of 100 Mbps. You can connect the xMate ER3 Pro robot to a network device that has the xMate ER3 Pro software installed. -
Page 43: Tool Interface
RS485A RS485B 6.2.9.1 Special-purpose tool IO The xMate ER3 Pro robot supports the use of a special-purpose gripper as the end effector. The electrical and special-purpose communication interfaces of the gripper are integrated into this connector. 6.2.9.2 General-purpose tool IO... - Page 44 6 Electrical Connections 202207272114/V0.1 specific robot tool. The electrical specifications of the tool's power supply are listed below. Typical Unit Supply voltage 23.5 24.8 Supply current —— Attention 1. The maximum supply current of the tool is 2A, which lasts up to 1 second.
-
Page 45: Power Adapter
Figure 31. Wrist input interface 6.3 Power adapter The power adapter is an optional part of the xMate ER3 Pro robot. It converts the mains power to the DC power usable by the robot and provides a power supply indicator. -
Page 46: Power Input
Indicator Adapter locking) status status Not powered Steady red Powered on The electrical specifications of the input power are listed below. ROKAE power adapter DC voltage 48 V Output Rated current 21 A Ripple and noise 150 mVp-p Voltage range... -
Page 47: Power Output
The power output interface of the adapter is an M23 special-purpose socket (hole-type) that outputs the 48V DC voltage usable by the xMate ER3 Pro robot. It works with the xMate ER3 Pro power cord that has a special-purpose plug (pin-type) to supply power to the robot. -
Page 48: Maintenance
7 Maintenance 202207272114/V0.1 7 Maintenance 7.1 Introduction Please read the "Maintenance Safety" section, this manual, and other related documents carefully before maintenance. Perform the maintenance after you have gained a full understanding of the safe maintenance methods. 7.2 Maintenance safety Warning Strictly follow the maintenance procedures. - Page 49 7 Maintenance 202207272114/V0.1 soldering battery terminals, and forced discharge. For disposal of batteries, refer to relevant national and local laws and regulations ⚫ or consult a professional company. Note that even used batteries can cause a short circuit when they come into contact with other metals or battery terminals and result in danger.
- Page 50 7 Maintenance 202207272114/V0.1 Figure 35. Step 2 ③ Step 3: Separate the rear base cover until it is as shown in Figure 36. You will find that the battery is connected to its holder with two nylon ties. Cut the nylon ties with pliers and remove the connector on the battery adapter cable to take out the battery.
-
Page 51: Maintenance Schedule
7 Maintenance 202207272114/V0.1 M3x10 Battery holder Nylon ties Battery Battery adapter cable 7.4 Maintenance schedule The robot must be maintained regularly to ensure high performance over a long period of time. The maintenance personnel must prepare maintenance plans and implement such plans strictly. - Page 52 7 Maintenance 202207272114/V0.1 Observe the following instructions when cleaning the robot: Cleaning should only be performed by trained users. Do not clean the robot with any chemical solvents. Use a damp cloth that has been wrung out to clean all devices. Do not apply excessive force to the manipulator during cleaning.
-
Page 53: Zero Calibration
8 Zero Calibration 202207272114/V0.1 8 Zero Calibration 8.1 Introduction 8.1.1 Overview This section describes the zero calibration. Use the calibration tools described in this section during calibration. 8.1.2 What is a mechanical zero? The robot is pre-defined with an initial pose during its design, in which the angle of each joint is zero. -
Page 54: Calibration Method
8.2.2 Mechanical calibration Axes 1 to 4 of xMate ER3 Pro are calibrated with a combination of calibration pins and slots, while Axes 5 to 7 with calibration slots only. You can calibrate only one axis at a time. The specific procedure is as follows. - Page 55 8 Zero Calibration 202207272114/V0.1 Figure 38. Step 1 Figure 39. Step 2 Step 2: Remove the plastic shell at Axis 1 Remove the plastic shell at Axis 1 as shown in Figure 39 to expose the calibration pin. Step 3: Calibrate Axis 1 Slowly rotate Axis 1.
- Page 56 8 Zero Calibration 202207272114/V0.1 Figure 41. Step 4 Step 4: Calibrate Axes 2 to 4 Push the plastic ring of Axes 2 to 4 onto the link in the direction shown in the figure, and calibrate them as described in Step 3. Step 5: Calibrate Axes 5 to 7 Calibrate Axes 5 to 7 as described in Step 3.
-
Page 57: Decommissioning
9 Decommissioning 202207272114/V0.1 9 Decommissioning 9.1 Robot decommissioning The decommissioning, storage and disposal of the robot must be performed in compliance with relevant national laws, regulations, and standards. 9.2 Battery See Section 7.3.1.1 for the disposal of batteries. 9.3 Recycling Contact us for the recycling of batteries. -
Page 59: Revision History
错误!使用“开始”选项卡将 标题,附录标题 应用于要在此处显示的文字。 202207272114/V0.1 Revision History Version Content Initial version xMate ER3 ProHardware Installation Manual...
Need help?
Do you have a question about the xMate ER3 Pro and is the answer not in the manual?
Questions and answers