Table of Contents
Advertisement
Quick Links
OWNER'S MANUAL
AIR CONDITIONER
Read this owner's manual thoroughly before operating the
appliance and keep it handy for reference at all times.
ENGLISH
ABNQ36GM3A4 ABQ48GM3A4 ZBNQ18GM1A0 ZBNQ24GM1A0 ZBNQ36GM3A0
ZBNQ36LM3A0 ZBNQ48GM3A0 ZBNQ48LM3A0 ZBNQ60GM3A0
MFL72075604
Rev.00_083123
Copyright © 2017-2023 LG Electronics Inc. All Rights Reserved.
www.lg.com
Advertisement
Table of Contents

Related Manuals for LG ABNQ36GM3A4


Summary of Contents for LG ABNQ36GM3A4
- Page 1 Read this owner's manual thoroughly before operating the appliance and keep it handy for reference at all times. ENGLISH ABNQ36GM3A4 ABQ48GM3A4 ZBNQ18GM1A0 ZBNQ24GM1A0 ZBNQ36GM3A0 ZBNQ36LM3A0 ZBNQ48GM3A0 ZBNQ48LM3A0 ZBNQ60GM3A0 www.lg.com MFL72075604 Rev.00_083123 Copyright © 2017-2023 LG Electronics Inc. All Rights Reserved.
-
Page 2: Table Of Contents
TABLE OF CONTENTS This manual may contain images or content that may be different from the model you purchased. This manual is subject to revision by the manufacturer. SAFETY INSTRUCTIONS READ ALL INSTRUCTIONS BEFORE USE ............ 4 Safety Messages....................4 Notes for Flammable Refrigerant ..............5 WARNING INSTRUCTIONS ................. - Page 3 Cleaning..................... 25 Cleaning Interval ....................25 Cleaning the Air Filter ..................26 Tips for Maintenance ................26 Before Long Periods of Disuse .................26 After Long Periods of Disuse ................27 TROUBLESHOOTING Before Calling for Service ................ 28 Operation ......................28 Performance .......................31 Calling for Service ..................32 Situations in which Calling for Service is Necessary ........32 APPENDIX Outdoor Unit information...............
-
Page 4: Safety Instructions
SAFETY INSTRUCTIONS SAFETY INSTRUCTIONS READ ALL INSTRUCTIONS BEFORE USE The following safety guidelines are intended to prevent unforeseen risks or damage from unsafe or incorrect operation of the appliance. The guidelines are separated into ‘WARNING’ and ‘CAUTION’ as described below. Safety Messages This symbol is displayed to indicate matters and operations that can cause risk. -
Page 5: Notes For Flammable Refrigerant
SAFETY INSTRUCTIONS Notes for Flammable Refrigerant The following symbols are displayed on units. This symbol indicates that this appliance uses a flammable refrigerant. If the refrigerant is leaked and exposed to an external ignition source, there is a risk of fire. This symbol indicates that the Owner's Manual should be read carefully. -
Page 6: Installation
SAFETY INSTRUCTIONS responsible for their safety. Children should be supervised to ensure that they do not play with the appliance. • Installation or repairs made by unauthorized persons can pose hazards to you and others. • The information contained in the manual is intended for use by a qualified service technician who is familiar with the safety procedures and equipped with the proper tools and test instruments. - Page 7 • Do not install the product on a defective installation stand. • Be sure the installation area does not deteriorate with age. • Be sure to only use accessories made by LG which are specifically designed for use with the equipment and have them installed by a professional.
-
Page 8: Operation
SAFETY INSTRUCTIONS • Use non-flammable gas (nitrogen) to check for leaks and to purge air; using compressed air or flammable gas may cause fire or explosion. Operation • Do not modify or extend the power cable. Scratches or peeling insulation on the power cables may result in fire or electric shock, and the cables should be replaced. -
Page 9: Maintenance
SAFETY INSTRUCTIONS • In the event of a gas leak (such as Freon, propane gas, or LP gas), ventilate sufficiently before using the air conditioner again. • Stop operation and close the window during a storm or hurricane. If possible, remove the product from the window before the hurricane arrives. -
Page 10: Caution Instructions
SAFETY INSTRUCTIONS refrigerant leaks exceeding the level of limiting concentration, an oxygen deficiency accident may happen. R32 Only • The appliance shall be stored in a well-ventilated area where the room size corresponds to the room area as specified for operation. •... -
Page 11: Installation
SAFETY INSTRUCTIONS Installation • Use a forklift or 2 or more people to transport the air conditioner. • Do not install the air conditioner in an area where it is directly exposed to sea wind (salt spray). • Install the drain hose properly for the smooth drainage of water condensation. -
Page 12: Maintenance
SAFETY INSTRUCTIONS purposes, and is not a precision refrigeration system. There is risk of damage or loss of property. • Do not turn on the breaker or power when the front panel, cabinet, top cover, or control box cover are removed or opened. •... -
Page 13: Operation Before Use
OPERATION OPERATION Before Use Notes for Operation • Speed up the fan to cool or warm indoor air quickly, within a short period of time. • Turn off the appliance and periodically open windows for ventilation. The indoor air quality may deteriorate if the appliance is used for long periods. -
Page 14: Product Overview
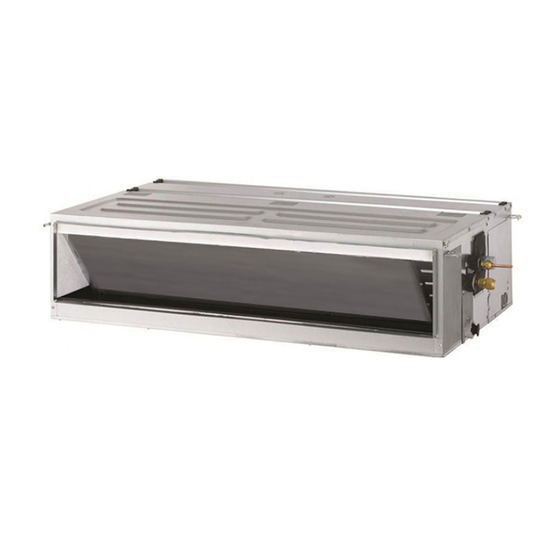
OPERATION Product Overview Ceiling Concealed Duct Type 1 Type 2 Air Intake Vents Takes in air from the room. Air Outlet Vents Circulates air back into the room at the desired temperature. NOTE • The number and location of parts may vary depending on the model of the appliance. •... -
Page 15: Using The Appliance With Remote Control
Follow these steps to see a detailed guide for using the product with the remote control. Click the below website address. • www.lg.com Insert the model name in the search box. • The model name is on the remote control or printed on the box in which the remote control is packed. -
Page 16: Wired Remote Control Overview
OPERATION Wired Remote Control Overview Wired Remote Control Use the wired remote control to operate the appliance more conveniently. Buttons Image Description Temperature Setting Adjusts the desired temperature FAN SPEED Adjusts the fan speed Power Turns the appliance on/off... - Page 17 OPERATION Image Description OPER MODE Selects the desired operating mode • Each press changes the modes in this order: Cooling Dehumidification Heating Auto Fan.
-
Page 18: Operating Mode
OPERATION Operating Mode • You can set the temperature from 18 Cooling, Heating, Dehumidification, Auto, Fan Mode Turn on the appliance to control the operating mode. Cooling Mode This mode supplies cool air indoors. Turn the appliance on by pressing the button. - Page 19 OPERATION - If the desired temperature is lower than the • is displayed on the display screen. room temperature, the vent will only blow out air rather than heating. • What is the three-minute delay function? - It will take time for the product to blow warm air.
- Page 20 OPERATION Press the FAN SPEED button repeatedly to Press the button to select the desired adjust the fan speed. operation code if the temperature is higher or lower than the desired temperature. Auto Mode Code Description This function adjusts the airflow automatically. Auto Operation Mode (On Some Models) The appliance sets the desired temperature to a level higher than...
- Page 21 OPERATION • You can set the temperature from 16 Press the FAN SPEED button repeatedly to adjust the fan speed. Auto Changeover Mode (On Some Models) Press the FAN SPEED button repeatedly to Turn the appliance on by pressing the adjust the fan speed.
-
Page 22: Adjusting The Fan Speed
OPERATION Adjusting the Fan Speed Turn the appliance on by pressing the button. You can adjust the fan speed. • Press the FAN SPEED button repeatedly to select the desired fan speed. Press the OPER MODE button repeatedly to - Each press changes the fan speed in this select the Fan mode. -
Page 23: Additional Functions
OPERATION • Press the FAN SPEED button for about 3 • Press and FAN SPEED button simultaneously seconds. for about 3 seconds. NOTE NOTE • The room temperature displayed for 5 seconds • CL will be displayed for 3 seconds before before returning to the previous display. - Page 24 OPERATION NOTE - This means that the outdoor unit is operating in cooling mode. • If one indoor unit is operating in cooling or dehumidification mode while several indoor units are operating in heating mode, the outdoor segment and cooling segment will be blinking.
-
Page 25: Maintenance
MAINTENANCE MAINTENANCE Cleaning Cleaning Interval WARNING • Before cleaning or performing maintenance, disconnect the power supply and wait until the fan stops. • When you remove the air filter, do not touch the metal parts of the indoor unit. Doing so may cause an injury. -
Page 26: Cleaning The Air Filter
MAINTENANCE Cleaning the Air Filter Dry the filter in the shade. NOTE • Do not bend the air filter, as it may break. • Assemble the air filter properly to prevent dust and other substances from entering the product. Turn off the power to the appliance. Remove the air filter from the air intake. -
Page 27: After Long Periods Of Disuse
MAINTENANCE After Long Periods of Disuse Clean the air filter and install it in the indoor unit. Check that the air inlet and outlet of the indoor/ outdoor unit are not blocked. Check that the ground wire is connected correctly. •... -
Page 28: Troubleshooting
TROUBLESHOOTING TROUBLESHOOTING Before Calling for Service Please check the following before you contact the service centre. If the problem persists, contact your local service centre. NOTE • Some functions may not be supported, depending on the model. Operation Symptoms Possible Cause & Solution The appliance does not Burning smell and strange sounds are coming from the appliance. - Page 29 TROUBLESHOOTING Symptoms Possible Cause & Solution The appliance stops The appliance is suddenly turned off. during operation. • The Off Timer function may have timed out, which turns the appliance off. Check the timer settings. Have you made a mistake in timer operation? •...
- Page 30 TROUBLESHOOTING Symptoms Possible Cause & Solution The appliance does not The room temperature is too high. emit cool air. • In summer, cooling the indoor air fully may take some time. In this case, select the Jet mode to cool the indoor air quickly. The room may have been very hot when the room air conditioner was first turned on.
-
Page 31: Performance
TROUBLESHOOTING Performance Symptoms Possible Cause & Solution The indoor unit is still The Auto Clean function is being operated. operating even when • Allow the Auto Clean function to continue since it reduces any remaining the appliance has been moisture inside the indoor unit. If you do not want this function, you can turned off. -
Page 32: Calling For Service
TROUBLESHOOTING Calling for Service Situations in which Calling for Service is Necessary If the appliance is in one of the following situations, please call the service. • Anything abnormal, such as a burning smell, loud noises, etc., occur; - Turn off the appliance and circuit breaker. - Never try to repair or restart the appliance yourself. -
Page 33: Appendix
APPENDIX APPENDIX Outdoor Unit information Specification Power Supply: 1 , 220-240 V~, 50/60 Hz / 3 ø, 380-415 V~, 50/60 Hz ┤ Model ZUAA1 ZUAB1 ZUAC1 Phase Refrigerant precharged 0.75 0.98 1.25 amounted (kg) Net weight (kg) 24.2 30.9 41.5 Dimension (W X H X D) (mm) 717 x 483 x 230 770 x 545 x 288... -
Page 34: Installation Of Outdoor Unit
APPENDIX Installation of Outdoor Unit • If an awning is built over the unit to prevent direct sunlight or rain exposure, make sure that heat radiation from the condenser is not restricted. • Ensure that the spaces indicated by arrows around front, back and side of the unit. •... -
Page 35: Indoor Unit Information
APPENDIX Indoor Unit Information Specification Power Supply: 1 , 220-240 V~, 50/60 Hz ┤ Model ZBNQ18GM1A0 ZBNQ24GM1A0 ZBNQ36GM3A0 Phase Net weight (kg) 23.8 25.3 Dimension (W X H X D) (mm) 900 x 270 x 700 900 x 270 x 700 1250 x 360 x 700 Piping Liquid Pipes... -
Page 36: Only For India
APPENDIX Top View Inspection hole Control box Air otlet Side View 20 or more Only for INDIA...
Need help?
Do you have a question about the ABNQ36GM3A4 and is the answer not in the manual?
Questions and answers