Table of Contents
Advertisement
Available languages
Available languages
Quick Links
OWNER'S MANUAL
AIR
CONDITIONER
Please read this manual carefully before operating your set and retain it for future
reference.
CEILING CONCEALED DUCT
Original instruction
ABNQ09GL1A2 / ABNQ12GL2A2
ABNQ18GL2A2 / ABNQ24GL3A2
I.15.LEI8.04287.1018
*MFL67798206*
Rev. : 00(11T18)
Copyright © 2018 LG Electronics Inc. All Rights Reserved.
www.lg.com
Advertisement
Table of Contents

Related Manuals for LG ABNQ09GL1A2


Summary of Contents for LG ABNQ09GL1A2
- Page 1 Please read this manual carefully before operating your set and retain it for future reference. CEILING CONCEALED DUCT Original instruction ABNQ09GL1A2 / ABNQ12GL2A2 ABNQ18GL2A2 / ABNQ24GL3A2 I.15.LEI8.04287.1018 *MFL67798206* www.lg.com Copyright © 2018 LG Electronics Inc. All Rights Reserved. Rev. : 00(11T18)
- Page 2 TIPS FOR SAVING ENERGY TIPS FOR SAVING ENERGY Here are some tips that will help you minimize the power consumption when you use the air condi- tioner. You can use your air conditioner more efficiently by referring to the instructions below: •...
-
Page 3: Important Safety Instructions
IMPORTANT SAFETY INSTRUCTIONS IMPORTANT SAFETY INSTRUCTIONS READ ALL INSTRUCTIONS BEFORE USING THE APPLIANCE. Always comply with the following precautions to avoid dangerous situations and ensure peak perform- ance of your product WARNING It can result in serious injury or death when the directions are ignored CAUTION It can result in minor injury or product damage when the directions are ignored This appliance is intended to be used by expert or trained users in shops, in light industry and on... - Page 4 IMPORTANT SAFETY INSTRUCTIONS • Indoor/outdoor wiring connections must be secured tightly and the cable should be routed prop- erly so that there is no force pulling the cable from the connection terminals. Improper or loose connections can cause heat generation or fire. •...
- Page 5 IMPORTANT SAFETY INSTRUCTIONS the neighborhoods. It may cause a problem for your neighbors and hence dispute. • Always check for gas (refrigerant) leakage after installation or repair of product. Low refrigerant lev- els may cause failure of product. • Do not use the product for special purposes, such as preserving foods, works of art, etc. It is a consumer air conditioner, not a precision refrigeration system.
-
Page 6: Table Of Contents
TABLE OF CONTENTS TABLE OF CONTENTS TIPS FOR SAVING ENERGY IMPORTANT SAFETY INSTRUCTIONS BEFORE USE Preparing for operation Usage Cleaning and maintenance Service PRODUCT INTRODUCTION Name and function of parts (CEILING CONCEALED DUCT) What to do before operation Wired Remote Controller OPERATING INSTRUCTIONS Standard Operation - Standard Cooling Standard Operation - Power Cooling... -
Page 7: Before Use
BEFORE USE BEFORE USE Preparing for operation • Contact an installation specialist for installation. • Use a dedicated circuit. Usage • Being exposed to direct airflow for an extended period of time could be hazardous to your health. Do not expose occupants, pets, or plants to direct airflow for extended periods of time. •... -
Page 8: Product Introduction
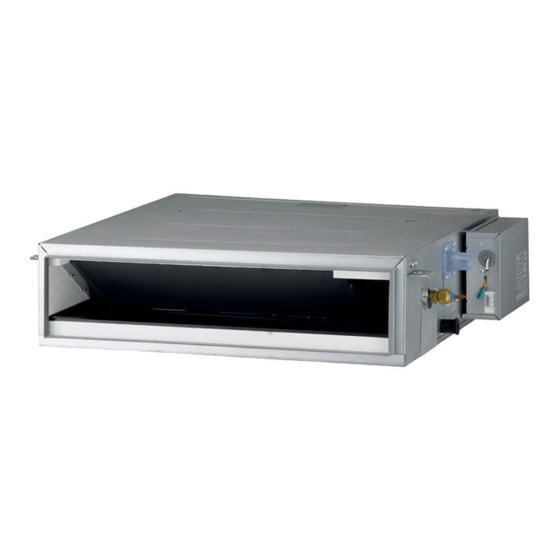
PRODUCT INTRODUCTION PRODUCT INTRODUCTION Name and function of parts (CELING CONCEALED DUCT) 1: Indoor unit 2: Outdoor unit Air intake vents 3: Remote controller 4: Inlet air Air outlet Remote 5: Discharge air vents Controller 6: Refrigerant piping, connection electric wire 7: Drain pipe 8: Ground wire wire to ground outdoor unit to prevent electrical... -
Page 9: What To Do Before Operation
PRODUCT INTRODUCTION What to do before operation If your installation has a customized control system, ask your LG dealer for the operation that corresponds to your system. 1: Unit with remote controller 2: Unit without remote controller (when used as... -
Page 10: Wired Remote Controller
PRODUCT INTRODUCTION Wired Remote Controller OPERATION INDICATION SCREEN SET TEMPERATURE Button FAN SPEED Button ON/OFF Button OPRATION MODE SELECTION Button WIRELESS REMOTE CONTROLLER RE- CEIVER • Some products don't receive the wireless signals. AIR FLOW Button SUBFUNCTION Button FUNCTION SETTING Button VENTILATION Button RESERVATION UP,DOWN,LEFT,RIGHT Button... -
Page 11: Operating Instructions
OPERATING INSTRUCTIONS OPERATING INSTRUCTIONS Standard Operation - Standard Cooling It cools the room by comfortable and clean wind. Press button to turn on the indoor. Press button to select Cooling operation mode. Adjust the desired temperature by pressing buttons. Press button to check the Room temperature. -
Page 12: Standard Operation - Power Cooling
OPERATING INSTRUCTIONS Standard Operation - Power Cooling It makes the room cool using pleasant and fresh air quickly. Press button to trun on the indoor. Press button to select cooling operation mode. Press button continuously until 'Po' displayed. What is Power Cooling? •... -
Page 13: Standard Operation - Dehumidification Mode
OPERATING INSTRUCTIONS Standard Operation - Dehumidification Mode It removes humidity while air-cooling weakly. Press button to turn on the indoor. Press button to select Dehumidification mode. The temperature setting can not be adjusted during operation this mode. Press the button to select airflow rate feeble weak medium... -
Page 14: Standard Operation - Fan Mode
OPERATING INSTRUCTIONS Standard Operation - Fan Mode It blows the air as it is in the indoor, not the cold wind. Press button to turn on the indoor. Press button to select Fan Mode. Every time pressing button, you can select wind flow in order of feeble →... -
Page 15: Standard Operation - Auto Operation Mode
OPERATING INSTRUCTIONS Standard Operation - Auto Operation Mode Press button to turn on the indoor. Press button to select Artificial intelligence Mode. You can adjust the temperature as the picture on the right for cooling and heating model. For the case of cooling exclusive, as the picture on the right, you can... -
Page 16: Standard Operation - Airflow Setting
OPERATING INSTRUCTIONS Standard Operation - Airflow Setting Wind powerfulness : You can simply adjust desired wind powerfulness. Please setup desired wind powerfulness by wind powerfulness button. • Every time you press wind powerfulness, you can select the wind flow in order of ‘feeble →... -
Page 17: Standard Operation - Temperature Setting/Room Temperature Check
OPERATING INSTRUCTIONS Standard Operation - Temperature Setting/Room Temperature Check Temperature Setting We can simply adjust the desired temperature. • Press the buttons to adjust the desired temperature. : Increase 1 ˚C or 2 ˚F per one time pressing : Decrease 1 ˚C or 2 ˚F per one time pressing •... -
Page 18: Function Setting - Child Lock
OPERATING INSTRUCTIONS Function Setting - Child Lock It is the function to use preventing children or others from careless using. Press button repeatedly until the is flashing. If moving to 'setup' icon area by using button, 'setup' icon blinks, and child lock function is setup if pressing button at that time. -
Page 19: Function Setting - Change Temp
OPERATING INSTRUCTIONS Function Setting - Change Temp Change temperature is the function to setup air-cooling and heating drive automatically changeable according to the temperature at artificial intelligence drive mode. Repeat pressing button until icon flash. Press button to change. ❈ Converting temp value : 1~7 Press button to complete and active the setting process. -
Page 20: Function Setting - Filter Sign Clear
OPERATING INSTRUCTIONS Function Setting - Filter Sign Clear This function is to clear the indicator of indoor filter cleaning. Press button repeatedly until the is flashing. When the is flashing, press to clear this display • When filter is covered by dust, it will reduce cooling/heating efficiency and accumulate more electric power. -
Page 21: Function Setting - Vane Angle Control
OPERATING INSTRUCTIONS Function Setting - Vane Angle Control This function is to adjust angle at which airflow is blow out. * Some functions may not be operated and displayed depending on the product type. Repeat pressing button until icon flash. Press button to select active vane : 1 / 2 / 3 / 4 / All / Standard... -
Page 22: Function Setting - Changing Current Time
OPERATING INSTRUCTIONS Function Setting - Changing Current Time Please press function setup button. If pressing function setup button repeatedly, it moves to time setup menu. ‘Time setup’ icon is indicated at that time and date blinks at current time indication area. - Page 23 OPERATING INSTRUCTIONS Press button to move to 'Minute' setting mode. (the 'Minute' segment will flash) Setting Minute value by pressing button. Press button to finish. In the process, press button to release and exit from setting mode. (In case of exit with incomplete information, it will return to the previous setting) ❈...
-
Page 24: Programming - Simple Reservation
OPERATING INSTRUCTIONS Programming - Simple Reservation You can set the reservation conveniently in the units of 1 hour from 1 hour to 7 hours. Press button to enter the Programming mode. (the segment flashing) Ex) Setting Simple Reservation time as '3'. Press button to adjust reservation time. -
Page 25: Programming : Weekly Reservation
OPERATING INSTRUCTIONS Programming : Weekly Reservation You can set the daily reservation in weekly unit. Weekly reservation keeps operating until before you cancel it once you setup. Please move to reservation setup mode by pressing reservation button. ❈ You can setup two weekly reservations for one day, and up to fourteen reservations for a week. - Page 26 OPERATING INSTRUCTIONS Please move to 'AM/PM' setup part of turning off by using button. - AM/PM setup is identical with turning on time setup. Please move to 'hour' setup part of turning off by using Right button. - It is the part to reserve the time at which air-conditioner is turned off.
-
Page 27: Programming - Sleep Reservation
OPERATING INSTRUCTIONS Programming - Sleep Reservation Sleep reservation is the function of air-conditioner to run and stop after certain period of time at sleep mode before sleep. When connected to a ventilation product and set the sleep reservation, when it goes to the sleep mode, after the set time has elapsed. -
Page 28: Programming - On Reservation
OPERATING INSTRUCTIONS Programming - ON Reservation Automatically turned On at reserved time that you set. Press button. Ex) Setting ON Reservation Time as 'AM 10:20'. Repeat pressing button to enter the ON reservation setting mode. segment flashing) Press button to adjust AM/ PM setting. - Page 29 OPERATING INSTRUCTIONS Press button to exit. ❈ After setup, it automatically gets out of setup mode if there is no button input for 25 seconds. ❈ When exiting without pressing set button, the manipulated value is not reflected. - If reservation is set, 'turned on' indication shows up at the lower part of LCD screen, and air-conditioner product runs at the time that is set.
-
Page 30: Programming - Off Reservation
OPERATING INSTRUCTIONS Programming - OFF Reservation Automatically turned Off at reserved time that you set. Press button. Ex) Setting OFF Reservation Time as 'AM 10:20'. Repeatedly pressing button to enter the OFF reservation setting mode. segment flashing) Press button to adjust AM/ PM setting. - Page 31 OPERATING INSTRUCTIONS Press button to exit. ❈ After setup, it automatically gets out of setup mode if there is no button input for 25 seconds. ❈ When exiting without pressing set button, the manipulated value is not reflected. - If reservation is set, 'turned off' indication shows up at the lower part of LCD screen, and air-conditioner product runs at the time that is set.
-
Page 32: Programming : Holiday Reservation
OPERATING INSTRUCTIONS Programming : Holiday Reservation It automatically stops at reserved day that you set. Please press button. It enters into reservation setup mode. Please move to 'holiday' by repeatedly pressing button. Please move to 'date' that you want to setup holiday by using button. -
Page 33: Maintenance And Service
MAINTENANCE AND SERVICE MAINTENANCE AND SERVICE - Never use any of the followings: CAUTION Water hotter than 40 °C. Before performing any maintenance, turn Could cause deformation and/or discoloration. off the main power to the system. Volatile substances. Could damage the surfaces of the air conditioner. -
Page 34: Operation Tips
MAINTENANCE AND SERVICE Operation Tips! Do not overcool the room. Keep blinds or curtains closed. Keep the room temperature uniform. This is not good for the health Do not let direct sunshine enter and wastes electricity. the room when the air Adjust the vertical and conditioner is in operation. -
Page 35: Troubleshooting Tips! Save Time And Money
MAINTENANCE AND SERVICE Troubleshooting Tips! Save time and money! Check the following points before requesting repairs or service..If the malfunction persist, please contact your dealer. Case E xplanation • Have you made a mistake in timer operation? The air conditioner does not operate. - Page 37 Vui lòng đọc kỹ hướng dẫn này trước khi vận hành thiết bị của bạn và giữ lại để tham khảo về sau. DÀN LẠNH ÂM TRẦN NỐI ỐNG GIÓ Hướng dẫn cơ bản www.lg.com Copyright © 2018 LG Electronics Inc. All Rights Reserved.
- Page 38 HƯỚNG DẪN TIẾT KIỆM ĐIỆN HƯỚNG DẪN TIẾT KIỆM ĐIỆN Dưới đây là một số hướng dẫn giúp bạn giảm thiểu mức tiêu thụ điện khi bạn sử dụng điều hòa không khí. Bạn có thể sử dụng điều hòa không khí hiệu quả hơn bằng cách tham khảo các hướng dẫn dưới đây: •...
- Page 39 CÁC HƯỚNG DẪN AN TOÀN QUAN TRỌNG CÁC HƯỚNG DẪN AN TOÀN QUAN TRỌNG ĐỌC KỸ TẤT CẢ HƯỚNG DẪN TRƯỚC KHI SỬ DỤNG THIẾT BỊ NÀY. Luôn tuân thủ các lưu ý sau đây để tránh các trường hợp nguy hiểm và đảm bảo hiệu quả hoạt động cao nhất của sản phẩm CẢNH BÁO Nó...
- Page 40 CÁC HƯỚNG DẪN AN TOÀN QUAN TRỌNG • Không được bảo quản hoặc sử dụng hoặc thậm chí để khí dễ cháy hoặc vật liệu dễ cháy gần sản phẩm. Có nguy cơ xảy ra cháy nổ. • Các điểm nối dây điện của dàn nóng / dàn lạnh phải được bảo vệ chắc chắn và phải đi cáp phù hợp sao cho không tạo ra lực kéo cáp từ...
- Page 41 CÁC HƯỚNG DẪN AN TOÀN QUAN TRỌNG • Không được lắp đặt sản phẩm tại nơi mà tiếng ồn hoặc không khí nóng sinh ra từ sản phẩm có thể làm bị thương hoặc gây phiền toái cho hàng xóm. Nó có thể gây khó khăn cho hàng xóm của bạn và nảy sinh xung đột.
- Page 42 MỤC LỤC MỤC LỤC HƯỚNG DẪN TIẾT KIỆM ĐIỆN CÁC HƯỚNG DẪN AN TOÀN QUAN TRỌNG TRƯỚC KHI SỬ DỤNG Chuẩn bị vận hành Cách sử dụng Vệ sinh và bảo trì Bảo dưỡng GIỚI THIỆU VỀ SẢN PHẨM Tên và chức năng của các bộ phận (ĐƯỜNG ỐNG ÂM TRẦN) Cần làm gì...
- Page 43 TRƯỚC KHI SỬ DỤNG TRƯỚC KHI SỬ DỤNG Chuẩn bị vận hành • Liên hệ với kỹ thuật viên lắp đặt để lắp đặt sản phẩm. • Sử dụng mạch được chỉ định. Cách sử dụng • Việc tiếp xúc với luồng không khí trực tiếp trong một khoảng thời gian dài có thể gây nguy hại cho sức khỏe của bạn.
- Page 44 GIỚI THIỆU VỀ SẢN PHẨM GIỚI THIỆU VỀ SẢN PHẨM Tên và chức năng của các bộ phận (ĐƯỜNG ỐNG ÂM TRẦN) 1: Thiết bị trong nhà 2: Thiết bị ngoài trời Air intake vents 3: Bộ điều khiển từ xa 4: Không khí...
- Page 45 Cần làm gì trước khi vận hành Nếu công tác lắp đặt của bạn có một hệ thống kiểm soát tuỳ chỉnh, hãy hỏi đại lý LG của bạn để biết cách vận hành tương ứng với hệ thống của bạn.
- Page 46 GIỚI THIỆU VỀ SẢN PHẨM Bộ Điều Khiển Từ Xa Có Dây Màn hình biểu thị vận hành Nút cài đặt nhiệt độ Nút tốc độ quạt Nút BẬT / TẮT Nút CHỌN CHẾ ĐỘ VẬN HÀNH Bộ thu tín hiệu bộ điều khiển từ xa không dây •...
- Page 47 HƯỚNG DẪN VẬN HÀNH HƯỚNG DẪN VẬN HÀNH Vận hành Tiêu chuẩn - Chế độ Làm mát Nó làm mát căn phòng bằng gió sạch và dễ chịu. Nhấn để bật thiết bị trong nhà. Nhấn nút để chọn Chế độ vận hành làm mát.
- Page 48 HƯỚNG DẪN VẬN HÀNH Vận hành Tiêu chuẩn - Làm mát nhanh Nó làm mát căn phòng bằng cách sử dụng không khí trong lành và dịu mát nhanh chóng. Nhấn để bật thiết bị trong nhà. Nhấn nút để chọn Chế độ vận hành làm mát.
- Page 49 HƯỚNG DẪN VẬN HÀNH Vận hành Tiêu chuẩn - Chế độ Khử ẩm Nó loại bỏ độ ẩm trong khi làm mát không khí yếu. Nhấn để bật thiết bị trong nhà. Nhấn nút để chọn Chế độ khử ẩm Không thể...
- Page 50 HƯỚNG DẪN VẬN HÀNH Vận hành Tiêu chuẩn - Chế độ Quạt Nó thổi không khí khi ở trong nhà, chứ không phải gió lạnh. Nhấn để bật thiết bị trong nhà. Nhấn nút để chọn Chế độ Quạt. Mỗi lần nhấn nút , bạn có...
- Page 51 HƯỚNG DẪN VẬN HÀNH Vận hành Tiêu chuẩn - Chế độ Vận hành Tự động Nhấn để bật thiết bị trong nhà. Nhấn nút để chọn Chế độ Trí tuệ Nhân tạo. Bạn có thể điều chỉnh nhiệt độ như hình ảnh bên phải cho dòng máy làm mát và...
- Page 52 HƯỚNG DẪN VẬN HÀNH Vận hành Tiêu chuẩn - Thiết lập Luồng không khí Công suất gió : Bạn có thể điều chỉnh đơn giản công suất gió mong muốn. Hãy thiết lập công suất gió mong muốn bằng nút công suất gió. •...
- Page 53 HƯỚNG DẪN VẬN HÀNH Vận hành Tiêu chuẩn - Thiết lập Nhiệt độ/Kiểm tra Nhiệt độ Phòng Thiết lập Nhiệt độ Chúng ta có thể điều chỉnh nhiệt độ mong muốn một cách đơn giản. • Nhấn nút để điều chỉnh nhiệt độ mong muốn.
- Page 54 HƯỚNG DẪN VẬN HÀNH Cài đặt chức năng - Khóa Trẻ em Sử dụng chức năng này để phòng ngừa trẻ em hoặc người khác do sử dụng bất cẩn. Nhấn nút liên tục cho đến khi nhấp nháy. Nếu chuyển đến vùng biểu tượng 'setup' bằng cách sử...
- Page 55 HƯỚNG DẪN VẬN HÀNH Cài đặt Chức năng - Thay đổi Nhiệt độ Thay đổi nhiệt độ là chức năng để thiết lập điều khiển làm mát và làm ấm không khí có thể thay đổi tự động theo nhiệt độ ở chế độ điều khiển trí tuệ nhân tạo. Nhấn liên tục nút cho đến khi biểu tượng...
- Page 56 HƯỚNG DẪN VẬN HÀNH Cài đặt chức năng - Xoá Tín hiệu Bộ lọc Chức năng này là để làm sạch đèn chỉ báo của chức năng vệ sinh bộ lọc của dàn lạnh. Nhấn nút liên tục cho đến nhấp nháy.
- Page 57 HƯỚNG DẪN VẬN HÀNH Cài đặt chức năng - Kiểm soát Góc Cánh quạt Chức năng này là để điều chỉnh góc lưu lượng khí được thổi ra. * Một số chức năng có thể không hoạt động và không được hiển thị tùy thuộc từng loại sản phẩm. Nhấn liên tục nút cho đến khi biểu tượng...
- Page 58 HƯỚNG DẪN VẬN HÀNH Cài đặt chức năng - Thay đổi Thời gian Hiện tại Hãy nhấn nút thiết lập chức năng. Nếu nhấn nút thiết lập chức năng liên tục, nó chuyển đến menu thiết lập thời gian. Biểu tượng ‘Time setup’ được chỉ báo ở ngày và...
- Page 59 HƯỚNG DẪN VẬN HÀNH Nhấn nút để chuyển đến chế độ thiết lập 'Phút'. (đoạn 'Phút' sẽ nhấp nháy) Thiết lập giá trị Phút bằng cách nhấn nút Nhấn để kết thúc. Trong quy trình, nhấn nút để giải phóng và thoát khỏi chế...
- Page 60 HƯỚNG DẪN VẬN HÀNH Lập trình - Bảo quản Đơn giản Bạn có thể thiết lập hẹn giờ một cách thuận tiện trong các thiết bị 1 giờ từ 1 giờ đến 7 giờ. Nhấn nút để nhập chế độ Lập trình.
- Page 61 HƯỚNG DẪN VẬN HÀNH Lập trình : Bảo quản Hàng tuần Bạn có thể thiết lập hẹn giờ hàng ngày ở thiết bị hàng tuần. Hẹn giờ hàng tuần duy trì vận hành cho đến trước khi bạn hủy nó ngay sau khi bạn thiết lập. Vui lòng chuyển đến chế...
- Page 62 HƯỚNG DẪN VẬN HÀNH Vui lòng chuyển đến phần thiết lập 'AM/PM' khi tắt bằng cách sử dụng nút - Thiết lập AM/PM giống với thiết lập thời gian bật. Vui lòng chuyển đến phần thiết lập 'giờ' khi tắt bằng cách sử dụng nút Phải.
- Page 63 HƯỚNG DẪN VẬN HÀNH Lập trình - Bảo quản Khi ngủ Hẹn giờ ngủ là chức năng của điều hòa không khí để vận hành và dừng sau một khoảng thời gian nhất định ở chế độ ngủ trước khi ngủ. Khi được kết nối với một sản phẩm thông khí và thiết lập hẹn giờ...
- Page 64 HƯỚNG DẪN VẬN HÀNH Lập trình - Bảo quản BẬT Tự động được Bật ở thời gian đã hẹn giờ mà bạn thiết lập. Nhấn nút Ví dụ) Thiết lập Thời gian Hẹn giờ BẬT là '10:20 AM'. Nhấn lặp lại nút để...
- Page 65 HƯỚNG DẪN VẬN HÀNH Nhấn nút để thoát. ❈ Sau khi thiết lập, nó tự động thoát khỏi chế độ thiết lập nếu không nhấn nút nào trong 25 giây. ❈ Khi thoát mà không nhấn nút thiết lập, giá trị được thao tác không được phản ánh.
- Page 66 HƯỚNG DẪN VẬN HÀNH Lập trình - Bảo quản TẮT Tự động được Tắt ở thời gian đã hẹn giờ mà bạn thiết lập. Nhấn nút Ví dụ) Thiết lập Thời gian Hẹn giờ TẮT là '10:20 AM'. Nhấn lặp lại nút để...
- Page 67 HƯỚNG DẪN VẬN HÀNH Nhấn nút để thoát. ❈ Sau khi thiết lập, nó tự động thoát khỏi chế độ thiết lập nếu không nhấn nút nào trong 25 giây. ❈ Khi thoát mà không nhấn nút thiết lập, giá trị được thao tác không được phản ánh.
- Page 68 BẢO TRÌ VÀ BẢO DƯỠNG Lập trình : Bảo quản Ngày nghỉ Nó sẽ tự động dừng lại ở ngày đã hẹn giờ mà bạn thiết lập. Vui lòng nhấn nút Nó sẽ vào chế độ thiết lập hẹn giờ. Vui lòng chuyển đến 'ngày nghỉ' bằng cách nhấn lặp đi lặp lại nút Vui lòng chuyển đến 'ngày' mà...
- Page 69 BẢO TRÌ VÀ BẢO DƯỠNG BẢO TRÌ VÀ BẢO DƯỠNG - Tuyệt đối không sử dụng : THẬN TRỌNG Nước nóng trên 40 °C. Trước khi thực hiện bảo trì, hãy tắt nguồn Có thể làm biến dạng và / hoặc bạc màu. điện chính vào hệ...
- Page 70 BẢO TRÌ VÀ BẢO DƯỠNG Các Hướng dẫn Vận hành! Không được bật quá lạnh Luôn đóng mành che hoặc Luôn giữ nhiệt độ trong trong phòng. rèm cửa. phòng tỏa đều. Điều này không tốt cho sức Không được để ánh nắng trực Điều chỉnh luồng không khí...
- Page 71 BẢO TRÌ VÀ BẢO DƯỠNG Hướng dẫn Xử lý sự cố! Tiết kiệm thời gian và tiền bạc! Hãy kiểm tra các mục sau trước khi yêu cầu sửa chữa hay bảo dưỡng..Nếu chưa khắc phục được trục trặc, hãy liên hệ với đại lý bán hàng của bạn. Vỏ...
- Page 73 BUKU PANDUAN PEMILIK PENDINGIN RUANGAN Silakan baca buku panduan ini dengan cermat sebelum mengoperasikan alat Anda dan simpan buku ini untuk referensi di masa mendatang. CEILING CONCEALED DUCT Petunjuk asli www.lg.com Hak cipta © 2018 LG Electronics. Semua hak cipta di lindungi.
- Page 74 KIAT UNTUK MENGHEMAT ENERGI KIAT UNTUK MENGHEMAT ENERGI Berikut ini beberapa kiat yang akan membantu Anda meminimalkan konsumsi daya saat Anda menggunakan pendingin ruangan. Anda dapat menggunakan pendingin ruangan secara lebih efisien dengan mengikuti petunjuk di bawah ini: • Jangan mendinginkan ruangan secara berlebihan. Hal ini dapat berbahaya bagi kesehatan Anda dan dapat mengonsumsi lebih banyak listrik.
- Page 75 PETUNJUK KESELAMATAN PENTING PETUNJUK KESELAMATAN PENTING BACA SEMUA PETUNJUK SEBELUM MENGGUNAKAN ALAT. Selalu patuhi tindakan pencegahan berikut untuk menghindari situasi yang berbahaya dan memastikan kinerja terbaik produk Anda PERINGATAN Saat petunjuk diabaikan, itu dapat menyebabkan cedera serius atau kematian. PERHATIAN Saat petunjuk diabaikan, itu dapat menyebabkan cedera ringan atau kerusakan produk.
- Page 76 PETUNJUK KESELAMATAN PENTING • Buang bahan kemasan dengan aman. Seperti sekrup, paku, baterai, barang yang rusak, dsb setelah pemasangan atau servis dan kemudian robek dan buang tas kemasan plastik. Anak-anak dapat bermain dengannya dan menyebabkan cedera. • Pastikan untuk mengecek steker tidak kotor, longgar atau rusak dan kemudian hanya masukkan steker sepenuhnya.
- Page 77 PETUNJUK KESELAMATAN PENTING • Jangan menggunakan produk untuk tujuan khusus, seperti mengawetkan makanan, karya seni, dsb. Ini adalah pendingin ruangan untuk konsumen, bukan sistem pendinginan yang presisi. Ada risiko kerusakan atau hilangnya properti. • Jangan menghalangi aliran udara masuk atau keluar. Hal itu dapat menyebabkan kerusakan produk.
- Page 78 DAFTAR ISI DAFTAR ISI KIAT UNTUK MENGHEMAT ENERGI PETUNJUK KESELAMATAN PENTING SEBELUM MENGGUNAKAN Mempersiapkan untuk pengoperasian Penggunaan Pembersihan dan pemeliharaan Layanan PENGENALAN PRODUK Nama dan fungsi bagian(CEILING CONCEALED DUCT) Apa yang harus dilakukan sebelum pengoperasian Pengendali Jarak Jauh Berkabel PETUNJUK PENGOPERASIAN Operasi Standar - Pendinginan Standar Operasi Standar - Pendinginan Kuat Operasi Standar - Mode Pemanasan...
- Page 79 SEBELUM MENGGUNAKAN SEBELUM MENGGUNAKAN Mempersiapkan untuk pengoperasian • Hubungi spesialis pemasangan untuk melakukan pemasangan. • Gunakan rangkaian khusus tersendiri. Penggunaan • Terpapar aliran udara langsung untuk waktu yang lama dapat berbahaya bagi kesehatan Anda. Jangan biarkan penghuni, hewan piaraan, atau tanaman terpapar aliran udara langsung untuk waktu yang lama.
- Page 80 PENGENALAN PRODUK PENGENALAN PRODUK Nama dan fungsi bagian (CEILING CONCEALED DUCT) 1: Unit dalam ruangan 2: Unit luar ruangan Saluran udara 3: Pengendali jarak jauh 4: Udara masuk 5: Udara buangan Lubang Lubang Pengendali keluar udara keluar udara jarak jauh 6: Pipa zat pendingin, sambungan kabel listrik 7: Pipa pembuangan 8: Kabel tanah...
- Page 81 PENGENALAN PRODUK Apa yang harus dilakukan sebelum pengoperasian Jika pemasangan Anda memiliki sistem kontrol yang disesuaikan, tanyakan kepada dealer LG Anda untuk operasi yang sesuai dengan sistem Anda. 1: Unit dengan pengendali jarak jauh 2: Unit tanpa pengendali jarak jauh...
- Page 82 PENGENALAN PRODUK Pengendali Jarak Jauh Berkabel LAYAR INDIKATOR OPERASI Tombol SETEL SUHU Tombol KECEPATAN KIPAS Tombol NYALA/MATI Tombol PEMILIHAN MODE OPERASI PENERIMA PENGENDALI JARAK JAUH NIRKABEL • Beberapa produk tidak menerima sinyal nirkabel. Tombol ALIRAN UDARA Tombol SUBFUNGSI Tombol PENGATURAN FUNGSI Tombol VENTILASI RESERVASI Tombol ATAS, BAWAH, KIRI, KANAN...
- Page 83 PETUNJUK PENGOPERASIAN PETUNJUK PENGOPERASIAN Operasi Standar - Pendinginan Standar Ini akan mendinginkan ruangan dengan angin yang nyaman dan bersih. Tekan tombol untuk menyalakan Unit dalam ruangan. Tekan tombol untuk memilih mode operasi Pendinginan. Sesuaikan suhu yang diinginkan dengan menekan tombol Tekan tombol untuk mengecek suhu Ruangan.
- Page 84 PETUNJUK PENGOPERASIAN Operasi Standar - Pendinginan Kuat Ini membuat ruangan dingin menggunakan udara yang nyaman dan segar dengan cepat. Tekan tombol untuk menyalakan Unit dalam ruangan. Tekan tombol untuk memiliki mode operasi pendinginan. Tekan tombol berulang kali sampai 'Po' ditampilkan. Apa itu Pendinginan Kuat? •...
- Page 85 PETUNJUK PENGOPERASIAN Operasi Standar - Mode Dehumidifikasi Operasi ini menghilangkan kelembapan sambil mendinginkan udara dengan lemah. Tekan tombol untuk menyalakan Unit dalam ruangan. Tekan tombol untuk memilih mode Dehumidifikasi. Penyetelan suhu tidak dapat disesuaikan selama pengoperasian mode ini. Tekan tombol untuk memilih laju aliran udara sangat lemah →...
- Page 86 PETUNJUK PENGOPERASIAN Operasi Standar - Mode Kipas Operasi ini mengembuskan udara seperti di dalam ruangan, bukan angin dingin. Tekan tombol untuk menyalakan Unit dalam ruangan. Tekan tombol untuk memilih Mode Kipas. Setiap kali menekan tombol Anda dapat memilih aliran angin dengan urutan sangat lemah →...
- Page 87 PETUNJUK PENGOPERASIAN Operasi Standar - Mode Operasi Otomatis Tekan tombol untuk menyalakan Unit dalam ruangan. Tekan tombol untuk memilih Mode Kecerdasan buatan. Anda dapat menyesuaikan suhu seperti gambar di sebelah kanan untuk model pendingin dan pemanas. Untuk kasus eksklusif pendingin, seperti gambar di sebelah Saat dingin kanan, Anda dapat...
- Page 88 PETUNJUK PENGOPERASIAN Operasi Standar - Pengaturan Aliran Udara Kekuatan angin: Anda dapat menyesuaikan kekuatan angin yang diinginkan. Silakan atur kekuatan angin yang diinginkan dengan tombol kekuatan angin. • Setiap kali Anda menekan kekuatan angin, Anda dapat memilih aliran angin dengan urutan ‘sangat lemah → lemah →...
- Page 89 PETUNJUK PENGOPERASIAN Operasi Standar - Pengaturan Suhu/Pengecekan Suhu Ruangan Pengaturan Suhu Kita dapat menyesuaikan suhu yang diinginkan. • Tekan tombol-tombol untuk memilih suhu yang diinginkan. : Menaikkan 1 °C atau 2 °F per satu kali tekan : Menurunkan 1 °C atau 2 °F per satu kali tekan •...
- Page 90 PETUNJUK PENGOPERASIAN Pengaturan Fungsi - Kunci Pengaman Anak Ini adalah fungsi yang digunakan untuk mencegah anak-anak atau orang lain menggunakan alat dengan sembrono. Tekan tombol berulang kali sampai berkedip. Jika pergi ke area ikon ‘pengaturan’ dengan menggunakan tombol , ikon ‘pengaturan’...
- Page 91 PETUNJUK PENGOPERASIAN Pengaturan Fungsi - Mengubah Suhu Mengubah suhu adalah fungsi untuk mengatur drive pendinginan udara dan pemanasan dapat berubah-ubah secara otomatis sesuai suhu pada mode drive kecerdasan buatan. Ulangi menekan tombol sampai ikon berkedip. Tekan tombol untuk mengubah. ❈ Konversi nilai suhu : 1~7 Tekan tombol untuk menyelesaikan dan mengaktifkan...
- Page 92 PETUNJUK PENGOPERASIAN Pengaturan Fungsi - Menghapus Tanda Filter Fungsi ini adalah untuk menghilangkan indikator pembersihan filter dalam ruangan. Tekan tombol berulang kali sampai berkedip. Saat berkedip, tekan untuk menghilangkan tampilan ini. • Saat filter tertutup debu, itu akan mengurangi efisiensi pendinginan/pemanasan dan mengumpulkan lebih banyak daya listrik.
- Page 93 PETUNJUK PENGOPERASIAN Pengaturan Fungsi - Kontrol Sudut baling-baling Fungsi ini adalah untuk menyesuaikan sudut aliran udara yang keluar. * Beberapa fungsi mungkin tidak beroperasi dan ditampilkan tergantung pada tipe produk. Ulangi menekan tombol sampai ikon berkedip. Tekan tombol untuk memilih baling-baling yang aktif: 1 / 2 / 3 / 4 / Semua / Standar.
- Page 94 PETUNJUK PENGOPERASIAN Pengaturan Fungsi - Mengubah Waktu Saat Ini Silakan tekan tombol pengaturan fungsi. Jika tombol pengaturan fungsi ditekan berulang kali, itu akan pergi ke menu pengaturan waktu. Ikon ‘Pengaturan waktu’ ditunjukkan pada saat itu dan tanggal berkedip pada area indikator waktu saat ini.
- Page 95 PETUNJUK PENGOPERASIAN Tekan tombol untuk pergi ke mode pengaturan 'Menit'. (Bagian 'Menit' akan berkedip) Atur waktu Menit dengan menekan tombol Tekan tombol untuk selesai. Dalam proses, tekan tombol untuk melepaskan dan (Jika keluar dengan informasi yang tidak lengkap, itu akan kembali ke pengaturan sebelumnya) ❈...
- Page 96 PETUNJUK PENGOPERASIAN Pemrograman - Reservasi Sederhana Anda dapat menyetel reservasi dengan mudah dalam satuan 1 jam mulai dari 1 jam sampai 7 jam. Tekan tombol untuk masuk ke mode Pemrograman. (bagian berkedip) Mis) Mengatur waktu Reservasi Sederhana ke '3'. Tekan tombol untuk menyesuaikan waktu reservasi.
- Page 97 PETUNJUK PENGOPERASIAN Pemrograman : Reservasi Mingguan Anda dapat menyetel reservasi harian dalam satuan mingguan. Reservasi mingguan terus beroperasi sampai sebelum Anda membatalkannya setelah Anda melakukan pengaturan. Silakan akses ke mode pengaturan reservasi dengan menekan tombol reservasi. ❈ Anda dapat mengatur dua reservas i mingguan untuk satu hari, dan hingga empat belas reservasi untuk satu minggu.
- Page 98 PETUNJUK PENGOPERASIAN Silakan akses ke bagian pengaturan 'AM/PM' waktu mati dengan menggunakan tombol - Pengaturan AM/PM sama persis dengan pengaturan waktu nyala. Silakan akses ke bagian pengaturan 'jam' waktu mati dengan menggunakan tombol Kanan. - Ini adalah bagian untuk mengatur waktu kapan pendingin ruangan mati.
- Page 99 PETUNJUK PENGOPERASIAN Pemrograman - Reservasi Tidur Reservasi tidur adalah fungsi pendingin ruangan untuk beroperasi dan berhenti setelah jangka waktu tertentu pada mode tidur sebelum tidur. Saat disambungkan ke produk ventilasi dan reservasi tidur disetel, alat akan masuk ke mode tidur, setelah waktu yang disetel berlalu. Tekan tombol untuk masuk ke mode Pemrograman.
- Page 100 PETUNJUK PENGOPERASIAN Pemrograman - Reservasi NYALA Otomatis menyala pada waktu reservasi yang Anda setel. Tekan tombol Mis) Mengatur waktu Reservasi NYALA ke 'AM 10:20'. Tekan tombol berulang kali untuk masuk ke mode pengaturan reservasi NYALA. (bagian berkedip) Tekan tombol untuk menyesuaikan pengaturan AM/ PM.
- Page 101 PETUNJUK PENGOPERASIAN Tekan tombol untuk keluar. ❈ Setelah pengaturan, alat akan otomatis keluar dari mode pengaturan jika tidak ada masukan tombol selama 25 detik. ❈ Saat keluar tanpa menekan tombol set, nilai yang diubah tidak akan tercermin. - Jika reservasi sudah disetel, indikator 'waktu nyala' akan muncul pada bagian bawah layar LCD, dan produk pendingin ruangan akan...
- Page 102 PETUNJUK PENGOPERASIAN Pemrograman - Reservasi MATI Otomatis mati pada waktu reservasi yang Anda setel. Tekan tombol Mis) Mengatur Waktu Reservasi MATI ke 'AM 10:20'. Tekan berulang kali untuk masuk ke mode pengaturan reservasi MATI. (bagian berkedip) Tekan tombol untuk menyesuaikan pengaturan AM/ PM. untuk akses ke Tekan tombol mode pengaturan jam.
- Page 103 PETUNJUK PENGOPERASIAN Tekan tombol untuk keluar. ❈ Setelah pengaturan, alat akan otomatis keluar dari mode pengaturan jika tidak ada masukan tombol selama 25 detik. ❈ Saat keluar tanpa menekan tombol set, nilai yang diubah tidak akan tercermin. - Jika reservasi sudah disetel, indikator 'waktu mati' akan muncul pada bagian bawah layar LCD, dan produk pendingin ruangan akan...
- Page 104 PETUNJUK PENGOPERASIAN Pemrograman - Reservasi Liburan Alat akan berhenti secara otomatis pada hari reservasi yang Anda setel. Silakan Tekan tombol Alat masuk ke mode pengaturan reservasi. Silakan akses ke 'liburan' dengan menekan tombol berulang kali. Silakan akses ke 'tanggal' yang ingin Anda atur untuk liburan dengan menggunakan tombol Silakan tentukan atau batalkan liburan...
- Page 105 PEMELIHARAAN DAN LAYANAN PEMELIHARAAN DAN LAYANAN - Jangan pernah menggunakan salah satu PERHATIAN barang berikut: Air yang lebih panas dari 40 °C. Dapat menyebabkan perubahan bentuk Sebelum melakukan pemeliharaan, matikan dan/atau perubahan warna. aliran daya utama ke sistem. Zat yang mudah menguap. Dapat merusak permukaan pendingin ruangan.
- Page 106 PEMELIHARAAN DAN LAYANAN Kiat Pengoperasian! Jangan mendinginkan Jaga tirai atau gorden tetap Jaga suhu ruangan tetap ruangan secara berlebihan. tertutup. seragam. Hal ini tidak baik untuk Jangan biarkan sinar matahari Sesuaikan arah aliran udara kesehatan dan langsung masuk ke ruangan vertikal dan horizontal untuk membuang-buang listrik.
- Page 107 PEMELIHARAAN DAN LAYANAN Kiat Pemecahan Masalah! Menghemat waktu dan uang! Cek hal-hal berikut sebelum meminta perbaikan atau layanan..Jika kegagalan fungsi tetap terjadi, silakan hubungi dealer Anda. Kasus Penjelasan • Apakah Anda membuat kesalahan dalam pengoperasian timer? Pendingin ruangan tidak •...
- Page 108 Diimpor oleh : PT. LG ELECTRONICS INDONESIA GANDARIA 8 OFFICE TOWER, LT.29 BC & 31 ABCD. JL. SULTAN ISKANDAR MUDA KEBAYORAN LAMA, JAKATA SELATAN 12240, DKI JAKARTA RAYA, INDONESIA...
Need help?
Do you have a question about the ABNQ09GL1A2 and is the answer not in the manual?
Questions and answers