Advertisement
Advertisement
Table of Contents

Related Manuals for Stanton T.90


Summary of Contents for Stanton T.90
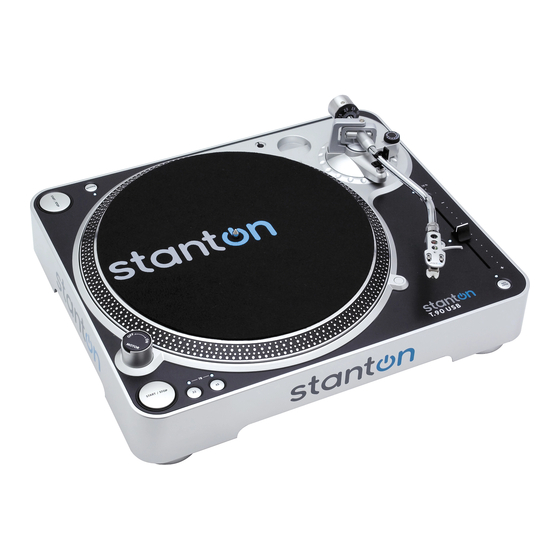
- Page 1 T.90 USB DIRECT DRIVE TURNTABLE USERS MANUAL...
-
Page 2: Important Safety Precaution
IMPORTANT SAFETY PRECAUTION 1. Read Instructions – All the safety and operating instructions should be read before this product is operated. 2. Retain Instructions – The safety and operating instructions should be retained for future reference. 3. Heed Warnings – All warnings on the appliance and in the operating instructions should be adhered to. - Page 3 SSEMBLY ‧ Cloth dust cover x1 CONNECTIONS Set the phono/line switch to “PH” Set the phono/line switch to “LINE”. T. 9 0 U S B T. 9 0 U S B TONE RM ND C RTRIDGE SETTING Visit www.stantondj.com for downloadable updates, videos, and news about this product.
-
Page 4: Controls Overview
When the strobe is stopped,the platter is rotating at the displayed speed. 4. SLIP MAT 5. CENTER SPINDLE - This spindle holds the turntable PLATTER and records stable and centered. 6. MOTOR ON/OFF SWITCH - As opposed to fully analog turntables, this is not the power switch. - Page 5 23. USB SOCKET- Connect the USB cable (included) to this socket and to a USB connector on your computer. After connecting the turntable to your computer, you can record your vinyl to your hard disk using the included Cakewalk Pyro 5 software.
-
Page 6: Audacity Software Overview
The T.90USB includes a USB computer interface and Cakewalk Pyro CD software for Windows. Macintosh users can download the free Audacity software for recording directly from the T.90 USB. By connecting the T.90USB to your computer and using the correct software, you can create custom CD’s from your record albums. - Page 7 AUDACITY SOFTWARE OVERVIEW RECORDING & SAVING TRACKS 10. When you are ready to record, click the 11. When you have finished the recording, click the You can now click and choose one audio file. 12. If you want to record the entire side of an LP, or a continuous selection of songs, repeat steps 1-3 above. When you are finished, you will be able to see each song as a waveform, with silence in-between each song.
- Page 8 CAKEWALK PYRO 5 SOFTWARE OVERVIEW (for PC users) To start, insert your complimentary Cakewalk Pyro 5 CD into your disc drive on your computer and follow the installation instructions to completely install the software on your operating system. Complete instructions on how to use all the features of the software are included in the Help Menu. To transfer and record transfer LPs to your hard drive from your T.90USB, start by connecting your T.90USB to your computer using a USB cable.
- Page 9 CAKEWALK PYRO 5 SOFTWARE OVERVIEW 2. On the , type in the filename you wish to save the LP recording under and locate where you want the file to be stored. 3. You can record the entire side of an LP, a continuous selection of tracks, or just a single track. To begin recording, click the begin playing your LP on the T.90USB.
- Page 10 CAKEWALK PYRO 5 SOFTWARE OVERVIEW 6. It’s a good idea to save each of your tracks, at least temporarily, prior to burning a CD. The easiest way to do this is to press the choose 7. This brings up a dialog box offering several choices. The first choice allows you to choose which tracks you want to save. Click on the box to the left of the track to save it.
- Page 11 CAKEWALK PYRO 5 SOFTWARE OVERVIEW (for PC users) 11. To create a CD, press the button. This brings up a dialog where you can select the CD burner to use. Press the button, and your CD will be created.
-
Page 12: Specifications
SPECIFICATIONS Dimensions: 452(W) x 370(D) x 143(H)mm Weight: 8.6Kgs Power supply: AC 100V, 50/60Hz (For Japan) AC 110V, 60Hz (For Taiwan) AC 120V, 60Hz (For U.S.A., Canada, Mexico) AC 220V, 50Hz (For United Arab Emirates, Chile, Argentina) AC 220V, 60Hz (For Philippines) AC 230V, 50Hz (For Europe, New Zealand, South Africa, Singapore, Israel) AC 240V, 50Hz (For Australia, U.K.) Power consumption:... -
Page 13: Warranty And Return Policy
Any returns to a non-authorized dealer or to an authorized Stanton dealer not in the same country as the merchandise was intended to be sold or as set forth above will void this warranty. - Page 14 NOTE...
Need help?
Do you have a question about the T.90 and is the answer not in the manual?
Questions and answers
how to play
To play the Stanton T.90 turntable, follow these steps:
1. Set Up the Cartridge: Install the cartridge into the headshell as per the instructions. Ensure the cartridge body is parallel with the headshell-tone arm centerline.
2. Attach the Headshell to the Tonearm: Insert the cartridge-headshell assembly into the tonearm tube lock.
3. Connect Wires: Attach the necessary cables, including the AC power cord, which is detachable for convenience.
4. Place the Turntable on a Stable Surface: The T.90 has shock-absorbing footpads, allowing placement on soft surfaces without balance issues.
5. Turn on the Turntable: Power on the unit and set the desired speed (33, 45, or 78 RPM) using the speed controls.
6. Use Additional Features (if needed): Adjust pitch and key using the slider, use the reverse button, and monitor spinning speed with the platter’s side dots.
7. Place the Vinyl on the Platter: Position the record on the turntable and lower the tonearm onto the vinyl to start playback.
8. Recording (Optional): If digitizing vinyl, use the USB output to connect to a computer and record audio using software like Audacity.
These steps ensure proper setup and playback of records on the Stanton T.90 turntable.
This answer is automatically generated