
Related Manuals for HOMCOM 370-160V70


Summary of Contents for HOMCOM 370-160V70
- Page 1 INfaa036_UK 370-160V70 Children’s Battery Operated Ride on Car WARNING! ● The toy must be assembled by adults. IMPORTANT, RETAIN FOR FUTURE REFERENCE: READ CAREFULLY ASSEMBLY INSTRUCTION...
- Page 2 Specifications: 6V/4.5AH*1 Battery: Motor: 18-48 months Suitable ages: 25kg Maximum weight: 0-3km/h Speed : Power way: Charging type Charg: 8-12 hours ; Use: 0.75 hours Use of time: Input AC 120~ 240V, 50~60Hz, output DC 6 V 500mA Charger: WARNING 1.The pictures in this instruction is only for explaining the operation and structure of the product, when there's any difference with the real product, please confirm with the real product.
- Page 3 STORAGE BATTERY INFORMATION AND MAINTENANCE ●Please charge hours before first time use. ●Please use the suitable adapter to charge storage battery, otherwise the ride-on will be damaged. ●Please charge the car once the speed is slower than normal, otherwise it will decrease storage battery life.
- Page 4 PREVENT FIRE AND ELECTRIC SHOCK: - Use the only rechargeable battery and charger supplied with your vehicle. -NEVER substitute the battery or the charger with another brand. Using another battery or charger may cause a fire or explosion. -Do not use the battery or charger for any other product. Overheating, fire or explosion could occur.
-
Page 5: Parts List
Parts List Q’ty (pcs) Name Remark Vehicle body Motor Wheel Bushing Rear axle Φ10 washer Φ8 washer Lock nut Hubcap Side wheel Φ4x16 turss head screw Vehicle head Warning light Spanner Seat Handlebar Front axle Foot board Rear number plate Front fork Φ5 nut M5X40 machine screw... -
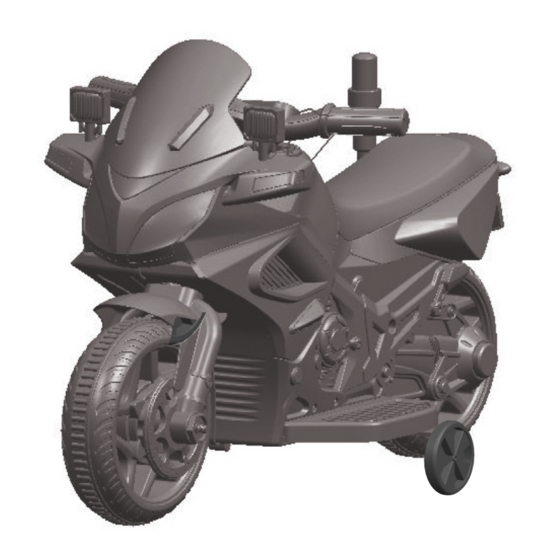
Page 6: Parts Diagram
Parts Diagram... - Page 7 Assembly Left side view Rear bottom view Insert the tabs on the foot board into the opening on the left of the vehicle body. 2. Fit the linkage of the side wheel against to the vehicle body. 3. Tighten four Φ4x16 truss head screws to secure it.
- Page 8 Assembly...
- Page 10 Assembly Front bottom view 6 6 6 Rear view Rear view 1. Fit the straight end of the front fork into the hole on the front of the vehicle. 2. Fit the handle bar to the front fork. 3. Align the holes on the each side of the handle bar with the holes at the end of front fork.
- Page 11 Assembly 3 3 1 Front view 1. Plug the connector on the faceguard into the connector on the vehicle. 2. Insert the tabs on the faceguard into the slots on the front of the vehicle. 3. Insert the two Φ4x12 round head screws and tighten them with a screwdriver to secure it.
- Page 12 Assembly 2 2 2 1 1 1 Seat inside view B a t t e r y 1. Remove the screw on the top of the seat and lift the seat. 2. Replace the seat. 3. Insert the red vehicle connector into the red terminal on the battery. 4.
- Page 13 Use Your New Ride-on Power switch: Turns the vehicle on or off. ① Forward/Reverse switch: Changes the ② direction that vehicle moves from forward to reverse. In the middle is stop. ③ Foot pedal switch: Applies power(speed) to the ride-on. ●...
- Page 14 Troubleshooting Guide 故障排查 故障类型 检 查 部 位 排 除 方 法 Possible Cause Solution Problem 电机不转 1.车辆的保险丝是否过载?(位 Vehicle does not run Battery low on power 是,保险丝会自动切断电源15-20秒, Recharge battery. 于本车座垫下方的保险丝盒) 然后重新启动; 否,下一项。 Thermal fuse has tripped 2.脚踏开关接触是否良好? The fuse will reset automatically in 20 seconds. 否,将脚踏开关修好;是,下一项。...
Need help?
Do you have a question about the 370-160V70 and is the answer not in the manual?
Questions and answers