Advertisement
Quick Links
Installation Instructions /
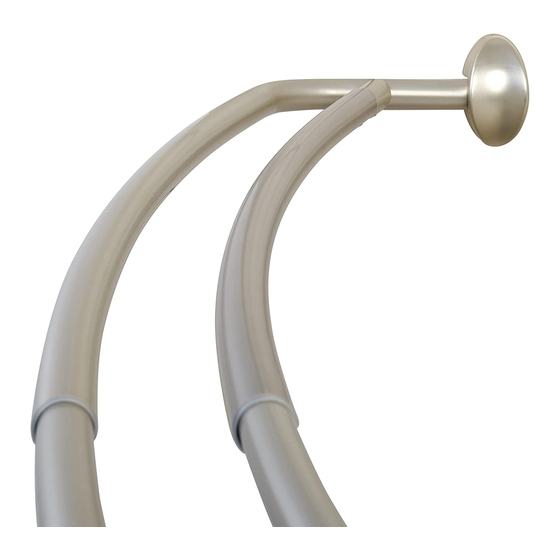
35604BN / E35604SS / E35604HB / E35604BN01
(Double Curved Rod /
Before You Begin:
Thank you for purchasing this product. Please identify all parts and hardware pieces before you begin.
When laying out parts, place them on a soft surface to prevent scratching.
If any pieces are missing, call our Toll Free Number 1-800-892-3986 between 8:00AM-5:00PM EST Monday
through Friday or contact our website at www.zennahome.com for more information.
Antes de que empiece:
Muchas gracias por comprar este producto. Identifique todas las piezas y las piezas de ferretería antes de
comenzar. Al distribuir las piezas, colóquelas sobre una superficie suave para evitar que se rayen.
Si faltaran piezas, llame a nuestro número gratuito 1-800-892-3986 entre las 8:00 a.m.- 5:00 p.m., hora del este,
de lunes a viernes o contáctenos a través de nuestro sitio web en www.zennahome.com para solicitar
mas información.
Avant de commencer :
Merci d'avoir acheté ce produit. Veuillez identifier toutes les pièces et les accessoires de montage avant
de commencer. Lorsque vous déballez les pièces, placez-les sur une surface non rugueuse afin d'éviter les
éraflures.
S'il venait à vous manquer des pièces, appelez notre numéro sans frais 1.800.892.3986 entre 8 h et 17 h (heure
de l'Est des États-Unis), du lundi au vendredi, ou contactez notre site Web à www.zennahome.com pour de
plus amples informations.
Pg 1 of 11
Instrucciones de Instalación / Instructions de montage
Doble Tubo Curvo / Double Tringle incurvée)
MCS 6/11/2020
1-800-892-3989
IS35650-I20
Advertisement

Subscribe to Our Youtube Channel
Related Manuals for Zenna Home E35604BN01


Summary of Contents for Zenna Home E35604BN01
- Page 1 Installation Instructions / Instrucciones de Instalación / Instructions de montage 35604BN / E35604SS / E35604HB / E35604BN01 (Double Curved Rod / Doble Tubo Curvo / Double Tringle incurvée) Before You Begin: Thank you for purchasing this product. Please identify all parts and hardware pieces before you begin.
-
Page 2: List Of Parts
Tools Needed - not included / Herramientas que se requieren - no incluidas / Outils nécessaires -non inclus List of Parts / Lista de Partes / Liste des pièces (A) 1 in. Diameter Tube (B) 7/8 in. Diameter Tube Tubos de diámetro de 1 pulg Tubos de diámetro de 7/8 pulg Tubes de 25,4 mm (1 po) de diamètre Tubes de 22 mm (7/8 po) de diamètre... - Page 3 List of Parts / Lista de Partes / Liste des pièces (J) 2 Threaded Sleeves (H) 2 Plastic Rings (I) 2 Bracket Screws 2 Mangas con rosca 2 Anillos de plástico 2 Tornillos del soporte 2 Manchons filetés 2 Bagues en plastique 2 Vis de support (L) 1 Medium Allen Wrench for use with (K) 2 Allen Wrenches for use with Bracket...
-
Page 4: Mounting Instructions
Mounting Instructions Instrucciones de Montaje Instructions de Montage The locations for mounting brackets (C,D) Las ubicaciones para las placas de L’emplacement des plaque de will vary depending on the width of the montaje (C, D) variarán dependiendo montage (C, D) dépendra de la largeur tub opening. - Page 5 Measure up 65 in. above the front of the Mida 65 pulg por arriba del frente del Mesurez une longueur de 165 cm (65 po) tub ledge. borde de la bañera. au-dessus de l’avant du rebord de la baignoire. NOTE: Refer to the chart below for the NOTA: consulte la siguiente tabla para REMARQUE : Reportez-vous au tableau depth of installation of the brackets.
- Page 6 Hold the 1 in. mounting bracket (C) Sujete el 1 pulgada soporte (C) contra Maintenez po 1 plaque de montage (C) against the wall so that the mark (from la pared para que la marca (del paso 2) de contre le mur afin que la marque step 2) is centered in the top screw hole está...
- Page 7 Fasten the 1 in. mounting bracket (C) to Asegure la placa de montaje de 1 pulg (C) Fixez de plaque de montage de the wall, using 2 mounting screws (M). a la pared, utilizando 2 tornillos de 25,4 mm (1 po) (C) au mur à l’aide de montaje (M).
- Page 8 Insert 1 in. tube plug (F) into 1 in. diameter Inserte el tapón para tubo de 1 pulg (F) en Introduisez le bouchon de tube de tube (A) as shown. NOTE: Be sure to line up el tubo con diámetro de 1 pulg (A) como 25,4 mm (1 po) (F) dans le tube de the cut-outs in the tube plug with the holes se muestra.
- Page 9 Insert plastic ring (H) into the end of the Inserte los anillos de plástico (H) en el Introduisez la bague en plastique (H) à 1 in. diameter tube (A), as shown. Insert extremo del tubo con diámetro de l’extrémité du tube de 25,4 mm (1 po) the end of the 7/8 in.
- Page 10 Fasten the 7/8 in. diameter tube (B) to Asegure el tubo con diámetro de Fixez le tube de 22 mm (7/8 po) de the 7/8 in. mounting bracket (D) using 7/8 pulg (B) a la placa de montaje de diamètre (B) à de plaque de montage mounting bracket screws (I) and threaded 7/8 pulg (D) utilizando los tornillos para de 2,2 cm (7/8 po) (D) à...
- Page 11 ® NeverRust Guaranteed for Life Warranty: ® The manufacturer warrants to the original purchaser that NeverRust aluminum shower rods, caddies and accessories will be free from red rust during its lifetime. This warranty only covers the proper and intended use of this product. Any alteration of this product or use of this product in any manner other than its intended use shall automatically void this warranty.
Need help?
Do you have a question about the E35604BN01 and is the answer not in the manual?
Questions and answers