Table of Contents
Advertisement
Quick Links
Advertisement
Chapters
Table of Contents

Related Manuals for BMW Motorrad R nineTPure 2018


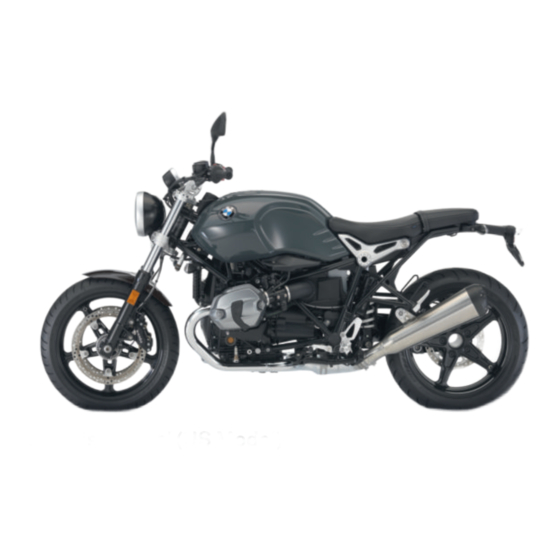
Summary of Contents for BMW Motorrad R nineTPure 2018
- Page 1 BMW Motorrad Rider's Manual (US Model) R nineT Pure...
- Page 2 Motorcycle/Retailer Data Motorcycle Data Retailer Data Model Contact in Service Ms./Mr. Vehicle identification number Phone number Color number Initial registration Retailer's address/phone number (com- License plate pany stamp)
- Page 3 Welcome to BMW Documentation confirming per- formance of scheduled mainte- nance is a precondition for gen- Congratulations on choosing a motorcycle from BMW Motorrad erous handling of out-of-warranty claims and goodwill warranty and welcome to the community treatment. of BMW motorcycle owners and riders.
-
Page 4: Table Of Contents
Table of Contents 3 Displays ....23 Heated handlebar grips ..53 Indicator and warning Rider and passenger 1 General instructions ..5 lights . - Page 5 Brake system ....95 BMW Motorrad Service . . . 149 Paint care ....132 Clutch .
- Page 6 Service confirmations ..168 13 Appendix ... . . 171 Certificate for Electronic Immobilizer ....172 14 Index .
-
Page 7: General Instructions
General instructions Quick & easy reference ....6 Abbreviations and symbols ..6 Equipment ......7 Technical Data . -
Page 8: Quick & Easy Reference
Optional extra. NOTICE Special informa- your motorcycle. BMW Motorrad optional tion on operating and in- extras are already com- Abbreviations and specting your motorcycle as well pletely installed during... -
Page 9: Equipment
In addition, BMW Motorrad can- you have not ordered. Please ket version or country-specific not guarantee the total absence note, too, that your motorcycle measuring procedures. -
Page 10: Certificates And Operating Permits
In accordance with applicable BMW Motorrad information systems. Control units also make data privacy laws, vehicle users related to the technology or comfort and infotainment func-... - Page 11 This information generally doc- ual cases. The vehicle owner can have a uments the condition of a com- BMW Motorrad retailer or other ponent, module, system or the Operating data in the vehicle qualified service partner or spe- surrounding area; for example:...
- Page 12 The information can be read out reset by a BMW Motorrad retailer vation of dynamic driving sys- by a BMW Motorrad retailer or or other qualified service partner...
- Page 13 services. The data transmitted It is possible to introduce data used. The range of possible into the vehicle entertainment depends on the selected settings settings depends on the and communication system via a when using the services. particular app and the operating smartphone, for instance.
- Page 14 Vehicle manufacturer ser- the case for legally prescribed vices functions. In the case of the vehicle man- Services of other providers ufacturer's online services, the When using the online services particular functions are described of other providers, these services at the appropriate location, such are subject to the responsibil- as in the Rider's Manual or on ity and the data protection and...
-
Page 15: Overviews
Overviews Overall view, left side ....15 General view, right side ... . . 17 Underneath seat ....18 Multifunction switch, left . -
Page 17: Overall View, Left Side
Overall view, left side Connector for rotational- speed sensor (optional ac- Clutch system cessories) Check clutch function 99). Fuel filler opening Fuel specifications ( 78). Correct loading ( 70). Secure luggage on motor- cycle ( 121). Adjusting screw Adjusting damping on rear wheel ( 62). -
Page 19: General View, Right Side
General view, right side Topping up engine oil 94). Checking the front brake fluid level ( 97). Vehicle identification num- Check rear brake fluid level 98). Adjusting spring preload at rear wheel ( 61). Remove rider's seat 54). Remove passenger seat 54). -
Page 20: Underneath Seat
Underneath seat Rider's Manual (US Model) Quick & easy reference Positive battery connection point ( 112) Fuse box Replace fuses ( 115). Load capacity table Tool kit ( Diagnostic connector Removing the diagnostic connector ( 117). -
Page 21: Multifunction Switch, Left
Multifunction switch, left High beam and headlight flasher ( Hazard warning lights sys- tem ( with Automatic Stability Control (ASC) Deactivate ABS ( 51). with Automatic Stability Control (ASC) Deactivating ASC ( 52). Turn indicators ( Horn Rocker button MENU Multifunction display Select displays. -
Page 22: Right
Multifunction switch, right with heated grips Operating heated grips 53). Emergency on/off switch (kill switch) ( Starter button Starting engine ( 72). -
Page 23: Instrument Cluster
Instrument cluster Speedometer Indicator and warning lights Photosensor for brightness control in the multifunction display with anti-theft alarm sys- tem (DWA) DWA LED ( Multifunction display Select display readings 44). -
Page 25: Displays
Displays Indicator and warning lights ..24 Multifunction display ....25 Warning lights ..... . 26 Service display . -
Page 26: Indicator And Warning Lights
Indicator and warning lights Headlight high beam indi- cator light Operate the high beam and headlight flasher 41). General warning light Shown in conjunction with warning symbols in the multifunction display Neutral indicator light - with Automatic Stability Control (ASC) ASC indicator and warning light ( Turn signal indicator light... -
Page 27: Multifunction Display
Multifunction display Value Onboard computer Select display readings 44). Unit Warning symbol Screen display in conjunc- tion with universal warning light (... -
Page 28: Warning Lights
Warning lights in connection with the general warning lamp 2. The universal Displays warning light lights up or flashes Warnings are displayed with ap- depending on the urgency of the propriate warning lights. warning. If several warnings are active, all of the corresponding warning lamps and warning symbols will appear in the display. - Page 29 Overview of warning indicators Indicator and warning Display text Meaning lights Universal warning Key symbol is dis- Electronic immobilizer is active ( light lights up. played. Universal warning Temperature sym- Coolant temperature too high ( light flashes. bol is displayed. Universal warning Engine symbol Engine in emergency-operation mode...
- Page 30 Indicator and warning Display text Meaning lights ABS indicator light ABS switched off ( lights up. ABS indicator light ABS error ( lights up. ASC indicator ASC intervention ( and warning light flashes rapidly. ASC indicator ASC self-diagnosis not completed and warning light flashes slowly.
- Page 31 Indicator and warning Display text Meaning lights Universal warning Symbols for fuel re- Fuel down to reserve ( light lights up. serve and odome- ter TRIP R are dis- played. Universal warning Symbol for service Service appointment has passed ( light lights up.
- Page 32 Possible cause: rized BMW Motorrad retailer. quickly as possible by a spe- The engine control unit has di- cialist workshop, preferably an Coolant temperature too agnosed a fault.
- Page 33 WARNING available. BMW Motorrad retailer. Have the malfunction corrected Possible cause: Failure of vehicle systems as soon as possible at an Accident hazard The engine control unit has di- authorized service facility, Do not continue riding.
- Page 34 ABS self-diagnosis not ABS switched off WARNING completed with Automatic Stability Control (ASC) Overlooking the vehicle in ABS indicator light flashes. traffic due to a defective light ABS indicator light lights source on the vehicle Possible cause: Safety risk Possible cause: Replace defective bulbs as ABS self-diagnosis rou- The ABS system has been deac-...
- Page 35 ASC indicator and warning authorized service facility, ASC indicator and warning light lights up. preferably an authorized light flashes slowly. BMW Motorrad Retailer. Possible cause: Possible cause: ASC intervention The ASC system has been deac- with Automatic Stability Control tivated by the rider.
- Page 36 Contact an authorized service preferably an authorized warning lamp was switched on. facility, preferably an authorized BMW Motorrad Retailer. The odometer for the fuel BMW Motorrad retailer. reserve is reset when the fuel Anti-theft alarm system...
-
Page 37: Service Display
Service appointment has WARNING passed Rough engine running or Universal warning light switching off of the engine lights up. due to a fuel shortage Symbol for service is dis- Accident hazard, damage to cat- played. alytic converter Do not drive to the extent that Service display the fuel tank is completely If service is due within 700 miles,... -
Page 39: Operation
Operation Steering and ignition lock ... 38 Emergency on/off switch (kill switch) ......40 Lights . -
Page 40: Steering And Ignition Lock
Steering and ignition Switching on ignition lock Vehicle keys You will receive 2 ignition keys as well as a key to remove the passenger seat ( 54). Should you lose your keys, re- fer to the information regarding the electronic immobilizer (EWS) Turn the ignition key to posi- 39). - Page 41 Light switched off. only through an authorized Handlebars not locked. NOTICE BMW Motorrad retailer. The Ignition key can now be re- keys are part of an integrated A further key attached to the moved. security system, so the retailer is...
-
Page 42: Emergency On/Off Switch
Lights Emergency on/off The engine can be switched off easily and quickly using the switch (kill switch) Parking lights and low- emergency on/off switch. beam headlight The parking lamps come on au- tomatically when the ignition is switched on. NOTICE The parking lights are a strain on the battery. - Page 43 High beam and headlight flasher Immediately after switching off Immediately after turning off ignition, push button 1 to left the ignition, pull switch 1 back and hold it until parking lights and hold until the headlight Press switch 1 toward front to come on.
-
Page 44: Hazard Warning Flashers
Hazard warning Comfort turn signals Ignition can be switched off. To switch off hazard warning flashers flashers, switch on the ignition Operating hazard warning and press button 1 again. flashers Turn indicators NOTICE Operating turn signals The hazard warning flashers Switching on ignition ( 38). - Page 45 Speed is above 60 mph (100 km/h): after turn signal flashes five times. When button 1 is pressed and held slightly longer to the right or left, the turn signals will only turn off automatically after reaching the distance depending on the speed.
-
Page 46: Display
Display Select display readings Requirement The motorcycle is stopped. Switching on ignition ( 38). The onboard computer is dis- played. Briefly press button 1 repeat- edly until desired value is dis- played. Possible displays: Total mileage: ODO Trip distance 1: TRIP 1 Trip distance 2: TRIP 2 Automatic trip distance: TRIP A, is automatically reset if... - Page 47 Clock: CLOCK Call up menu for settings: SETUP ENTER...
- Page 48 Resetting the trip odometer Switching on ignition ( 38). Repeatedly press button 1 briefly until trip recorder 2 to be reset is displayed. Press and hold button 1 until trip recorder 2 is reset.
-
Page 49: Anti-Theft Alarm System
Turn indicators light up once. ing the DWA alarm, an alarm Confirmation tone sounds once tone sounds and the indica- (if programmed). tors flash. The type of alarm DWA is now switched off. sound can be set by an autho- rized BMW Motorrad retailer. -
Page 50: Clock
Adjust DWA Clock Switching on ignition ( 38). Set clock WARNING Adjusting the clock while rid- Accident hazard Adjust the clock only when the motorcycle is stationary. Press button 2 briefly to change the adjusted value. Switching on ignition ( 38). -
Page 51: Date
Press and hold button 1 to Briefly press button 1 to incre- open SETUP. ment minutes. Repeatedly press button 1 Briefly press button 2 to decre- briefly until SET CLOCK is dis- ment minutes. played. The minutes are set. Press and hold button 2 until minutes no longer flash. -
Page 52: Adjusting Brightness
Adjusting brightness Press and hold button 2 until SET YEAR is displayed. Adjusting display brightness Switching on ignition ( 38). Press and hold button 2 until day 4 flashes. Briefly press button 1 to incre- Briefly press 1 to increment ment day. -
Page 53: Antilock Braking System
Deactivate ABS ABS indicator light lights Switching on ignition ( 38). Release button 1 within two NOTICE seconds. ABS indicator light contin- The ABS function can also be ues to be lit up. deactivated while driving. ABS is deactivated. Activating ABS Repeatedly press button 1 briefly until the desired value for display brightness 3 is set. -
Page 54: Automatic Stability Control
Deactivating ASC The ASC setting remains un- Release button 1 within two changed. seconds. Switching on ignition ( 38). ABS indicator light goes ASC indicator and warning out, and starts to flash if NOTICE light continues to be lit up. self-diagnosis has not been com- The ASC function can also be pleted. -
Page 55: Heated Handlebar Grips
Operating heated grips Release button 1 within two seconds. NOTICE ASC indicator and warning light remains off or contin- The heated grips option can only ues to flash. be activated when the engine is running. ASC activated. As an alternative, the ignition NOTICE can also be switched off and then on again. -
Page 56: Rider And Passenger Seats
Remove passenger seat If no further changes are made Pull rider's seat 2 toward rear the selected heating level is and remove. adopted as the setting. Installing rider's seat To turn off grip heating, press button 1 repeatedly until the heated grip symbol 2 is no longer shown in the display. - Page 57 Install passenger seat Insert passenger seat 2 in rear frame making sure that tab 5 of passenger seat is seated in rear frame. Hand-tighten screw 1 using motorcycle seat key 4. Pull grab strap 1 over passen- ger seat.
-
Page 59: Setting
Setting Mirrors ......58 Headlight ......58 Clutch . -
Page 60: Mirrors
Mirrors Adjust mirror arm Slide protective cap over threaded fastener. Adjusting mirrors Headlight Adjusting headlight for RHD/LHD traffic This motorcycle's headlight fea- tures a symmetrical low beam. No special adjustments or proce- dures are required prior to oper- Slide up protective cap over ating the motorcycle in a coun- threaded fastener on mirror try where traffic travels on the... -
Page 61: Clutch
To position 5: largest distance an authorized BMW Motorrad between handlebar grip and retailer. clutch lever Clutch Adjusting clutch lever... -
Page 62: Brakes
the handlebar grip and clutch with Option 719 milled part package, Classic lever. Brakes with Option 719 milled part package, Storm Adjust brake lever with Option 719 milled part WARNING package, Club Sport Modified position of the brake fluid reservoir Rotate the adjusting screw 1 Air in the brake system into the desired position by... -
Page 63: Spring Preload
the handlebar grip and brake with Option 719 milled part package, Classic lever. Spring preload with Option 719 milled part package, Storm Setting It is essential to set the spring with Option 719 milled part preload to suit the load carried by package, Club Sport the motorcycle. -
Page 64: Damping
Adjust damping to changed Use vehicle tools to adjust spring preload. damping via adjusting screw 1. Adjusting damping on rear wheel ( 62). Damping Setting Damping must be adjusted to the road conditions and the spring preload. CAUTION A rough road surface requires softer damping than a smooth Adjusting the spring strut To increase damping, turn ad-... -
Page 65: Adjustable Footrest System
Adjustable footrest Recommendation on Recommendation on system chassis adjustment for chassis adjustment for one-up operation two-up operation with Option 719 milled part package, Classic Turn the adjustment screw Turn the adjustment screw clockwise as far as possible, clockwise as far as possible, with Option 719 milled part then turn it back by 1.75 turns then turn it back by 0.5 turns... - Page 66 The position of the rotor must The footrest can only fold up- have the same setting on the ward and slightly backward. right and left. Adjusting the footrest joint The footrest joint is adjusted in the same way on the left and right.
- Page 67 Remove the screw 1. When ultimately installed on Attach the spring 1 to the eye the rotor 2, the opening arrow on the footrest joint 3. Pull the footrest joint 2 from of the footrest joint 1 must the rotor 3. Fold the footrest body 2 up- point upward or slightly to the ward in the footrest joint 3.
- Page 68 Adjusting the footbrake lever foot piece Install bolt 1 with flattened Clean the thread. head 2 flush to the footrest Turn the foot piece 1 into the joint and footrest body 3. desired position. The distance between the foot Fit screw 4. Install the new screw 2.
- Page 69 Adjusting gearshift lever foot piece Clean the thread. Turn the foot piece 1 into the desired position. The distance between the foot Install the new screw 2. and the foot piece 1 can be adjusted by turning the foot Foot piece on gearshift piece into different positions.
-
Page 71: Riding
Riding Safety information ....70 Checklist ......72 Starting . -
Page 72: Safety Information
Incorrect settings of spring- of the year. Your authorized with tank bag strut and shock absorber sys- BMW Motorrad retailer will be Observe maximum payload of happy to advise you and has Unevenly distributed load tank rucksack. the correct clothing for every Loose clothing purpose. - Page 73 Risk of poisoning Catalytic converter Danger of overheating Exhaust fumes contain carbon If misfire causes unburned fuel ATTENTION monoxide, which is colorless and to enter the catalytic converter, odorless but highly toxic. there is a danger of overheating Engine idling for a lengthy and damage.
-
Page 74: Checklist
Checklist Checking the front brake fluid During cold start and at low level ( 97). temperatures: Observe checklist Check rear brake fluid level Pull clutch. Use the following checklist to 98). check your motorcycle at regu- lar intervals. Starting Starting engine Always before riding off Switching on ignition ( 38). - Page 75 The general warning light 2 changes from a steady light to The self-diagnosis routine checks flashing. whether the BMW Motorrad In- The needle 4 for the speedome- tegral ABS is ready for opera- ter moves to top speed. tion. The self-diagnosis routine...
- Page 76 Check on system components The self-diagnosis routine checks tine not completed monitored by diagnostic sys- whether the BMW Motorrad ASC tem while motorcycle is parked. ABS is not available, as the is ready for operation. The self- ABS indicator light flashes.
-
Page 77: Breaking In
Check the display of all indica- preferably an authorized tor and warning lights. 0 to 1000 km BMW Motorrad Retailer. max 31 mph (max 50 km/h) ASC self-diagnosis rou- Breaking in (1st gear) tine not completed... -
Page 78: Brakes
Brakes Tyres Observe mileage, after which the running-in check should be New tires have a smooth sur- How do you achieve performed. face. This must be roughened the shortest stopping by riding in a restrained manner Mileage until first distances? at various lean angles until the running-in check The dynamic load distribution be-... -
Page 79: Parking Your Motorcycle
WARNING Reduced of braking action, de- Locking up of the front wheel struction of the brakes caused by is prevented by BMW Motorrad Poorer braking action due to overheating ABS. moisture and dirt Use both front and rear brakes,... -
Page 80: Refueling
Refueling Component damage cause by Fuels with a maximum ethanol tipping over content of 10 %, i.e. E10, may Fuel specifications be used for refueling. Always check that the ground Requirement under the stand is level and Recommended fuel qual- For optimal fuel economy, the firm. - Page 81 ing until fuel is no higher than ATTENTION lower edge of filler neck 3. Component damage NOTICE Component damage due to over- filled fuel tank If refueling is carried out after running on fuel reserve, the re- If the fuel tank is overfilled, the sulting filling capacity must be excess fuel will flow into the greater than the fuel reserve so...
-
Page 82: Securing Motorcycle For Transport
Fuel reserve Approx. 3.7 quarts (Approx. 3.5 l) Press fuel tank cap down firmly to close. Remove vehicle key and close protective cap. ATTENTION ATTENTION Securing motorcycle for transport Motorcycle tips to the side Pinching of components when raising Component damage Protect against scratching all Component damage cause by Do not pinch components,... - Page 83 Secure and tighten the ten- sioning straps at the rear on the frame for the rear footrests on both sides. Tighten all straps evenly. The vehicle is pulled down against its springs with the suspension compressed strongly.
-
Page 85: Detail
Technology in detail General instructions ....84 Antilock Brake System (ABS) ..84 Automatic Stability Control (ASC) ....... 86... -
Page 86: General Instructions
During extremely heavy and rapid (ABS) decelerations it is possible that surface condition. the BMW Motorrad ABS can- How does ABS work? What happens when not prevent the rear wheel from The maximum braking force that rough roads are lifting off the ground. - Page 87 The system is not optimized for To ensure that the gaged (burn out) the special conditions encoun- BMW Motorrad ABS is in a Heating up on the main or ad- tered under extreme weather properly maintained condition, ditional stand at idle or with...
-
Page 88: (Asc)
In the following unusual driving WARNING limit is exceeded. conditions, the BMW Motorrad ASC may possibly switch off au- Braking in curves Special situations tomatically. Risk of accident despite ABS with Automatic Stability Control... - Page 89 In this case, BMW Motorrad rec- ommends switching off the ASC BMW Motorrad recommends that you respond to this condi- temporarily. tion by twisting back the throttle Bear in mind that the rear wheel...
-
Page 91: Maintenance
Maintenance General instructions ....90 Battery ......114 Onboard tool kit . -
Page 92: General Instructions
Further information about main- Adjust mirror arm tenance and repair work can be 58). obtained on DVD through your Reversible screwdriver in- authorized BMW Motorrad re- sert tailer. with Phillips and straight blade Special tools and thorough spe- Adjusting damping on... -
Page 93: Tool For Adjusting The Spring
BMW Motorrad front wheel stand. Place motorcycle on an auxil- iary stand; BMW Motorrad rec- Loosen clamping bolt 1. ommends the BMW Motorrad auxiliary stand. Push two mounts 2 outward,... -
Page 94: Rear-Wheel Stand
Align two mounts 2 so that available through your autho- ATTENTION front suspension rests securely rized BMW Motorrad retailer. on them. Center stand retracts if mo- Tighten clamping bolts 1. torcycle is lifted too high. -
Page 95: Engine Oil
Engine oil Check engine oil level ATTENTION Misinterpretation of the oil filling quantity, as the oil level is temperature-depen- dent (the higher the tempera- ture, the higher the oil level) Push the rear-wheel stand from ATTENTION Engine damage the right onto the rear axle. Only check the oil level after Apply the retaining disk from Motorcycle tips to the side... - Page 96 BMW Motorrad retailer. NOTICE Read oil level in display 1. Wipe area around oil fill loca- BMW Motorrad recommends oc- tion to clean it. casionally checking the motor oil To be able to apply force more after a journey of at least 50 km...
-
Page 97: Brake System
MAX) Check engine oil level ( 93). Have the brakes checked at an Install the cap 3. authorized workshop, preferably an authorized BMW Motorrad Brake system retailer. Check brake operation Check front brake pad Visually inspect left and right Operate the brake lever. - Page 98 Check the wear indicators. BMW Motorrad retailer. If the wear indicators are no longer clearly visible: Have brake pads replaced at an authorized service facil- ity, preferably an authorized...
- Page 99 Checking the front brake fluid level WARNING Insufficient brake fluid in the brake-fluid reservoir Considerably reduced braking performance caused by air in the brake system Shaft 1 with three marker rings 2 Adjust the riding mode imme- Rear brake-pad wear is between the brake pads.
- Page 100 If brake fluid level falls below the approved level: Have defect corrected as soon as possible by an authorized workshop, preferably an autho- rized BMW Motorrad retailer.
-
Page 101: Clutch
If no clear pressure point can be felt: Have the clutch checked by an authorized workshop, preferably Read off brake fluid level at Rear brake fluid level an authorized BMW Motorrad brake-fluid reservoir 1. retailer. NOTICE Brake fluid, DOT4 Tires... -
Page 102: Wheel Rims And Tires
Checking wheel rims Check tyre pressures against preferably by an authorized Park motorcycle, ensuring that data below. BMW Motorrad Retailer. support surface is firm and Tire pressure, front level. Subject wheel rims to visual inspection for defects. -
Page 103: Wheels
Replace the worn tires. Risk of accident due to poorer BMW Motorrad retailer. In some rideability cases the data stored in the Wheels If necessary, replace the tyres control units can be adapted for... - Page 104 Mask off the parts of the wheel rim that could be scratched when removing the brake caliper. Remove screws 1. Push brake pads 1 slightly apart by turning the brake Loosen the left-hand brake caliper 2 back and forth against caliper 2.
- Page 105 Carefully pull brake calipers back and outward to remove them from brake rotors. Pull quick-release axle 3 out Remove spacer bushing 4 from while supporting the front the wheel hub. wheel. Install front wheel Place front wheel down and Remove screw 2. roll it forward out of the front WARNING Loosen clamping screws 1 on...
- Page 106 Front wheel installation op- torques checked by a spe- posite the running direction Lubricate quick-release axle 3. cialized workshop, preferably Accident hazard an authorized BMW Motorrad Observe running direction ar- Lubricant retailer. rows on tire or rim. Roll front wheel into front Optimoly TA suspension.
- Page 107 Lift the front wheel and install the quick-release axle 3. Position brake caliper 2 on Clamping screw in axle right and install screws 1. adapter Brake caliper on tele- Install screw 2. Brace quick- Tightening sequence: tighten scopic forks release axle on the right side at the screws 6 times, alternating the same time.
- Page 108 Removing rear wheel caliper 2 and install the Install screw 2. screws 1. Raise motorcycle, preferably Fasten the cable 3 in the with a BMW Motorrad rear- bracket 4. Brake caliper on tele- wheel stand. Engage the brakes repeatedly, scopic forks...
-
Page 109: Headlight
Installing rear wheel Mount rear wheel from left rear and position on wheel carrier. WARNING Use of a wheel which does not comply with series speci- fications Malfunctions during control inter- ventions by ABS and ASC Please see the information on Remove screws 1 while sup- the effect of wheel sizes on the porting wheel. - Page 110 Installing the reflector Park motorcycle, ensuring that support surface is firm and level. WARNING Position the reflector 1 behind the lug 2 and swivel downward. Bent clamp due to appli- Align the reflector 1 in the cen- cation of force on the lamp Loosen screw 1 with several ter.
-
Page 111: Light Sources
Light sources Detach the rubber cap 2 from To protect the glass against the lamp housing. soiling, only grasp the light Replacing low and high- source by the base. beam light sources in headlight Switch off ignition ( 39). Park motorcycle, ensuring that support surface is firm and level. - Page 112 Replace defective light source. Bulb for parking light W5W / 12 V / 5 W To prevent contaminants from being deposited on the glass surface, always use a clean, dry cloth to hold the light source. Mount rubber cap 1. Pull the socket 1 for the parking lamps out of the lamp Connect connector 2 for low-...
- Page 113 Mount socket 1 for parking Remove the screw 1. Remove the light source 1 by light in light housing. turning it counterclockwise. Install the reflector. Replace defective light source. Replacing front and Bulbs for flashing turn rear turn indicator light indicators, front sources RY10W / 12 V / 10 W...
-
Page 114: Jump-Starting
In this case: ATTENTION Contact an authorized service facility, preferably an authorized Contact between crocodile BMW Motorrad retailer. clips of jump leads and mo- torcycle Jump-starting Danger of short circuit Use jump leads fitted with fully... - Page 115 tive terminal of the donor bat- ATTENTION tery. Use the black jump lead to Jump-starting with a voltage connect the ground support higher than 12 V point 2 to the negative terminal Damage to the motorcycle's of the second battery. electronics Allow engine on support mo- The battery of the donor mo-...
-
Page 116: Battery
NOTICE Compliance with the points be- BMW Motorrad retailer. low is important in order to maxi- BMW Motorrad has developed a Disconnect any devices con- mize battery life: trickle-charger specially designed nected to the socket. Keep surface of battery clean... -
Page 117: Fuses
Contact a specialist workshop, preferably an authorized Charging a disconnected ATTENTION BMW Motorrad retailer, if the battery battery is faulty. A fully discharged battery Charge battery using a suitable must be charged via a power charger. - Page 118 If the fuses blow frequently, have the electrical system checked by level. an authorized specialized work- Remove passenger seat shop, preferably an authorized 54). BMW Motorrad retailer. Remove rider's seat ( 54). Replace defective fuse in ac- cordance with following fuse Fuse 1 assignment diagram.
-
Page 119: Data Link Connector
rized persons during your next nected at the diagnostic con- Fuse 2 BMW Service appointment. nector 2. Have the work performed by Secure the data link appropriately trained staff. 7.5 A (ABS control unit, en- connector Refer to the vehicle manufac- gine control unit, output for turer specifications. -
Page 121: Accessories
Accessories General instructions ....120 Onboard power sockets ... 120 Luggage ......121 Passenger seat frame . -
Page 122: General Instructions
The power sockets are automat- Safety risk be liable for unapproved parts ically deactivated under the fol- and accessory products of any BMW Motorrad cannot exam- lowing conditions: ine or test each product of out- kind. If the battery voltage falls below... -
Page 123: Luggage
OA (muffler bracket) is essen- motorcycle thorized BMW Motorrad re- tial for removing the passenger tailer. frame. WARNING Detailed information can be obtained from your authorized Reduced riding stability BMW Motorrad retailer or online caused by overloading and at www.bmw-motorrad.com. uneven loading Accident hazard... - Page 124 Also observe the general infor- ATTENTION mation at the beginning of this chapter. Hard or sharp-edged compo- nents Park motorcycle, ensuring that support surface is firm and Scratching or damage to the level. paint Use pads or tape off the ar- Installing rear-wheel stand eas at risk of scratching or 92).
- Page 125 Remove screws 1 and take Secure decoupling elastic ele- Position bracket 1 for silencer off passenger seat frame 2 to- ment 1 in bracket 2 for silencer on rear frame 2. wards rear. and install shouldered bush- Install screws 3 and 4 loosely. ing 3 from the right.
- Page 126 Mounting muffler Installing left footrest Load correctly without passenger frame system with carrier for silencer Align silencer 1 on bracket 2, Fit footrest system 1 to rear WARNING fit washer 3 and install frame 2 on left and install screw 4. screws 3.
-
Page 127: Frame
Remove screws 1 and take off advice in choosing genuine BMW left footrest system 2. parts, accessories and other products such as aluminum Loosening silencer humps or covers for the rear with carrier for silencer frame. You will find all BMW Motorrad optional accessories on... -
Page 128: Installing Passenger Seat
Installing left footrest Installing passenger seat frame system ATTENTION Hard or sharp-edged compo- nents Scratching or damage to the paint Use pads or tape off the ar- Remove screws 1 and 2. eas at risk of scratching or Take off bracket 3 for silencer. damage. - Page 129 Install screw 1 and lock Tighten screws 1. ATTENTION washer 2 loosely. Passenger seat from on Install screws 3. Pinching of components luggage frame Component damage Passenger seat frame on 6 lb/ft (8 Nm) Do not pinch components, rear frame e.g.
-
Page 131: Care
Care Care products ..... 130 Washing your motorcycle ..130 Cleaning sensitive motorcycle parts . -
Page 132: Care Products
BMW Insect Re- Brake early until the brake ro- thorized BMW Motorrad retailer. mover to soften and wash off tors and brake pads are dry. BMW Motorrad Care Products insects and stubborn dirt from... -
Page 133: Cleaning Sensitive Motorcy
Exercise caution when using Headlight diffuser and Use BMW Motorrad metal polish high-pressure or steam-jet headlight lenses made from for additional treatment. devices. plastic Radiator Clean off dirt and insects with a Cleaning sensitive Clean the radiator regularly to soft sponge and plenty of water. -
Page 134: Paint Care
However, remove particularly coating. aggressive materials immediately; BMW Motorrad recommends Clean the motorcycle. otherwise changes in the paint or BMW Motorrad high gloss polish Install a charged battery. discoloration can occur. These or agents that contain carnauba Observe checklist ( 72). -
Page 135: Technical Data
Technical data Troubleshooting chart ... . . 134 Performance data ....146 Threaded fasteners ....135 Fuel. -
Page 136: Troubleshooting Chart
Troubleshooting chart Engine does not start. Possible cause Remedy Side stand is extended and gear is engaged. Fold in side stand. Gear is engaged and clutch is not operated. Place transmission in neutral or disengage clutch. Fuel tank is empty. Fuel specifications ( 78). -
Page 137: Threaded Fasteners
Threaded fasteners Front wheel Value Valid Brake caliper on telescopic forks M10 x 40 x 1.25 28 lb/ft (38 Nm) Clamping screw in axle adapter M8 x 35 Tightening sequence: tighten the screws 6 times, alternating between one and the other each time 14 lb/ft (19 Nm) Screw on quick-release axle M20 x 1.5... - Page 138 Mirror arm Value Valid Mirror (locknut) on adapter M10 x 1.25 Left-hand thread, 16 lb/ft (22 Nm) Adapter on clamping block 18 lb/ft (25 Nm)
-
Page 139: Fuel
Approx. 1 gal (Approx. 3.95 l), with filter replace- ment Specification SAE 15W-50, API SJ/JASO MA2, Additives (for instance, molybdenum-based substances) are prohibited, because they would attack the coat- ings on engine components, BMW Motorrad rec- ommends BMW Motorrad ADVANTEC Pro Oil BMW recommends... -
Page 140: Engine
Engine oil, quantity for topping up max 0.5 quarts (max 0.5 l), Difference between MIN and MAX BMW recommends Engine Engine number location On crankcase at lower right, below starter motor Engine type 12 2E J Engine design Air-/oil-cooled two-cylinder four-stroke opposed- twin engine with double overhead camshaft and a counterbalance shaft Displacement... -
Page 141: Clutch
Clutch Clutch design Single-plate dry clutch Transmission Transmission design Helical 6-gear transmission with integrated torsional vibration damper, claw shift via sliding sleeves Transmission gear ratios 1.737, Primary gear ratio 2.375 (38:16 teeth), 1st gear 1.696 (39:23 teeth), 2nd gear 1.296 (35:27 teeth), 3rd gear 1.065 (33:31 teeth), 4th gear 0.939 (31:33 teeth), 5th gear 0.848 (28:33 teeth), 6th gear... -
Page 142: Rear-Wheel Drive
Rear-wheel drive Type of final drive Shaft drive with bevel gears Type of rear suspension Cast-aluminum single swing arm with BMW Motorrad Paralever Gear ratio of final drive 2.910 (32/11 teeth) Frame Frame design Lattice-tube frame with supporting drive unit... - Page 143 Rear wheel Type of rear suspension Cast-aluminum single swing arm with BMW Motorrad Paralever Type of rear suspension Central spring strut with coil spring, adjustable rebound-stage damping and spring preload Spring travel at rear wheel 4.7 in (120 mm) with lowered 4.1 in (105 mm)
-
Page 144: Brakes
Brakes Front wheel Type of front brake Hydraulically operated two-rotor disk brake with 4- piston fixed calipers and floating brake discs Front brake pad material Sintered metal Front brake-disk thickness min 0.16 in (min 4 mm), Wear limit Rear wheel Type of rear brake Hydraulically operated disc brake with 2-piston floating caliper and fixed brake disc... -
Page 145: Wheels And Tires
Wheels and tires Speed category of front/rear tires V, minimum requirement: 149 mph (240 km/h) Front wheel Front wheel design Aluminum cast wheel with spoke wheels Spoked wheel Front-wheel rim size 3.5" x 17" Front tire designation 120/70 ZR 17 Load index for front tire Permissible front-wheel imbalance max 0.2 oz (max 5 g) -
Page 146: Electrical System
Tire inflation pressures Tire pressure, front 36.3 psi (2.5 bar), One-up and use with passen- ger, on cold tire Tire pressure, rear 39.2 psi (2.7 bar), One-up, with cold tires 42.1 psi (2.9 bar), Two-up riding, with cold tires Electrical system Fuses Fuse 1 10 A, Instrument cluster, DWA anti-theft alarm... -
Page 147: Dimensions
Bulbs Bulb for low-beam and high-beam headlight H4 / 12 V / 60/55 W Bulb for parking light W5W / 12 V / 5 W Bulb for taillight/brake light Bulbs for flashing turn indicators, front RY10W / 12 V / 10 W Bulbs for flashing turn indicators, rear RY10W / 12 V / 10 W Dimensions... -
Page 148: Weights
Rider's inside-leg arc, heel to heel 70.3 in (1785 mm), measured without rider, at DIN unladen weight with lowered 68.9 in (1750 mm), measured without rider, at DIN unladen weight Weights Vehicle curb weight 483 lbs (219 kg), DIN unladen weight, ready for road, 90 % full tank of gas, without OE Permissible gross weight 948 lbs (430 kg) -
Page 149: Service
Reporting safety defects ... 148 BMW Motorrad Service ... . 149 BMW Motorrad Service History ..149 BMW Motorrad Mobility Services . -
Page 150: Defects
NHTSA may order the manufac- turer to perform a recall and remedy campaign. However, the NHTSA cannot become involved in individual problems between you, your authorized BMW Motorrad retailer, or BMW of North America, LLC. -
Page 151: Bmw Motorrad Service
100 countries sistently remains in optimal con- performed is recorded in the di- around the globe. Authorized dition BMW Motorrad urges you agnostics and information sys- BMW Motorrad retailers have to observe the recommended tem. Like a Service Booklet, the technical information and service intervals. -
Page 152: Bmw Motorrad Mobility
Objection additional information on available formed and enters the date for mobility-maintenance services. the next service. At the BMW Motorrad retailer For riders who drive long dis- or specialist workshop, the ve- Maintenance tances annually, it may be neces- hicle owner can object to the... - Page 153 The required scope of mainte- nance work for your vehicle can be found in the following mainte- nance schedule.
-
Page 155: Maintenance Schedule
Maintenance schedule annually or ev- ery 12000 miles BMW Running-in check (20000 km) (whichever (including oil change) comes first) BMW Service Standard for the first time after one Scope year, then every two years Engine oil change with fil- or 24000 mls (40000 km) (whichever comes first) Oil change in the rear every six years or every... -
Page 156: Maintenance Confirmations
Checking the lighting and signal system Functional check for engine starting suppression Final inspection and check for road safety Setting the service due date and remaining distance before next service using the BMW Motorrad diag- nosis system Checking charging state of battery... - Page 157 BMW pre-delivery BMW Running-in check Check performed performed at km Next service latest or, if reached earlier at km Stamp, signature Stamp, signature...
- Page 158 BMW Service Work performed performed BMW Service Engine oil change with filter at km Oil change in rear bevel gears Checking valve clearance Next service Changing gear oil latest Replacing all spark plugs Replacing air cleaner element or, if reached earlier Replacing alternator drive belt at km Adjusting engine synchronization...
- Page 159 BMW Service Work performed performed BMW Service Engine oil change with filter at km Oil change in rear bevel gears Checking valve clearance Next service Changing gear oil latest Replacing all spark plugs Replacing air cleaner element or, if reached earlier Replacing alternator drive belt at km Adjusting engine synchronization...
- Page 160 BMW Service Work performed performed BMW Service Engine oil change with filter at km Oil change in rear bevel gears Checking valve clearance Next service Changing gear oil latest Replacing all spark plugs Replacing air cleaner element or, if reached earlier Replacing alternator drive belt at km Adjusting engine synchronization...
- Page 161 BMW Service Work performed performed BMW Service Engine oil change with filter at km Oil change in rear bevel gears Checking valve clearance Next service Changing gear oil latest Replacing all spark plugs Replacing air cleaner element or, if reached earlier Replacing alternator drive belt at km Adjusting engine synchronization...
- Page 162 BMW Service Work performed performed BMW Service Engine oil change with filter at km Oil change in rear bevel gears Checking valve clearance Next service Changing gear oil latest Replacing all spark plugs Replacing air cleaner element or, if reached earlier Replacing alternator drive belt at km Adjusting engine synchronization...
- Page 163 BMW Service Work performed performed BMW Service Engine oil change with filter at km Oil change in rear bevel gears Checking valve clearance Next service Changing gear oil latest Replacing all spark plugs Replacing air cleaner element or, if reached earlier Replacing alternator drive belt at km Adjusting engine synchronization...
- Page 164 BMW Service Work performed performed BMW Service Engine oil change with filter at km Oil change in rear bevel gears Checking valve clearance Next service Changing gear oil latest Replacing all spark plugs Replacing air cleaner element or, if reached earlier Replacing alternator drive belt at km Adjusting engine synchronization...
- Page 165 BMW Service Work performed performed BMW Service Engine oil change with filter at km Oil change in rear bevel gears Checking valve clearance Next service Changing gear oil latest Replacing all spark plugs Replacing air cleaner element or, if reached earlier Replacing alternator drive belt at km Adjusting engine synchronization...
- Page 166 BMW Service Work performed performed BMW Service Engine oil change with filter at km Oil change in rear bevel gears Checking valve clearance Next service Changing gear oil latest Replacing all spark plugs Replacing air cleaner element or, if reached earlier Replacing alternator drive belt at km Adjusting engine synchronization...
- Page 167 BMW Service Work performed performed BMW Service Engine oil change with filter at km Oil change in rear bevel gears Checking valve clearance Next service Changing gear oil latest Replacing all spark plugs Replacing air cleaner element or, if reached earlier Replacing alternator drive belt at km Adjusting engine synchronization...
- Page 168 BMW Service Work performed performed BMW Service Engine oil change with filter at km Oil change in rear bevel gears Checking valve clearance Next service Changing gear oil latest Replacing all spark plugs Replacing air cleaner element or, if reached earlier Replacing alternator drive belt at km Adjusting engine synchronization...
- Page 169 BMW Service Work performed performed BMW Service Engine oil change with filter at km Oil change in rear bevel gears Checking valve clearance Next service Changing gear oil latest Replacing all spark plugs Replacing air cleaner element or, if reached earlier Replacing alternator drive belt at km Adjusting engine synchronization...
-
Page 170: Service Confirmations
Service confirmations The table serves to provide evidence of maintenance and repair work, as well as installed optional acces- sories and special campaigns performed. Work performed at km Date... - Page 171 Work performed at km Date...
- Page 173 Appendix Certificate for Electronic Immobi- lizer ....... . 172...
- Page 174 FCC Approval This device complies with Any changes or modifi- Part 15 of the FCC rules. cations not expressly Ring aerial in the Operation is subject to the approved by the party ignition switch following two conditions: responsible for compliance (1) This device may not could void the user’s cause harmful inter-...
- Page 175 Approbation de informations avec la clé de Toute modification contact via l'antenne qui n'aurait pas été la FCC annulaire. approuvée expressément Antenne annulaire Le présent dispositif est par l'organisme responsa- conforme à la partie 15 ble de l'homologation peut présente dans le des règles de la FCC.
- Page 176 Technical Data, 142 Abbreviations and symbols, 6 Battery Wear indicator, 97 Charging a disconnected Breaking in, 75 Indicator and warning light, 32 battery, 115 Bulbs Operating, 51 Maintenance instructions, 114 High-beam headlamp, 109 Self-diagnosis, 73 Position on motorcycle, 18 Low-beam headlight, 109 Technology in detail, 84 Recharging connected Parking lights, 110...
- Page 177 Clutch Fuel Electrical system Adjusting handlebar lever, 59 Filler neck, 15 Technical Data, 144 Checking operation, 99 Fuel reserve, 34 Emergency on/off switch (kill Refueling procedure, 78 Fluid reservoir, 15 switch), 20 Technical data, 137 Technical Data, 139 Operating, 40 Coolant Technical Data, 137 Engine...
- Page 178 Heated handlebar grips Parking, 77 Lights Operating, 53 Returning to use, 132 Control, 19 Horn, 19 Storage, 132 Headlight courtesy delay Tying down, 80 feature, 41 Multifunction display, 21 Ignition Low-beam headlight, 40 Overview, 25 Switching off, 39 Operating headlight flasher, 41 Selecting display readings, 44 Switching on, 38 Operating high-beam...
- Page 179 Onboard tool kit Performance data Settings Position on motorcycle, 18 Technical data, 146 display: SETUP ENTER, 44 Overview of warning Pre-Ride-Check, 73 Spark plugs indicators, 27 Technical Data, 144 Overviews Speedometer, 21, 25 Rear-wheel drive Indicator and warning lights, 24 Spring preload Technical Data, 140 Instrument cluster, 21...
- Page 180 Engine oil, 137 Technical Data, 143 Electronic engine management, 30 Frame, 140 Torques, 135 Electronic immobilizer, 30 Fuel, 137 Transmission Technical Data, 139 Engine warning, 31 Fuses, 144 Tripmeter Fuel reserve, 34 General notes, 7 display: TRIP 1, TRIP 2 or Light source defective, 31 Performance data, 146 TRIP A, 44...
- Page 182 80788 Munich, Germany quently when servicing your Reprints and duplication of this vehicle. work, in whole or part, are pro- For more information visit: hibited without the express writ- www.P65Warnings.ca.gov/ ten approval of BMW Motorrad, passenger-vehicle Aftersales.
- Page 183 Important data for refueling: Fuel Recommended fuel quality Super plus unleaded (max. 5 % ethanol, E5) 91 AKI (98 ROZ/RON) 93 AKI Alternative fuel quality Super unleaded (max. 15 % ethanol, E15) 89 AKI (95 ROZ/RON) Fuel level Approx. 4.5 gal (Approx. 17.0 l) Fuel reserve Approx.
Need help?
Do you have a question about the R nineTPure 2018 and is the answer not in the manual?
Questions and answers