
Related Manuals for Siemens BI710.1.1


Summary of Contents for Siemens BI710.1.1
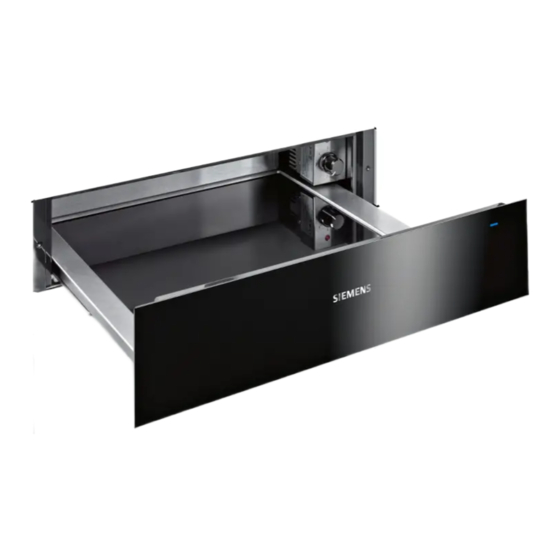
- Page 1 BI710.1.1, BI910.1.1 Warming drawer EN User manual and installation instructions Register your appliance on My Siemens and discover exclusive services and offers. Siemens Home Appliances...
-
Page 2: Table Of Contents
en Safety Table of contents 1.2 Intended use Only use this appliance: INFORMATION FOR USE ¡ To keep food warm and to warm cookware. ¡ To prepare meals and drinks. Safety .............. 2 ¡ in private households and in enclosed Preventing material damage ...... 3 spaces in a domestic environment. -
Page 3: Preventing Material Damage
Preventing material damage en If the appliance or the power cord is dam- WARNING ‒ Risk of electric shock! aged, this is dangerous. Improper repairs are dangerous. ▶ Never operate a damaged appliance. ▶ Repairs to the appliance should only be ▶ Never pull on the power cord to unplug the carried out by trained specialist staff. -
Page 4: Familiarising Yourself With Your Appliance
en Familiarising yourself with your appliance 4 Familiarising yourself with your appliance 4.1 Control panel You can use the control panel to configure all functions of your appliance and to obtain information about the operat- ing status. ¡ The settings that are currently selected light up in Touch fields colour. - Page 5 Before using for the first time en 4.2 Sabbath mode 4.3 Safety shut-off With this function, the appliance keeps the temperature For your safety, the appliance has a safety shut-off between 30 and 80 °C for a longer period of time. function. Any kind of heating will be switched off after You can keep food warm for up to 74 hours without 24 hours if the appliance controls are not used during having to switch the appliance on or off.
- Page 6 en Pre-heating cookware Press . a The operation indicator flashes while the appliance is preheating. a The default temperature lights up in colour. Set the required temperature between 30 °C and a The operation indicator lights up, the appliance heats up and the fan runs. 80 °C.
- Page 7 Keep food warm en a The operation indicator flashes while the appliance 9.2 Ending the "Preheat cups" function is preheating. a The operation indicator lights up, the appliance WARNING ‒ Risk of burns! heats up and the fan runs. The accessories and cookware become very hot dur- ing operation.
- Page 8 en Low-temperature cooking Stir natural yogurt with designated yogurt cultures If available, disinfect the washed yoghurt jars in your into the milk. steam oven at 100 °C and 100% humidity for Use one to two teaspoons of yoghurt per 100 ml 20-25 minutes. milk. Pour the yoghurt mixture into the disinfected yoghurt When using yoghurt starter, follow the instructions jars.
- Page 9 Low-temperature cooking en 12.4 Recommended settings for low-temperature cooking The following settings have been specially tested for your appliance. All tender joints of beef, pork, veal, lamb, pork, game and poultry are suitable for low-temperature cooking. The searing and cooking times depend on the size of the piece of meat.
- Page 10 en Additional applications 13 Additional applications Your appliance offers additional useful applications. 13.1 Recommended settings for other applications Observe the following recommended settings. Warming Food Temperature in °C Duration in minutes Information Egg and flour-based foods, 10-60 Cover the food e.g. crêpes, pancakes, wraps, tacos Cakes, e.g.
-
Page 11: Defrosting
Defrosting en 14 Defrosting You can use your appliance to defrost frozen food Only defrost the amount of food that you require im- gently and more evenly than in the microwave. mediately. Turn the meat or fish after half of the defrosting time has elapsed. -
Page 12: Cleaning And Servicing
en Cleaning and servicing ¡ We recommend that you install security updates as soon as possible. 15.3 Remote diagnostics Customer Service can use Remote Diagnostics to ac- cess your appliance if you contact them, have your ap- pliance connected to the Home Connect server and if Remote Diagnostics is available in the country in which you are using the appliance. -
Page 13: Troubleshooting
Troubleshooting en Do not use any abrasive sponges that may 16.4 Cleaning the glass front ‒ scratch or any glass scrapers. Clean the glass front using a glass cleaning product ▶ Dry with a soft cloth. and a soft cloth. Do not use any abrasive sponges that may ‒... - Page 14 en Troubleshooting Fault Cause and troubleshooting The cookware or The cookware covers the ventilation system slots and the appliance switches on the over- food is not heating heating protection. Wait until the appliance has cooled down. Ensure that the ventilation slots on the rear panel of the appliance are not covered. Use the main switch to switch the appliance off and back on again.
-
Page 15: Customer Service
130 mW Directive 2014/53/EU. A detailed RED Declaration of Conformity can be found online at siemens-home.bsh-group.com among the ad- ditional documents on the product page for your appli- ance. Hereby, BSH Hausgeräte GmbH declares that the ap- pliance with Home Connect functionality is in compli-... - Page 16 en Installation instructions UK (NI) 5 GHz WLAN (Wi-Fi): For indoor use only. 5 GHz WLAN (Wi-Fi): For indoor use only. 21 Installation instructions 21.2 Appliance dimensions You will find the dimensions of the appliance here 21.1 Included with the appliance After unpacking all parts, check for any transport dam- age and for completeness of delivery.
-
Page 17: Installation Instructions
Installation instructions en 21.4 Instructions for the electrical connection In order to safely connect the appliance to the elec- trical system, follow these instructions. WARNING ‒ Risk of electric shock! It must always be possible to disconnect the appliance from the electricity supply. The appliance must only be connected to a protective contact socket that has been correctly installed. - Page 18 en Installation instructions For the following combinations, install tilt protection on WARNING ‒ Risk of electric shock! the warming drawer: If the insulation of the power cord is dam- ¡ Warming drawer separately, including when in- aged, this is dangerous. stalling below an intermediate floor ¡...
- Page 19 Installation instructions en Unscrew the two lower screws on the back of the Finally, screw the brackets to the fitted unit. appliance. Insert the power cable fully into the appliance. Use the two screws to tighten the two metal retain- Push the appliance into the fitted unit. ers on the back of the appliance.
- Page 20 en Installation instructions Fit the two plastic covers on the left and right of the profile. Insert the power cable into a protective contact socket. The power cable must not touch the rear and base of the appliance after installation. Adjusting the appliance front Adjust the appliance front upwards or downwards if ne- cessary.
- Page 24 EN Manufactured by BSH Hausgeräte GmbH under the trademark licence of Siemens AG Valid within Great Britain: Imported to Great Britain by BSH Home Appliances Ltd. Grand Union House Old Wolverton Road Wolverton, Milton Keynes MK12 5PT United Kingdom BSH Hausgeräte GmbH Carl-Wery-Straße 34...
Need help?
Do you have a question about the BI710.1.1 and is the answer not in the manual?
Questions and answers