Siemens BI710 1 1 Series User Manual And Installation Instructions
Hide thumbs
Also See for BI710 1 1 Series:
- User manual and installation instructions (24 pages) ,
- User manual and installation instructions (24 pages)
Table of Contents
Advertisement
Quick Links
Advertisement
Table of Contents

Related Manuals for Siemens BI710 1 1 Series


Summary of Contents for Siemens BI710 1 1 Series
- Page 1 Warming drawer BI710.1.1, BI910.1.1 User manual and installation instructions Register your product on My Siemens and discover exclusive ser- vices and offers. siemens-home.bsh-group.com/welcome The future moving in. Siemens Home Appliances...
-
Page 2: Table Of Contents
en Safety 1.2 Intended use Table of contents Only use this appliance: ¡ To keep food warm and to warm cookware. ¡ In private households and in enclosed USER MANUAL spaces in a domestic environment. Safety .............. 2 ¡ Up to an altitude of max. 4000 m above sea level. -
Page 3: Preventing Material Damage
Preventing material damage en If the appliance or the power cord is dam- WARNING ‒ Risk of electric shock! aged, this is dangerous. Incorrect repairs are dangerous. ▶ Never operate a damaged appliance. ▶ Repairs to the appliance should only be ▶ Never pull on the power cord to unplug the carried out by trained specialist staff. -
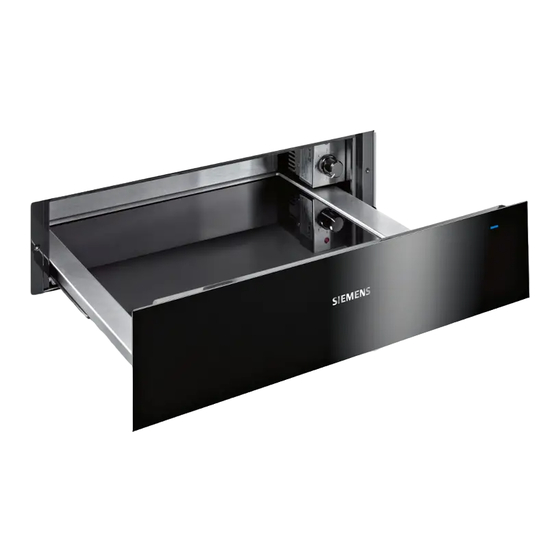
Page 4: Familiarising Yourself With Your Appliance
en Familiarising yourself with your appliance 4 Familiarising yourself with your appliance 4.1 Control panel You can use the control panel to configure all functions of your appliance and to obtain information about the operat- ing status. ¡ The settings that are currently selected light up in Touch fields colour. - Page 5 Before using for the first time en 4.2 Sabbath mode 4.3 Safety shut-off With this function, the appliance keeps the temperature For your safety, the appliance has a safety shut-off between 30 and 80 °C for a longer period of time. function. Any kind of heating will be switched off after You can keep food warm for up to 72 hours without 24 hours if the appliance controls are not used during having to switch the appliance on or off.
- Page 6 en Pre-heating cookware Press and hold the symbol for the required default 7.3 Switching on the appliance temperature until the signal tone sounds. Press . a The default temperature has changed. a A signal tone sounds. Select an operating mode. 7.7 Starting Sabbath mode a The default temperature lights up in colour.
- Page 7 Keep food warm en Close the warming drawer. 9.2 Ending the "Preheat cups" function a The operation indicator flashes while the appliance is preheating. WARNING ‒ Risk of burns! a The operation indicator lights up, the appliance The accessories and cookware become very hot dur- heats up and the fan runs.
- Page 8 en Low-temperature cooking Use one to two teaspoons of yoghurt per 100 ml Pour the yoghurt mixture into the disinfected yoghurt milk. jars. When using yoghurt starter, follow the instructions Close the yoghurt jars using a screw lid. on the packet. Place the yoghurt jars in the appliance. Use yoghurt jars with screw tops.
- Page 9 Low-temperature cooking en 12.4 Recommended settings for low-temperature cooking The following settings have been specially tested for your appliance. All tender joints of beef, pork, veal, lamb, pork, game and poultry are suitable for low-temperature cooking. The searing and cooking times depend on the size of the piece of meat.
- Page 10 en Additional applications 13 Additional applications Your appliance offers additional useful applications. 13.1 Recommended settings for other applications Observe the following recommended settings. Warming Food Temperature in °C Duration in minutes Information Egg and flour-based foods, 10-60 Cover the food e.g. crêpes, pancakes, wraps, tacos Cakes, e.g.
-
Page 11: Defrosting
Defrosting en 14 Defrosting You can use your appliance to defrost frozen food Only defrost the amount of food that you require im- gently and more evenly than in the microwave. mediately. Turn the meat or fish after half of the defrosting time has elapsed. -
Page 12: Cleaning And Servicing
en Cleaning and servicing 15.3 Remote diagnostics Customer Service can use Remote Diagnostics to ac- cess your appliance if you contact them, have your ap- pliance connected to the Home Connect server and if Remote Diagnostics is available in the country in which you are using the appliance. - Page 13 Troubleshooting en 16.5 Cleaning the glass plate 16.6 Cleaning the control panel Clean the glass plate using a glass cleaning Clean the control panel with a damp cloth and neut- product and a soft cloth. ral cleaning agents, such as washing-up liquid and Do not use any abrasive sponges that may water ‒...
- Page 14 en Customer Service Fault Cause and troubleshooting The cookware or The warming drawer is not completely closed. food does not get Close the warming drawer. ▶ warm enough. The appliance The appliance has overheated. switches off. Wait until the appliance has cooled down. light up.
-
Page 15: Information Regarding Free And Open
BSH Hausgeräte GmbH hereby declares that the appli- A detailed Declaration of Conformity can be found on- ance with Home Connect functionality conforms to the line at www.siemens-home.bsh-group.com/uk/ among basic requirements and other relevant provisions of Dir- the additional documents on the product page for your ective 2014/53/EU. - Page 16 en Installation instructions 21.1 Included with the appliance After unpacking all parts, check for any transport dam- age and for completeness of delivery. 14 cm 21.3 Installation in the cabinet You will find the dimensions of the appliance here 14 cm 29 cm 21.2 Appliance dimensions You will find the dimensions of the appliance here...
-
Page 17: Installation Instructions
Installation instructions en installing a residual-current circuit breaker (RCCB) 29 cm in the appliance's power supply circuit. The appliance must only be connected using the power cable provided. Connect the power cable to the back of the appliance. Connecting cables with various plug types are avail- able from customer service. - Page 18 en Installation instructions Fit the two plastic covers on the left and right of the ATTENTION! profile. Covering the ventilation slots and air intake openings causes the appliance to overheat. Do not cover ventilation slots and air intake open- ▶ ings. If the appliance is installed behind a decorative panel, this may cause it to overheat.
- Page 19 Installation instructions en Unscrew the two lower screws on the back of the Screw the brackets to the fitted unit. appliance. Remove the adhesive strip from the appliance front. Use the two screws to tighten the two metal retain- Open the appliance carefully and check whether the ers on the back of the appliance.
- Page 20 Valid within Great Britain: Imported to Great Britain by BSH Home Appliances Ltd. Grand Union House Old Wolverton Road Wolverton, Milton Keynes MK12 5PT United Kingdom Manufactured by BSH Hausgeräte GmbH under the trademark licence of Siemens AG *9001674174* 9001674174 (020103)
Need help?
Do you have a question about the BI710 1 1 Series and is the answer not in the manual?
Questions and answers