
Related Manuals for FLIGHTORY Mini Plank


Summary of Contents for FLIGHTORY Mini Plank
- Page 1 USER MANUAL © 2023 Flightory by Szymon Wójcik All rights reserved. USER MANUAL...
- Page 2 Socials Join Flightory Tech group on Facebook and create community with us. Share progress of your builds. Any suggestions or questions welcome. www.facebook.com/groups/flightory Follow Instagram where I share more footage on a regular basis www.instagram.com/flightory_ Check out the Youtube channel where you can find videos about my projects: www.youtube.com/@FLIGHTORY...
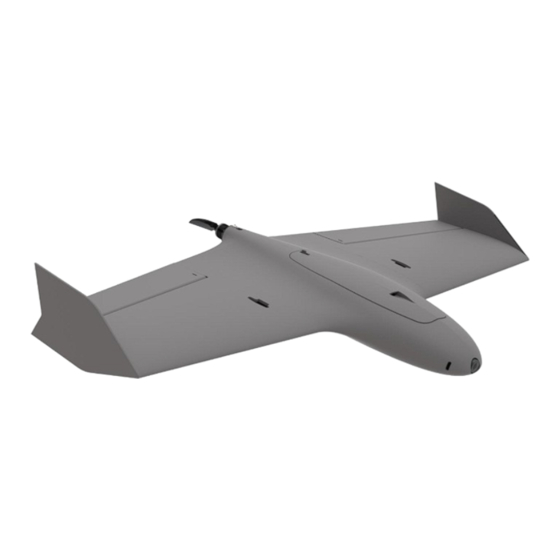
- Page 3 General Aircraft Data General data Wingspan 650mm Wing area 12.5 dm² Lenght 370mm Center of Gravity 35mm from leading Edge 300-400g Optimal Cruise Speed 45-55 km/h Airfoil PW75 Root Chord 230mm 191mm Aspect Ratio 3.43 Wing load 24 -32g / dm² USER MANUAL...
- Page 4 CFD Analysis Geometry is designed to provide the best possible characteristics. Excellent and well-tested PW75 airfoil was selected for this project. It is a reflex airfoil designed specifically for planks. With the center of gravity located 35mm from the leading edge, stability and the zero pitching moment at zero angle of attack is maintained.
-
Page 5: Exploded View
Exploded view USER MANUAL... -
Page 6: Print Settings
Settings are prepared a standard 0.4mm nozzle. Download link is available on Flightory Blog. Infill in this profile is set to 6%. For this project I recommend changing it to 3%. - Page 7 Parts Orientation All parts are suitable for printing on any standard printer with a small working area. I printed all parts on a 200 x 200mm area. The settings are just a base that you can change and adjust as needed. The following pages will list my recommended infill settings for each part.
- Page 8 Parts Orientation Important thing is the correct orientation of the printed parts to avoid overhangs, and not have to use supports. Below is the recommended orientation of parts and infill settings. FUS 1 - 3% gyroid infill FUS 2 - 3% gyroid infill USER MANUAL...
- Page 9 Parts Orientation FUS 3 - 3% gyroid infill FUS 4 - 6% gyroid infill USER MANUAL...
- Page 10 Parts Orientation NOSE - 3% gyroid infill HATCH1 - 6% gyroid infill USER MANUAL...
- Page 11 Parts Orientation HATCH2 - 6% gyroid infill ROOT - 3% gyroid infill USER MANUAL...
- Page 12 Parts Orientation WING - 3% cubic subdivision infill WINGLET - 3% gyroid infill USER MANUAL...
- Page 13 Reccomended RC Equipment Reccomended electronics Motor T-Motor F1507 3800KV or similar size Propeller Flight Controller Matek F405 WMN Matek M10Q or similar GPS with compass Servos Corona 929MG Metal Gear Little-Bee 20A BlHeliS Battery Li-on 3S1P 3000mAh or similar LiPo Receiver Matek R24-D ELRS Digital or analog VTX...
-
Page 14: Required Accessories
Required accessories ITEM QUANTITY 4x645mm Carbon Tube (MAIN SPAR) 4x310mm Carbon Tube (SECOND SPAR) Thin CA Glue CA Activator M3 Threaded Insert (Outer Ø5mm, height 5mm) M3 screw LW-PLA About 150g Small amount Polyester hinge 20x25mm Pen spring Adhesive velcro USER MANUAL... - Page 15 PARTS LIST - FUSELAGE PART MATERIAL FUS 1 LW-PLA FUS 2 LW-PLA FUS 3 LW-PLA FUS 4 LW-PLA WING L LW-PLA WING R LW-PLA ROOT L LW-PLA ROOT R LW-PLA AILERON L LW-PLA AILERON R LW-PLA WINGLET L LW-PLA WINGLET R LW-PLA HATCH 1 LW-PLA...
- Page 16 STEP files A few airframe parts are also available in STEP format. This way you will be able to customize these items. For example, make a mount for a custom camera, a mount for a VTX, GPS or change the size of the servos used.
- Page 17 Nose variants There are 2 variants of the nose in the files. One of them is adapted for a standard 19x19mm FPV camera. A clean version is relevant if you don't want to mount an FPV camera. The nose file is also available in STEP format for easier editing and customization.
- Page 18 Variant Selection USER MANUAL...
-
Page 19: Fuselage Assembly
Fuselage assembly Prepare all fuselage segments. Before gluing, you can gently sand the surface of all elements, especially the gluing surfaces. It’s best to use thick CA glue. You can use short pieces of 4mm carbon tube as pins to strengthen the connection. This is an optional action USER MANUAL... - Page 20 Fuselage assembly After gluing all the fuselage segments together, attach the ROOT parts. It’s best to use thick CA glue. USER MANUAL...
- Page 21 Fuselage assembly Now you can mount the servos into the designated places. Install the servo arm now. Make sure the servo is in neutral position. You can use a small amount of hot glue to secure the servo. USER MANUAL...
- Page 22 Fuselage assembly Now prepare 4mm carbon tubes. Cut them to the appropriate lengths. The longer spar should be 645mm and the shorter 310mm. USER MANUAL...
- Page 23 Wings Now it's time to install the wings. Glue them permanently into the fuselage. Spars should fit tightly into the designated places. Tubes do not require additional gluing USER MANUAL...
- Page 24 Wings Glue the ailerons using 20x30mm polyester hinges. Slide them into the prepared places in the ailerons and wing. Use a small amount of thin CA to fix the hinges. At this stage you can also mount the aileron horns and pushrods.
- Page 25 Wings Mount vertical stabilizers on the wingtips. There is a large centering pin that will help you get this part well aligned. You can also cut the stabilizers by hand from EPP foam and and increase their strength a little bit during hard landings. USER MANUAL...
-
Page 26: Motor Mount
Motor mount Now take the firewall and install the M3 threaded inserts. Press them into the designated places with a slightly heated soldering iron. Do it precisely, these inserts will be responsible for mounting the motor with a frame in the fuselage. USER MANUAL... - Page 27 Motor mount Slide the motor into the designated place and screw from the top and bottom with short M3 screws. The motor should hold without any play. You can also mount the propeller on right away. USER MANUAL...
-
Page 28: Equipment Layout
Equipment layout You can easily arrange the equipment inside the fuselage. The surface inside is flat. Between the carbon tubes there is a space intended for the flight controller, a receiver or other additional small item. In the front part of the fuselage it is best to place self-adhesive Velcro to which the battery will be attached. - Page 29 Finishing build The model is practically ready. You can add a piece of duct tape on the lower part of the fuselage as well as on the leading edges of the wings, to strengthen the structure. I recommend using Ardupilot software to configure the aircraft.
- Page 30 USER MANUAL...
Need help?
Do you have a question about the Mini Plank and is the answer not in the manual?
Questions and answers