Advertisement
Quick Links
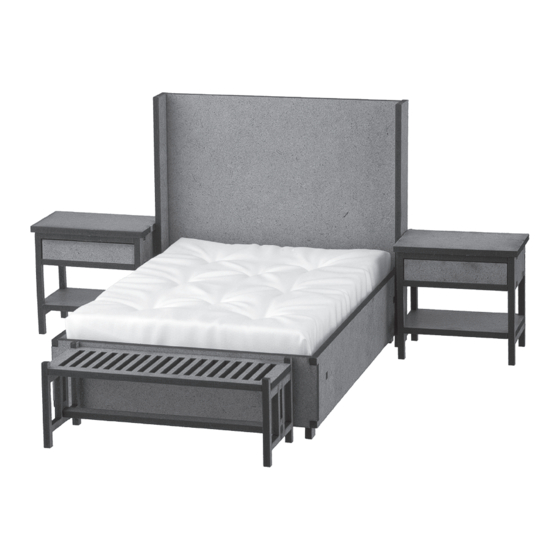
#46200 hanna collection
Bedroom Set
Available exclusively at miniatures.com
Step-by-step assembly instructions
Copyright miniatures.com 2022
PARTS LIST:
Bed
Nightstand Table
Outer Rail (OR) x2
Leg (L) x2
Lower Rail (LR) x2
Middle Brace (MB)
Headboard (HB)
Top Brace (TB)
Footboard (FB)
Lower Brace (LB)
Side Panel (SP) x2
Back (BK)
Feet (F) x4
Top (TP)
Mattress
Nightstand drawer
Bench
Base (B)
Brace (B)
Short Side (SS) x2
Side (S) x2
Long Side (LS) x2
Top (T)
Front (F)
SUPPLIeS Needed:
Masking tape
Glue (such as #1249 Weldbond)
Damp clean cloth
Hardware
Assembly Instructions
Tip: Gently wipe off any residual soot from all cut edges
using a little rubbing alcohol on a clean cloth.
Bed
1.
Glue a Lower Rail (LR) onto an Outer Rail
(OR). The notches on the Lower Rail (LR) fit
into the holes in the Outer Rail (OR).
2. Repeat Step 1 with the second set of rails.
Let the glue set for a few minutes.
3. Glue one rail assembly to the Headboard
(HB). The notches on the rail assembly fit
into the holes in the Headboard (HB). If they do not line up,
then rotate the rail assembly and try again.
4. Repeat Step 3 with the second rail assembly.
5. Glue the Footboard (FB) to the rail assemblies.
The notches on the rail assembly fit into the
holes in the Footboard (FB).
6. Glue the Side Panels (SP) to the
Headboard (HB) and Outer Rails (OR).
The Side Panels (SP) are flush with
the Headboard (HB) at the back.
7. Let the glue set for a few minutes.
8. Flip the bed over so that the Headboard
(HB) is hanging over and off your table and the underside
of the bed is accessible.
2388 Pleasantdale Road, Atlanta, GA 30340 • 800-926-6464 • www.miniatures.com • Made in Thailand
GeNeRAL INSTRUcTIONS
• Identify and inspect all parts using the Parts List and Parts Diagram.
• Read the directions completely before beginning the project.
• If possible, have a dedicated work area so that you are not unpack-
ing, repacking, and moving the project from place to place.
• Choose a work surface that is level, clean, dry, and protected from
glue spills.
• Do a dry fit, using masking tape to hold parts in place, to make sure
everything fits together correctly before assembling permanently.
9. Glue the Feet (F) into the bed
corners.
10. Secure the corners of the
assembly with tape (or clamps).
11. Use a damp clean cloth to wipe
away any excess glue.
12. Let dry.
Assembly of the Bed is now complete.
To finish, add wood filler to any gaps around the notches and
sand. Then paint or cover with velvet paper, patterned paper,
or thin cotton fabric. Add the mattress and make up the bed
with either #91046 Beige Taramore Bedding Set or #91047
Blue Taramore Bedding Set.
BeNch
1.
Glue the Brace (B) into one Side (S). The notch
on the Brace (B) fits into the square hole in the
Side (S). The Brace (B) can be oriented with
the cut edge facing up or out.
2. Repeat Step 1 with the second Side (S).
3. Glue the Top (T) onto the
assembly and inside the posts.
4. Secure the corners with tape (or clamps).
5. Use a damp clean cloth to wipe away any excess glue.
6. Let dry.
0922
Advertisement

Summary of Contents for Miniatures Hanna 46200
- Page 1 5. Use a damp clean cloth to wipe away any excess glue. (HB) is hanging over and off your table and the underside 6. Let dry. of the bed is accessible. 0922 2388 Pleasantdale Road, Atlanta, GA 30340 • 800-926-6464 • www.miniatures.com • Made in Thailand...
- Page 2 5. Glue the Back (BK) into place. 6. Glue the Top (TP) flush at the back and even at the sides. 7. Let dry. Parts Layout 0922 2388 Pleasantdale Road, Atlanta, GA 30340 • 800-926-6464 • www.miniatures.com • Made in Thailand...


Need help?
Do you have a question about the Hanna 46200 and is the answer not in the manual?
Questions and answers