Advertisement
Quick Links
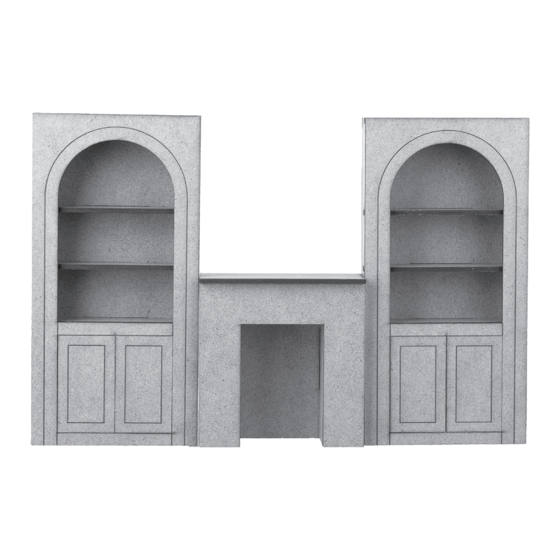
#14495 Archie Built-Ins and Mantel
Available exclusively at miniatures.com
Step-by-step assembly instructions
Copyright miniatures.com 2022
BOOKCASE PARTS:
Back (B)
Wall (W) x2
Shelf (S) x6
Front (F)
Door (D) x2
FIREPLACE PARTS:
Firebox Back (FBB)
Firebox Wall (FBW) x2
Firebox Ceiling (FBC)
Mantel Shelf (MS)
Mantel Wall (MW) x2
Surround (SR)
GENERAL INSTRUCTIONS
• Read all the instructions before you begin.
• Choose a work surface that is clean, dry
and protected from glue spills.
• Make sure all parts are in the kit.
• Do a dry fit, using masking tape to hold
parts in place, to make sure everything
fits together correctly before permanent
assembly.
Assembly Instructions
Bookcase
1.
Place Back (B) flat on the work surface.
2. Glue a Wall (W) to a long edge
of Back (B). All notches fit flush.
3. Glue a Shelf (S) to a short
edge of Back (B). Also, glue it
to the Wall (W).
4. Glue another Shelf (S) to the
other short edge of Back (B).
Also, glue it to the Wall (W).
5. Glue another Wall (W) to the other long edge of Back (B).
Also, glue it to both Shelves (S).
6. Use a damp clean cloth to wipe away any excess glue.
1
7. Let the glue set for a few minutes.
8. Glue the remaining four Shelves
1
(S) in place.
9. Use a damp clean cloth to wipe
away any excess glue.
10. Set this shelving assembly
aside.
5
2388 Pleasantdale Road, Atlanta, GA 30340 • 800-926-6464 • www.miniatures.com • Made in USA
5
Tip: Plan your finishes at the dry-fit stage, before final/permanent
assembly. It is easier to finish the panels as flat surfaces.
Disassemble and finish as desired, then reassemble using glue.
1
1
5
2
5
2
Bookshelf Parts Diagram
6
Bookshelf Parts Diagram
F
S
W
S
6
D
S
F
S
2
11. Place Front (F) flat on the work
surface with the etched lines
facing up.
2
12. Add glue* to the edges of both
Doors (D).
13. Place both Doors (D) into the
square opening of Front (F)
with the etched lines facing up.
14. Lightly press both Doors (D) flat with Front (F).
15. Use a damp clean cloth to wipe away any excess glue.
6
16. Let the glue set for a moment.
17. Carefully turn this front assembly over and use a damp
clean cloth to wipe away any
6
3
excess glue on the back**.
18. Orient the front assembly with
its arch at the top and orient
3
the shelf assembly with its tall-
est shelf at the top.
19. Glue the front assembly onto
the shelving assembly. All edges
are flush.
20. Assembly of one bookshelf is now complete.
7
21. Repeat these instructions for the second bookshelf.
S
W
B
7
S
3
3
7
7
4
4
Fireplace Parts Diagram
Fireplace Parts Diagram
SR
MS
FBC
SR
1122
Advertisement

Related Manuals for Miniatures Archie 14495


Summary of Contents for Miniatures Archie 14495
- Page 1 20. Assembly of one bookshelf is now complete. 21. Repeat these instructions for the second bookshelf. Bookshelf Parts Diagram Fireplace Parts Diagram 1122 2388 Pleasantdale Road, Atlanta, GA 30340 • 800-926-6464 • www.miniatures.com • Made in USA...
- Page 2 ** The etched lines can be oriented towards the back if a smooth front finish is preferred. Parts Layout Diagram Bookshelf Parts Diagram Fireplace Parts Diagram 1122 2388 Pleasantdale Road, Atlanta, GA 30340 • 800-926-6464 • www.miniatures.com • Made in USA...
Need help?
Do you have a question about the Archie 14495 and is the answer not in the manual?
Questions and answers