Advertisement
Quick Links
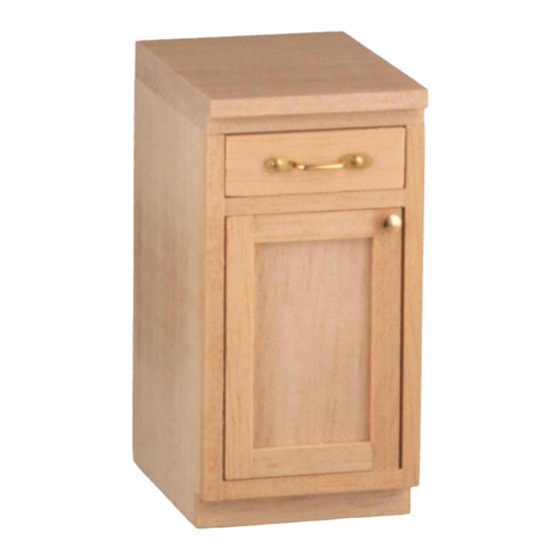
#15001 Shaker Kitchen –
Lower Cabinet 1
Step-by-step assembly instructions
Copyright miniatures.com 2024
SUPPLIES NEEDED:
Masking tape
White glue (such as #1249 Weldbond)
Damp clean cloth
Finishes
GENERAL INSTRUCTIONS
• Identify and inspect all parts using the Parts Diagram.
• Read the directions completely before beginning the project.
• If possible, have a dedicated work area so that you are not
unpacking, repacking, and moving the project from place to place.
• Choose a work surface that is level, clean, dry, and protected from
glue spills.
• Do a dry fit, using masking tape to hold parts in place, to make sure
everything fits together correctly before assembling permanently.
Assembly Instructions
1.
Glue the three Shelves
into the grooves on a
Side. They are flush on
one edge while clearing
the rabbet on the other
edge.
2. Add the other Side to the
assembly.
3. Glue the Back to the Sides and into their
rabbet grooves.
4. Glue the Footing at the bottom front
edge between the Sides.
5. Glue the Toe Kick over the Footing.
6. Glue the Long Trim to the front edges of
the Sides. All edges are flush.
7. Glue the Short Trim to the front edges of
the top and bottom Shelves. The holes
go on the same side as the door hinges.
8. Assemble and install the door.
9. Assemble and insert the drawer.
10. Glue on the Top. It is flush at the back
and overhangs at the front.
11. Glue on the Counter. It is flush at the
back and overhangs at the front.
Assembly is now complete. Enjoy!
2388 Pleasantdale Road, Atlanta, GA 30340 • Tel 1.800.926.6464 • www.miniatures.com • Made in Thailand
/
" Kit
1
2
Not Suitable for Children
under 15 years old.
Tips:
•
The kit is precisely cut to fit together with minimal
sanding, if any. Where needed, use a fine grit paper on
a sanding block.
•
A fine-tipped glue applicator (such as the Pinpoint
Glue Syringe Kit #10244) can be helpful.
•
Stain the cabinets before assembly or paint after
assembly.
•
All drawers in the collection fit together the same way.
The sides attach around the base. All outside edges
are flush. Fronts have two predrilled holes for hardware;
they are flush at the bottom edge and rises above the
drawer.
•
All doors in the collection fit together the same way.
The door framing fits around the door panel and the
back is flat. The frame piece that is contoured and has
a hole at either end goes on the hinge side. The hole
on the surface of a frame piece is for the pull. Pulls are
at the top for lower cabinets and the bottom for upper
cabinets.
•
To install door hinges, insert one pin in the hole at the
top or side of the frame. Push the pin through and into
the corresponding hole in the door. Adjust the door
alignment as necessary for the holes to align. Insert
another pin through on the other end.
WARNING:
CHOKING HAZARD — Small parts
1024
Advertisement

Related Manuals for Miniatures 15001


Summary of Contents for Miniatures 15001
- Page 1 Adjust the door Assembly is now complete. Enjoy! alignment as necessary for the holes to align. Insert another pin through on the other end. 2388 Pleasantdale Road, Atlanta, GA 30340 • Tel 1.800.926.6464 • www.miniatures.com • Made in Thailand 1024...
- Page 2 Drawer Back Horizontal Trim (x2) Door Frame Long (knob) Toe Kick Drawer Sides (x2) Counter Shelves (x3) Drawer Bottom Side Side Back Door Panel 2388 Pleasantdale Road, Atlanta, GA 30340 • Tel 1.800.926.6464 • www.miniatures.com • Made in Thailand 1024...
Need help?
Do you have a question about the 15001 and is the answer not in the manual?
Questions and answers