Table of Contents
Advertisement
Available languages
Available languages
Quick Links
Advertisement
Chapters
Table of Contents

Related Manuals for inventum VVW6046AB


Summary of Contents for inventum VVW6046AB
- Page 1 Handleiding VVW6046AB Vrijstaande vaatwasser Freestanding dishwasher • Freistehende Geschirrspüler • Lave-vaiselle non-encastré • Handleiding EN • User manual DE • Benutzerhandbuch FR • Manuel d’utilisation www.inventum.eu...
- Page 8 Inhoudsopgave Inleiding.................................. 8 Veiligheid................................8 Specificaties................................15 Beschrijving................................16 Installatie................................19 Bediening................................19 Reiniging en onderhoud............................24 Aanvullende informatie............................25 Probleemoplossing............................... 26 Algemene service- en garantievoorwaarden......................28 Inleiding HOE DIT DOCUMENT TE GEBRUIKEN 1. Lees dit gehele document. Zorg dat u alle instructies kent en begrijpt. 2.
- Page 9 voor de gevolgen bij de gebruiker. Schade aan het apparaat of andere producten valt niet onder de garantie. • Bij het niet in acht nemen van de veiligheidsinstructies en waarschuwingen stelt de fabrikant zich niet aansprakelijk voor eventuele hieruit voortkomende schade. •...
- Page 10 • Plaats en sluit het apparaat aan volgens de installatievoorschriften. • Zorg dat het apparaat tijdens het plaatsen niet is aangesloten. • Controleer of het aardingssysteem van de elektrische huisinstallatie volgens de voorschriften is aangesloten. • Alle elektrische aansluitingen moeten overeenkomen met de waarden op het typeplaatje.
- Page 11 • Plaats het apparaat op een veilige locatie met een vlakke ondergrond. • Zorg dat het apparaat waterpas en in balans is door de voeten te verstellen. Een juiste plaatsing van het apparaat betekent dat de deur eenvoudig kan worden geopend en gesloten. WATERAANSLUITING •...
- Page 12 40 en 100 cm worden geplaatst en mag niet in water worden ondergedompeld. • Het apparaat moet op de waterleiding worden aangesloten met behulp van de nieuw geleverde slangensets. Gebruik oude slangensets niet opnieuw. ELEKTRISCHE AANSLUITING • Zorg dat de stekker van het apparaat is aangesloten op een geaard stopcontact.
- Page 13 • Gebruik om veiligheidsredenen uitsluitend accessoires en reserveonderdelen van de fabrikant die geschikt zijn voor uw apparaat. • Dit apparaat moet worden geaard om het risico van een elektrische schok in het geval van een fout of storing te voorkomen. Het apparaat heeft een geaard netsnoer met een geaarde stekker.
- Page 14 • Houd kinderen uit de buurt van het apparaat wanneer de deur geopend is. Er kan nog reinigingsmiddel in het apparaat aanwezig zijn. Raadpleeg bij inslikken van reinigingsmiddel direct een arts en neem de verpakking mee. • Sommige vaatwasmiddelen zijn sterk alkalisch en kunnen bij inslikken extreem gevaarlijk zijn.
- Page 15 • Plaats geen voorwerpen in het apparaat die niet vaatwasserbestendig zijn. • Vul een korf niet overmatig. De fabrikant is niet aansprakelijk voor schade aan het apparaat als gevolg van verplaatsing van een korf. • Drink geen water uit het apparaat. Het water is niet geschikt voor consumptie.
- Page 16 AFMETINGEN EN GEWICHT Onderdeel Specificatie Afmetingen (B x D x H) [mm] 598 x 600 x 845 Nettogewicht [kg] Brutogewicht [kg] TECHNISCHE SPECIFICATIES Onderdeel Specificatie Totaal energieverbruik [W] 1760 - 2100 Verwarmingsvermogen [W] 1800 Nominale spanning [V] / frequentie [Hz] 220-240 / 50 Watertoevoerdruk [MPa] 0,04 (0,4 bar) - 1 (10 bar)
- Page 17 Onderdeel Functie Vaatwas- en glansspoelmiddelreservoir Reservoir voor vaatwasmiddel en glansspoelmiddel. Het apparaat inruimen Bestekkorf Zie paragraaf Zoutreservoir Reservoir voor zout. Filters Apparaat vrijhouden van vervuiling. Onderste sproeiarm Reinigen van het vaatwerk in de onderste korf. Bovenste sproeiarm Reinigen van het vaatwerk in de bovenste korf. BEDIENINGSPANEEL (Figuur 2) Aan/uit-knop...
- Page 18 Onderdeel Functie • Indicator links voor extra reiniging. Gebruik deze functie voor het wassen van sterk vervuild, moeilijk te reinigen vaatwerk. • Indicator rechts voor extra drogen. Functie-indicator Opmerking: Deze functies kunnen uitsluitend worden gebruikt bij de programma's Intensive, Universal, ECO, Glass en 90 minutes.
- Page 19 Opmerking: Het eco-programma is geschikt voor het reinigen van normaal bevuild vaatwerk. Dit is het meest efficiënte programma door een combinatie van energie- en waterverbruik en voldoet aan de EU- wetgeving op het gebied van ecologisch ontwerp. Installatie HET APPARAAT ONDER EEN WERKBLAD PLAATSEN Waarschuwing: Het werkblad moet stabiel zijn.
- Page 20 HET ZOUTRESERVOIR VULLEN Voor een goed resultaat heeft het apparaat zacht (minder kalkhoudend) water nodig. Zout wordt gebruikt om het water te verzachten en het voorkomt witte kalkresten op uw vaatwerk en de binnenkant van het apparaat. Voorzichtig: Gebruik uitsluitend zout dat geschikt is voor vaatwassers. Gebruik geen keukenzout. Opmerking: Vul het zoutreservoir wanneer de zoutindicator op het bedieningspaneel brandt.
- Page 21 Voorzichtig: Plaats geen vaatwastablet in de bestekkorf. Gebruik uitsluitend het vaatwasmiddelreservoir. Opmerking: Vaatwasmiddel is verkrijgbaar in poeder, gel en tabletten en ook verkrijgbaar als een gecombineerd product (met zout en/of glansspoelmiddel). Gecombineerde producten geven alleen voldoende resultaat onder bepaalde omstandigheden. Neem de aanwijzingen op de verpakking in acht. 1.
- Page 22 4. Wacht 5 seconden op druk op de aan/uit-knop om de instelling te voltooien en de instelfunctie te verlaten. 5. Sluit de kap. HET APPARAAT INRUIMEN Het op de juiste wijze in het apparaat plaatsen van vaatwerk heeft een positief effect op het energieverbruik en de was- en droogprestaties van uw apparaat.
- Page 23 (Figuur 20) De rekken van de onderste 1. Klap indien nodig de rekken van de onderste korf in. Zie paragraaf korf inklappen (Figuur 21) 2. Plaats het vaatwerk in de onderste korf. DE HOOGTE VAN DE REKKEN VAN DE BOVENSTE KORF AANPASSEN De rekken kunnen omhoog worden verplaatst om meer ruimte in de bovenste korf te creëren, bijvoorbeeld om glazen van verschillende grootte onder de rekken te plaatsen of om bestekdelen op de rekken te plaatsen.
- Page 24 HET PROGRAMMA UITSTELLEN Opmerking: De starttijd van een programma kan maximaal 24 uur worden uitgesteld. 1. Druk op de timerknop om de starttijd van een programma uit te stellen. Iedere keer als u op de knop drukt, wordt de starttijd met 1 uur uitgesteld. 2.
- Page 25 Reinig de filters wekelijks. Waarschuwing: Gebruik het apparaat niet zonder het filtersysteem. Opmerking: Schone filters zorgen dat uw apparaat op de juist wijze werkt. 1. Verwijder de onderste korf. (Figuur 26) 2. Draai het hoofdfilter (A) linksom om het te verwijderen. Opmerking: Het microfilter en de zeef zijn aan het hoofdfilter bevestigd.
- Page 26 ALGEMENE PROCEDURE VOOR PROBLEEMOPLOSSING 1. Probeer aan de hand van de tabel voor het oplossen van problemen en de foutcodes een oplossing voor het probleem te vinden. 2. Neem contact op met de Inventum-servicedienst als de foutcode steeds opnieuw verschijnt. PROBLEEMOPLOSSINGSTABEL Probleem Mogelijke oorzaak...
- Page 27 Probleem Mogelijke oorzaak Mogelijke oplossing Zorg dat u het apparaat juist inruimt. De bestekkorf is overvol. Het apparaat inruimen Zie paragraaf Het vaatwerk is te dicht tegen elkaar Zorg dat u het apparaat juist inruimt. Het apparaat inruimen aan geplaatst. Zie paragraaf Zorg dat u het vaatwasmiddelreservoir met...
- Page 28 (door hetzelfde of een gelijkwaardig product). Inventum zal dit beoordelen. 3. Om een claim onder de 5 jaar Inventum garantie in te dienen, moet u binnen twee maanden na het ontdekken van de fout of het defect het product aan de winkel waar u dit heeft gekocht retourneren of contact opnemen met 'https://www.inventum.eu/service'...
- Page 29 2. Een kopie van het originele aankoopbewijs moet bij het verzoek worden ingesloten. 3. De serviceafdeling van Inventum bepaalt op basis van het verzoek en het verkoopbewijs of het product wordt gerepareerd of vervangen.
-
Page 30: Table Of Contents
Contents Introduction................................30 Safety..................................30 Specifications................................37 Description................................38 Installation................................40 Operation................................41 Cleaning and maintenance........................... 46 Extra information..............................47 Troubleshooting..............................47 General terms and conditions of service and warranty..................49 Introduction HOW TO USE THIS DOCUMENT 1. Read this document completely. Make sure that you know and understand all the instructions. 2. - Page 31 • If the safety instructions and warnings are not observed, the manufacturer cannot be held liable for any resulting damage. • Make sure that the appliance is placed out of reach of children. Children are not always able to understand potential risks.
- Page 32 • Check whether the indoor electrical fuse system is connected according to the regulations. • All electrical connections must match the values of the rating plate. • If the mains cable is damaged, it can only be replaced by the service organizations of the manufacturer or equivalent qualified persons.
- Page 33 WATER CONNECTION • Make sure that the indoor plumbing is suitable for installing the appliance. • Install a filter at the water supply to avoid damage to the appliance due to contamination from the water (sand, clay, rust, etc.). • Use the new water inlet hose supplied with the appliance. Before making the connection, run water through the hose.
- Page 34 damage resulting from using the appliance with a mains socket that is not grounded. • Make sure that the voltage and the frequency values for the current correspond to the values of the rating plate. • The electrical system in your home must be supplied with a 16 Amp fuse.
- Page 35 • Do not make changes to the mains plug. If the mains plug does not fit into the mains socket, contact a qualified electrician. • Do not place heavy objects on the opened door of the appliance. • Do not stand on the opened door of the appliance. The appliance can fall over which can result into damage to the appliance.
- Page 36 • Do not use the appliance for any other purpose than washing dishes. • Only use the appliance in a frost free room. • Remove the door or deactivate the lock when disposing of the appliance. Make sure that children cannot lock themselves in an old appliance.
-
Page 37: Specifications
Specifications GENERAL SPECIFICATIONS Item Specification Type Freestanding Color of control panel Black with white LED Number of spray arms Upper basket height adjustable Maximum amount of place settings Half-load option Extra-dry option Timer [hours] Aquastop Type of drying system Turbo DIMENSIONS AND WEIGHT Item Specification... -
Page 38: Description
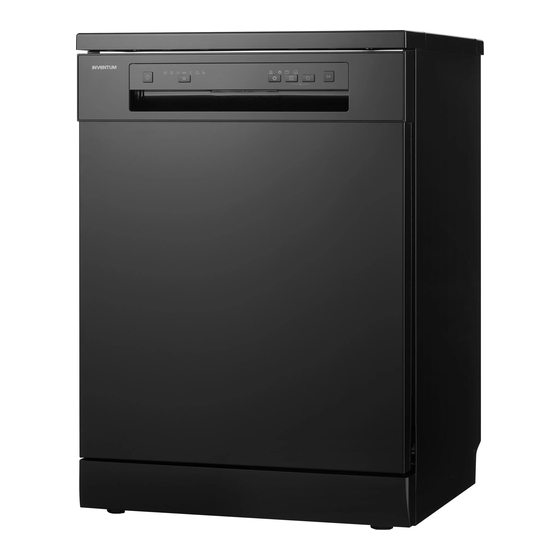
Description INTENDED USE The appliance is intended to wash dishes. Do not use the appliance for any other purpose than described in this document. BUILT-IN DISHWASHER (Figure 1) Nozzle of the cutlery drawer Detergent and rinse aid reservoir Cutlery drawer Cutlery basket Upper basket Salt reservoir... - Page 39 Item Function Press the half-load and delay button to start the auto door program. After the program has ended, the door will open automatically to achieve better drying results. The auto door option can be turned off by pressing the buttons for 3 seconds.
-
Page 40: Installation
Time Icon Name Description [min.] Daily program for normally soiled dishes. The program takes longer, but uses less water and slowly heats for lower energy consumption. Glass For lightly soiled crockery and glass. 90 minutes For normally soiled loads that need quick wash. ... -
Page 41: Operation
(Figure 5) 2. Push the appliance in the correct position. Refer to the dimensions in the figure. Caution: Be careful not to crush or bend the hoses during positioning of the appliance. CONNECTING THE APPLIANCE (Figure 6) 1. Connect the drain hose directly to the drain hole or to the siphon. The connection must have a minimum height of 50 cm and a maximum height of 110 ... - Page 42 Note: Contact your local water company to verify the level of water hardness in your area. Note: As a default, the level of water hardness of the appliance is set to level H3. 1. Push the on/off button to start the appliance. 2.
- Page 43 (Figure 14) 1. Remove the rinse reservoir cap (A) by lifting up the handle. (Figure 15) 2. Pour the rinse aid into the dispenser (B), being careful not to overfill. Caution: Remove any spilled rinse aid immediately. Spilled rinse aid can form extreme foam which can cause leaks.
- Page 44 Loading the upper basket The upper basket is designed for loading cups and saucers, small bowls and glasses. You can both adjust the height of the upper basket and the height of the racks of the upper basket to create more space. Adjusting the height of the upper 1.
- Page 45 CHOOSING A PROGRAM Note: Programs For an overview of the programs, refer to section 1. Use the program selector button to choose a program. 2. Use the timer button to delay the start time of the program. Refer to section Delaying the program 3.
-
Page 46: Cleaning And Maintenance
Cleaning and maintenance CLEANING THE APPLIANCE Caution: Make sure that the appliance is off. Note: If you clean the appliance regularly, it will improve the service life. 1. Clean the outside of the appliance. Use a damp cloth. 2. Clean the seals of the door. Use a soft cloth. 3. -
Page 47: Extra Information
Eco and Quick '90, on Troubleshooting GENERAL TROUBLESHOOTING PROCEDURE 1. Try to find a solution for the problem with the help of the troubleshooting table and the fault codes. 2. If the fault code keeps re-occuring, contact the Inventum-servicedienst. TROUBLESHOOTING TABLE Problem Possible cause Possible solution The mains plug is not connected. - Page 48 Problem Possible cause Possible solution Clean the filters. Refer to section The filters are clogged. Cleaning the filters Wait until the program is finished. The program has not finished. A buzzer sounds five times when the program is finished. There is a power failure. Make sure that there is power.
-
Page 49: General Terms And Conditions Of Service And Warranty
The safety for water overflow is Contact the Inventum-servicedienst. activated. Error in the electronics. Contact the Inventum-servicedienst. General terms and conditions of service and warranty 5-year Inventum warranty! 1. Customers enjoy a 5-year full manufacturer’s warranty on all Inventum products. English •... - Page 50 3. In order to make a claim under the 5-year Inventum warranty, you must, within two months after discovering the fault or defect, either return the product to the shop where you bought it, or contact the Inventum customer 'https://www.inventum.eu/service' service department by using the form at 4.
-
Page 51: Einleitung
Inhaltsverzeichnis Einleitung................................51 Sicherheit................................51 Spezifikationen..............................58 Beschreibung................................59 Installation................................62 Bedienung................................63 Reinigung und Wartung............................68 Zusätzliche Informationen.............................69 Fehlerbehebung..............................69 Allgemeine Service- und Garantiebedingungen....................72 Einleitung VERWENDUNG DIESES DOKUMENTS 1. Lesen Sie dieses Dokument vollständig durch. Vergewissern Sie sich, dass Sie alle Anweisungen verstehen und kennen. - Page 52 Folgen verantwortlich, wenn dieses Gerät zu anderen Zwecken verwendet wird. Alle Schäden an dem Gerät oder anderen Produkten unterliegen nicht der Garantie. • Bei Nichtbeachtung der Sicherheits- und Warnhinweise kann der Hersteller nicht für daraus resultierende Schäden haftbar gemacht werden. •...
- Page 53 INSTALLATION • Das Gerät sollte nur durch einen autorisierten Service installiert und repariert werden. • Das Gerät muss den Installationsvorschriften entsprechend aufgestellt und angeschlossen werden. • Stellen Sie sicher, dass das Gerät während der Platzierung nicht eingesteckt ist. • Prüfen Sie, dass das innere Stromsicherungssystem den Vorschriften entsprechend verbunden ist.
- Page 54 • Stellen Sie das Gerät in der Nähe eines Wasserhahns oder Ablaufs und einer Netzsteckdose auf. Denken Sie daran, dass die Verbindungen nach Herstellung nicht mehr geändert werden. • Halten Sie das Gerät zur Bewegung nicht an der Tür oder der Steuertafel.
- Page 55 • Verwenden Sie keinen Ablaufschlauch mit mehr als 4 Meter Länge. Dies kann dazu führen, dass Geschirr schmutzig bleibt. Der Hersteller trägt keine Verantwortung dafür. • Der Wasserablaufschlauch kann entweder direkt an ein Ablaufrohr mit einem Mindestdurchmesser von 4 cm angeschlossen werden, oder in ein Spülbecken geführt werden, wobei darauf zu achten ist, dass der Schlauch möglichst nicht geknickt oder gequetscht wird.
- Page 56 • Ziehen Sie immer am Netzstecker, wenn Sie das Gerät trennen. Ziehen Sie nie am Netzkabel. SICHERHEITSHINWEISE ZUR BEDIENUNG • Dieses Gerät dient der Verwendung im Haushalt und in ähnlichen Anwendungen, wie etwa in Läden, Büros und anderen Arbeitsumgebungen, auf Bauernhöfen, durch Motel- und Hotelgäste und in anderen Wohnumgebungen sowie in Bed-and-Breakfasts.
- Page 57 werden. Folgen Sie den Anweisungen des Herstellers, wenn Geschirr keine Markierung aufweist. • Verwenden Sie nur Spülmittel, Klarspüler und Salz, die für Spülmaschinen vorgesehen sind. Der Hersteller trägt keine Verantwortung für Schäden durch die Verwendung ungeeigneter Produkte. • Spülmittel und Klarspüler darf nicht in die Hände von Kindern gelangen.
-
Page 58: Spezifikationen
• Füllen Sie vor der ersten Verwendung und bei Aufleuchten der Anzeigen immer den Salz- und Klarspülerbehälter auf. • Stellen sie vor der Verwendung immer den Salzverbrauch ein. • Trennen Sie das Gerät immer vor Reinigungs- oder Reparaturarbeiten. Entfernen Sie den Netzstecker aus der Steckdose, oder legen Sie den Schalter im Sicherungskasten •... -
Page 59: Beschreibung
Gegenstand Spezifikation Anzahl der Sprüharme Höhe des oberen Korbs einstellbar Maximale Anzahl der Gedecke Halbladungsoption Option "Extratrocknen" Timer [Stunden] Aquastop Art des Trocknersystems Turbo ABMESSUNGEN UND GEWICHT Gegenstand Spezifikation Abmessungen (B x T x H) [mm] 598 x 600 x 845 Nettogewicht [kg] Bruttogewicht [kg] TECHNISCHE DATEN... - Page 60 EINBAU-SPÜLMASCHINE (Abbildung 1) Düse der Besteckschublade Spülmittel- und Klarspülerbehälter Besteckschublade Besteckkorb Oberer Korb Salzbehälter Unterer Korb Filter Typenschild Unterer Sprüharm Bedienfeld Oberer Sprüharm Gegenstand Funktion Düse der Besteckschublade Reinigt das Geschirr in der Besteckschublade. Beladen des Geräts Besteckschublade Siehe Abschnitt Beladen des Geräts Oberer Korb Siehe Abschnitt ...
- Page 61 Gegenstand Funktion Drücken Sie die Halbladungs- und Verzögerungstaste, um das automatische Türprogramm zu starten. Nach Beendigung des Programms öffnet sich die Tür automatisch, um das Trockenergebnisse zu verbessern. Die automatische Türfunktion kann durch 3 Sekunden langes Drücken der Taste ausgeschaltet werden. Die Automatische Tür Anzeige für die automatische Tür auf dem Display blendet aus.
-
Page 62: Installation
Icon Name Beschreibung Zeit [min.] Tägliches Programm für normal verunreinigtes Geschirr. Dieses Programm dauert länger, verbraucht aber weniger Wasser und heizt für geringeren Energieverbrauch langsamer auf. Glas Für leicht verschmutztes Geschirr und Glas. 90 Minuten Für normal verschmutzte Ladungen, die schnell gespült werden muss. -
Page 63: Bedienung
(Abbildung 5) 2. Schieben Sie das Gerät in die richtige Position. Beziehen Sie sich auf die Abmessungen in der Abbildung. Vorsicht: Achten Sie darauf, dass die Schläuche bei der Positionierung des Geräts nicht gequetscht oder geknickt werden. DAS GERÄT ANSCHLIEßEN (Abbildung 6) 1. - Page 64 EINSTELLEN DER SALZVERBRAUCHSMENGE Der Salzverbrauch des Geräts hängt von der Wasserhärte ab. Fehlerbehebungstabelle Stellen Sie die Salzverbrauchsmenge den Informationen aus Abschnitt entsprechend ein. Hinweis: Die Wasserhärte Ihres Gebiets erfahren Sie von Ihrem örtlichen Wasserwerk. Hinweis: Standardmäßig ist die Wasserhärte in Ihrem Gerät auf H3 gestellt. 1.
- Page 65 Vorsicht: Verwenden Sie nur spülmaschinengeeigneten Klarspüler. Hinweis: Füllen Sie den Klarspülerbehälter, wenn die Klarspüleranzeige an der Steuertafel aufleuchtet. (Abbildung 14) 1. Entfernen Sie den Deckel des Klarspülerbehälters (A), indem Sie ihn am Griff anheben. (Abbildung 15) 2. Füllen Sie Klarspüler in den Spender (B), aber überfüllen sie ihn nicht. ...
- Page 66 Warnung: Stecken Sie scharfe Besteckteile wie Messer und Gabeln über Kopf in den Besteckkorb, um Verletzungen zu vermeiden. Vorsicht: Stellen Sie sicher, dass keine Besteckteile durch den Boden des Korbs ragen. (Abbildung 18) 1. Stecken Sie das Besteck ein Teil nach dem anderen in einen Behälter des Besteckkorbs, ...
- Page 67 UMKLAPPEN DER RACKS DES UNTEREN KORBS Klappen Sie die Racks um, um mehr Platz im unteren Korb zu schaffen, etwa um große Gegenstände (Töpfe, Pfannen usw.) in den Korb zu stellen. Die Racks können getrennt oder gleichzeitig umgeklappt werden. (Abbildung 25) 1.
-
Page 68: Reinigung Und Wartung
Hinweis: Die Tür des Geschirrspülers darf nicht blockiert werden, wenn sie auf automatische Öffnung eingestellt ist. Dies kann die Funktion des Türschlosses beeinträchtigen. Hinweis: Die Bodenlampe blinkt 5 Minuten lang, um anzuzeigen, dass das Programm beendet ist. 1. Öffnen Sie die Tür, wenn die automatische Türfunktion deaktiviert ist. 2. -
Page 69: Zusätzliche Informationen
Eco und Schnell '90, ein Fehlerbehebung ALLGEMEINE VORGEHENSWEISE ZUR FEHLERBEHEBUNG 1. Versuchen Sie, das Problem mithilfe der Fehlerbehebungstabelle und der Fehlercodes zu lösen. 2. Wenn der Fehlercode weiter auftritt, wenden Sie sich an den Inventum-servicedienst. FEHLERBEHEBUNGSTABELLE Problem Mögliche Ursache Mögliche Lösung Der Netzstecker ist nicht Schließen Sie den Netzstecker an. - Page 70 Problem Mögliche Ursache Mögliche Lösung Es wird kein Wasser zugeführt. Öffnen Sie den Wasserhahn. Die Gerätetür ist geöffnet. Schließen Sie die Tür. Schalten Sie das Gerät an. Siehe Das Gerät ist ausgeschaltet. Einschalten des Geräts Abschnitt Stellen Sie sicher, dass der Der Wasserzufuhrschlauch und die Wasserzufuhrschlauch und die Filter Filter sind verstopft.
- Page 71 Problem Mögliche Ursache Mögliche Lösung Reinigen Sie die Filter. Siehe Die Filter sind verstopft. Reinigen der Filter Abschnitt Die Filter sind nicht korrekt platziert. Platzieren Sie die Filter korrekt. Stellen Sie sicher, dass die Die Wasserablasspumpe ist Wasserablasspumpe nicht verstopft verstopft.
-
Page 72: Allgemeine Service- Und Garantiebedingungen
Lösung bietet, ersetzt (durch gleiche oder gleichwertige Produkte). Die Einschätzung der notwendigen Maßnahme obliegt Inventum. 3. Um einen Anspruch im Rahmen der 5-Jahresgarantie von Inventum geltend zu machen, müssen Sie das Produkt innerhalb von zwei Monaten nach Entdeckung des Fehlers oder Defekts entweder an das Geschäft zurückgeben, 'https:// in dem Sie es gekauft haben, oder die Kundendienstabteilung von Inventum über das Formular unter... - Page 73 Wichtige Informationen • Ohne vorherige Benachrichtigung eingesandte Produkte werden nicht angenommen. Im Anschluss an die Benachrichtigung werden Sie von Inventum darüber informiert, ob eine Garantie gilt und ob Sie das Produkt zurückgeben müssen. • Der Ersatz oder die Ausbesserung eines defekten Produktes oder eines seiner Geräteteile hat nicht eine Verlängerung der ursprünglichen Garantiefrist zur Folge.
-
Page 74: Introduction
Table des matières Introduction................................74 Sécurité.................................74 Spécifications................................81 Description................................82 Installation................................84 Utilisation................................85 Nettoyage et entretien............................90 Informations additionnelles........................... 91 Dépannage................................92 Conditions générales de garantie et de service après-vente................94 Introduction COMMENT UTILISER CE DOCUMENT 1. Lisez intégralement ce document. Assurez-vous de connaître et comprendre toutes les instructions. 2. - Page 75 les conséquences. Aucun dégât affectant l'appareil ou d'autres produits n'est couvert par la garantie. • En cas de non-respect des instructions de sécurité, le fabricant décline toute responsabilité envers les dommages en résultant. • Assurez-vous que l'appareil est placé hors de portée des enfants.
- Page 76 • Placez et connectez l'appareil selon la réglementation relative à l'installation. • Assurez-vous que l'appareil n'est pas branché durant le placement. • Vérifiez si le système de fusible électrique intérieur est connecté selon la réglementation. • Toutes les connexions électriques doivent respecter les valeurs de la plaque signalétique.
- Page 77 • Assurez-vous que les flexibles d'entrée et de sortie d'eau ne sont pas bloqués pendant le placement de l'appareil. • Placez l'appareil à un emplacement sûr et de niveau. • Assurez-vous que l'appareil est de niveau et équilibré en ajustant les pieds. Si l'appareil est correctement placé, la porte s'ouvre et se ferme facilement.
- Page 78 une hauteur entre 40 et 100 cm et ne pas être immergé dans l'eau. • L'appareil doit être connecté au réseau d'eau avec les nouveaux kits de flexible fournis. Ne réutilisez pas d'anciens kits de flexible. CONNEXION ÉLECTRIQUE • Assurez-vous que la fiche secteur de l'appareil est connectée à...
- Page 79 • Par mesure de sécurité, utilisez uniquement des accessoires et des pièces de rechange du fabricant adaptés à votre appareil. • Cet appareil doit être mis à la terre pour éviter un risque de décharge électrique en cas d'erreur ou de panne. L'appareil comporte un cordon d'alimentation et une fiche secteur mis à...
- Page 80 • Certains détergents pour lave-vaisselle sont fortement alcalins et peuvent s'avérer extrêmement dangereux en cas d'ingestion. Évitez le contact avec la peau et les yeux. Maintenez les enfants et les animaux de compagnie à l'écart de l'appareil lorsque la porte est ouverte. Assurez-vous que le réservoir de détergent est vide une fois le cycle de lavage terminé.
-
Page 81: Spécifications
• Ne remplissez pas un panier au-delà de sa capacité. Le fabricant décline toute responsabilité pour tout dommage de l'appareil occasionné par le mouvement d'un panier. • Ne buvez pas l'eau de l'appareil. L'eau n'est pas adaptée à la consommation. •... -
Page 82: Description
SPÉCIFICATIONS TECHNIQUES Élément Spécification Consommation électrique totale [W] 1760 - 2100 Puissance de chauffage [W] 1800 Tension [V] / fréquence [Hz] nominales 220-240 / 50 Pression d'alimentation en eau [MPa] 0,04 (0,4 bar) - 1 (10 bars) Courant [A] Longueur de cordon d'alimentation [m] 1,50 Type de fiche secteur UE/TR... - Page 83 PANNEAU DE COMMANDE (Figure 2) Bouton d'alimentation Bouton marche/pause Bouton de programme Indicateur de programme Bouton de fonction Indicateur de fonction Bouton demi-charge Indicateur demi-charge Porte auto Affichage Bouton de délai Élément Fonction Bouton d'alimentation Pour allumer ou arrêter l'appareil. Appuyez sur ce bouton pour sélectionner le programme Bouton de programme de lavage approprié.
-
Page 84: Installation
PROGRAMMES Temps Icône Description [min.] Auto Lavage à détection auto, vaisselle légèrement, 85-150 normalement ou fortement sale, avec ou sans aliments séchés. Intensif Pour la vaisselle la plus sale et les casseroles, poêles, plats, etc. normalement sales, avec aliments séchés. ... -
Page 85: Utilisation
Précaution : Assurez-vous que la plomberie et le câblage sont compatibles avec l'installation de l'appareil sous le plan de travail. Précaution : Assurez-vous que le dégagement sous le plan de travail est suffisant pour installer l'appareil. Préparation de l'appareil Pour installer l'appareil sous un plan de travail, le panneau supérieur doit être retiré. (Figure 3) 1. - Page 86 (Figure 9) 3. Remplissez le réservoir de sel avec de l'eau. Note : Vous devez remplir le réservoir de sel avec de l'eau uniquement avant la première utilisation de l'appareil. 4. Placez un entonnoir dans l'ouverture du réservoir de sel. (Figure 10) 5.
- Page 87 (Figure 12) 3. Remplissez le réservoir (B) avec du détergent. Précaution : Le réservoir de détergent offre une capacité de 40 grammes. Ne remplissez pas trop le réservoir de détergent. Vous pourriez susciter une mauvaise dissolution du détergent et endommager la verrerie. 4.
- Page 88 Précaution : Assurez-vous de charger l'appareil de sorte que la vaisselle ne bloque pas les bras de pulvérisation supérieur et inférieur. Si les bras de pulvérisation sont bloqués, ils ne peuvent pas tourner durant le lavage. Chargement du tiroir à couverts Le tiroir à...
- Page 89 AJUSTEMENT DE LA HAUTEUR DES CLAYETTES DU PANIER SUPÉRIEUR Les clayettes peuvent être remontées pour offrir plus d'espace dans le panier supérieur, ainsi pour placer des verres de différentes tailles sous les clayettes ou des couverts sur les clayettes. (Figure 22) 1.
-
Page 90: Nettoyage Et Entretien
RETARD DU PROGRAMME Note : L'heure de début d'un programme peut être retardée jusqu'à 24 heures. 1. Appuyez sur le bouton minuteur pour retarder l'heure de début d'un programme. À chaque pression sur le bouton, l'heure de début est retardée d'une heure. 2. -
Page 91: Informations Additionnelles
Nettoyez les filtres chaque semaine. Avertissement : N’utilisez pas l’appareil sans le système de filtre. Note : Des filtres propres assurent le fonctionnement correct de votre appareil. 1. Retirez le panier inférieur. (Figure 26) 2. Tournez le filtre principal (A) dans le sens antihoraire pour le retirer. Note : Le microfiltre et la crépine sont fixés sur le filtre principal. -
Page 92: Dépannage
Dépannage PROCÉDURE DE DÉPANNAGE GÉNÉRALE 1. Tentez de trouver une solution au problème à l'aide de la table de dépannage et des codes de panne. 2. Si le code de panne est récurrent, contactez le Inventum-servicedienst. TABLEAU DE DÉPANNAGE Problème... - Page 93 Problème Cause possible Solution possible Assurez-vous de charger L'un des bras de pulvérisation frappe correctement l'appareil. Voir la la vaisselle. Chargement de l'appareil section L'appareil n'est pas chargé Assurez-vous de charger correctement et les bras de correctement l'appareil. Voir la pulvérisation n'atteignent pas toute la Chargement de l'appareil section...
-
Page 94: Conditions Générales De Garantie Et De Service Après-Vente
Conditions générales de garantie et de service après-vente 5 ans de garantie Inventum ! 1. Une garantie complète de fabrication de 5 ans est accordée au consommateur pour tous les produits d'Inventum. 2. Durant cette période, une pièce ou un produit défectueux, rendant impossible le fonctionnement normal du produit ou de la pièce impossible, bénéficie systématiquement d'une réparation à... - Page 95 3. Pour déposer une réclamation au titre de la garantie Inventum de 5 ans, vous devez, dans les deux mois de la découverte de la panne ou défaillance, soit retourner le produit à la boutique où vous l'avez acheté, soit contacter 'https://www.inventum.eu/service'...
- Page 96 VVW6046AB/01.0723 Wijzigingen en drukfouten voorbehouden Modifications and errors reserved Inventum Huishoudelijke Änderungen und Druckfehler vorbehalten Apparaten B.V. Sous réserve de modification Postbus 5023 6802 EA Arnhem www.inventum.eu facebook.com/inventum1908 pinterest.com/inventum1908 youtube.com/inventum1908 instagram.com/inventum1908 www.inventum.eu...
Need help?
Do you have a question about the VVW6046AB and is the answer not in the manual?
Questions and answers