Table of Contents
Advertisement
Quick Links
Advertisement
Table of Contents

Related Manuals for AstroNova QuickLabel QL-900


Summary of Contents for AstroNova QuickLabel QL-900
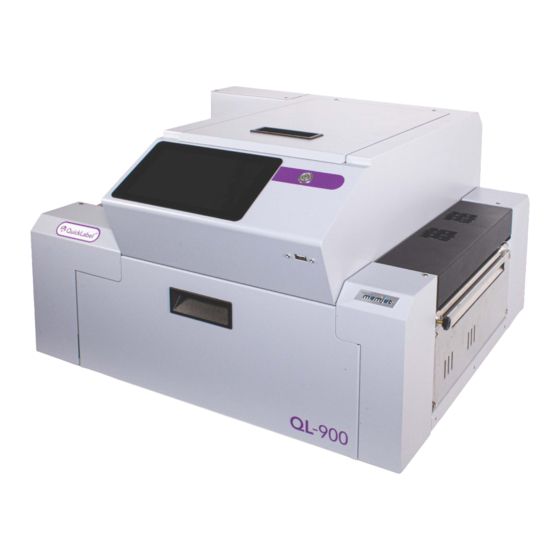
- Page 2 QL-900 User Guide Part Number 22834714-EN-E Revision 1.1 8/2023 AstroNova, Inc.® 600 East Greenwich Ave., West Warwick, RI 02893 Tel: (877) 757-7978 Fax: (401) 822-2430 info@astronovaproductid.com www.AstroNovaProductID.com...
- Page 3 This manual is copyrighted with all rights reserved. No part of this manual may be reproduced, transmitted, transcribed, stored in a retrieval system, or translated into any language in any form by any means without written permission of AstroNova. Trademarks QL-900®...
- Page 4 Place of issue: West Warwick, RI European Contact: Your local AstroNova, Inc. Sales and Service Office. FRANCE - Parc Euclide, ZA la Clef de St Pierre, 10A Rue Blaise Pascal 78990 Elancourt, Tel: (+33) 1 34 82 09 00, Fax: (+33) 1 34 82 05 71 GERMANY - Waldstraße 70, D-63128 Dietzenbach, Tel.
-
Page 5: Table Of Contents
Contents Contents Chapter 1: Getting Acquainted ........... . . 8 Front View . - Page 6 Contents Chapter 3: Operating the Printer ..........41 Printer Driver Properties .
- Page 7 Contents Chapter 4: Maintenance ............88 Replace Ink Tanks .
-
Page 8: Getting Acquainted
Getting Acquainted Chapter 1: Getting Acquainted Front View Description Control Panel Touchscreen - Displays the menu and information about the printer status. Controls printer functions and settings. Top Cover - Provides access to the print engine, printhead, and service station. ON/OFF LED Button - Turn the power ON or OFF during idle time and maintenance. -
Page 9: Rear View
Getting Acquainted Description Ink Tanks - The printer has five ink tanks: cyan, yellow, magenta, and two black. Ink Waste Tray - Catches any waste ink produced by the system. The tray is filled with absorbent material. Pull on the tab to remove the tray. Ink Tank Latches - Used to hold ink tanks in the slots. - Page 10 Getting Acquainted Description Top Forwarding Wheels Assembly and Forwarding Rollers - Moves media smoothly into the Printer. Adjustable Media (Entry) Sensor Assembly - Aligns the media sensor to accurately read irregular-shaped media (such as die-cut ovals or circles). Network Port - Ethernet cable plugs in here. USB Port - USB cable attaches to the printer here.
-
Page 11: Print Engine View
Getting Acquainted Print Engine View Description Printhead Latch - When closed, connects the ink revolver couplings with the printhead cartridge. When opened, retracts the ink couplings from the printhead cartridge and provides access to the printhead cartridge for cleaning and replacement. -
Page 12: Print Area View (Under Clamshell)
Getting Acquainted Print Area View (Under Clamshell) Description Forwarding Rollers - Move media into the printer. Clamshell “Open” Switch - Signals to the printer when the top assembly latch is released and the top assembly is opened. Shows on the touchscreen display and in the toolbox system status icon. -
Page 13: Ink Tank Door View
Getting Acquainted Ink Tank Door View Description Print Engine Assembly Latch - Release to raise the printhead assembly to clear media jams or for other maintenance. Ink Tank Latches - Used to hold ink tanks in slots. Note: Make sure both sides at the bottom part of the latch are engaged. Ink Tanks - Printer has 5 ink tanks: cyan, yellow, magenta, and two black. -
Page 14: U1C-L Unwinder/Roll Feeder (Optional)
Getting Acquainted U1C-L Unwinder/Roll Feeder (Optional) Description Speed Control - Turn clockwise to speed up, counterclockwise to slow down. AUTO/Manual Mode Switch - Use to set unwinder in automatic or manual mode. Fuse - Unwinder fuse is located here. Hub Assembly - Reversible to fit 1-1/2” and 3” cores. Spindle Lock - Holds the label roll on the spindle. -
Page 15: W1C-L Winder (Optional)
Getting Acquainted W1C-L Winder (Optional) Description Speed Control - Turn clockwise to speed up, counterclockwise to slow down. ON/OFF Switch - Use to turn the winder power ON or OFF. Fuse - Winder fuse is located here. Hub Assembly/Guide - Fits 3” cores. Spindle Lock/Guide - Holds the label roll in place on the spindle. -
Page 16: Installing The Printer
Installing the Printer Chapter 2: Installing the Printer Contents of Packaging Unpack the printer. Make sure that all parts are included and verify that no items were damaged in transit. Description QL-900 Label Printer Ink Drip Tray Assembly Five Ink Tanks - Cyan, Magenta, Yellow, Black, Black Printhead Cartridge AC Power Cord USB Cable (10-Ft.) -
Page 17: Choose A Location
Installing the Printer Choose a Location Place the printer on a sturdy level worktable or cabinet at least 9 inches from any walls. Open the ink tank door and raise the clamshell assembly. Use the bubble gauge mounted on the ink station frame, or a small level placed on the ink station frame, to make sure the printer is level. - Page 18 Installing the Printer 2. Remove the foam shipping block [A]. The color of the foam block may vary. Note: The foam shipping block is used to secure the service station sled during transport. 3. Cut and remove the two yellow zip ties [B]. Note: These zip ties are used to secure the wiper motor assembly during transport.
-
Page 19: Install Ink Drip Tray Assembly
Installing the Printer Install Ink Drip Tray Assembly 1. Open the ink tank door [A]. 2. Release the latch [B] to raise the clamshell. QL-900 User Guide... -
Page 20: Install Unwinder/Winder Adapter Plates
Installing the Printer 3. Insert the tabs on the ink drip tray into the frame slots [C] as shown. Note: If necessary, bend the tab on the grounding spring [D] so it touches the bottom of the ink drip tray tab. 4. - Page 21 Installing the Printer 3. Align the adapter plate with the two pre-drilled holes at the base of the feed end of the printer. Secure with (2) thumbscrews [B]. Winder 1. Attach the adapter plate to the left-side base of the winder using the (2) screws provided [A]. 2.
-
Page 22: Connect The Printer
Installing the Printer Connect the Printer Plug in the Printer Plug the power cord into the receptacle [1] located on the rear panel of the printer. The internal power supply in the printer is rated 100 to 240VAC, 50/60 Hz. Caution: Do not use adapter plugs or extension cords to connect the printer to a wall receptacle. -
Page 23: Install The Printer Driver
Installing the Printer 2. Press the power button on the control panel. Powering Down the Printer Caution: When powering down the unit, always follow these instructions. 1. Close all doors. 2. Press the power button on the control panel. 3. Wait for the printer to stop processing. 4. -
Page 24: Install Over Network Connection (Version A)
Installing the Printer 5. Select a printer connection method. Click Configure to print using USB. Then click Next. 6. Installing the printer software. The software download begins. 7. Click Install when prompted by Windows to install the software. 8. Connect the device when prompted. Turn the printer ON and connect the USB cable. Don't click on either button. - Page 25 Installing the Printer Multiple Printers To help distinguish between multiple QL-900 series drivers on your system, open the Printers and Faxes (Devices and Printers) folder and rename the printers. For example, rename a network- configured printer “QL-900 (Network-1)” and a USB-configured printer “QL-900 (USB)”. To open the Toolbox utility over an Ethernet (network) connection, click Start >...
-
Page 26: Install Over Network Connection (Version B)
Installing the Printer Install Over Network Connection (Version B) Use this procedure to install the printer driver over the network connection on static IP systems requiring that an IP address is assigned manually. Note: Copy the 12-digit Hardware ID number listed on the label located below the Ethernet port so you can identify the printer in a later step. - Page 27 Installing the Printer Note: Disconnect the USB cable from the local computer or laptop. If you are not using that computer for printing, the software can be uninstalled. 2. Connect the Ethernet cable to the Ethernet port and rerun the installation procedure. “Install Over Network Connection (Version A)”...
-
Page 28: Install Ink Tanks
Installing the Printer Install Ink Tanks The printer uses one printhead cartridge and five ink tanks (two black, one cyan, one magenta, and one yellow). 1. Look at the control panel touchscreen. Ink tank status information appears on the right side of the touchscreen. Note that the ink tank indicator boxes are empty. - Page 29 Installing the Printer 5. Close the ink tank door. Ink colors fill in as the ink tanks are installed. If the ink colors do not fill in after a few seconds, open the ink tank door again and reinstall the ink tanks. Warning: Ink in ink tanks may be harmful if swallowed.
-
Page 30: Initial Printhead Cartridge Installation
Installing the Printer Initial Printhead Cartridge Installation The printhead cartridge is a delicate precision device. Handle with extreme care to avoid damage and issues that could degrade print quality. Caution: Use electrostatic discharge (ESD) protection when handling. Caution: Hold the printhead cartridge by the handles ONLY. Caution: DO NOT touch the ink couplings, nozzle surface, or electrical contacts. - Page 31 Installing the Printer Use the touchscreen to tap Menu, then Setup. Press Release Printhead. The printer runs, then the Latch [1] opens. Open the top cover. Note: Remove the cap protectors [2] on the ink nozzles. Be sure to open the latch fully to retract the ink nozzles.
- Page 32 Installing the Printer [C] Remove the protective strip from the printhead electrical contacts. Once removed, DO NOT allow the strip to touch the electrical contacts. [D] Remove the protective strip from the printhead nozzles. Hold the printhead by the handle. Pull the strip tab and slowly peel the strip from the printhead.
- Page 33 Installing the Printer 5. Close the printhead latch [6]. Close the top cover. The printer starts up and primes ink into the printhead (this may take a few minutes). Note: When priming stops, open the top cover and check that ink is flowing through the hoses. If air bubbles appear, tap the lines and close the top cover.
-
Page 34: Connect The Printer To An External Device
Installing the Printer Connect the Printer to an External Device Warning: Hazardous moving parts! Keep fingers and other body parts away! Warning: Make sure that the printer is turned off before connecting an external device. Connect one end of the interconnect cable into the 9-pin connector port on the printer [1] (located just below the USB port). -
Page 35: Connect The Optional Unwinder And Winder
Installing the Printer Connect the Optional Unwinder and Winder Warning: Hazardous moving parts! Keep fingers and other body parts away. Caution: Make sure that the printer is turned off before connecting the unwinder and winder. Connecting the Printer to the UW-1C Unwinder Connect one interconnect cable into the 7-pin connector port on the printer [1] (located just below the USB port). -
Page 36: Loading Labels
Installing the Printer Loading Labels Roll-to-Roll Printing Important: Make sure the unwinder is connected to the printer. The printer is equipped with one adjustable side media guide. Make sure the unwinder is set to Auto, and the winder (if used) is turned OFF, and that both are connected to the printer via the appropriate ports. - Page 37 Installing the Printer 2. Load a label roll: [A] Slide the roll onto the unwinder shaft, labels facing up, with the roll end facing the printer. [B] Slide the roll lock onto the unwinder shaft until the 4 pins fit into the roll core. [C] Pull the roll leader under the drive press roller, and under the crossbar.
-
Page 38: Adjusting Speed On U1C-L Unwinder And W1C-L Winder
Installing the Printer 4. [A] Load an empty 3" core on the winder spindle. Slide the spindle lock on the shaft until the 4 pins fit into the roll core. [B] Take the leader end and pull it under the label tension arm on the winder. [C] Tape or glue the roll end (label side up) to the top side of the empty core. -
Page 39: Adjusting Winder Tension
Installing the Printer Adjusting Winder Tension Use the Tension Control selector [A] to adjust spring tension on the label tension arm for different label stock widths. Use the 0 setting (least tension) for narrow label stock and the 4 setting (highest tension) for the widest label stock. -
Page 40: Bleeds
Installing the Printer 2. Feed the labels under the brush and into the printer, aligning the left-side edge with the alignment pins on the printer. Feed the label end into the print engine. 3. Slide the adjustable side guide so it just touches the right-side edge of the labels. 4. -
Page 41: Chapter 3: Operating The Printer
Operating the Printer Chapter 3: Operating the Printer Once the printer driver is installed and the printhead is primed, you are ready to start printing. Set up your job and send it to the printer. The printer will start and print. Set the printer driver as the default driver. - Page 42 Operating the Printer The General tab lets you select: • Orientation - Set the print direction as Portrait (default), Landscape, Rotate 180°, and Mirrored. • Job Management - Stitch is for printing on continuous media (no gaps). Buffer loads the entire print job before printing starts. Mask Optimization optimizes images for printing in most applications.
-
Page 43: Layout Tab
Operating the Printer Layout Tab Layout allows you to change how the document prints without changing the original document. Resizing - Specify Original Size or Custom Resize. This resizes the original as a percentage • of normal size. The printer prints the document in the size you selected regardless of the paper size selected. -
Page 44: Color Tab
Operating the Printer Color Tab Color is used to adjust the color output of the printer. Use the sliders to adjust Color Tone, Brightness and Saturation. The C, M, Y, K sliders adjust individual colors. Use Defaults to reset to 0 settings. QL-900 User Guide... -
Page 45: Media Tab
Operating the Printer Media Tab Media tab shows the type of media the printer is configured to run and allows minor changes to the positioning and cutting of the media. • Media - Displays the type of media currently selected for the printer. Press Refresh to update the display. - Page 46 Operating the Printer Label Frequency - Allows the printer to ignore a set number of gaps between labels. This is particularly useful when the labels are different shapes and the printer sensor may not sense the edge of the second label correctly. For example, printing both front and back bottle labels in one pass.
- Page 47 Operating the Printer Using Media Tab Printing Adjustments • Top Adjustment /Top of Form (TOF) - Moves the image up or down (-5mm up to +200mm down) from the top left corner of the media used. Left Adjustment - Moves the image area away (-3mm left to +200mm right) from the left edge •...
-
Page 48: Import/Export Tab
Operating the Printer Import/Export Tab Import/Export is used to preserve any custom Watermarks, Media Sizes, and/or Print Settings you may have developed and saved for various jobs when you update the printer firmware. • Export - Send custom settings to a holding file before downloading the new firmware. •... -
Page 49: Using The Printer Touchscreen
Operating the Printer Using the Printer Touchscreen Once the printer driver is installed, and the printer is turned ON, you can use the printer's touchscreen. You can check the printer status, monitor ink usage, perform diagnostic checks, print reports, and run maintenance tasks on the printer from the touchscreen. Note: These functions and more can also be operated remotely from a computer using the Printer Toolbox. -
Page 50: Drop-Down Menu Options
Operating the Printer Drop-Down Menu Options The Menu drop-down gives you nine selections: Job, Setup, Test Print, Maintenance, Paperpath, Media Scan, Wiper, System Test, and Videos. Note: The Videos menu is only available when MP4 video files are loaded on the printer. QL-900 User Guide... -
Page 51: Job (Status Screen)
Operating the Printer Job (Status Screen) The opening screen provides information about the status of the printer. Status Indicator box shows the printer activity as ONLINE, ERROR, MAINTENANCE, PRINTING, or PAUSED. The gray box below the status indicator shows the name of the job being processed. System Status displays the status of the printer and/or error message. - Page 52 Operating the Printer Media Icon: Displays the type of media the printer is currently configured for (Continuous, Diecut, or Black Mark). Set the type of media by tapping the icon and selecting the appropriate media type or using the media scan function after selecting Service from the Menu drop-down. Printhead Height Icon: Shows the current printhead printing height setting.
-
Page 53: Using Stored Jobs (Print Job Library)
Operating the Printer Using Stored Jobs (Print Job Library) Print jobs can be saved to the printer's Job Library by selecting the Printer Capture option under Job Management on the General tab of the printer driver. You can access jobs saved in the printer's Job Library using the Stored Jobs button on the Jobs screen. - Page 54 Operating the Printer List View: Search Screen: Select a job by tapping the job icon or the list name. The Job Print Options screen opens. The (4) Control buttons let you Exit, Print, Save, or Delete the print job. The Save button saves any changes you make to the job specifications in the Print Options on the right side of the screen.
- Page 55 Operating the Printer The Print Options allow you to change or adjust print specifications for the print job. Scroll down the screen to access all options. • Quality - Tap the button to select Normal or Best. Normal is 1600 x 800 dpi. Best setting is 1600 x 1600 dpi.
- Page 56 Operating the Printer • Sheets Per Cut - Set the number of labels (sheets) between cuts. For example, 1 will cut after every label. 5 will cut after every fifth label. Note: Since End of Job Cut will also be active, the last cut may have fewer labels than the set Pages per Cut number depending on the total number of labels you are printing.
-
Page 57: Setup Screen
Operating the Printer Setup Screen Tap the Menu button, then the Setup button to open the Setup screen. Release Printhead - Pumps ink back into the ink tanks and opens the printhead latch to • remove or install the printhead cartridge. Button is only active if the system is deprimed first. •... -
Page 58: Test Print Screen
Operating the Printer Test Print Screen Tapping Menu, then Test Print opens the Test Print screen options for printing different reports. Print Color Bars - Prints a series of 7 color bars (per printhead) to indicate how well the • printheads are mixing colors and printing. -
Page 59: Maintenance Screen
Operating the Printer Maintenance Screen Tapping Menu, then Maintenance opens the Maintenance screen. These buttons operate functions for printer and printhead maintenance. • Inspect Sled - Moves the service station out from under the printhead assembly for inspection, cleaning, or service. •... -
Page 60: Paperpath Screen
Operating the Printer Paperpath Screen Tapping Menu, then Paperpath opens the Paperpath screen. These buttons are used to move media through the printer when loading or unloading the printer. Unload - Rewinds the media back onto the unwinder and into the start position on the printer. •... -
Page 61: Media Scan Screen
Operating the Printer Media Scan Screen Use Media Scan to fine tune sensor sensitivity and/or adjust scan length if media is not printing correctly, or to determine if a type of media is going to have problems printing. This is generally due to the sensors having trouble differentiating between the label surface and backing/gap. - Page 62 Operating the Printer 5. Tap Auto Scan. The touchscreen will display a graph together with results marked Legend and Edge Distances. The graph shows the difference between the high points (gaps/backing) and flats (label media). If there is slight difference between the highs and the flats, the printer may have trouble differentiating the labels from the gaps.
-
Page 63: Wiper Screen
Operating the Printer 6. Manual Scan: For Advanced Users Only. Use Manual Scan if you wish to fine tune the results of the Auto Scan. First, make sure that the label type and the selected touchscreen label icon match. Only the sensors for that type of media will be active. If the label type is different, an error will show on the touchscreen status box. -
Page 64: System Test
Operating the Printer System Test Note: These tests should only be performed by authorized service personnel. System Test allows testing individual or all printer systems listed to check that they are operating within specifications. It also allows service people to check the printer after servicing or replacing parts, particularly belts. -
Page 65: Videos
Operating the Printer Videos MP4 video files can be uploaded to the printer using the control panel USB port. Access saved video files by tapping Menu, then Videos. This opens the Video Library screen. Note: The Videos menu is only available when video files are loaded on the printer. Note: Requires user interface (UI) firmware version 2.0 or higher. -
Page 66: Using The Control Panel Usb Port
Operating the Printer Using the Control Panel USB Port The USB port is located below the touchscreen. It can be used to back up stored print jobs and debug logs, upload print jobs, upload MP4 video files, and apply printer firmware and touchscreen (UI) updates. - Page 67 Operating the Printer Backup Logs button: Backs up all the debug log files currently on the printer. There are two groups of logs. Each group is automatically backed up as a zip file located at the top level on the USB drive directory using the following format: Printer Logs: Model_SerialNumber_YYMMDDHHMM.tgz •...
-
Page 68: Using The Printer Toolbox
Operating the Printer Using the Printer Toolbox Once the printer driver is installed, you can access the Printer Toolbox remotely from a computer. You can check printer status, monitor ink usage, perform diagnostic checks, print reports, and run maintenance tasks on the printer from your computer. The Printer Toolbox also has a more extensive list of functions not available on the touchscreen and password-protected access to a range of options for qualified service personnel. -
Page 69: View Drop-Down
Operating the Printer View Drop-Down The View drop-down gives you four choices: System Status, User Interface, Ink Usage, and Service Menus. QL-900 User Guide... -
Page 70: System Status
Operating the Printer System Status This screen opens when you access the Toolbox. It provides information about the printer. • Status Indicator shows printer activity as ONLINE, ERROR, MAINTENANCE, PRINTING, or PAUSED. The gray box below the Status Indicator shows the name of the job being processed. - Page 71 Operating the Printer • Printer Icon: Shows status of the media sensors located in the media feed path of the printer. Also shows status of ink valves, service station, printhead and auxiliary devices (such as unwinders and winders). These can alert the operator to the type and location of a problem. Rolling over any of the status icons with your cursor opens a description of that icon.
-
Page 72: User Interface
Operating the Printer User Interface Adjust the printer for automated service and cleaning intervals, for specific types of media, and to set the feeder speed for a job. • Mid-Job Servicing - Sets how frequently an automatic maintenance cycle is performed by selecting the length of printed media (in meters) that is run between cycles. - Page 73 Operating the Printer • Media Feed - Sets the printer sensors to read the type of media and/or the gaps between media when you select Continuous, Diecut, or Blackmark. • Internal Print Job Cut - Checking this box allows you to print and cut one of the reports or test pages listed in the Print drop-down menu.
- Page 74 Operating the Printer You can find and load the latest firmware (".fbf") files for your printer using the Printer Toolbox. Warning: This procedure should only be performed by qualified service personnel. If this process is not performed properly, the printer is rendered inoperable. Note: Printer firmware can also be applied using a USB flash drive and the control panel USB Port.
-
Page 75: Ink Usage
Operating the Printer Ink Usage Displays the amount of ink used and other information about each job sent to the printer. Also tracks estimated page and job costs if information is entered in the Job Cost Settings. • Ink Estimation Mode - Lets you predetermine how much ink a given job may use prior to printing a job. -
Page 76: Service Menus
Operating the Printer • Reset Page Counter - Tap or click this button to reset the printer page count to 0. (Page on the Printer Toolbox and touchscreen.) Job Cost Settings Enter your Ink Tank Cost, Printhead Cost, and Media Size preference (inches or mm). Set a minimum of at least 100 pcs. -
Page 77: Diagnostics
Operating the Printer Media Scan Use Media Scan to fine tune sensor sensitivity and/or adjust scan length if media is not printing correctly, or to determine if a type of media is going to have problems printing. This is generally due to the sensors having trouble differentiating between the label surface and backing/gap. - Page 78 Operating the Printer Upload Debug Log Upload and save a log of the printer status to send to a technician to help diagnose a problem. Clicking this button creates a snapshot log showing everything going on with the printer since powering up.
-
Page 79: System Settings
Operating the Printer System Settings Set up a network connection for the printer. You can also configure and set the printer Date and Time, set the Debug Log Level, and set the Screensaver Timeout (sleep delay). Network Settings Permits you to view, enter, or change settings to connect the printer to your network. Network Connection Set-Up Printer is still connected to the computer via the USB cable. - Page 80 Operating the Printer Date and Time Enter or change the way the date and time will appear in the Printer Status section of the Toolbox screens. From the Toolbox, select View drop-down menu, click Service Menus, and then click System Settings.
-
Page 81: Debug Logs
Operating the Printer Screensaver Set the amount of time the touchscreen will remain idle before automatically going to Sleep Mode. From the Toolbox, select View drop-down menu, click Service Menus, and then click System Settings. System Settings page opens. Go to Screensaver. Enter the number of seconds the touchscreen will remain idle before going to Sleep Mode. -
Page 82: Media Scan
Operating the Printer Media Scan Use Media Scan to fine tune sensor sensitivity and/or adjust scan length if the media is not printing correctly, or to determine if a type of media is going to have problems printing. This is generally due to the sensors having trouble differentiating between the label surface and backing/ gap. - Page 83 Operating the Printer 2. From the Toolbox, select the View drop-down menu, click Service Menus. Click Media Scan. 3. Under Media Scan Setup, set Scan Length: The media length for the scan is in millimeters. Set a length at least 4-5 labels long. 4.
-
Page 84: Scan Sensors
Operating the Printer 6. Click Submit to enter your selections. Then click the Scan Media button. Blank media moves across the sensors to create the graph shown on the screen. Note: Tapping or rolling the cursor over the blue graph line provides readouts of the points on the graph. -
Page 85: Maintenance Drop-Down
Operating the Printer Maintenance Drop-Down Perform maintenance tasks on the printer. Circulate Ink Purges air from the lines and primes the system after replacing the ink tanks or printhead cartridge. Full Clean Printhead Runs the cleaning routine multiple times for the most thorough flushing and cleaning of the printhead. -
Page 86: Service Drop-Down
Operating the Printer Service Drop-Down Control functions that require the printer to be out of service for extended periods of time while they are being performed. System Deprime Pumps ink back into the ink tanks prior to replacing the printhead cartridge or transporting the printer. - Page 87 Operating the Printer Print Configuration Prints the current printer configuration including firmware version, network connection, printer serial number, and more. Print Printhead Test Prints color bands, text, and patterns to check the condition of the printhead's ink nozzles. Note that this uses less ink than Print Color Bars. Print Color Bars Prints a series of 7 color bars (per printhead) to indicate how well the printhead is mixing colors and printing.
-
Page 88: Maintenance
Maintenance Chapter 4: Maintenance Periodic maintenance is needed to keep the printer in good working order. This section covers how to care for the ink tanks, printhead cartridge, and service station. It also covers how to clear paper jams. Replace Ink Tanks Replace the ink tanks when the ink runs out. -
Page 89: Clean Ink Tank Contacts
Maintenance 4. Insert the ink tanks (labels up) into the appropriate color slots [B]. Close the ink tank latches. Note: Make sure the ink tanks seat properly. Insert the ink tank into the appropriate ink station. Pull the ink tank back about an inch and then push forward firmly to ensure that the ink nozzles penetrate the seals on the ink tanks. -
Page 90: Storage
Maintenance 2. Clean the ink level prism [A] and QA chip contacts [B] with a clean, dry, lint-free cloth. Note: Dampen the cloth with distilled water to wipe the prism, but DO NOT get the QA chip contacts wet. 3. Reinstall the ink tanks (labels up). Close the ink tank latches. Close the ink tank door. Storage New ink tanks should be stored in the original packaging and kept away from heat. -
Page 91: Clean/Replace The Printhead Cartridge
Maintenance Clean/Replace the Printhead Cartridge Cleaning The printhead is cleaned automatically each time the printer is turned on or when the Quick Clean Printhead routine is performed. This can be found under Service Tab, Normal Clean Printhead in the printer driver or Maintenance drop-down menu on the touchscreen. If running automated cleaning levels doesn't help improve print quality, the printhead cartridge can be cleaned manually. - Page 92 Maintenance 3. Moisten the printhead nozzles using deionized/distilled water (reference ASTM D5127-90 Type E-II Electronic Grade Water) and a damp, lint-free cloth. Wipe the printhead nozzles end to end. (Gray strip located below orange strip.) Take care not to damage the copper contacts, metal plate, or printhead surface. 4.
-
Page 93: Replace The Printhead Cartridge
Maintenance Replace the Printhead Cartridge Important: To ensure optimum printing performance, inspect and replace the wiper roller as necessary when replacing the printhead. 1. From the touchscreen, tap Setup in the Menu drop-down, then tap System Deprime. The printer pumps any ink in the system back into the ink tanks. Then the printhead latch opens. Caution: Do not pry or manually lift the printhead latch or the latch may break. - Page 94 Maintenance 3. [A] Carefully remove the printhead cartridge from the foil packaging. Tear the foil at the notch or cut the end with scissors. [B] Remove the protective plastic cover. Hold the printhead by its handle and unclip the cover from the printhead.
- Page 95 Maintenance 4. Wet the printhead surface to ensure that the printhead will prime correctly. Moisten the printhead nozzles using distilled water and a damp, lint-free cloth, wiping end to end. (Gray strip located below the orange strip.) Take care not to damage the copper contacts, metal plate, or gold printhead surface.
- Page 96 Maintenance 6. Close the printhead latch [6]. Close the top cover. The printer starts up and primes ink into the printhead (this may take a few minutes). Note: When priming stops, open the top cover and check that ink is flowing through the hoses. If air bubbles appear, tap the lines and close the top cover.
-
Page 97: Printhead Storage
Maintenance Printhead Storage Store and transport the cartridge as indicated by the “this side up” arrow symbol on the packaging. The cartridge and ink supply must be within the operating temperature range before attempting to prime the cartridge with ink and starting to print. When stored at temperatures below the operating range, it may take up to 3 hours for a cartridge in its packaging to reach operating temperature. -
Page 98: Inspect The Service Station
Maintenance Inspect the Service Station The service station (located directly under the printhead assembly) cleans the printhead cartridge of excess ink and debris, keeps the printhead hydrated and protected when not in use, and removes ink used to keep the nozzles clear. It moves out of the way of the printhead during printing. -
Page 99: Replace The Ink Waste Tray
Maintenance 4. Tap End Inspection on the touchscreen to move the service station back under the printhead assembly. 5. Close the top cover. Replace the Ink Waste Tray The ink waste tray soaks up any excess ink that may drip from the print engine during operation. After a period of time it may become saturated and need replacement. -
Page 100: Jams In The Printer
Maintenance Jams in the Printer Clearing a jam depends on where the jam occurred. Print Area: • Open the ink tank door. • Pull the clamshell latch [A] toward you to unlatch the clamshell. • Raise the clamshell [B]. • Clear the jam, then carefully lower the clamshell. -
Page 101: Feed Rollers And Forwarding Rollers
Maintenance 3. Exterior: Wipe clean with a lint-free cloth using any standard nonabrasive household cleaner that does not contain plastic-harming solvents. Caution: Never spray or pour cleaners directly on or into the printer. Excess liquid could harm electronic parts. Dampen a lint-free cloth with the cleaner and apply it to parts to be cleaned. Feed Rollers and Forwarding Rollers Feed, forwarding, and transport rollers can become glazed with paper lint and ink from the media. -
Page 102: Clean Ink Revolver Couplings
Maintenance [B] Rubber Rollers: Clean as needed using distilled water with a damp, lint-free cloth. Be careful not to splash or drip ink on other parts of the printer. [C] Printing Surfaces, Ink Drip Cover, and Tray: Wipe using distilled water and a damp, lint-free cloth. - Page 103 Maintenance Remove the Printhead Cartridge 1. From the touchscreen, tap Setup in the Menu drop-down. Then tap System Deprime. The printer pumps any ink in the system back into the ink tanks. Then the printhead latch opens. Caution: Do not pry or manually lift the printhead latch or the latch may break. Only open the latch using the release printhead button on the touchscreen or in the printer toolbox.
-
Page 104: Turn The Printer Power Off
Maintenance 2. Carefully lift the two tabs out of the slots in the print engine frame and remove the ink drip tray assembly [A]. DO NOT tip the tray or ink may spill. Empty the tray if necessary and wipe off excess ink. -
Page 105: Printer Maintenance Schedule
Maintenance 2. Carefully package the ink tanks in the original packaging. Important: Make sure the ink seals on the ink tanks face up to prevent leakage. 3. Pack the ink tank bays with absorbent towels to catch any ink drips or spills. Printer Maintenance Schedule General, periodic maintenance is needed to keep the printer in good working order. - Page 106 Maintenance Schedule Maintenance Tasks Components/Tasks Daily Bi-Weekly Monthly Yearly As Needed Performed by Operator Printhead (Manual Wiping) Wipe Ink Revolver Couplings and Every Connections: Inspection/ Printhead Cleaning Removal Residue and Debris Clean Clean Clean Clean Clean Removal Optical Sensors (Media Clean Clean Clean...
-
Page 107: Troubleshooting
Troubleshooting Chapter 5: Troubleshooting This information is provided to assist in solving any problems that might occur with the printer. Make sure that the system is set up properly, plugged in, and has an adequate supply of ink before attempting to troubleshoot any problem. Printhead Condition Problem... -
Page 108: Printer
Troubleshooting Condition Problem Solution System will not reprime ink after Printhead nozzles are dry. Wipe the printhead manually with replacing the printhead cartridge. distilled water and a wet, clean, lint-free cloth. Ink tanks may be 1/3 full or less. Replace the printhead. Warning: Do not remove the side covers of the printer! High voltages are present behind the covers! Printer... -
Page 109: Errors And Warnings
Troubleshooting Condition Problem Solution Blurry address Image is not sharp. Clean the printhead using a cleaning level on the printer touchscreen or in the Printer Toolbox. Clean the printhead manually using distilled water and a wet, clean, lint-free cloth. Feeding problems Misfeeds. - Page 110 Troubleshooting Message Solution Mechanical Jam Check for and remove obstruction, then press PAUSE/ RESUME button to resume printing. Check/Clean sensors. If the problem persists, contact technical support. Missing Printhead Remove the printhead cartridge. Check/Clean electrical contacts. Reinsert the printhead. Replace the printhead. If the problem persists, contact technical support.
-
Page 111: Toolbox System Status Messages
Troubleshooting Toolbox System Status Messages Use the touchscreen or Toolbox screen to quickly determine and locate a problem in the printer. The status indicator shows ERROR in a red box. The printer graphic icon highlights the printer and system affected. The system status information displays the basic problem (in red). Ink levels display the ink status. - Page 112 Troubleshooting System Status Source Solution PAPERPATH_PAPERJAM Media jam detected. Carefully remove jammed media from the printer and close the print Depending on where the media The printer has detected that one engine. System status message in stops/jams, it is also possible for (or more) media sensors are red should go away.
- Page 113 Troubleshooting System Status Source Solution DATA_PATH_UNDERRUN Media is not moving from the entry Check/Clean the media transport sensor to the exit sensor within a rollers. Check/Clean the sensors specified time. and reflector. Possible issue with format or Try changing the orientation setting orientation of job being sent.
- Page 114 Troubleshooting System Status Source Solution [Crit 63 03-phead offline Dirty/Damaged printhead contacts Try restarting the printer. cancelpage restart] at the printhead or board. Try replacing the printhead. If the problem persists, call for service. ONLINE Service station position sensors Check service station position. are damaged or malfunctioning.
- Page 115 Troubleshooting System Status Source Solution WIPER OVERTEMP Wiper motor is overheated due to Wait for the wiper motor to cool performing a wiper transfer down. The printer will automatically (removing excess ink off service resume operation. station wiper) too often or for Tip: To reduce this issue, set the multiple or extended periods.
- Page 116 Troubleshooting System Status Source Solution MAINTENANCE_JAM Printhead or ink tank door opened Close doors (printhead and ink during process. tank) and tap the Clear Error Note: To determine the error, button. check the touchscreen to see if it Motor that drives component has detected a problem or movement is Check for anything that may be displays one of the following...
-
Page 117: Appendix A: Safety Precautions
In addition, follow any specific occupational safety and health standards for your workplace or area. This manual is intended solely for the use and information of AstroNova, its designated agents, customers, and their employees. The information in this guide was obtained from several different sources that are deemed reliable by all industry standards. -
Page 118: Appendix B: Printer Specifications
Printer Specifications Appendix B: Printer Specifications Printer Specifications Print Resolution Best: 1600 x 1600 DPI Normal: 1600 x 800 DPI Print Speed Best: 6" (15 cm)/second Normal: Up to 12" (30 cm)/second Media Print Size 8.5" W x 75" L (215.9 mm x 1905 mm) Media Types Roll or Fanfold (Label, Tag) Media Size... -
Page 119: Appendix C: Borderless Printing
Borderless Printing Appendix C: Borderless Printing The printer driver (under Printing Preferences) offers two ways for printing to the edge of the media, sometimes called “orderless” or “full-bleed” printing. Each option adjusts the relationship between the target image, selected media size, and the actual media on which is it printed, but in different ways. -
Page 120: Impact Of Using Borderless Print
Borderless Printing Impact of Using Borderless Print Selecting the Borderless Print checkbox scales the target image beyond the size of the selected media, by adding a Borderless default resolution value set in the printer driver. The image is stretched to print larger than actual size. For example, if the Borderless default setting is 21 (dots), then the resultant Borderless Print selection will have a resolution of 821 dpi, (when printing with a normal resolution of 800). -
Page 121: Oversize Settings
Borderless Printing Oversize Settings The Oversize checkbox is in the Custom Sizes dialog box, located in Printing Preferences under General tab. Select the Oversize checkbox. Enter measurements of the physical media in the Width and Height fields. Select units (inches or millimeters). -
Page 122: Impact Of Using Oversize
Borderless Printing Impact of Using Oversize Selecting Oversize extends Custom Sizes dimensions beyond that of the actual media being printed on. Since this size extension is equal in both X- and Y- axes, there is no distortion of the target image. Instead, choosing Oversize opens more of the target image for printing, so that it can print beyond the size of the physical media. -
Page 123: Page Sizing And Handling With Adobe Acrobat
Borderless Printing Page Sizing and Handling with Adobe Acrobat Many target images are in PDF format. When printing from Adobe Acrobat, be sure to select only Actual Size under Page Sizing & Handling. Other options will affect settings already made for Borderless Print and Oversize, producing undesirable results. - Page 124 Index Index Adjustable Media Guide ..........9 Ink Drip Cover ............12 Adjustable Media Sensor ........10 Ink Drip Tray ............12 Installing ............19 Ink Revolver Couplings ..........11 Borderless Printing ..........119 Ink Tank Contacts Cleaning ............89 Ink Tank Disconnect Switch ........13 Clamshell ...............8 Ink Tank Door ............8 Clamshell Latch ...........9 Ink Tank Latches ..........9 Clamshell Switch ............12...
- Page 125 Index Packaging ..............16 Safety ..............117 Power On/Off ............22 Service Station ............11 Print Engine Assembly Latch ........13 Inspection ............98 Print Platen ..............12 Setting Up ..............16 Printer Shipping ..............102 Cleaning ............100 Shipping Materials ...........17 Connections ............22 Specifications ............118 Printer Driver Support Strut ............12 Color Tab ............44 System Requirements ..........23 General Tab ............41...
Need help?
Do you have a question about the QuickLabel QL-900 and is the answer not in the manual?
Questions and answers