Advertisement
Quick Links
Advertisement

Related Manuals for Alphacool Eisblock GPX


Summary of Contents for Alphacool Eisblock GPX
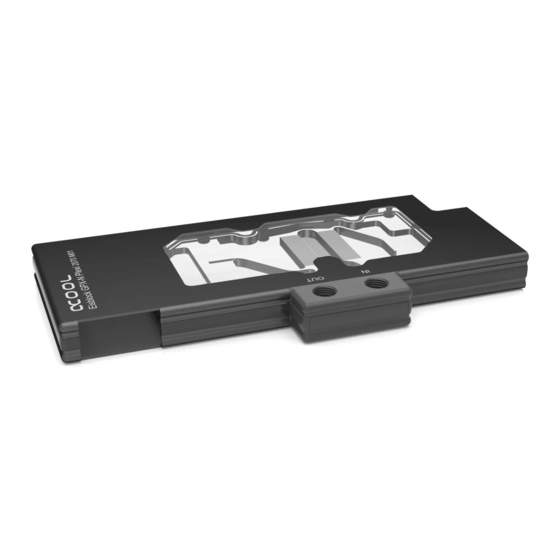
- Page 1 EISBLOCK GPX - N 2080 M01...
- Page 3 ACCESSORIES - ZUBEHÖR - ACCESSOIRES 4x Pads 30 x 30 x 1.5 mm 1x hexagon key 2x o-rings 1x thermal grease 2x screw plugs 1x screw tool GPX Plexi: 5x Pads 3x M3x12 8x M3x11 30 x 30 x 3 mm 1x connector Acetal + Plexi Light:...
- Page 4 Read the safety instructions before starting the installation. Lesen Sie die Sicherheitshinweise, bevor Sie mit der Installation beginnen. Lisez les instructions de sécurité avant de commencer l‘installation.
-
Page 5: Table Of Contents
PREPARING THE COOLER - VORBEREITEN DES KÜHLERS - PRÉPARATION DU REFROIDISSEUR CHANGING THE CONNECTOR - ANSCHLUSS WECHSELN - CHANGER LE CONNECTEUR CHANGING LEDs - LEDs WECHSELN - CHANGER DES LEDs CHANGING FRONT PANEL - FRONTBLENDE WECHSELN - CHANGER DU PANNEAU AVANT PREPARING THE VIDEO CARD - VORBEREITEN DER GRAFIKKARTE - PRÉPARATION DE LA CARTE VIDÉO MOUNTING THE COOLING BLOCK - KÜHLERMONTAGE - MONTAGE DU BLOC DE REFROIDISSEMENT CUTTING PATTERNS - SCHNITTVORLAGE - MODÈLES DE DÉCOUPAGE... -
Page 6: Preparing The Cooler - Vorbereiten Des Kühlers - Préparation Du Refroidisseur
Le refroidisseur pour carte graphique shipped fully assembled. In order to install komplett montiert ausgeliefert. Um Ihre Eisblock GPX est livrée prêt à emploi. Afi n your graphics card, remove the screws and Grafi kkarte einzusetzen, entfernen Sie d’installer votre carte graphique, dévissez et take the back plate (plexi version) off. - Page 7 PREPARING THE COOLER - VORBEREITEN DES KÜHLERS - PRÉPARATION DU REFROIDISSEUR EISBLOCK GPX PLEXI ONLY Remove the placeholder underneath the back Entfernen Sie die Platzhalter unter den Back- Enlevez l’espaceur en dessous des vis de la plate screws. This spacer is no longer neces- plate-Schrauben.
-
Page 8: Changing The Connector - Anschluss Wechseln - Changer Le Connecteur
CHANGING THE CONNECTOR - ANSCHLUSS WECHSELN - CHANGER LE CONNECTEUR Plexi Plexi Acetal Acetal REQUIRED ACCESSORIES BENÖTIGTES ZUBEHÖR ACCESSOIRES REQUIS 1x connector 2x o-rings 3x M3x12 Begin by removing the cover on the pre- Entfernen Sie zunächst die Blende des Enlevez dans un premier temps le panneau installed connector. - Page 9 CHANGING THE CONNECTOR - ANSCHLUSS WECHSELN - CHANGER LE CONNECTEUR 3. 3. Position the short connector so that the GPU Orientez le connecteur court de manière que le Richten Sie den kurzen Anschluss so aus, dass der lettering is pointed at the inlet. The inlet is labelled mot “GPU”...
-
Page 10: Changing Leds - Leds Wechseln - Changer Des Leds
CHANGING LEDs - LEDs WECHSELN - CHANGER DES LEDs EISBLOCK GPX PLEXI & PLEXI LIGHT ONLY Um die vorinstallierten LEDs zu tauschen, To exchange the pre-installed LEDs, loosen Afi n d’échanger les LED préinstallés, dévissez lösen Sie die vier M3 x 8 Schrauben und... -
Page 11: Changing Front Panel - Frontblende Wechseln - Changer Du Panneau Avant
CHANGING FRONT PANEL - FRONTBLENDE WECHSELN - CHANGER DU PANNEAU AVANT EISBLOCK GPX PLEXI ONLY To operate the graphics card in an SLI setup, Um die Grafi kkarte im SLI Verbund zu betrei- Afi n d’utiliser la carte graphique en mode remove the SLI slot cover. -
Page 12: Preparing The Video Card - Vorbereiten Der Grafikkarte - Préparation De La Carte Vidéo
PREPARING THE VIDEO CARD - VORBEREITEN DER GRAFIKKARTE - PRÉPARATION DE LA CARTE VIDÉO Put the hardware on an antistatic mat. Begin Legen Sie die Hardware auf eine antistatische Posez le matériel sur un tapis antistatique. dismantling the original cooler. Depending on the Unterlage. - Page 13 Bauteile frei liegen und der Kühler die bloc n’endommage pas la carte graphique. Alphacool International GmbH is not liable Grafi kkarte nicht beschädigt. Alphacool International GmbH n’est pas for assembly errors occurring due to Alphacool International GmbH haftet nicht responsable ni des erreurs d’installation ni du...
-
Page 14: Mounting The Cooling Block - Kühlermontage - Montage Du Bloc De Refroidissement
MOUNTING THE COOLING BLOCK - KÜHLERMONTAGE - MONTAGE DU BLOC DE REFROIDISSEMENT 1. 1. well distributed thermal paste poorly distributed thermal paste gut verteilte Wärmeleitpaste schlecht verteilte Wärmeleitpaste pâte thermique distribué mal pâte thermique distribué bien With the help of a plastic strip or thermal Tragen Sie nun, unter Zuhilfenahme eines Appliquez maintenant la pâte thermique sur paste spreader, spread a thin layer of thermal... - Page 15 MOUNTING THE COOLING BLOCK - KÜHLERMONTAGE - MONTAGE DU BLOC DE REFROIDISSEMENT REQUIRED ACCESSORIES SEE PAGE 22 BENÖTIGTES ZUBEHÖR SIEHE SEITE 22 ACCESSOIRES REQUIS REGARDEZ À LA PAGE 22 4x Pads 30 x 30 x 1.5 mm Using the pattern template, cut the thermal pads Schneiden Sie, mit Hilfe der Schnittmustervorlage, À...
- Page 16 MOUNTING THE COOLING BLOCK - KÜHLERMONTAGE - MONTAGE DU BLOC DE REFROIDISSEMENT Remove the protective fi lm on the cooler Entfernen Sie die Schutzfolie am Kühlerboden Enlevez le fi lm de protégé sur le fond du bloc bottom and clean the contact surfaces on the und reinigen Sie die Kontaktfl...
- Page 17 MOUNTING THE COOLING BLOCK - KÜHLERMONTAGE - MONTAGE DU BLOC DE REFROIDISSEMENT REQUIRED ACCESSORIES EISBLOCK ACETAL & PLEXI LIGHT ONLY BENÖTIGTES ZUBEHÖR ACCESSOIRES REQUIS 8x M3x6 If you have chosen the plexi cooler, skip Haben Sie sich für den Plexi Kühler Si vous avez choisi le refroidisseur plexi, this step.
- Page 18 MOUNTING THE COOLING BLOCK - KÜHLERMONTAGE - MONTAGE DU BLOC DE REFROIDISSEMENT REQUIRED ACCESSORIES SEE PAGE 22 EISBLOCK GPX PLEXI BENÖTIGTES ZUBEHÖR SIEHE SEITE 22 ONLY ACCESSOIRES REQUIS REGARDEZ À LA PAGE 22 5x Pad 30 x 30 x 3 mm Remove the protective fi...
- Page 19 MOUNTING THE COOLING BLOCK - KÜHLERMONTAGE - MONTAGE DU BLOC DE REFROIDISSEMENT REQUIRED ACCESSORIES BENÖTIGTES ZUBEHÖR ACCESSOIRES REQUIS EISBLOCK GPX PLEXI ONLY 8x M3x11 If you have chosen the acetal cooler Haben Sie sich für den Acetal Kühler Si vous avez choisi le refroidisseur without backplate, skip this step.
- Page 20 MOUNTING THE COOLING BLOCK - KÜHLERMONTAGE - MONTAGE DU BLOC DE REFROIDISSEMENT REQUIRED ACCESSORIES BENÖTIGTES ZUBEHÖR ACCESSOIRES REQUIS 2x screw plugs 1x screw tool 8. 8. If you use the extended connector close Sollten Sie den verlängerten Anschluss nut- Si vous utilisez le connecteur étendu, fermez the inlets which you do not need for tubing.
- Page 21 MOUNTING THE COOLING BLOCK - KÜHLERMONTAGE - MONTAGE DU BLOC DE REFROIDISSEMENT Retighten the screws after about 12 hours of Drehen Sie nach ca. 12 Stunden Benutzung Resserrez les vis après 12 heures d’utilisation use of the graphics card. der Grafi kkarte nochmals alle Schrauben fest. de la carte graphique.
-
Page 22: Cutting Patterns - Schnittvorlage - Modèles De Découpage
CUTTING PATTERNS - SCHNITTVORLAGE - MODÈLES DE DÉCOUPAGE... - Page 24 Imprint: Alphacool International GmbH Marienberger Str. 1 38122 Braunschweig Support: +49 (0) 531 28874 - 0 Fax: +49 (0) 531 28874 - 22 E-Mail: info@alphacool.com General Manager: Fabian Noelte WEEE-Reg.-Nr.: DE 54464644 Trade Register: Amtsgericht Braunschweig HRB 202390 VAT.ID.Nr.: DE27058421...
Need help?
Do you have a question about the Eisblock GPX and is the answer not in the manual?
Questions and answers