Table of Contents
Advertisement
Quick Links
Advertisement
Table of Contents

Subscribe to Our Youtube Channel
Related Manuals for Alphacool Eisblock XPX


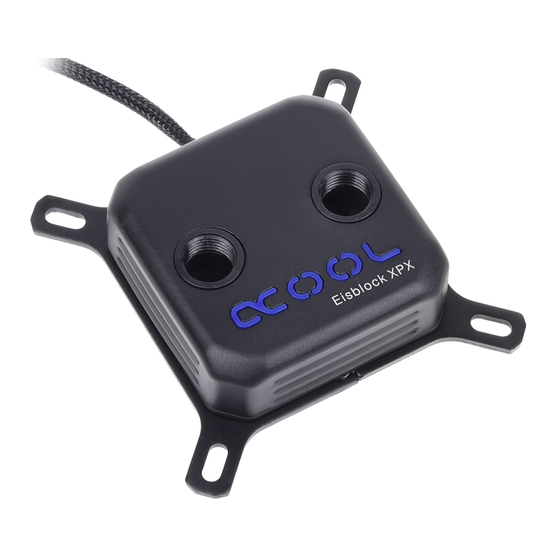
Summary of Contents for Alphacool Eisblock XPX
- Page 1 Eisblock XPX...
- Page 2 Read the safety instructions before starting the installation. Lesen Sie die Sicherheitshinweise, bevor Sie mit der Installation beginnen. Lisez les instructions de sécurité avant de commencer l‘installation.
-
Page 3: Table Of Contents
CONTENT - INHALT - CONTENU SCOPE OF DELIVERY LIEFERUMFANG CONTENU DE LA LIVRAISON STRUCTURE AUFBAU STRUCTURE INSTALLATION - MONTAGE - INSTALLATION PREPARATION VORBEREITUNG PRÉPARATION INTEL 2011 / -3 INTEL 1150/51, 1155/56, 1366, 775, 771, 604 AM3, AM3+, AM2, AM2+, FM1, FM2, FM2+, G34, C32, 940, 939, 754 FINISHING TOUCH DER LETZTE SCHLIFF... -
Page 4: Scope Of Delivery Lieferumfang
SCOPE OF DELIVERY - LIEFERUMFANG - CONTENU DE LA LIVRAISON CPU COOLER THERMAL GREASE CPU KÜHLER WÄRMELEITPASTE REFROIDISSEUR CPU PÂTE THERMIQUE INTEL BACKPLATE SCREW CAPS INTEL RÜCKPLATTE SCHRAUBENKAPPEN CONTREPLAQUE INTEL PROTÈGE-VIS INTEL + AMD BRACKET RUBBER COVERS INTEL HALTERUNG GUMMIKAPPEN CROCHET DE INTEL PROTECTION ÉLASTIQUE... - Page 5 SCOPE OF DELIVERY - LIEFERUMFANG - CONTENU DE LA LIVRAISON UNC 6-32 SPRINGS AMD SCREWS FEDERN AMD SCHRAUBEN RESSORTS RESSORTS VIS AMD WASHERS INTEL 115X SCREWS UNTERLEGSCHEIBEN INTEL 115X SCHRAUBEN RONDELLES RONDELLES VIS INTEL 115X NUTS INTEL 2011(-V3) SCREWS MUTTERN INTEL 2011(-V3) SCHRAUBEN ÉCROUS VIS INTEL 2011(-V3)
-
Page 6: Structure Aufbau Structure
STRUCTURE - AUFBAU - STRUCTURE ORIGINAL cover logo inlay topplate with ports topplate with ports gaskets middleplate fl ow distributor gaskets jetplate copperplate M4 screws... - Page 7 STRUCTURE - AUFBAU - STRUCTURE CLEAR topplate with ports gaskets middleplate fl ow distributor gaskets jetplate copperplate M4 screws...
-
Page 8: Preparation Vorbereitung Préparation
PREPARATION - VORBEREITUNG - PRÉPARATION After removing your old cooler start cleaning the hardware: • Remove leftover thermal paste from the CPU. • Use a cloth or cotton swabs and Ethyl alcohol for dried thermal paste. • Apply a pea-sized drop of thermal paste onto the CPU. •... -
Page 9: Intel 2011 / -3
PREPARATION - VORBEREITUNG - PRÉPARATION INTEL • Remove the protective fi lm on the cooler bottom. • Choose the appropriate bracket to your socket (AMD or NTEL). • Mount the bracket as shown. • Entfernen Sie die Schutzfolie auf dem Kühlerboden. •... - Page 10 INSTALLATION - MONTAGE - INSTALLATION 2011 / - 3 Intel 2011 screws Intel 2011 Schrauben vis Intel 2011 springs Druckfedern ressorts washers 0.5 mm Unterlegscheiben 0,5 mm rondelles 0.5 mm...
- Page 11 INSTALLATION - MONTAGE - INSTALLATION 2011 / - 3 Please note: Some motherboards of the Socket 2011 / - 3 do not have continuous mounting holes in the socket area. In this case, don’t turn in the screws more than 4 mm. Beachten Sie: Einige Mainboards des Sockel 2011/- 3 haben keine durchgehenden Montagebohrungen im Sockelbereich.
-
Page 12: Intel 1150/51, 1155/56, 1366, 775, 771, 604
INSTALLATION - MONTAGE - INSTALLATION 1151 & older Intel 1150 screws Intel 1150 Schrauben vis Intel 1150 springs Druckfedern ressorts washers 0.5 mm Unterlegscheiben 0,5 mm rondelles 0.5 mm nuts Muttern écrous... - Page 13 INSTALLATION - MONTAGE - INSTALLATION 1151 & older included backplate beiliegende Backplate hand tighten only plaque arrière incluse nur handfest anziehen serrer à la main seulement...
- Page 14 INSTALLATION - MONTAGE - INSTALLATION AMD screws AMD Schrauben vis AMD springs Druckfedern ressorts nuts Muttern écrous washers 0.5 mm Unterlegscheiben 0,5 mm rondelles 0.5 mm washers 2 mm Unterlegscheiben 2 mm rondelles 2 mm...
- Page 15 INSTALLATION - MONTAGE - INSTALLATION AMD backplate AMD Backplate plaque arrière AMD hand tighten only nur handfest anziehen serrer à la main seulement...
- Page 16 INSTALLATION - MONTAGE - INSTALLATION remove retention module Haltemodul entfernen enlever module de fi xation...
- Page 17 INSTALLATION - MONTAGE - INSTALLATION AMD screws AMD Schrauben vis AMD springs Druckfedern ressorts washers 0.5 mm Unterlegscheiben 0,5 mm rondelles 0.5 mm washers 2 mm Unterlegscheiben 2 mm rondelles 2 mm nuts Muttern écrous thread of the original retention module Gewinde des Original-Halterahmens fi letage de la fi xation d’origine hand tighten only...
-
Page 18: G34, C32, 940, 939, 754
INSTALLATION - MONTAGE - INSTALLATION AM3+ & older AMD screws AMD Schrauben vis AMD springs Druckfedern ressorts washers 0.5 mm Unterlegscheiben 0,5 mm rondelles 0.5 mm nuts Muttern écrous... - Page 19 INSTALLATION - MONTAGE - INSTALLATION AM3+ & older included backplate beiliegende Backplate plaque arrière incluse hand tighten only nur handfest anziehen serrer à la main seulement...
-
Page 20: Finishing Touch Der Letzte Schliff La Touche Finale
FINISHING TOUCH - DER LETZTE SCHLIFF - LA TOUCHE FINALE rubber covers screw cap Gummiüberzug Schraubenkappe protection élastique protège-vis... - Page 21 FINISHING TOUCH - DER LETZTE SCHLIFF - LA TOUCHE FINALE Connect the 3-pin connector to your mainboard. Verbinden Sie den 3-Pin-Stecker mit ihrem Mainboard. Connecter le connecteur à 3 broches à la carte mère.
-
Page 22: Connecter Tuyaux
ATTACHING HOSES - SCHLAUCH INSTALLIEREN - CONNECTER TUYAUX... - Page 23 ATTACHING HOSES - SCHLAUCH INSTALLIEREN - CONNECTER TUYAUX Note that the inlet and outlet are designated on the connection holes. It is helpful to follow this order: 1. unscrew coupling nut + screw hose connectors into the components 2. attach hose 3.
-
Page 24: Individualization Individualisierung Individualisation
INDIVIDUALIZATION - INDIVIDUALISIERUNG - INDIVIDUALISATION EISBLOCK XPX ORIGINAL... - Page 25 INDIVIDUALIZATION - INDIVIDUALISIERUNG - INDIVIDUALISATION EISBLOCK XPX ORIGINAL Individualize your cooler with our separately available Moddings Kits. These include color matching caps, brackets and screw caps as well as Logo inlays in different colors. So you can design yourself an unique model.
- Page 26 INDIVIDUALIZATION - INDIVIDUALISIERUNG - INDIVIDUALISATION 1. Detach the CPU cooler from your mainboard 1. Detach the CPU cooler from your mainboard 2. Carefully remove the original cap with the included tool Place the tool on one side, push the cap up, repeating on the other side, if necessary 1.
- Page 27 INDIVIDUALIZATION - INDIVIDUALISIERUNG - INDIVIDUALISATION 1. Carefully push the LED out of the logo fi tting 2. Place the lighting plate into the new logo 3. Put the logo back in correctly and arrange the cables outwards through the channel 1.
- Page 28 INDIVIDUALIZATION - INDIVIDUALISIERUNG - INDIVIDUALISATION Make sure that the logo and LED are set correctly and press the cover onto the cooling block. You will hear a distinct click when the cap is securely in place. Achten Sie darauf, dass der Logoeinsatz und die LED richtig sitzen und drücken Sie das Cover auf den Kühlblock.
- Page 29 INDIVIDUALIZATION - INDIVIDUALISIERUNG - INDIVIDUALISATION Alphacool Eisblock XPX CPU Modding Kit Blue EAN: 4250197125710 Alphacool Eisblock XPX CPU Modding Kit EAN: 4250197125703 Alphacool Eisblock XPX CPU Modding Kit White EAN: 4250197128636...
- Page 30 INDIVIDUALIZATION - INDIVIDUALISIERUNG - INDIVIDUALISATION EISBLOCK XPX CLEAR...
- Page 31 INDIVIDUALIZATION - INDIVIDUALISIERUNG - INDIVIDUALISATION EISBLOCK XPX CLEAR Individualize your cooler with our separately available Aurora XPX RGB Frame. With impressive 15 RGB LEDs evenly distributed over the XPX Eisblock CPU cooler, per- fect lighting is guaranteed. Via an RGB controller you can- change not only the colors, but also add colour effects like gradients, blinking, slow colour changes and much more.
- Page 32 INDIVIDUALIZATION - INDIVIDUALISIERUNG - INDIVIDUALISATION...
- Page 33 INDIVIDUALIZATION - INDIVIDUALISIERUNG - INDIVIDUALISATION Press the frame onto the already mounted cpu cooler. To operate the LEDs connect the RGB plug with an RGB controller (sold separately). Drücken Sie den Rahmen auf den bereits montierten CPU - Kühler. Zum Ansteuern der LEDs verbinden Sie den RGB Stecker mit einem RGB Controller (separat erhältlich).
- Page 34 INDIVIDUALIZATION - INDIVIDUALISIERUNG - INDIVIDUALISATION Alphacool Aurora XPX RGB Frame EAN: 4250197128933 Alphacool Aurora LED RGB Controller Compact EAN: 4250197153157 Alphacool RGB 4pol LED Adaptor Cable for Mainboards EAN: 4250197185400...
- Page 36 Imprint: Alphacool International GmbH Marienberger Str. 1 38122 Braunschweig Head Office: +49 (0) 531 28874 - 0 Fax: +49 (0) 531 28874 - 22 E-Mail: info@alphacool.com General Manager: Fabian Noelte WEEE-Reg.-Nr.: DE 54464644 Trade Register: Amtsgericht Braunschweig HRB 202390 VAT.ID.Nr.:...
Need help?
Do you have a question about the Eisblock XPX and is the answer not in the manual?
Questions and answers