Advertisement
- 1 Camera Specification
- 2 Important Messages
- 3 What's in the Box
- 4 Overivew
- 5 Getting Started
- 6 Button Operation Instructions
- 7 Camera Modes
- 8 Customizing
- 9 Connecting to AKASO Go App
- 10 Playing Back Your Content
- 11 Downloading Your Content
- 12 Remote
- 13 Maintaining Your Camera
- 14 Maximizing Battery Life
- 15 Mounting Your Camera
- 16 Documents / Resources
Camera Specification
| Model | Brave 4 Elite |
| LCD | Dual-Color Screens (2.0-inch touch screen & 1.4-inch front screen) |
| Video/Photo Format | MOV/JPG |
| Gyroscope | 6-axis gyroscope |
| Battery | 3.7V 1650mAh non-removable battery |
| Battery life | Records 4K30fps video for 120 minutes, and 180 minutes in the 1080P30fps video recording |
| Lens | 6G |
| Aperture | 2.6 |
| Remote Control | Support |
| Voice Control | Support |
Important Messages
Congratulations on your new AKASO Action Camera Brave 4 Elite!
You must be excited to use your AKASO Brave 4 Elite. However, please spend time reading this manual before using it. You need to get to know all the features now so as to get the most out of it.

- This camera is a precision product. Please take care to avoid dropping or colliding with it to prevent damage.
- Avoid exposing the item to strong magnetic fields, such as those generated by electric motors, magnets, or machinery with strong radio waves.
- Never leave the item in high-temperature areas. Electronics and optics can be damaged under prolonged exposure to heat.
- Although this camera is waterproof without needing an additional housing, we recommend you put it into the waterproof case properly before capturing underwater adventures.
- Avoid extended periods of camera charging. Keep it away from children and pets while charging to avoid accidents.
Warm Tip: In case your camera does not work normally or encounters any photo or video quality issues, please feel free to refer to Q&A in this manual or contact customer support for help by sending emails to our official email address cs@akaso-tech.com.
What's in the Box

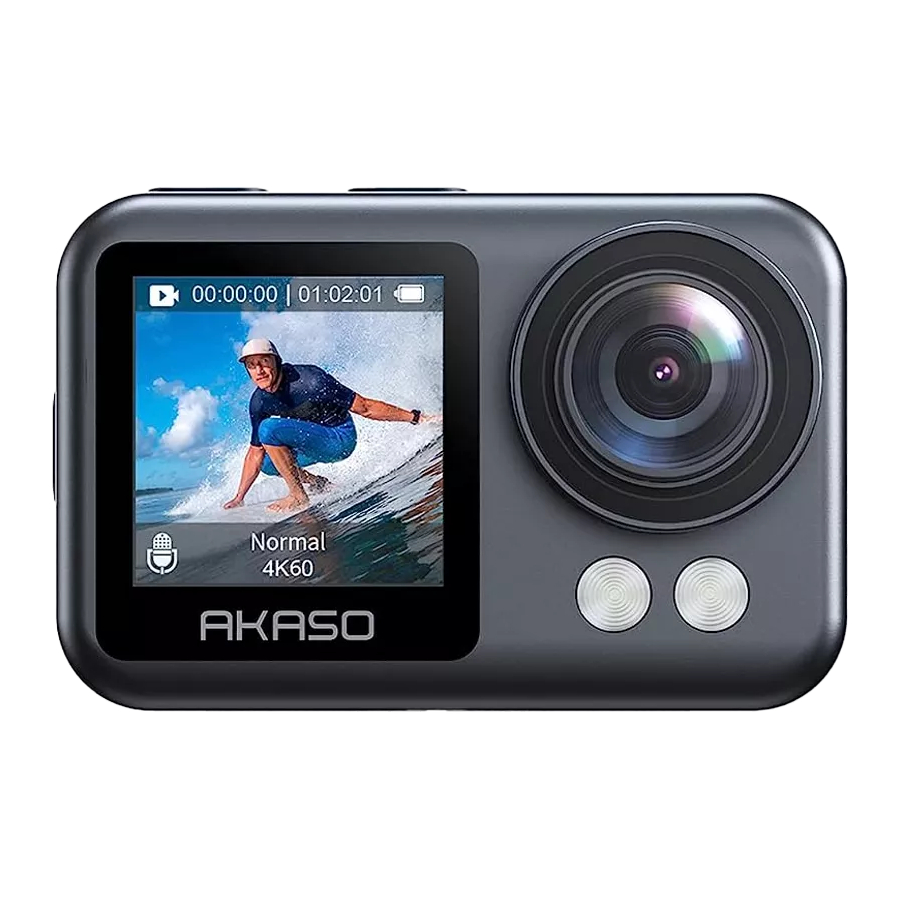
Overivew

- Mode Button
- Shutter Button
- Voice Control Mic
- Front Screen
- Lens
- Fill Light
- Magnetic Charging Port
- Speaker

- Touchscreen
- Charging Indicator
- Working Indicator
- Power Button
- Microphone
- Reset Button
Note: The camera does not record sounds when it's in the waterproof case.
Getting Started
Welcome to your Brave 4 Elite. To capture videos and photos, please complete the formatting process first.
Memory
This camera comes with a built-in 64GB memory storage, so you needn't purchase a memory card separately and install it.
Heads up:
Usually it takes one minute to copy a file of 1 GB. When the memory card is full, it will take about one hour to offload all files.
Format
Tap the Settings icon to enter camera settings page, locate the Format option, then tap Confirm to complete the process.

Removing & Installing Waterproof Case
How to remove the waterproof case from the packing box?
- Take out the silicon rubber protector.

- Give the mount buckle a hard pull.

- Pull backward to disassemble the camera.

- Rotate mount 1 counterclockwise with your hands or the spanner.

- Detach the waterproof case from the mount buckle.


How to remove the camera from the waterproof case?
- Pull up the buckle as indicated by the arrows.

- Open the back door of the waterproof case.

- Remove the camera from the waterproof case.


How to install the camera to the waterproof case?
- Put the camera in the waterproof case as indicated by the arrow.

- Compress the back door.
![]()
- Fasten the buckle.

- Press down the back door to ensure tightness.


Charging
The camera's battery is non-removeable, you can't charge it separately. To charge this action camera, you can plug it in after connecting it to the included magnetic USB cable. Please make sure the action camera is turned off before charging.
Warm Tips:
- The camera will be fully charged in four hours. Please do not keep charging it. When fully charged, the camera can capture 4K30FPS videos for up to 120 minutes and last up to 180 minutes in the 1080P30fps video recording.
- To prevent a short circuit, it is important to ensure that the magnetic port is kept away from any metal conductors while using the magnetic charging cable.


Heads up:
The exact battery life of electronic products may depend on the usage environment. As the temperature drops, the battery life will become shorter, typically decreasing by 20% for every 10-degree drop in temperature.
Button Operation Instructions
| Power Button | Long press to turn the camera on or off. |
| Press to turn the Wifi on or off. | |
| Shutter Button | Press to start or stop shooting. |
| Long press to enter the shooting mode menu. | |
| Mode Button | Press to enter the playback, video and photo settings. |
| Long press to switch between the touchscreen and front screen. | |
| Working Indicator | Stays solid when the camera is on, flashes during capturing. It flashes when the Wifi turns on and stays solid when connected. |
| Charging Indicator | Stays solid while charging and goes out when fully charged. |
| Connect to PC | MSDC |
| PCCAM | |
| Working | |
| Charging |
- Turning On and Off
To turn on the camera, simply press and hold the Power button. Once turned on, the working indicator light will remain steady, and the camera screen will present the preview interface. When you first power on the camera, you have the option to select your desired language and set the time and date. To power off the camera, either press and hold the Power button or swipe down to access the quick menu and tap the power icon. Consequently, the working indicator light will extinguish, indicating that the camera is now turned off. - Turning Wifi On and Off
There are two ways to turn on the Wifi. You can press the Power button or swipe up to enter the mode menu and tap the Wifi icon to turn on Wifi. When Wifi is turned on, the indicator on the top of the screen will be flashing blue. It will go out when Wifi is turned off and stay solid when connected. To turn off Wifii, press the Power button again or tap the 'X' icon on the Wifi screen. - Choosing Modes
To choose a desired shooting mode, you can press and hold the Shutter button, or tap the mode icon to enter the mode menu.
To press the Shutter button:
When you turn on the camera, press and hold the Shutter button to access the mode menu. From there, select the desired shooting mode. Pressing the Shutter button will confirm the current shooting mode and take you to its respective settings page. Alternatively, utilize the Mode button to switch between different shooting modes, such as Photo, Video, and Playback settings.
To touch the screen:
When the camera is on, tap the bottom screen or swipe up to access the mode menu. From there, select either Video or Photo mode based on your intended usage. Next, choose the shooting mode that you want. If you wish to exit the mode menu at any point, you can easily do so by tapping the "X" icon. Additionally, to switch between the Video and Photo modes, simply swipe left or right on the screen.

Camera Modes
There are 10 modes for the Brave 4 Elite action camera: Photo, Burst photo, Time-lapse Photo, Long Exposure, Self-Timer, Video, Loop Record, Time-lapse Video, Slow Motion, and Fast Motion.
Photo Mode
When the camera is in Photo mode, you can press the Shutter button to take a photo. The indicator light will also be flashing.
Single Photo Mode
In this mode, when you press the Shutter button, the camera captures photos at the specified resolution.

Burst Photo Mode
In this mode, when you press the Shutter button, the camera continously takes multiple photos at the specific shot. This mode is suitable for capturing fast-moving scenes.

Time-lapse Photo Mode
In this mode, when you press the Shutter button, the camera will take a series of photos at the set interval. This mode is suitable for capturing the movement of clouds, stars, and sunsets.

Long Exposure Mode
In this mode, when you press the Shutter button, the camera will continuously capture photos at specific intervals until the exposure time comes to an end. This mode is suitable for use in dark, light, and water scenes.

Self-Timer Mode
In this mode, the camera takes photos at specific intervals. The Self-timer mode allows you to set a delay before the camera takes a photo. You can take a photo of yourself or be in a group photo without physically pressing the Shutter button.

Video Mode
Video mode is the default mode when the camera is turned on. In the Video mode, press the Shutter button to start or stop recording videos. The indicator light will be flashing during recording.
Normal Video Mode
In this mode, the camera records multiple videos in the set video resolution. You can press and hold the Up or Down button or tap the Zoom icon to adjust the zoom level. The camera supports up to 4X.

Loop Record Mode
In this mode, when you press the Shutter button, the camera records videos of the specific length. When the memory is full, old files will be overwritten by new ones. This mode is suitable for taking videos in a long journey.

Time-lapse Video Mode
In Time-lapse Video mode, press the Shutter button, the camera will record 30fps videos from frames captured at specific intervals. This process results in a high-quality representation of the transformation of space over time. A video that lasts several hours can be played back in just a couple of minutes or even seconds.
Heads up
Time-lapse Videos are captured without audio.

Slow Motion Mode
The camera records videos in specific resolutions and zoom levels. For example, if you choose the 2.7K 2X option to record a video for 1 minute, the camera will create a 2-minute slow-motion video in 2.7K resolution. This mode is particularly useful for capturing scenes with fast movements that benefit from the slow-motion effect.

Fast Motion Mode
The camera records videos in specific resolutions and zoom levels in a fast motion mode. For example, if you choose the 2.7K 2X option to record a video for 1 minute, the camera will create a 30-second slow-motion video in 2.7K resolution. This mode is particularly useful when you want to play back videos at a faster speed than normal.

Wifi Mode
When Wifi is turned on, the camera will enter Wifi mode and display the Wifi information. To exit Wifi mode, simply tap the "X" icon on the Wifi screen.

For further details regarding the app connection, please refer to Connecting to AKASO GO App.
Customizing
Photo Settings
- Resolution
20MP/16MP/14MP/10MP/8MP/5MP/2MP (Default setting is 20MP.)
This camera is capable of capturing 20MP photos, with higher resolution offering greater clarity and detail due to the increased number of pixels. However, higher resolution photo also results in larger file sizes. - Output Format
JPEG/JPEG+DNG (Default setting is JPEG.)
This setting allows you to choose the image format you want. - ISO
Auto/100/200/400/600/800/1600/3200 (Default setting is Auto.)
ISO determines the camera's sensitivity to light and creates a trade-off between brightness and resulting image noise. Image noise refers to the degree of graininess in the image. In low light, higher ISO values result in brighter images, but with greater image noise. Lower values result in lower image noise, but darker images. - EV
-2.0/-1.0/0/+1.0/+2.0 (Default setting is 0.)
Sets the exposure value. The larger the number, the larger the brightness. By default, your camera uses the entire image to determine the appropriate exposure level. However, Exposure lets you select an area that you want the camera to prioritize when determining exposure. This setting is particularly useful in shots where an important region might otherwise be over-or underexposed. - Burst Photo
Off/3 shots/7 shots/15 shots/30 shots (Default setting is Off.)
This option allows you to set the number of photos to be taken in Burst Photo mode, making it perfect for capturing fast-moving activities.
Heads up:
Burst Photo works in Burst mode only. It will not show in the settings menu when other modes are enabled. - Timelapse Interval
3 Sec/5 Sec/10 Sec/30 Sec/1 Min (Default setting is 3Sec.)
This option allows you to specify the frequency at which photos are captured and compiled in Time Lapse Photo mode. The camera will take a series of photos at the set interval.
Heads up:
Timelapse Interval works in Time-lapse Photo mode only. It will not show in the settings menu when other modes are enabled. - Timelapse Duration
Unlimited/5 Min/10 Min/15 Min/20 Min/30 Min/60 Min (Default setting is Unlimited.) This option works with Timelapse Interval, giving you the ability to specify the desired duration of your timelapse photo.
Heads up:
Timelapse Duration works in Time-lapse Photo mode only. It will not show in the settingsmenu when other modes are enabled. - Self-Timer
2s/10s (Default setting is 2s.)
A self-timer provides a delay between pressing the shutter release and the firing of the shutter. It is commonly used to take selfies without physically pressing the button.
Heads up:
Self-timer works in Self-Timer mode only. It will not show in the settings menu when other modes are enabled. - Long Exposure
Off/1 Second/2 Seconds/5 Seconds/8 Seconds/30 Seconds/60 Seconds (Default setting is Off.)
This option helps you set the exposure time in Long exposure mode. The camera will take photos until the set time comes to an end.
Heads up:
Long Exposure works in Long Exposure mode only. It will not show in the settings menu when other modes are enabled. - Metering
Center/Multi/Spot (Default setting is Multi.)
Metering in photography refers to the process of measuring the amount and intensity of light in a scene, which helps determine the correct exposure settings for capturing the photo. Using the appropriate metering mode can help ensure that your photos are well-exposed and have the proper balance of shadows and highlights. - Sharpness
High/Middle/Low (Default setting is Middle.)
Adjusts the sharpness of the objects in your scene, which is crucial for capturing the fine details and enhancing the overall quality of your photos or videos. - Date Stamp
Off/Date/Date&Time (Default setting is Date&Time.)
Sets the camera's date stamp format. You can set the camera's date and time according to your local time. - Fill Light
Off/On/Auto (Default setting is Off.)
When Fill Light is enabled, the camera excels at capturing clear videos in low light conditions, making it ideal for such scenes. However, we recommend turning off Fill Light when it is not necessary.
Video Settings
- Video Resolution
4K60 FPS/4K 30FPS/2.7K 60FPS/2.7K 30FPS/1080P 120FPS/1080P 60FPS/1080P 30FPS/720P 240FPS /720P 120FPS/720P 60FPS (Default setting is 4K60FPS) This camera is capable of recording video up to 4K30FPS, with higher resolution offering greater clarity and detail due to the increased number of pixels. However, higher resolution video also results in larger file sizes.
Heads up:- Capturing high-resolution or high-fps videos in low-temperature scenes can consume more power.
- 30FPS is not available in Slow Motion mode.
- Voice Record
Off/On (Default setting is On.)
You can mute or unmute your videos according to your needs. - Image Stabilization
Off/On (Default setting is Off.)
Electronic Image Stabilization (EIS) 2.0 effectively corrects the lens distortion, allowing for smooth videos. This feature is suitable for use in riding, skiing, and handheld scenes. But when this option is enabled, the shooting angle will be narrowed.
Heads up:- Image Stabilization won't work together with Distortion Correction, which means Image Stabilization will be disabled when Distortion Correction is enabled, and vice versa.
- Image Stabilization will be disabled when you set the resolution to 1080P/120FPS, 720P/240FPS, 720P/120FPS.
- Loop Record
1 Min/2 Min/3 Min (Default setting 1 Min.)
Loop Record allows you to set the shooting time of each video. When Loop Record mode is enabled, old files will be overwritten by new ones. Once the memory becomes full, the camera will delete the first video file to make room for the new file. For example, if you set Loop Record to "1 Minute", the camera will create a 1-minute video, and this video will be deleted when the camera needs more memory.
Heads up:
This feature works in Loop Record mode only. It will not show in the settings menu when other modes are enabled. - Timelapse Interval
1 Sec/3 Sec/5 Sec/10 Sec/30 Sec/1 Min (Default setting is 1 Sec.)
This option enables you to specify the frequency at which the video frames are captured and compiled. The camera will capture series of videos at the set interval.
Heads up:- Time lapse videos are recorded without audio.
- Timelapse Interval works in Time-lapse Video mode only. It will not show in the settings menu when other modes are enabled.
- Timelapse Duration
Unlimited/5 Min/10 Min/15 Min/20 Min/30Min/60Min (Default setting is Unlimited) This option works with Timelapse Interval, giving you the ability to specify the desired duration of your timelapse video.
Heads up:
Timelapse Duration works in Time-lapse mode only. It will not show in the settings menu when other modes are enabled. - Fast Motion Movie
Off/2X/4X/6X/10X/15X (Default setting is Off.)
This option is available in Fast Motion mode. You can choose the resolution and zoom level before recording fast motion videos.
Heads up:
Fast Motion Movie works in Fast Motion and Loop Record modes only. It will not show in the settings menu when other modes are enabled. - Wind Noise Reduction
Off/On (Default setting is Off.)
When Wind Noise Reduction is enabled, the noise will be lowered to an acceptable level, allowing for better video quality.
Heads up:
Wind Noise Reduction works in Normal Video mode only. It will not show in the settings menu when other modes are enabled. - Auto Low Light
Off/On (Default setting is Off.)
The Auto Low Light mode automatically adjusts camera settings to optimize low light performance, making it ideal for dark scenes and resolutions above 60 FPS.
Heads up:
Auto Low Light and Image Stabilization can't be enabled at the same time. - EV
-2.0/-1.0/0/+1.0/+2.0 (Default setting is 0.)
Sets the exposure value. The larger the number, the larger the brightness. By default, your camera uses the entire image to determine the appropriate exposure level. However, Exposure lets you select an area that you want the camera to prioritize when determining exposure. This setting is particularly useful in shots where an important region might otherwise be over- or underexposed. - Sharpness
High/Middle/Low (Default setting is Middle.)
Adjusts the sharpness of the objects in your scene, which is crucial for capturing the fine details and enhancing the overall quality of your photos or videos. - Fill Light
High/Middle/Low (Default setting is Middle.)
When Fill Light is enabled, the camera captures clear videos in dark light. This makes it perfect for low light scenes. We recommend you to turn off Fill Light when not necessary. - Date Stamp
Off/Date/Date&Time (Default setting is Date&Time.)
Sets the camera's date stamp format. You can set the camera's date and time according to your local time.
System Settings
- Power Frequency
50Hz/60Hz (Default setting is 60Hz.)
Also known as the line frequency or mains frequency, it is the frequency of the alternating current (AC) that is used in most electrical power systems around the world. If you live in the northeastern area, please set the power frequency to 60Hz, meaning the current changes direction 60 times per second. If you live outside this area, set it to 50Hz. - Sounds
Shutter: On/Off
Boot-up: On/Off
Beep: On/Off
(Default setting is On.)
You can turn on or off the shutter, boot-up and beep tones.
Volume: 0/1/2/3 (Default setting is 2.) Adjusts the camera's volume. - Voice Control
Off/On/Instruction (Video start, Stop Video, Take photo, Shutdown DV, Turn on Wifi,
Wifi off, Turn on fill light, Fill light off) (Default setting is Off.)
This feature enables you to control the action camera using your voice. With this setting enabled, you can issue commands in Chinese, English, Japanese, German, French, Spanish, and Italian.
Heads up:
We recommend you use this function in quiet scenes. The camera listens to commands only when you keep a distance within 50 meters from it. - White Balance
Auto/Daylight/Shade/Tungsten Light/White Fluorescent (Default setting is Auto.) White Balance captures the objects in photos with accurate color representation in various lighting conditions by adjusting the white balance, making it suitable for use in both warm and cool environments.
Heads up:
This feature won't work together with Effect and Diving Mode. So be sure to set Effect to Normal and disable Diving Mode before enabling White Balance. - Effect
Normal/BW/Natural/Negative/Warm/Brightness Contrast (Default setting is Natural) You can choose any one of the options to get a desired shooting result.
Heads up:
This feature won't work together with White Balance and Diving Mode. So be sure to set White Balance to Auto and disable Diving Mode before enabling Effect. - WDR
Off/On (Default setting is Off.)
Wide Dynamic Range (WDR) retains a greater level of details in the dark and bright areas of an image. The result is that a photo is properly exposed in the two extremes.
WDR is ideal for use in high-contrast scenes. - Distortions Calibration
Off/On (Default setting is Off.)
This setting corrects the fisheye effect that can occur in wide-angle shots, resulting in distortion-free images.
Heads up:
Distortion calibration won't work with Image Stabilization. So it will be disabled when Image Stabilization is turned on, and vice versa. - Angle
Wide/Medium/Narrow (Default setting is Wide.)
This setting allows you to choose a desired field of view.
Heads up:
Angle can't work together with the zoom function. - Diving Mode
Off/On (Default setting is Off.)
When Diving Mode is enabled, the camera can compensate for the absence of red light in underwater scenes. This mode is ideal for use in tropical and blue waters.
Heads up:
This feature won't work together with Effect and Diving Mode. So be sure to set Effect to Normal and disable Diving Mode before enabling White Balance. - Face Detection
Off/On (Default setting is Off.)
When Facial Recognition is enabled, the camera can recognize faces in the scene being captured.
Heads up:
Face Recognition is not available when you switch to the front screen. It only works when the camera is within 1 meter of the subject. - Date&Time
Default setting is YY/MM/DD
You can set the camera's date and time. - Upside Down
Off/On (Default setting is Off.)
The user interface will be upside-down when Upside Down is enabled. - Screen Saver
Off/1 Min/3 Min/5 Min (Default setting is 1 Min.)
The display will be turned off automatically after a period of inactivity to save battery life. To turn on the display again, press any buttons on the camera. - Auto Power Off
Off/1 Min/3 Min/5 Min (Default setting is 3 Min.)
The camera will power off after a period of inactivity to save battery life. - Language
English/ 简体中文 / 繁体中文 /Deutsch/Français/Italiano/Español/Português/Pol-ska/Русский/ 日本語 /ภาษาไทย (Default setting is English) - Format
Yes/No
Please complete the formatting process before recording. - System
Factory Reset: Yes/No
This option resets all settings to their default values.
System Info
Brand: AKASO
Model: Brave 4 Elite
Version: A-22xxxx-V 1.0
You can check the model and version of your Brave 4 Elite.
Memory Info
Capacity: xxxxx MB
Free Space: xxxxx MB
Connecting to AKASO Go App
Please download and install the AKASO GO app on the App Store or Google Play first. The AKASO GO APP allows you to control your camera using a smartphone. When your camera is connected to this APP, you can control it to capture, or change any settings. You can also live preview, playback, download, and edit videos via this APP. Please follow the following instructions to connect your camera to the AKASO GO APP.
- Turn on the camera, press the Power button or tap the Wifi icon to turn on Wifi. The camera will enter Wifi mode and display the Wifi SSID as well as the default password in 3 seconds.

- Turn on your phone's Wifi to enter the Wifi settings page, find the Wifi SSID in the list and tap on it, then enter the password 1234567890 for connection.

Warm tip: Once the camera Wifi is connected, it will give you a "No Internet Connection" or "Weak Security" notice since your phone's 4G signal is blocked.
You can ignore it and continue the app connection. - Open the AKASO GO app, tap "Device", then tap the "+" icon in the upper right corner to add "Brave 4 Elite".

- Tick "The above operation has been confirmed", and tap "Live Preview". Your camera will be connected to the AKASO GO app.


Playing Back Your Content
You can play back your contents on the camera, your computer, TV, or smartphone. To play back your videos and photos on a computer, you need to transfer these files first. Transferring files also frees up space on your memory for new contents.
Playing Back or Deleting Files
Press the Mode button or tap the Playback icon in the bottom left corner to enter the playback interface.
To play back files: Tap the video or photo you want to play back. The video or photo will play.
To delete files: To delete a file, tap the Delete icon, select the file you wish to delete, and then tap the Delete icon again. The screen will display three options: "Delete File", "Delete All Files", and "Cancel". Tap "Delete File" and then confirm your choice by tapping "Yes" when the screen prompts you with "Yes/No" to complete the deletion process.
To exit: Tap the Return icon to exit.

- Open the AKASO GO app, then connect it to your camera.
For further details regarding the app connection, please refer to Connecting to AKASO GO App. - Tap the Album icon to see all the videos and photos
 .
. - Tap the Select icon in the upper right corner to choose the photo or video you want to playback. The photo or video willl play. To delete the photo or video, simply tap the Delete icon.

 .
.
Downloading Your Content
Offloading Your Content to A Computer
To offload video or photo files to a computer, you need to connect the camera to your computer's USB port using the included magnetic USB cable, and choose the MSDC mode when the camera turns on and displays the connection mode menu. After successfully transferring files, you will be able to play back files on your computer, or delete the chosen files with the file exporter.
Tip:
- To ensure stable data transmission, we recommend properly connecting the magnetic USB cable to the camera and avoiding moving the camera during data transmission.
![]()
- To prevent a short circuit, it is important to ensure that the magnetic port is kept away from any metal conductors while using the magnetic charging cable.


Downloading Your Content to A Smartphone
- Open the AKASO GO app, then connect it to your camera.
For further details regarding the app connection, please refer to Connecting to AKASO GO App. - Tap the Album icon to see all the videos and photos.
- Tap the Select icon in the upper right corner to choose the photo or video you want to download, then tap the Download icon in the bottom left corner to download. Waiting for the completion of download progress, the video or photo will be downloaded to your phone's photo album.


Heads up:
If you cannot download videos or photos to your iPhone, please enter your phone's Settings page→ Privacy → Photos, find "AKASO GO" and select "All photos".
Remote
Once the camera is switched on, it will instantly connect with the remote. This enables you to effortlessly capture videos or photos using the remote. Photo Button

Heads up:
The remote is splashproof, but it is not waterproof.
Video
To record a video, make sure the camera is in Video mode.
To start recording:
Press the gray Video button. The camera beeps and the camera status light flashes while recording.
To stop recording:
Press the gray Video button again. The camera beeps and the camera status light stops flashing.
Photo
To capture a photo, verify the camera is in Photo mode.
To take a photo:
Press the gray Photo button. The camera will emit a camera shutter sound and start taking photos.
Charging
There is a built-in battery in the remote. To charge the remote, plug it in with a USB cable.
Maintaining Your Camera
Please follow these guidelines to get the best performance from your camera:
- For best audio performance, shake the camera or blow on the mic to remove debris from the microphone holes.
- To clean the lens, wipe it with a soft, lint-free cloth. Do not insert foreign objects around the lens.
- Don't touch the lens with fingers.
- Keep the camera away from drops and bumps, which may cause damage to the parts inside.
- Keep the camera away from high temperature and strong sunshine to avoid being damaged.
Maximizing Battery Life
If the battery reaches 0% while recording, the camera will save the file and power off. To maximize battery life, follow these guidelines when possible:
- Turn off the Wifi connection.
- Capture videos at lower frame rates and resolutions.
- Use Screen Saver setting.

Do not drop, disassemble, open, crush, bend, deform, puncture, shred, microwave, incinerate or paint the camera. Do not insert foreign objects into the camera. Do not use the camera if it has been damaged. For example, if cracked, punctured or harmed by water. Disassembling or puncturing the camera can cause an explosion or fire.
Mounting Your Camera
You can attach your camera to helmets, gear and equipment.

Documents / ResourcesDownload manual
Here you can download full pdf version of manual, it may contain additional safety instructions, warranty information, FCC rules, etc.
Advertisement


Need help?
Do you have a question about the Brave 4 Elite and is the answer not in the manual?
Questions and answers