
Related Manuals for anko CM5403E-SA


Summary of Contents for anko CM5403E-SA
- Page 1 ESPRESSO COFFEE MAKER INSTRUCTION MANUAL MODEL: CM5403E-SA Read this booklet thoroughly before using and save it for future reference...
-
Page 2: Important Safeguards
IMPORTANT SAFEGUARDS Please read the instruction manual before using this appliance and follow all the safety instructions to avoid damage and/or injury due to improper use. Read all instructions. Before using check that the voltage of wall outlet corresponds to rated voltage marked on the rating plate. -
Page 3: Know Your Coffee Maker
Scalding Hazard! Hot water/ hot steam escapes from the espresso machine during use. Parts of the espresso machine become very hot. Handle with care to avoid scalding: ⮚ Turn the steam controller clockwise all the way (“O” position) each time before switching ON the espresso machine. -
Page 4: Before The First Use
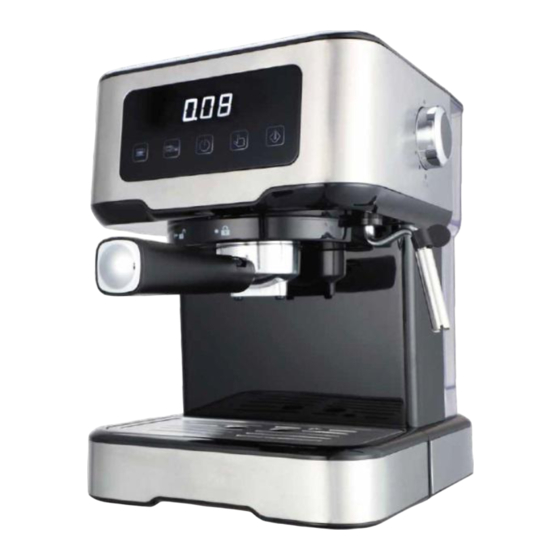
Control Panel BEFORE THE FIRST USE Remove all the plastic bags, packaging material on the Espresso Machine. Remove the stopper at bottom of water tank. Prior to initial use and when not used for a long time, allow the contents of approx. 2-3 cups of water to run through the machine without adding any coffee powder in the filter. -
Page 5: Brewing Espresso
Filling the Brewing Filter This machine includes 2 brewing filters: single shot and double shot filter. Use the provided measuring spoon to add ground coffee, 1 spoon is approximately 8-10g of ground coffee. Insert the preferred brewing filter into the filter holder. Align the lung of filter with the groove in filter holder, then slide in the filter (refer to Fig.1). - Page 6 Insert the holder into the appliance at the position of “ ” mark, make sure the tube on the funnel aligns with groove in the appliance. Turn anti-clockwise until the handle is aligned with the “ ” mark. IMPORTANT! you may need to turn the handle a little harder to make the holder stop at the right locking position.
- Page 7 Press the Manual button , the espresso will begin to flow into the cup and the timer will start counting up. Before the cup is full, press the Manual button again to stop the process. WARNING: Do not leave the machine unattended during use! Risk of burning! Parts of the espresso machine become very hot during operation.
-
Page 8: Frothing Milk
the desired espresso brew time, i.e. 30s (display shows 0.30). The machine will return to READY mode and the custom setting for 30s for 1-shot is now programmed in the machine. The preset 30s 1-shot brewing can now be activated by pressing the 1-Cup button ... - Page 9 4. Wait until the Steam indicator turns steady. Note: Prior to frothing milk, it is recommended to clean the steam nozzle. To do this, hold an empty large cup underneath the milk frother nozzle and turn on the steam controller. Wait for approx. 15 seconds, then close the steam controller.
-
Page 10: After Use
1. Place an empty large cup underneath the milk frother nozzle. 2. Turn ON the steam controller and wait for approx. 15seconds, then close the steam controller. 3. Wipe the nozzle with a clean damp cloth. 4. Detach the nozzle and wipe the milk frother with a clean damp cloth. -
Page 11: Risk Of Damage
SHORT-CIRCUIT HAZARD! Ensure that no water or other liquids enter into the housing. Always switch off the machine and disconnect from mains power before cleaning! RISK OF DAMAGE! Improper handling of the espresso machine may result in damage. Do not use any aggressive detergents, sharp or metallic cleaning implements, such as knives, hard spatulas and similar. - Page 12 Water is escaping from the Too much ground coffee in the Remove the filter holder and check the brewing filter, the filter holder coffee quantity. Do not exceed the side of the filter holder cannot be tightened completely. MAX marking in the brewing filter. There might be coffee grounds Remove the filter holder and clean all on the brewing filter rim or the...
- Page 13 12 Month Warranty Thank you for your purchase from Kmart. Kmart Australia Ltd warrants your new product to be free from defects in materials and workmanship for the period stated above, from the date of purchase, provided that the product is used in accordance with accompanying recommendations or instructions where provided.
Need help?
Do you have a question about the CM5403E-SA and is the answer not in the manual?
Questions and answers