
Related Manuals for anko CM5013-SA


Summary of Contents for anko CM5013-SA
- Page 1 ESPRESSO COFFEE MAKER INSTRUCTION MANUAL MODEL: CM5013-SA Read this booklet thoroughly before using and save it for future reference...
-
Page 2: Important Safeguards
IMPORTANT SAFEGUARDS Before using the electrical appliance, the following basic precautions should always be followed including the following: 1. Read all instructions. 2. Before using check that the voltage of wall outlet corresponds to rated voltage marked on the rating plate. 3. - Page 3 IMPORTANT! Caution should be taken when moving unit with hot liquids. 18. After use, before disconnecting the supply cord plug from mains power outlet socket turn all switches on the appliance to OFF. 19. This appliance is not intended for use by persons (including children) with reduced physical, sensory or mental capabilities, or lack of experience and knowledge, unless they have been given supervision or instructions concerning use of the appliance by a person responsible for their safety.
-
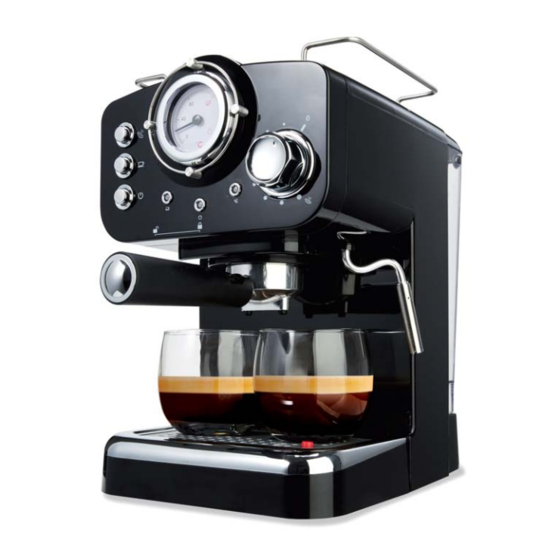
Page 4: Know Your Coffee Maker
KNOW YOUR COFFEE MAKER Storage shelf Water Tank Steam controller Handle Filter Blocker Coffee Spout Filter Holder Milk Frother Draining Rack Drip Tray Cleaning Display Measuring Spoon Small Brewing Filter Large Brewing Filter... -
Page 5: Control Panel
CONTROL PANEL Steam button: press Temperature indicator down to steam and up to stop Espresso brewing button: press down make coffee and Steam controller press again stop brewing ON/OFF button Steam pressure indicator Power indicator (red): When Espresso brewing indicator (yellow): When steam (green): When temperature is... - Page 6 correctly then fold the carrying handle downwards. 5. Insert the small or large brewing filter into the filter holder. DO NOT fill any espresso powder into the brewing filter for the first run-through. 6. Fit the filter holder into the espresso machine. Angled the lever towards to the left, then turn the lever to the right until it locks.
- Page 7 1. Insert the small or large brewing filter into the filter holder. Do not fill any espresso powder into the brewing filter yet. 2. Insert the filter holder into the espresso machine from underneath. For this, the lever must be angled towards the left (refer to Fig.
- Page 8 6. Compress the espresso powder using the tamper on the measuring spoon. • Add more espresso powder, if necessary, so that the brewing filter is filled up to the MAX mark. • Compress the espresso powder with the tamper again. •...
- Page 9 Prepare cappuccino / froth milk WARNING! Hot splashes may occur when frothing the milk. Always handle the milk frother with care. Ensure that the handle is correctly seated on the milk frother. A classic cappuccino is prepared with one espresso (approx. 20 ml) in one 150 ml cup, which is then filled up with frothed hot milk.
-
Page 10: After Use
18. After steam generation, let the espresso machine cool off for 5 minutes before preparing espresso again. Therefore, it is recommended to prepare the espresso first and then the milk froth. AFTER USE Empty drip tray The drip tray has a cleaning display (refer to Fig. 3). It is essential to remove and empty the drip tray prior to, or at the point this becomes visible. - Page 11 CLEANING WARNING! The espresso machine becomes hot during operation. You may burn yourself. Metal parts particularly remain hot for longer. Prior to cleaning, wait until the espresso machine has cooled down completely. Short-circuit hazard! Water, which has penetrated the housing, may cause a short-circuit. Never immerse the espresso machine in water or other liquids.
-
Page 12: Troubleshooting
Clean housing 1. Clean the water tank with a cloth or sponge and water on a regular basis. 2. Clean the draining rack and the drip tray in water. 3. Clean the housing with a slightly damp, non-abrasive cloth. Descale espresso machine When using hard, calcium-rich water, lime scale deposits occur sooner than with water containing less calcium. - Page 13 The espresso is not strong The ground coffee is ground too Use a finer grind of coffee. enough and not hot enough. coarsely. The ground coffee is not tamped Use more ground coffee and enough. press the ground coffee down further into the brewing filter with the tamper.
- Page 14 12 MONTH WARRANTY Thank you for your purchase from Kmart. Kmart Australia Ltd warrants your new product to be free from defects in materials and workmanship for the period stated above, from the date of purchase, provided that the product is used in accordance with accompanying recommendations or instructions where provided.
Need help?
Do you have a question about the CM5013-SA and is the answer not in the manual?
Questions and answers
For Anko-Cm5013-SA. I need a new filter holder and I need one large filter and one small filter. I thank you.