Sony Dream Machine ICF-C318 Operating Instructions
Fm/am clock radio
Hide thumbs
Also See for Dream Machine ICF-C318:
- User manual ,
- Operating instructions (2 pages) ,
- Specifications (2 pages)
Advertisement
Quick Links
2-899-361-31(1)
FM/AM Clock Radio
ICF-C318
Operating Instructions
Manual de instrucciones
Manual de Instruções (lado contrário)
使用说明书(背面)
Dream Machine is a trademark of Sony Corporation.
Dream Machine es marca comercial de Sony Corporation.
Dream Machine é marca registada de Sony Corporation.
Dream Machine(梦乡机)是 Sony 公司的注册商标。
© 2006 Sony Corporation
Printed in China
FM wire antenna
(Except Central America
CLOCK
DST
model)
Antena monofilar de FM
ALARM
ALARM
A
B
BRIGHTNESS
(excepto en el modelo
para América central)
SLEEP
RADIO
BUZZER
BUZZER
ON
OFF
RADIO
RADIO
AC power cord
OFF
OFF
ALARM RESET
Cable de
alimentación de ca
SNOOZE
DATE SLEEP OFF
/
HIGH
LOW
ALARM VOLUME
ALARM
TIME SET
* There is a tactile dot beside
Battery
VOLUME to show the direction to
compartment
turn up the volume.
Compartimiento
* Existe un punto táctil junto al
de la pila
control VOLUME que muestra la
dirección para subir el volumen.
AM FM
DST
ALARM
BAND
A
AM
ALARM
B
PM
TIME SET
TUNING
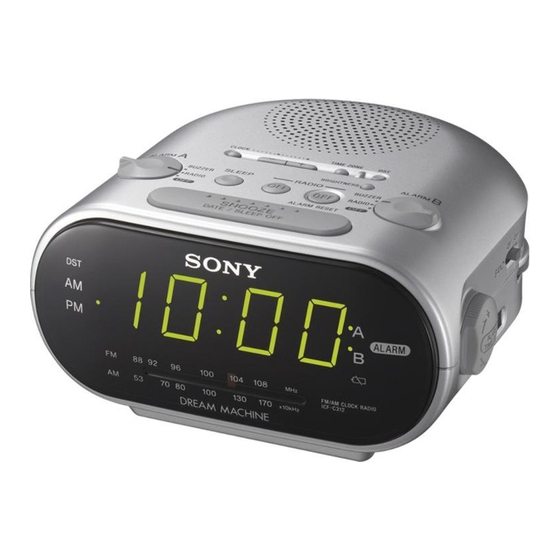
Display window* (12-hour system)
Visualización en pantalla* (sistema de 12 horas)
* The display differs depending on your country.
* La visualización varía en función del país.
A
1
2
3
PUSH
Features
• Dual alarm FM/AM Clock radio.
• Various types of alarms — radio and buzzer.
• DST button to adjust Daylight Saving Time/
Summer time.
• Date button to display month, day and year.
English
• Brightness control (High/Middle/Low).
• Supplied CR2032 battery for backup power source
to keep the clock and alarm operating during a
power interruption.
WARNING
• Extendable snooze — snooze time can be extended
from 10 to 60 minutes in maximum every time you
To reduce the risk of fire or electric shock, do
use.
not expose this apparatus to rain or moisture.
To avoid electrical shock, do not open the cabinet.
About the backup
Refer servicing to qualified personnel only.
Do not install the appliance in a confined space, such
battery
as a bookcase or built-in cabinet.
To reduce the risk of fire or electric shock, do not
To keep good time, as backup power source, this unit
place objects filled with liquids, such as vases, on the
needs one CR2032 battery (supplied), in addition to
apparatus.
the house current.
Connect the apparatus to an easily accessible AC
The battery keeps the clock and the alarm operating in
outlet. Should you notice an abnormality in the
the event of a power interruption.
apparatus, disconnect the main plug from the AC
outlet immediately.
Knowing when to replace
the battery
WARNING
Battery may explode if mistreated.
When the battery becomes weak, "E" indicator
Do not recharge, disassemble or dispose of in fire.
appears in the display.
In the event of a power interruption when the battery
is weak, current time and alarm functions will be
initialized.
Installing and replacing the
Setting the alarm
backup battery
1
Keep the AC plug connected to the AC
The dual alarm function allows you to set two alarm
outlet, remove the screw that secures the
programs (ALARM A and ALARM B).
The alarm time can be set for each program and the
battery compartment at the bottom of the
alarm sound is selectable from RADIO or BUZZER.
unit using a screwdriver, and remove the
battery compartment. (See Fig. A-1)
Notes
2
Insert a new battery in the battery
• Before setting the alarm, make sure to set the clock
(see "Setting the clock and date").
compartment with the e side facing up.
• The factory setting alarm time is "PM 12:00" or
To remove the battery from the battery
"12:00".
compartment, push it out from the side marked
• To set the radio alarm, first tune in to a station and
PUSH. (See Fig. A-2)
adjust the volume (see "Operating the radio").
3
Insert the battery compartment back into the
• When you set the buzzer alarm, set ALARM
unit and secure it with the screw.
VOLUME to LOW or HIGH.
(See Fig. A-3)
4
When you are replacing the battery, press
To set the alarm time
RADIO ON to turn "E" indicator off in
1
the display.
Note
If you replace the battery, do not disconnect AC plug
from AC outlet.
Otherwise, current time and alarm will be initialized.
2
NOTES ON LITHIUM BATTERY
• Keep the lithium battery out of the reach of
children.
Should the battery be swallowed, immediately
consult a doctor.
• Wipe the battery with a dry cloth to assure a good
contact.
• Be sure to observe the correct polarity when
installing the battery.
• Do not hold the battery with metallic tweezers,
otherwise a short-circuit may occur.
• Do not expose the battery to excessive heat such as
direct sunlight, fire or the like.
CAUTION
Danger of explosion if battery is incorrectly replaced.
Replace only with the same or equivalent type
recommended by the equipment manufacturer.
Battery Warning
When the unit will be left unplugged for a long time,
• While ALARM A (or B) is set to RADIO or
remove the battery to avoid undue battery discharge
BUZZER, the alarm time setting can be changed by
and damage to the unit from battery leakage.
ALARM TIME SET A (or B).
One turn of ALARM TIME SET A (or B) displays
the alarm time for about 4 seconds. By turning
Setting the clock
ALARM TIME SET A (or B) while the alarm time
appears in the display, the alarm time will be
and date
changed.
• The
Set the clock and date according to the following
while:
steps.
– The alarm time appears in the display.
1
Plug in the unit.
– The alarm sounds.
– Snooze function is turned on.
The display will flash "AM 12:00" or "0:00".
2
• The alarm time setting cannot be changed if
Press CLOCK for more than 2 seconds.
ALARM A (or B) is set to OFF. If ALARM TIME
You will hear a beep and the year will start to
SET A (or B) is turned, "OFF" appears in the
flash in the display.
display for about 0.5 seconds.
3
Press + or – until the correct year appears
• If a second alarm sounds during a first (or the
in the display.
snooze function is active), the second alarm takes
4
Press CLOCK.
priority.
5
Repeat steps 3 and 4 to set the month, day
• CLOCK and DST are unavailable while the alarm
sounds or snooze function is turned on.
and time.
• The ALARM VOLUME setting works together with
After setting the time, two short beep sound and
the beep sound volume. If the ALARM VOLUME is
the clock starts from 0 seconds.
set to LOW, the beep sound will be also set to low.
• Pressing and holding + or – changes the year, month
• If the same alarm time is set for both alarm
or day rapidly.
(ALARM A and B), the ALARM A takes priority.
When setting the current time, time changes rapidly
by 1 minute-increments up to 10 minutes, and then
To doze for a few more minutes
by 10 minute-increments.
Press SNOOZE/DATE/SLEEP OFF.
• The clock system varies depending on the model
The sound turns off but will automatically come on
you own.
again after about 10 minutes. Each time you press
12-hour system: "AM 12:00" = midnight
SNOOZE/DATE/SLEEP OFF, the snooze time
24-hour system: "0:00" = midnight
changes as follows:
• While setting the clock, you must perform each step
within 65 seconds, or the clock setting mode will be
cancelled.
The maximum length of the snooze time is
To display the year and date
60 minutes.
The display shows the snooze time for about
4 seconds and returns to show the current time. When
Press SNOOZE/DATE/SLEEP OFF once
you press SNOOZE/DATE/SLEEP OFF after the
for the date, and within about 3 seconds press it
current time appears, the snooze time starts from 10
again for the year.
minutes again.
The display shows the date or year for about 3
seconds and then changes back to the current time.
To stop the Alarm
If you connect the AC plug to AC outlet while this
Press RADIO OFF/ALARM RESET to
unit is powered from the backup power source, the
current date and time appears in the following order.
turn off the alarm.
(It is same as when the unit is powered on after the
The alarm will come on again at the same time the
power failure.)
next day.
"month and date" (about 1 second) t "year" (about 1
If RADIO OFF/ALARM RESET is not pressed, the
second) t "current time"
alarm sounds continuously for about 60 minutes, and
then it will be stop automatically.
To change the display to the
To deactivate the Alarm
daylight saving time (summer
Turn ALARM A (or B) to OFF.
time) indication
ALARM
Press DST.
Note on alarm in the event of a power
DST indicator appears in the display and the time
interruption
indication changes to the daylight saving time
VOLUME
In the event of a power interruption, alarm functions
(summer time).
work until the battery is empty. But following
To deactivate the daylight saving time (summer time)
functions are different:
adjustment, press DST again.
• Display will disappear.
• When the alarm sound is set to RADIO, it will
change to BUZZER automatically.
Setting the
• If the power returns while the alarm sounds, the
alarm sounds continuously for about 60 minutes
brightness of the
when the power returns.
display
• The alarm buzzes for about one minute, stops
temporarily, and will buzz again after about five
minutes if neither SNOOZE/DATE/SLEEP OFF
Three levels of brightness are available by
or RADIO OFF/ALARM RESET are pressed
pressing BRIGHTNESS.
while the alarm is buzzing.
If the alarm buzzes and stops (either automatically
High (default) t Middle t Low
after 1 minute or by pressing SNOOZE/DATE/
SLEEP OFF) five times, the alarm is automatically
reset in the case of a power interruption. The alarm
will buzz for 30 minutes after power is resumed if
Operating the radio
the power is resumed within 60 minutes from the
alarm time.
1
• If you press SNOOZE/DATE/SLEEP OFF while
Press RADIO ON to turn on the radio.
the alarm sounds, snooze time is set to 10 minutes.
2
Adjust volume using VOLUME.
During a power failure, snooze time cannot be set to
3
Select BAND.
more than 10 minutes.
4
Tune in to a station using TUNING.
• If "E" indicator appears in the display, the alarm
will not work in the event of power interruption.
To turn off the radio
Replace the battery if "E" indicator appears.
Press RADIO OFF/ALARM RESET.
Setting the sleep
Improving the
timer
reception
You can fall asleep to the radio using the built-in
sleep timer that turns off the radio automatically after
FM:
a preset duration.
Model for Central America:
The AC power cord functions as an FM antenna.
Press SLEEP.
Extend the AC power cord fully to increase
The radio turns on. You can set the sleep timer to
reception sensitivity.
durations of 90, 60, 30, or 15 minutes. Each press
Model for other countries/ regions:
changes the display as follows:
Extend the FM wire antenna fully to increase
reception sensitivity.
Two short beeps sound when the display returns to
"90".
The radio will play for the duration you set, then shut
off.
To turn off the radio before the
AM:
preset time
Rotate the unit horizontally for optimum reception.
A ferrite bar AM antenna is built-in to the unit.
Press RADIO OFF/ALARM RESET or
SNOOZE/DATE/SLEEP OFF.
To use both sleep timer and
alarm
You can fall asleep to the radio and also be awakened
by the radio or buzzer alarm at the preset time.
1
Do not operate the unit over a steel desk or metal
surface, as this may lead to interference of reception.
2
Troubleshooting
Should any problem occur with the unit, make the
following simple checks to determine whether or not
servicing is required.
If the problem persists, consult your nearest Sony dealer.
The clock flashes "AM 12:00" or "0:00" due to
a power interruption.
• The battery is low. Replace the battery. Remove the
old battery and install a new one.
The radio or buzzer alarm does not sound at
the preset alarm time.
• Has the desired radio or buzzer alarm been
activated? (i.e., Does the
A (or B) indicator
ALARM
light up?)
The radio alarm is activated but no sound
comes on at the preset alarm time.
• Has VOLUME been adjusted?
Set ALARM A (or B) to the desired
alarm sound (RADIO or BUZZER).
Precautions
The alarm time appears for a few seconds, and
then the
ALARM
A (or B) indicator lights up in the
display. (It does not appear when the switch is set
• Operate the unit on the power source specified in
to OFF.)
"Specifications".
Turn ALARM TIME SET A (or B) +
• The nameplate indicating operating voltage, etc. is
or – to set the desired time.
located on the bottom of the unit.
• To disconnect the power cord (mains lead), pull it
Each turn of ALARM TIME SET A (or B) + or –
out by the plug, not the cord.
changes the indication by 1 minute. If you turn and
• The unit is not disconnected from the AC power
hold ALARM TIME SET A (or B) + or –, the
source (mains) as long as it is connected to the wall
alarm time goes forward (or backward) by 1 minute
outlet, even if the unit itself has been turned off.
up to 10 minutes, and then by 10 minutes
• Allow adequate air circulation to prevent internal
increments. While setting the alarm time, the
ALARM
heat build-up. Do not place the unit on a surface (a
A (or B) indicator flashes in the display. The
rug, blanket, etc.) or near materials (a curtain) that
following example is when setting the ALARM A.
might block the ventilation holes.
ALARM
• Should any solid object or liquid fall into the unit,
A
unplug the unit and have it checked by a qualified
personnel before operating it any further.
B
• To clean the casing, use a soft cloth dampened with
a mild detergent solution.
When the alarm time setting operation is
• Do not connect the antenna lead to the external
complete, the display returns to the clock after a
antenna.
few seconds and the
ALARM
A (or B) indicator
• To reduce the risk of fire, do not cover the
changes from flashing to fully lit.
ventilation of the apparatus with newspapers,
tablecloths, curtains, etc. And do not place lighted
candles on the apparatus.
If you have any questions or problems
concerning your unit, please consult your
nearest Sony dealer.
Specifications
A (or B) indicator flashes in the display
ALARM
Time display
Model for Central America: 12-hour System
Model for other countries/ regions: 24-hour system
Frequency range
Band
Frequency
FM
87.5 – 108 MHz
AM
530 – 1 710 kHz
Speaker
Approx. 6.6 cm (2
5
/
inches) dia., 8
8
Power output
150 mW (at 10% harmonic distortion)
Power requirements
Model for Central America: 120 V AC, 60 Hz
Model for other countries/ regions: 230 – 240 V
AC, 50 Hz
For power backup: 3 V DC, one CR2032 battery
Dimensions
Approx. 155 82.8
151.5 mm (w/h/d)
1
3
(6
/
3
/
6 inches) incl. projecting parts and
8
8
controls
Mass
Approx. 482 g (1 lb 1 oz) incl. CR2032 battery
Design and specifications are subject to change
without notice.
Español
ADVERTENCIA
Para reducir el riesgo de incendios o
A (or B) indicator disappears from the display.
electrocución, no exponga el aparato a la
lluvia ni a la humedad.
Para evitar descargas eléctricas, no abra la caja. En
caso de averías, solicite los servicios de personal
cualificado.
No sitúe el aparato en un espacio cerrado, como una
estantería o un armario empotrado.
Para reducir el riesgo de incendio o sacudida eléctrica,
no ponga objetos que contengan líquido, tal como
floreros, encima del aparato.
Conecte la unidad a una toma de corriente de ca de
fácil acceso. Si detecta alguna anomalía en la unidad,
desconecte inmediatamente el enchufe principal de la
toma de corriente de ca.
ADVERTENCIA
La pila puede explotar si se utiliza de forma
incorrecta.
No la recargue, desmonte ni arroje al fuego.
Características
• Radio despertador con alarma doble FM/AM.
• Varios tipos de alarmas: radio y pitido.
• Botón DST para ajustar el horario de ahorro de
energía/horario de verano.
• Botón de fecha para visualizar el mes, el día y el
año.
• Control de luminosidad (alta/media/baja).
• Pila CR2032 suministrada como fuente de
alimentación auxiliar para mantener el reloj y la
alarma en funcionamiento en caso de cortes del
suministro eléctrico.
• Repetición de alarma ampliable: el tiempo de
repetición de la alarma puede ampliarse de 10 a 60
minutos como máximo cada vez que utilice esta
función.
Acerca de la pila
auxiliar
Para mantener la hora correcta, esta unidad requiere
una pila CR2032 (suministrada), como fuente de
alimentación auxiliar, además de la corriente
doméstica.
La pila mantiene el reloj y la alarma en
funcionamiento en el caso de producirse un corte del
suministro eléctrico.
Cuándo es necesario
cambiar la pila
Cuando la energía de la pila comienza a agotarse, el
indicador "E" aparece en la pantalla.
En el caso de producirse un corte del suministro
eléctrico cuando la pila dispone de poca energía, las
funciones de hora actual y alarma se reiniciarán.
Instalación y sustitución de
la pila auxiliar
Set the alarm. (See "Setting the alarm".)
1
Mantenga el enchufe de ca conectado a la
Set the sleep timer. (See "Setting the sleep
toma de corriente de ca, retire el tornillo
timer".)
que fija el compartimiento de la pila de la
parte inferior de la unidad con un
destornillador y extraiga el compartimiento
de la pila. (Consulte la figura A-1)
2
Inserte una nueva pila en el compartimiento
con el lado e mirando hacia arriba.
Para extraer la pila del compartimiento, presione
el lado con la marca PUSH. (Consulte la figura
A-2)
3
Inserte de nuevo el compartimiento de la
Ajuste de la alarma
pila en la unidad y fíjelo con el tornillo.
(Consulte la figura A-3)
La función de alarma doble permite ajustar dos
4
Cuando sustituya la pila, presione RADIO
programas de alarma (ALARM A y ALARM B).
ON para que desaparezca el indicador
Puede ajustar la hora de la alarma para cada programa
"E" de la pantalla.
y puede elegir el sonido de la alarma entre RADIO o
BUZZER.
Nota
Notas
Si cambia la pila, no desconecte el enchufe de ca de la
• Antes de ajustar la alarma, asegúrese de ajustar el
toma de corriente de ca.
reloj (consulte "Ajuste del reloj y la fecha").
Si lo hace, la hora actual y la alarma se reiniciarán.
• La hora de alarma predeterminada es "PM 12:00" o
NOTAS SOBRE LA PILA DE LITIO
"12:00".
• Mantenga la pila de litio fuera del alcance de los
• Para ajustar la alarma de la radio, primero sintonice
niños.
una emisora y ajuste el volumen (consulte
"Funcionamiento de la radio").
Si la pila se ingiriese accidentalmente, comuníquese
de inmediato con un médico.
• Cuando ajuste la alarma de pitido, ajuste ALARM
• Limpie la pila con un paño seco para garantizar un
VOLUME en LOW o HIGH.
contacto óptimo.
• Asegúrese de tener en cuenta la polaridad correcta
Para ajustar la hora de la
cuando instale la pila.
alarma
• No sujete la pila con pinzas metálicas, ya podría
producirse un cortocircuito.
1
Ajuste ALARM A (o B) en el sonido de
• No exponga la pila a fuentes de calor excesivo como
alarma deseado (RADIO o BUZZER).
luz solar directa, fuego o similar.
La hora de la alarma aparece durante unos
segundos y, a continuación, el indicador
PRECAUCIÓN
(o B) se ilumina en la pantalla (no aparece cuando
Si la pila se sustituye incorrectamente, existe peligro
el interruptor está ajustado en la posición OFF).
de explosión. Sustitúyala únicamente por otra del
2
Ajuste ALARM TIME SET A (o B) +
mismo tipo o equivalente recomendada por el
fabricante.
o – para ajustar la hora deseada.
Cada vez que se gira ALARM TIME SET A (o
Advertencia sobre la pila
B) + o –, la indicación cambia 1 minuto. Si
Si va a dejar la unidad desconectada durante un
mantiene girado ALARM TIME SET A (o B) +
período de tiempo prolongado, extraiga la pila para
o –, la hora de la alarma avanzará (o retrocederá)
evitar que se descargue de manera indebida o que se
en intervalos de 1 minuto hasta 10 minutos y,
produzcan daños por fugas de ésta.
posteriormente, en intervalos de 10 minutos.
Mientras ajuste la hora de alarma, el indicador
ALARM
A (o B) parpadeará en la pantalla. El
Ajuste del reloj y la
siguiente ejemplo representa el ajuste de ALARM
A.
fecha
ALARM
Ajuste el reloj y la fecha de acuerdo con los pasos
A
siguientes.
B
1
Conecte la unidad.
En la pantalla parpadeará "AM 12:00" o "0:00".
Cuando el ajuste de la hora de alarma se
2
Presione CLOCK durante más de 2
completa, la pantalla vuelve al reloj después de
segundos.
unos segundos y el indicador
Se escuchará un pitido y el año comenzará a
de parpadear a permanecer iluminado.
parpadear en la pantalla.
• Mientras ALARM A (o B) está ajustado en RADIO
3
Presione + o – hasta que aparezca el año
o BUZZER, el ajuste de la hora de la alarma puede
correcto en la pantalla.
cambiarse con ALARM TIME SET A (o B).
4
Presione CLOCK.
Un giro de ALARM TIME SET A (o B) muestra la
5
Repita los pasos 3 y 4 para ajustar el mes,
hora de la alarma durante unos 4 segundos. Si gira
ALARM TIME SET A (o B) mientras la hora de la
el día y la hora.
alarma aparece en la pantalla, la hora de la alarma
Después de ajustar la hora, sonarán dos pitidos
cambiará.
cortos y el reloj comenzará a funcionar desde 0
segundos.
• El indicador
A (o B) parpadea en la pantalla
ALARM
mientras:
• Mantenga pulsado + o – para cambiar el año, el mes
– Se muestra la hora de la alarma.
o el día rápidamente.
– Suena la alarma.
Cuando ajuste la hora actual, la hora cambiará
– La función de repetición de alarma está activada.
rápidamente en incrementos de 1 minuto hasta 10
• El ajuste de la hora de la alarma no se puede
minutos y, posteriormente, en intervalos de 10
cambiar si ALARM A (o B) está ajustado en OFF.
minutos.
Si gira ALARM TIME SET A (o B), "OFF"
• El sistema del reloj varía en función del modelo que
aparece en la pantalla durante unos 0,5 segundos.
ha adquirido.
• Si suena una segunda alarma al mismo tiempo que
Sistema de 12 horas: "AM 12:00" = medianoche
la primera (o la función de repetición de alarma está
activada), tendrá prioridad la segunda alarma.
Sistema de 24 horas: "0:00" = medianoche
• Cuando ajuste el reloj, debe llevar a cabo cada paso
• CLOCK y DST no están disponibles mientras
en un lapso de 65 segundos, ya que de lo contrario,
suena la alarma o la función de repetición de alarma
está activada.
el modo de ajuste del reloj se cancelará.
• El ajuste de ALARM VOLUME funciona junto con
el volumen de los pitidos. Si ALARM VOLUME
Para visualizar el año y la fecha
está ajustado en LOW, el sonido de los pitidos
también se ajustará en un volumen bajo.
Presione SNOOZE/DATE/SLEEP OFF
• Si se ajusta la misma hora para las dos alarmas
una vez para visualizar la fecha, y presiónelo
(ALARM A y B), tendrá prioridad ALARM A.
de nuevo antes de que transcurran unos 3
segundos para visualizar el año.
Para dormir unos minutos más
La pantalla muestra la fecha o el año durante unos 3
Presione SNOOZE/DATE/SLEEP OFF.
segundos y, a continuación, vuelve a mostrar la hora
actual.
El sonido se desactiva, pero volverá a sonar
Si conecta el enchufe de ca a la toma de corriente de
automáticamente después de unos 10 minutos. Cada
ca mientras la unidad recibe alimentación de la fuente
vez que presione SNOOZE/DATE/SLEEP OFF, la
de alimentación auxiliar, la fecha y la hora actuales
hora de repetición de la alarma cambiará de la
aparecerán en el siguiente orden (del mismo modo
siguiente forma:
que al conectar la unidad tras un corte del suministro
eléctrico).
"mes y fecha" (durante 1 segundo aprox.) t "año"
La duración máxima de la hora de repetición de
(durante 1 segundo aprox.) t "hora"
alarma es de 60 minutos.
La pantalla muestra la hora de repetición de alarma
Para cambiar la visualización a
durante unos 4 segundos y vuelve a mostrar la hora
actual. Al presionar SNOOZE/DATE/SLEEP OFF
la indicación del horario de
después de que aparezca la hora actual, la hora de
ahorro de energía (horario de
repetición de alarma comienza otra vez desde los 10
verano)
minutos.
Presione DST.
Para detener la alarma
El indicador DST aparece en la pantalla y la
Presione RADIO OFF/ALARM RESET
indicación de hora cambia al horario de ahorro de
para desactivar la alarma.
energía (horario de verano).
Para desactivar el ajuste del horario de ahorro de
La alarma volverá a sonar a la misma hora el día
energía (horario de verano), presione DST de nuevo.
siguiente.
Si no presiona RADIO OFF/ALARM RESET, la
alarma sonará continuamente durante unos 60 minutos
y, a continuación, se detendrá automáticamente.
Ajuste del brillo de
Para desactivar la alarma
la pantalla
Gire ALARM A (o B) hasta la posición
Si presiona BRIGHTNESS, dispondrá de
OFF.
tres niveles de luminosidad.
El indicador
ALARM
A (o B) desaparece de la pantalla.
Alta (Predeterminado) t Media t Baja
Nota sobre la alarma en el caso de producirse
un corte del suministro eléctrico.
En el caso de producirse un corte del suministro
eléctrico, las funciones de alarma estarán operativas
hasta que se agote la pila. No obstante, las funciones
Funcionamiento de
siguientes serán diferentes:
• La pantalla se apagará.
la radio
• Cuando el sonido de la alarma esté ajustado en
RADIO, cambiará automáticamente a BUZZER.
1
Presione RADIO ON para encender la
• Si la alimentación se restablece mientras la alarma
radio.
está sonando, ésta sonará de forma continua durante
2
Ajuste el volumen mediante VOLUME.
60 minutos aproximadamente a partir de ese
momento.
3
Seleccione BAND.
4
• La alarma emitirá un pitido durante un minuto
Sintonice una emisora mediante
aproximadamente, se detendrá temporalmente y
TUNING.
volverá a sonar transcurridos unos cinco minutos si
no se presiona SNOOZE/DATE/SLEEP OFF o
Para apagar la radio
RADIO OFF/ALARM RESET mientras suena la
alarma.
Presione RADIO OFF/ALARM RESET.
Si la alarma emite un pitido y se detiene (ya sea
automáticamente transcurrido un minuto o al
presionar SNOOZE/DATE/SLEEP OFF) cinco
Mejora de la
veces, ésta se reiniciará de manera automática si se
produce un corte del suministro eléctrico. La alarma
recepción
emitirá un pitido durante unos 30 minutos cuando se
restablezca la alimentación, si ésta se restablece
FM:
antes de que transcurran 60 minutos desde la hora
Modelo para América central:
de la alarma.
El cable de alimentación de ca funciona como una
• Si presiona SNOOZE/DATE/SLEEP OFF
antena de FM. Extienda el cable de alimentación
mientras suena la alarma, la hora de repetición de
de ca completamente para mejorar la sensibilidad
alarma se ajustará en 10 minutos. Durante un fallo
de la recepción.
del suministro eléctrico, la hora de repetición de la
Modelo para otros países y regiones:
alarma no puede ajustarse en más de 10 minutos.
Extienda la antena monofilar de FM
• Si aparece el indicador "E" en la pantalla, la
completamente para mejorar la sensibilidad de la
alarma no funcionará en el caso de producirse un
recepción.
corte del suministro eléctrico. Sustituya la pila si
aparece el indicador "E".
Ajuste del
temporizador
AM:
Gire la unidad horizontalmente para obtener una
Disfrute quedándose dormido mientras escucha la
recepción óptima. La unidad cuenta con una antena
radio gracias al temporizador incorporado que apaga
incorporada de AM de barra de ferrita.
la radio de manera automática después de un tiempo
preajustado.
Presione SLEEP.
La radio se enciende. Puede ajustar el temporizador en
90, 60, 30 ó 15 minutos. Cada vez que presione el
botón, la indicación cambia de la forma siguiente:
No utilice la unidad sobre una mesa de acero o
Sonarán dos pitidos cortos cuando la indicación
superficie metálica, ya que podrían producirse
regrese a "90".
interferencias en la recepción.
La radio sonará durante el tiempo que haya
establecido y, a continuación, se apagará.
Para apagar la radio antes de la
hora preajustada
Presione RADIO OFF/ALARM RESET o
SNOOZE/DATE/SLEEP OFF.
Para utilizar el temporizador y
la alarma
Puede quedarse dormido mientras escucha la radio y
despertarse con la alarma de la radio o el pitido a la
hora preajustada.
1
Ajuste la alarma (consulte "Ajuste de la
alarma").
2
Ajuste el temporizador (consulte "Ajuste
del temporizador").
Solución de
problemas
Si se produce cualquier problema con la unidad,
realice las siguientes comprobaciones para determinar
si necesita o no servicio técnico.
Si el problema persiste, consulte al distribuidor Sony
más cercano.
En el reloj, parpadea "AM 12:00" o "0:00"
debido a un corte del suministro eléctrico.
• La pila dispone de poca energía. Cámbiela. Extraiga
la pila usada e instale una nueva.
A
ALARM
La alarma de radio o de pitido no suena a la
hora preajustada.
• ¿Ha activado la alarma de radio o pitido deseada?
(Es decir, ¿se enciende el indicador
ALARM
A (o
B)?)
La alarma de la radio está activada, pero no
suena a la hora preajustada.
• ¿Ha ajustado el control VOLUME?
Precauciones
• Opere la unidad con la fuente de alimentación que
se indica en "Especificaciones".
• La placa de características donde se indica el voltaje
de funcionamiento, etc., se encuentra en la parte
inferior de la unidad.
• Para desconectar el cable de alimentación (cable de
corriente), tire del enchufe, nunca del cable.
• La unidad no se desconecta de la fuente de
alimentación de ca mientras está conectada a la
toma de pared, aunque esté apagada.
• Permita una ventilación adecuada para evitar que se
ALARM
A (o B) pasa
produzca recalentamiento interno en la unidad. No
coloque la unidad sobre una superficie (alfombra,
manta, etc.) ni cerca de materiales (cortinas) que
puedan bloquear los orificios de ventilación.
• Si se introduce algún objeto sólido o líquido en la
unidad, desenchúfela y hágala revisar por personal
especializado antes de volver a utilizarla.
• Limpie el aparato con un paño suave ligeramente
humedecido con una solución de detergente poco
concentrada.
• No conecte el cable de la antena directamente a la
antena externa.
• Para reducir el riesgo de incendio, no cubra los
orificios de ventilación de la unidad con periódicos,
manteles, cortinas u objetos similares. No coloque
velas encendidas sobre la unidad.
Si tiene alguna duda o experimenta algún
problema con respecto a la unidad, consulte
al distribuidor Sony más cercano.
Especificaciones
Visualización horaria
Modelo para América central: sistema de 12 horas
Modelo para otros países y regiones: sistema de
24 horas
Gama de frecuencias
Banda
Frecuencia
FM
87,5 – 108 MHz
AM
530 – 1 710 kHz
Altavoz
Aprox. 6,6 cm, 8
Salida de potencia
150 mW (al 10% de distorsión armónica)
Requisitos de alimentación
Modelo para América central: ca de 120 V , 60 Hz
Modelo para otros países y regiones: ca de 230 –
240 V, 50 Hz
Para la fuente de alimentación de auxiliar: cc de 3
V, una pila CR2032
Dimensiones
Aprox. 155
82,8 151,5 mm (an/al/prf)
incluyendo partes y controles salientes
Masa
Aprox. 482 g. incluida la pila CR2032
El diseño y las especificaciones están sujetos a
cambios sin previo aviso.
Advertisement

Related Manuals for Sony Dream Machine ICF-C318


Summary of Contents for Sony Dream Machine ICF-C318
- Page 1 The alarm time can be set for each program and the servicing is required. alarm sound is selectable from RADIO or BUZZER. If the problem persists, consult your nearest Sony dealer. The clock flashes “AM 12:00” or “0:00” due to Notes a power interruption.
- Page 2 定。 (参见图A-3) manutenção é necessária. Se o problema persistir, consulte o distribuidor mais 更换电池后,按下RADIO ON,使显示 próximo da Sony. 器上的“E”指示消失。 O relógio pisca como “AM 12:00” ou “0:00” 注 devido a uma falha na energia.