Table of Contents
Advertisement
Quick Links
OWNER'S & INSTALLATION MANUAL
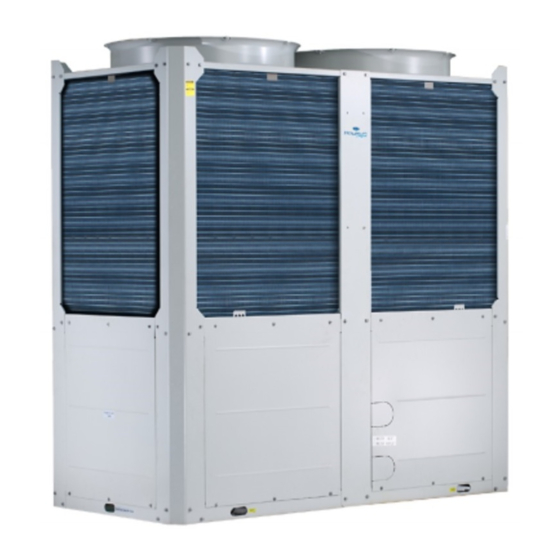
New Modular Full Dc Inverter Chillers HT
KEM-HT-65 DRS5
KEM-HT-110 DRS5
Thank you very much for purchasing our product,
Before using your unit , please read this manual carefully and keep it for future reference.
The figure shown in this manual is for reference only and may be slightly different from the actual
product.
Advertisement
Table of Contents

Related Manuals for Kaysun KEM-HT-65 DRS5


Summary of Contents for Kaysun KEM-HT-65 DRS5
- Page 1 OWNER'S & INSTALLATION MANUAL New Modular Full Dc Inverter Chillers HT KEM-HT-65 DRS5 KEM-HT-110 DRS5 Thank you very much for purchasing our product, Before using your unit , please read this manual carefully and keep it for future reference. The figure shown in this manual is for reference only and may be slightly different from the actual...
-
Page 2: Table Of Contents
CONTENTS ACCESSORIES ........................01 1 INTRODUCTION • 1.1 Use conditions of the unit ....................01 2 SAFETY CONSIDERATION ................... 02 3 BEFORE INSTALLATION • 3.1 Handling of the unit ......................04 4 IMPORTANT INFORMATION ON REFRIGERANT ..........05 5 SELECTION OF INSTALLATION SITE .............. - Page 3 11 MAINTENANCE AND UPKEEP • 11.1 Failure information and code ..................29 • 11.2 Digital display of main board ..................31 • 11.3 Care and maintenance ....................31 • 11.4 Removing scale ......................31 • 11.5 Winter shutdown ......................31 •...
-
Page 4: Accessories
ACCESSORIES Temperature testing components Installation manual of Unit Installation & Operation Manual Transformer of total water outlet wired controller Quantity Shape Purpose Use for installation (only need for setting the main module) 1 INTRODUCTION 1.1 Use conditions of the unit 1) The standard voltage of power supply is 380-415V 3N~50Hz, the minimum allowable voltage is 342V, and the maximum voltage is 456V. -
Page 5: Safety Consideration
2. SAFETY CONSIDERATION The precautions listed here are divided into the following types.They are quite important, so be sure to follow them carefully. Meanings of DANGER, WARNING, CAUTION and NOTE symbols. INFORMATION • Read these instructions carefully before installation. Keep this manual in a handy for future peference. •... - Page 6 WARNING • Servicing shall only be performed as recommended by the equipment manufacturer. Maintenance and repair requiring the assistance of other skilled personnel shall be carried out under the supervision of the person competent in the use of flammable refrigerants. •...
-
Page 7: Before Installation
CAUTION • Do not install the unit in the following places: - Where there is mist of mineral oil, oil spray or vapors. Plastic parts may deteriorate, and cause possible loose or water to leak. - Where corrosive gases (such as sulphurous acid gas) are produced. Where corrosion of copper pipes or soldered parts may cause refrigerant leakage. -
Page 8: Important Information On Refrigerant
2) Lifting: each lifting rope (belt) should be able to bear 4 times the weight of the unit. Check the lifting hook and ensure that it is firmly attached to the unit. To avoid damages to the unit, a protective block made of wood , cloth or hard paper should be placed between the unit and rope when lifting, and its thickness should be 50mm or more. -
Page 9: Precautions On Installation
6 PRECAUTIONS ON INSTALLATION 6.1 Outline dimensional drawing Left view Front view Top view Fig. 6-1 Outline dimensional Table 6-1 Model 65KW 110KW 2000 2220 1135 1770 2300 NOTE After installing the spring damper, the total height of the unit will increase by 135mm approximately. -
Page 10: Requirements Of Arrangement Space Of The Unit
6.2 Requirements of arrangement space of the unit 1) To ensure adequate airflow entering the condenser, the influence of descending airflow caused by the high-rise buildings around upon the unit should be taken into account when installing the unit. 2) If the unit is installed where the flowing speed of air is high, such as on the exposed roof, the measures including sunk fence and Persian blinds can be taken, to prevent the turbulent flow from disturbing the air entering the unit. -
Page 11: Installation Foundation
6.3 Installation foundation (unit: mm) 6.3.1 Base structure Outdoor unit base structure design should take account of the Inlet and outlet Electric following considerations: pipe side control box side 1) A solid base prevents excess vibration and noise. Outdoor Drainage unit bases should be constructed on solid ground or on channel structures of sufficient strength to support the units’... -
Page 12: Installation Of Device To Prevent Snow Build-Up And Strong Breeze
6.5.1 Measures used to prevent problems Anchor bolt caused by snow 1) Measures to prevent build-up of snow Ferrol Damping The base height should be as least the same as the predicted device snow depth in the local area. Outdoor Fig. -
Page 13: Connection Drawing Of Pipeline System
7 CONNECTION DRAWING OF PIPELINE SYSTEM This is the water system of standard module. Expansion tank 15#Unit Electronic Butterfly Valve Drain valve Drain valve Plate heat exchanger Differential pressure by-pass valve 1#Unit Electronic Butterfly Valve Drain valve Plate heat exchanger 0#Unit Drain valve... -
Page 14: Overview Of The Unit
Symbol explanation Water pressure Differential pressure by- Drain vavle Water flow switch Gate valve instrument pass valve Atmospheric exhaust Y-filter Thermometer Pump Check valve valve Expansion Solenoid three- Safety valve Soft joint tank way valve Fig.7-1 Connection drawing of pipeline system NOTE •... -
Page 15: Opening The Uint
8.2 Opening the uint Cover 1 Cover 2 Cover 3 Cover 6 Cover 5 Cover 4 Fig. 8-3 Doors of 65KW Cover 1/2/3 give access to the compartment of water pipes and water side heat exchanger. Cover 4 give access to the electrical parts. Cover 5/6 give access to the hydraulic compartment. -
Page 16: Outdoor Unit Pcbs
8.3 Outdoor unit PCBs 8.3.1 MAIN PCB 1) Label descriptions are givevn in Table 8-2 Fig. 8-5 Main board of 65KW and 110KW Table 8-2 Detail information CN32: Main board power supply. CN99: slave board power supply. CN68: Pump (220-240V control power supply ) 1) After receiving start-up instruction, the pump will be started up instantly, and will maintain start-up state always in the process of operation. - Page 17 Detail information CN18: Program burn in port (USB) . CN28: Three-phase protector output switch. (Protection code E8) CN22: Outdoor units communication and wired controller conmunication port CN46: The power supply port of the wired controller (DC12V) CN26: Compressor inverter module and Fan inverter module communication ports CN300: Program burn in port (WizPro200RS programming device) .
- Page 18 8 6 Sl d f 6 KW d 110KW Fig. 8-6 Slave board of 65KW and 110KW Table 8-3 Detail information CN140:Power supply, 220-240VAC input CN115:W-HEAT, Electric heater of water flow switch CN125:Three-way valve (hot-water valve) CN123: Pump (220-240V control power supply ) 1) After receiving start-up instruction, the pump will be started up instantly, and will maintain start-up state always in the process of operation.
-
Page 19: Electric Wiring
8.4 Electric wiring 8.4.1 Electric wiring CAUTION • The air-conditioner should apply special power supply, whose voltage should conform to rated voltage. • Wiring construction must be conducted by the professional technicians according to the labeling on the circuit diagram. •... - Page 20 8.4.4 Electrical wiring percautions c. It is advisable to use 3-core shielded cables for uint to minimize interference. Do not use the unshielded multicore conductor cables. a. On-site wiring, parts and materials must comply with the local and national regulations as well as relevant national electrical standards.
- Page 21 8.4.6 Requirements for power supply wiring Correct Power distribution Lightning transformer Manual arrester Fuses switch Grounding wire Power 380-415V Building 3N~50Hz Uint Grounding 1 Grounding 2 Grounding 3 Wrong Power distribution Manual transformer Lightning Fuses switch arrester Grounding wire Power 380-415V 3N~50Hz Uint...
- Page 22 8.4.9 Wiring of “ON/OFF” weak electric port NOTE Please use the round-type terminal with correct The remote function of “ON/OFF” must be set by DIP switch. specifications to connect the power cord. The remote function of “ON/OFF” is effective when S1-1 or S5-3 is chosen ON, at the same time, the wired controller is out of control.
- Page 23 8.4.11 Wiring of “TEMP-SWITCH” weak electric 8.4.13 Control system and installation port precautions The function of “TEMP-SWITCH” must be set by wired controller a. Use only shielded wires as control wires. Any other type of for two setting water temperature. For cooling and heating wires may produce a signal interference that will cause the units mode.
- Page 24 8.4.14 Wiring instances If multiple units are connected in cascade, the unit address should be set on the DIP switch ENC1. With 0-F being valid, 0 indicates the master unit and 1-F indicate slave units. CN46 CN46 3-way valve CN46 Fig.
- Page 25 If multiple units are connected in cascade, the unit address should be set on the DIP switch ENC1. With 0-F being valid, 0 indicates the master unit and 1-F indicate slave units. CN46 CN46 3-way valve CN46 Fig. 8-18 Networking communication schematic of main unit and auxiliary unit for 110KW...
-
Page 26: Water System Installation
k) All low positions of the water system should be provided with NOTE drainage ports, to drain water in the evaporator and the system completely; and all high positions should be supplied with When the power cord is parallel to the signal wire, make discharge valves, to facilitate expelling air from the pipeline. - Page 27 8.5.2 Connection mode of pipe The water inlet and outlet pipes are installed and connected as shown in the following figures. 65KW, 110KW model uses hoop connection. For the specifications of the water pipes and screw thread, see the Table 8-6 below. Table 8-6 Model Pipe connection methods...
- Page 28 Error Recommendation Error Recommendation Fig.8-20 Design of the store tank 8.5.7 Selection and installation of the pump 8.5.4 Minimum chilled water flow 1) Select the pump The minimum chilled water flow is shown in the table 8-7 The unit must be equipped with variable frequency pump. If the system flow is less than the minimum unit flow rate, the a) Select the water-flow of the pump evaporator flow can be recirculated, as shown in the diagram.
- Page 29 2) Applicable standard of water quality for the unit Table 8-8 PH value 6.8~8.0 Sulfate <50ppm Total hardness <70ppm Silicon <30ppm Conductivity <200μV/cm (25°C) Iron content <0.3ppm Sulfide ion Sodium ion No requirement Chloride ion <50ppm Calcium ion <50ppm Ammonia ion 8.5.9 Installation of multi-module water system pipeline Multi-module combination installation involves special design of the unit, so relevant explanation is given as follows.
-
Page 30: Strat-Up And Configruation
Each unit is required to install a one-way valve when multiple 1) DIP switch pumps are installed, refer to figure as follow. The choice of DIP switch see Table 8-4 in detail when single or multiple water pumps are installed for KEM-HT-65 DRS5 and KEM-HT-110 DRS5. unit unit (1#) -
Page 31: Test Run And Final Check
10 TEST RUN AND FINAL CHECK 10.1 Check item table after installation Table 10-1 Checking item Description Units are fixed mounting on level base. Ventilating space for heat exchanger at the air side is meeting for requirement Maintenance space is meeting for requirement. Whether installing site is meet for requirements Noise and vibration is meeting for requirement. -
Page 32: Maintenance And Upkeep
11 MAINTENANCE AND UPKEEP 11.1 Failure information and code In case the unit runs under abnormal condition, failure protection code will display on both control panel and wired controller, and the indicator on the wired controller will flash with 1Hz. The display codes are shown in the following table: Table11-1 65KW and 110KW No. - Page 33 No. Code Content Note 1HE No inset A valve error Recovered upon error recovery 2HE No inset B valve error Recovered upon error recovery 3HE No inset C valve error Recovered upon error recovery 1F0 IPM module A transmission error Recovered upon error recovery 2F0 IPM module B transmission error Recovered upon error recovery...
-
Page 34: Digital Display Of Main Board
11.2 Digital display of main board 2) Maintenance of main parts The data display area is divided into Up area and Down area, Close attention should be paid to the discharge and suction with two groups of two-digit half 7-segment digital display, pressure during the running process. -
Page 35: First Startup After Shutdown
11.7 First startup after shutdown 11.9 Disassembling compressor The folowing preparations should be made for re-startup of unit Follow the following procedures if compressor needs to be after long-time shutdown: disassembled: 1) Thoroughly check and clean unit. 1) Cut off the power supply of unit. 2) Clean water pipe system. -
Page 36: Replacement Of Safety Valve
11.12 Replacement of safety valve Replace the safety valve as follows: 1) Reclaim the refrigerant completely in the system. Doing so requires professional staff and equipment; 2) Note to protect the tank coating. Please avoid damaging to coating from external force or high temperature when removing and installing the safety valve;... -
Page 37: Information Servicing
11.13 INFORMATION SERVICING 1) Checks to the area Before working on systems containing flammable refrigerants, safety checks are necessary to ensure that the risk of ignition is minmised. For repair to the refrigerating system, the following precautions shall be complied with prior to conducting work on the system. - Page 38 b) Particular attention shall be paid to the following to ensure that by working on electrical components, the casing is not altered in such a way that the level of protection is affected. This shall include damage to cables, excessive number of connections, terminals not made to original specification, damage to seals, incorrect fitting of glands, etc.
- Page 39 17) Decommissioning Before carrying out this procedure, it is essential that the technician is completely familiar with the equipment and all its detail. It is recommended good practice that all refrigerants are recovered safely. Before the task being carried out, an oil and refrigerant sample shall be taken.
-
Page 40: Record Table Of Test Run And Maintenance
RECORD TABLE OF TEST RUN AND MAINTENANCE Table 11-2 Model: Code labeled on the unit: Customer name and address: Date: 1. Check temperature of chilled water or hot water Inlet (1111111) Outlet (1111111) 2. Check air temperature of air-side heat exchanger: Inlet (1111111) Outlet (1111111) 3. -
Page 41: Applicable Models And Main Parameters
12 APPLICABLE MODELS AND MAIN PARAMETERS Table 12-1 Model 65KW 110KW Cooling capacity 57.0 100.0 Heating capacity 65.0 110.0 Standard cooling input 19.0 32.8 Cooling rated current 29.3 50.6 Standard heating input 18.3 29.9 Heating rated current 28.2 46.1 Power supply 380-415V 3N~ 50Hz Operation control Control of wired controller, auto startup, running state display, failure alert etc. -
Page 42: Information Requirements
13 INFORMATION REQUIREMENTS Table 13-1 Information requirements for comfort chillers Model (s) : 65KW Outdoor side heat exchanger of chiller: Indoor side heat exchanger chiller: Water Type: Compressor driven vapour compression Driver of compressor: Electric motor Item Symbol Value Unit Item Symbol Value... - Page 43 Table 13-2 Information requirements for comfort chillers Model (s) : 110KW Outdoor side heat exchanger of chiller: Indoor side heat exchanger chiller: Water Type: Compressor driven vapour compression Driver of compressor: Electric motor Item Symbol Value Unit Item Symbol Value Unit Seasonal space Rated cooling capacity...
- Page 44 Table 13-3 Information requirements for heat pump space heaters and heat pump combination heaters Model (s) : 65KW Air-to-water heat pump: [yes] Water-to-water heat pump: [yes/no] Brine-to-water heat pump: [yes/no] Low-temperature heat pump: [yes] Equipped with a supplementary heater: [yes/no] Heat pump combination heater: [yes/no] In the table, the data are the parameters of the unit under the warmer climate conditions.
- Page 45 Table 13-4 Information requirements for heat pump space heaters and heat pump combination heaters Model (s) : 65KW Air-to-water heat pump: [yes] Water-to-water heat pump: [yes/no] Brine-to-water heat pump: [yes/no] Medium-temperature heat pump: [yes] Equipped with a supplementary heater: [yes/no] Heat pump combination heater: [yes/no] In the table, the data are the parameters of the unit under the warmer climate conditions.
- Page 46 Table 13-5 Information requirements for heat pump space heaters and heat pump combination heaters Model (s) : 65KW Air-to-water heat pump: [yes] Water-to-water heat pump: [yes/no] Brine-to-water heat pump: [yes/no] Low-temperature heat pump: [yes] Equipped with a supplementary heater: [yes/no] Heat pump combination heater: [yes/no] In the table, the data are the parameters of the unit under the average climate conditions.
- Page 47 Table 13-6 Information requirements for heat pump space heaters and heat pump combination heaters Model (s) : 65KW Air-to-water heat pump: [yes] Water-to-water heat pump: [yes/no] Brine-to-water heat pump: [yes/no] Medium-temperature heat pump: [yes] Equipped with a supplementary heater: [yes/no] Heat pump combination heater: [yes/no] In the table, the data are the parameters of the unit under the average climate conditions.
- Page 48 Table 13-7 Information requirements for heat pump space heaters and heat pump combination heaters Model (s) : 65KW Air-to-water heat pump: [yes] Water-to-water heat pump: [yes/no] Brine-to-water heat pump: [yes/no] Low-temperature heat pump: [yes] Equipped with a supplementary heater: [yes/no] Heat pump combination heater: [yes/no] In the table, the data are the parameters of the unit under the colder climate conditions.
- Page 49 Table 13-8 Information requirements for heat pump space heaters and heat pump combination heaters Model (s) : 65KW Air-to-water heat pump: [yes] Water-to-water heat pump: [yes/no] Brine-to-water heat pump: [yes/no] Medium-temperature heat pump: [yes] Equipped with a supplementary heater: [yes/no] Heat pump combination heater: [yes/no] In the table, the data are the parameters of the unit under the colder climate conditions.
- Page 50 Table 13-9 Information requirements for heat pump space heaters and heat pump combination heaters Model (s) : 110KW Air-to-water heat pump: [yes] Water-to-water heat pump: [yes/no] Brine-to-water heat pump: [yes/no] Low-temperature heat pump: [yes] Equipped with a supplementary heater: [yes/no] Heat pump combination heater: [yes/no] In the table, the data are the parameters of the unit under the warmer climate conditions.
- Page 51 Table 13-10 Information requirements for heat pump space heaters and heat pump combination heaters Model (s) : 110KW Air-to-water heat pump: [yes] Water-to-water heat pump: [yes/no] Brine-to-water heat pump: [yes/no] Medium-temperature heat pump: [yes] Equipped with a supplementary heater: [yes/no] Heat pump combination heater: [yes/no] In the table, the data are the parameters of the unit under the warmer climate conditions.
- Page 52 Table 13-11 Information requirements for heat pump space heaters and heat pump combination heaters Model (s) : 110KW Air-to-water heat pump: [yes] Water-to-water heat pump: [yes/no] Brine-to-water heat pump: [yes/no] Low-temperature heat pump: [yes] Equipped with a supplementary heater: [yes/no] Heat pump combination heater: [yes/no] In the table, the data are the parameters of the unit under the average climate conditions.
- Page 53 Table 13-12 Information requirements for heat pump space heaters and heat pump combination heaters Model (s) : 110KW Air-to-water heat pump: [yes] Water-to-water heat pump: [yes/no] Brine-to-water heat pump: [yes/no] Medium-temperature heat pump: [yes] Equipped with a supplementary heater: [yes/no] Heat pump combination heater: [yes/no] In the table, the data are the parameters of the unit under the average climate conditions.
- Page 54 Table 13-13 Information requirements for heat pump space heaters and heat pump combination heaters Model (s) : 110KW Air-to-water heat pump: [yes] Water-to-water heat pump: [yes/no] Brine-to-water heat pump: [yes/no] Low-temperature heat pump: [yes] Equipped with a supplementary heater: [yes/no] Heat pump combination heater: [yes/no] In the table, the data are the parameters of the unit under the colder climate conditions.
- Page 55 Table 13-14 Information requirements for heat pump space heaters and heat pump combination heaters Model (s) : 110KW Air-to-water heat pump: [yes] Water-to-water heat pump: [yes/no] Brine-to-water heat pump: [yes/no] Medium-temperature heat pump: [yes] Equipped with a supplementary heater: [yes/no] Heat pump combination heater: [yes/no] In the table, the data are the parameters of the unit under the colder climate conditions.
Need help?
Do you have a question about the KEM-HT-65 DRS5 and is the answer not in the manual?
Questions and answers