Table of Contents
Advertisement
Quick Links
Advertisement
Table of Contents

Related Manuals for ETNA CM914MZ


Summary of Contents for ETNA CM914MZ
- Page 1 INSTRUCTIONS FOR USE COMBINED MICROWAVE OVENS CM914MZ...
- Page 2 We thank you for your trust and the purchase of our appliance. This detailed instruction manual is supplied to make the use of this product easier. The instructions should allow you to learn about your new appliance as quickly as possible. Make sure you have received an undamaged appliance.
-
Page 3: Table Of Contents
Contents Safety precautions ........................Safe use of the microwave oven ....................Other important safety warnings ................... Appliance description ......................Rating plate product information ................... Control unit ..........................Appliance equipment ......................Control lights ..........................Guides ............................Oven door switch ........................Cooling fan ..........................Oven equipment and accessories .................... -
Page 4: Safety Precautions
Safety precautions IMPORTANT SAFETY PRECAUTIONS CAREFULLY READ THE INSTRUCTIONS AND SAVE THEM FOR FUTURE REFERENCE. Appliance must be connected to fixed wiring which has incorporated means of disconnection. Fixed wiring must be made in accordance with the wiring rules. Means for disconnection must be incorporated in the fixed wiring in accordance with the wiring rules. - Page 5 WARNING: Accessible parts may become hot during use. Young children should be kept away. WARNING: The appliance and some of its accessible parts may become very hot during use. Care should be taken to avoid touching heating elements. Children less than 8 years of age shall be kept away unless continuously supervised.
-
Page 6: Safe Use Of The Microwave Oven
Safe use of the microwave oven WARNING: Due to the extremely high temperatures generated when the appliance is used in combination mode, it is recommended that children only use the oven under adult supervision. WARNING: If the door or door seals are damaged, the oven must not be operated until it has been repaired by a competent person. - Page 7 When heating food in plastic or paper containers, keep an eye on the oven, as such packaging may ignite. Microwave heating of beverages can result in delayed eruptive boiling. Therefore, take care when handling the container with the heated beverage. To prevent this, place a non-metal object (e.g., a wooden, glass, or plastic spoon) into the container during the heating-up process.
-
Page 8: Other Important Safety Warnings
Other important safety warnings The appliance is intended for household use. Do not use it for any other purpose, such as room heating, drying of pets or other animals, paper, fabrics, herbs etc. As this may lead to injury or fire hazard. Appliance must be connected to fixed wiring which has incorporated means of disconnection. - Page 9 Do not leave any accessories or utensils in your oven when it is off. Do not switch on an empty oven to avoid damaging it. Do not use porcelain, ceramic, or earthenware cookware if such materials are porous or if such cookware is not glazed on the inside.
-
Page 10: Appliance Description
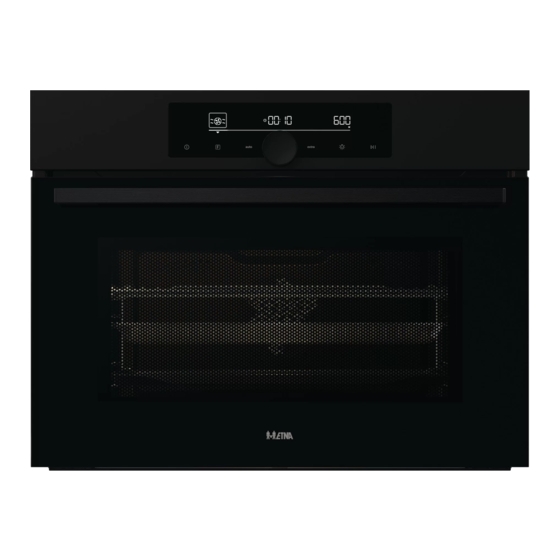
Appliance description INFORMATION! Appliance functions and equipment depend on the model. Basic equipment of your appliance includes wire guides, shallow baking tray, and a wire rack. 1. Control unit 5. Rating plate 2. Door switch 6. Oven door 3. Lighting 7. -
Page 11: Control Unit
Control unit (depending on the model) 1. on I off key 2. (pro bake) professional mode key 3. (auto bake) automatic mode key 4. Settings selection and confirmation knob - rotate the knob to choose a setting - press the knob to confirm the setting 5. -
Page 12: Appliance Equipment
Appliance equipment Control lights Oven light: oven light is switched on when you open or close the oven door, when you switch on the oven, at the end of the baking process, and when you touch the oven light key on the control unit. Guides •... -
Page 13: Oven Equipment And Accessories
Oven equipment and accessories WARNING! Never use the wire rack, the shallow baking tray or any other metal part or accessory when operating a system with microwaves. GLASS BAKING DISH is intended for cooking with all oven systems and for cooking with microwaves. -
Page 14: Before First Use
Before first use • Remove oven accessories and any packaging (cardboard, polystyrene foam) from the oven. • Wipe the oven accessories and interior with a damp cloth. Do not use abrasive or aggressive cloths or cleaners. • Heat an empty oven for approximately one hour with the top and bottom heater system at a temperature of 250 °C. -
Page 15: Switching On For The First Time
Switching on for the first time After connecting your appliance or after an extended power outage, 12:00 will flash on the display. First, choose and confirm the following basic settings. INFORMATION! Change them by rotating the KNOB. To confirm the desired setting, press the KNOB or touch key. -
Page 16: Choosing The Settings
Choosing the settings The interface allows choosing several operating modes: • Professional mode (pro bake) • Automatic mode (auto bake) • Extra functions (extra bake) • Step program (STEP) in the professional mode (pro bake) • Automatic programs in automatic mode (auto bake) INFORMATION! •... - Page 17 Fast preheat Use the fast preheating function if you wish to heat the oven to the desired temperature as quickly as possible. To activate fast preheating, rotate the KNOB to the setting (see image, label D). Confirm the selection. Rotate the KNOB to select the fully lit sign and confirm it. The function is now activated.
- Page 18 Table continued from last page Symbol TOP AND BOTTOM HEATER Use this system for conventional baking on a single rack, making soufflés, and baking at low temperatures (slow cooking). GENTLE BAKING For gentle and controlled slow cooking of delicate food (soft cuts of meat) and baking pastry with a crunchy bottom.
- Page 19 Microwave power level Power Quickly reheating beverages, water and dishes containing a large volume 1000 W of liquid. 750 W Cooking fresh or frozen vegetables. Melting chocolate. 600 W Cooking meat and seafood. Cooking side dishes. 360 W Reheating and cooking of delicate egg-based dishes. 180 W Defrosting other food, softening butter, softening ice cream.
- Page 20 TIMER FUNCTIONS Rotate the KNOB to select the timer functions. Timed cooking In this mode, you can specify the duration of oven operation (cooking time). The cooking duration symbol will appear on the display unit. Rotate the KNOB to set the desired cooking time. Confirm the setting by pressing on the KNOB.
- Page 21 After the set time expires, the oven will automatically stop operating. Sign End and 00.00 will alternate on the display unit. An acoustic signal will be emitted, which can be turned off by touching any key. After one minute, the acoustic signal will be switched off automatically. WARNING! This function is not suitable for food requiring fast preheating.
- Page 22 STEP PROGRAM This function allows baking in two steps or stages (two consecutive baking steps are combined in a single cooking process). A1. first cooking step STEP1, (STEP2) C. program duration/end of program (see chapter Timer Functions) E. temperature Step: STEP1 In the mode, set the baking system and temperature.
-
Page 23: Automatic Mode (Auto Bake)
AUTOMATIC MODE (auto bake) In this mode, you may choose between special baking systems or automatic programs (preset programs for particular types of food). Special baking systems Touch the key and set the following: B. cooking duration C. program E. preset temperature / power Rotate the KNOB and choose your settings. - Page 24 Automatic programs In the automatic mode (auto bake), you may choose between numerous automatic programs (the appliance will recommend the optimum cooking method, temperature, and cooking duration depending on the type of food specified). Press and hold the key to display the automatic programs on the display unit (see table). Where possible, you can also set the weight of the food.
- Page 25 Table continued from last page Indication Program name Equipment Level Preheating Turning Pr15 meat loaf baking pan/dish on wire rack Pr16 oven-baked beef wire rack with a drip after 2/3 of steak tray cooking time Pr17 meat slow small baking dish on cooking wire rack Pr18...
-
Page 26: Choosing Extra Functions (Extra Bake)
CHOOSING EXTRA FUNCTIONS (extra bake) Touch the extra bake key to display extra functions with their respective preset values on the display unit. C. cooking duration D. program E. preset temperature Rotate the KNOB and select the program. Preset values will be displayed: Some programs allow setting the temperature and cooking time. - Page 27 • When the child lock is activated, cooking or baking systems (modes) or additional functions cannot be changed. The cooking/baking/roasting process can only be stopped or switched off. • Child lock will remain active after the oven is switched off. To select a new system, the child lock must first be deactivated.
-
Page 28: Starting The Cooking Process
Starting the cooking process Start the cooking process by pressing the key. Until the set temperature is reached for the first time, the current and the set temperature will alternate on the display unit. The temperature symbol flashes at first. When the desired temperature is reached, it goes off. INFORMATION! If no timer function is selected, cooking time will appear on the display unit. -
Page 29: General Settings
General settings Press and hold the key. SEtt will appear on the display unit for a few seconds. Then, the general settings menu will appear. INFORMATION! Rotate the KNOB to scroll through the settings. Confirm each setting by pressing the KNOB or key. - Page 30 Automatic fast preheating This function allows automatic addition of fast preheating to the baking systems that allow it. Rotate the KNOB to select the Auto setting. Choose On or OFF. Sabbath The Sabbath function allows keeping the food warm tin eh oven without having to switch the oven on or off.
-
Page 31: General Tips And Advice For Baking
General tips and advice for baking • Remove all unnecessary equipment from the oven during baking • Use equipment made of heat-resistant non-reflective materials (supplied baking trays and dishes, enamel-coated cookware, tempered glass cookware). Bright-coloured materials (stainless steel or aluminium) materials reflect heat. As a result, thermal processing of food in them is less effective. •... -
Page 32: Cleaning And Maintenance
Cleaning and maintenance WARNING! Before cleaning, unplug the appliance from the power mains and wait for the appliance to cool down. Children should not clean the appliance or perform maintenance tasks without proper supervision. For easier cleaning, oven cavity and baking tray are coated with special enamel for a smooth and resistant surface. -
Page 33: Using The Aqua Clean Program To Clean The Oven
Using the Aqua Clean program to clean the oven This program makes it easier to remove any stains from inside the oven. The function is the most effective when used regularly. Before running the cleaning program, remove all large chunks of dirt and food residues from the oven cavity. -
Page 34: Removing And Cleaning The Wire Guides
Removing and cleaning the wire guides Undo the screw. Use a screwdriver. Remove the guides from the holes in the back wall. INFORMATION! Take care not to lose the spacers fitted on the wire guides. Replace the spacers after cleaning; otherwise, sparks may appear. -
Page 35: Replacing The Bulb
Replacing the bulb The bulb is a consumable and therefore not covered by warranty. Before replacing the bulb, remove all accessories from the oven. The oven is fitted with a halogen lamp. This product contains a light source of energy efficiency class (G). Halogen lamp: G9, 230 V, 25 W Undo the four screws. -
Page 36: Troubleshooting Table
Troubleshooting table Special warnings and fault reporting During the warranty period, only a service center authorized by the manufacturer may carry out any repairs. Before making any repairs, make sure the appliance is disconnected from the power mains either by removing the fuse or by disconnecting the power plug from the wall outlet. -
Page 37: Disposal
Disposal Our product packaging is made of environmentally friendly materials that can be recycled, disposed of, or destroyed without any hazard to the environment. To this end, packaging materials are labelled appropriately. The symbol on the product or its packaging indicates that the product should not be treated as normal household waste. - Page 38 892871-a2...
Need help?
Do you have a question about the CM914MZ and is the answer not in the manual?
Questions and answers