Table of Contents
Advertisement
Quick Links
Advertisement
Table of Contents

Related Manuals for IRIS IRIS4106


Summary of Contents for IRIS IRIS4106
- Page 1 IRIS4106 Installation Instructions & User Guide...
-
Page 2: Table Of Contents
Contents: Contents: Introduction Camera Dimensions Conventions: Limited Warranty: Warnings & Product Information: Package Contents: Installation Installation Considerations Camera Installation Terminating RJ45 Connector Terminating RJ45 Connector (EIA 568B) Connecting Up Login Credentials A Note on Resolution & Chartplotters (MFD’s) Browser Window Settings &... -
Page 3: Introduction
Thank you for purchasing this IRIS-4106 compact, marine IP camera from Iris. The IRIS-4106 is the IP version of our popular IRIS106 camera designed for use aboard boats, with a marine grade 316L stainless steel bezel and non-corrosive housing. The camera features excellent low light operation and is an excellent tool for on board safety, situational awareness and security. -
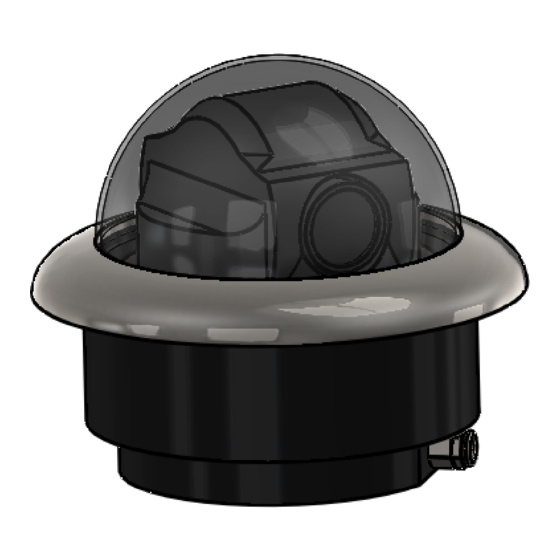
Page 4: Camera Dimensions
Camera Dimensions ... -
Page 5: Conventions
Conventions: At various points within this guide, the following icons are used to illustrate important and/ or potentially dangerous information: INFORMATION: This symbol points out important information pertaining to the installation, operation and maintenance of the camera. WARNING: This symbol indicates a risk of damaging the camera or other items, or an important issue that may effect the operation of the camera. -
Page 6: Limited Warranty
For products purchased through unauthorised dealers or online resellers, any warranty claims should be made against the seller and not Iris. Iris is not liable for any warranty claim made on products purchased through unauthorised vendor. - Page 7 THEN SUCH WARRANTIES ARE LIMITED IN DURATION TO THE DURATION OF THIS LIMITED WARRANTY. IN NO EVENT SHALL IRIS BE LIABLE IN A CLAIM FOR BREACH OF WARRANTY FOR ANY INCIDENTAL, SPECIAL, INDIRECT OR CONSEQUENTIAL DAMAGES, WHETHER RESULTING FROM THE USE, MISUSE OR INABILITY TO USE THIS PRODUCT OR FROM DEFECTS IN THE PRODUCT.
-
Page 8: Warnings & Product Information
Warnings & Product Information: LEGAL NOTICE: In some jurisdictions it could be considered an invasion of privacy rights to take or publicly display photographs or videos of people or their vehicles using this product. It is your responsibility to know and comply with applicable laws and rights to privacy in your jurisdiction. - Page 9 Operating the camera or viewing the video input whilst the vessel is moving could cause a distraction and result in accidental collision resulting in property damage, injury or death. Iris Innovations cannot be held liable for any incidental, special, indirect or consequential damages whether resulting from the use, misuse or inability to use this product.
- Page 10 The dome cover has a protective coating which may suffer damage as a result of improper cleaning. To clean the dome use a soft cotton cloth. Moisten with clean water if necessary. For further advise on cleaning the lens window, contact Iris Innovations. INFORMATION: PRODUCT DISPOSAL AND RECYCLING Dispose of this product in accordance with the WEEE Directive.
-
Page 11: Package Contents
Package Contents: Please unpack your new IRIS4106 camera and check to make sure the following items are included in the box. If there are any items missing please contact your Iris dealer immediately: • Manual • IRIS4106 Camera • Fixing Screw Pack •... -
Page 12: Installation
Installation Installation Considerations It's important to fully consider the intended position of the camera and the desired field of view prior to installation. Considerations include how you are going to get cables to the position, will the camera be able to see the appropriate areas, will the camera interfere with any other fixture such as a doorway or walkway once it's fixed in place, or are there any obstructions behind the surface onto which the camera is to be installed. -
Page 13: Terminating Rj45 Connector
Step 1: After you have established the desired mounting position and are happy there are no obstacles behind the surface into which you are drilling, use a 122mm hole saw to carefully create the circular recess into which the camera body will sit. Step 2: Once the mounting hole has been cut offer the camera into place and mark off... -
Page 14: Terminating Rj45 Connector (Eia 568B)
(1) and then secure the waterproof end-cap (4) to the cameras network interface socket (1). Connecting Up Check compatibility of your IRIS4106 by confirming with the latest information on boat-cameras.com and with your chart-plotter manufacturer / dealer. Some chart plotters will automatically assign the camera an IP address through RTSP whereas others will need you to manually configure an IP address. -
Page 15: Login Credentials
A Note on Resolution & Chartplotters (MFD’s) When using the IRIS4106 camera with a chart plotter, the resolution you set the camera is important, and it may be necessary to set the resolution of the camera in accordance with limitations of the MFD. -
Page 16: Browser Window
The cameras Pan, Tilt, Zoom controls are also accessed through the control Panel. Use the PTZ controls to drive the camera as required, control Iris, Zoom and Focus settings, select Pan, Tilt, Zoom and Focus speed, set and call preset positions, activate... - Page 17 Time Menu Set Time Zone and Daylight Saving Options, define Network Time Protocol settings and activate time sync to either connected PC or NTP. Advanced Menu Set Auto Reboot schedule, restore to factory settings, reboot camera and define firmware upgrade path. ...
- Page 18 Network Menu Define Network IP address settings, subnet mask, gateway address, DNS server addresses. Set DHCP ON / OFF FTP Menu Define FTP server parameters. SMTP Menu Define SMTP server parameters for email notifications (snapshot) ...
- Page 19 QoS Menu Define Quality of Service Parameters IGMP Menu Define Internet Group Management / Multicast Parameters Port Menu Specify Ports for RTSP, ONVIF, HTTP ...
- Page 20 DDNS Menu Define DDNS parameters PTP Menu Use QR codes to download and set up generic P2P Viewer Mobile App automatically. Protocol Menu Activate ONVIF and HikVision Protocols...
- Page 21 Camera Menu Basic Settings (provides overview of current camera settings) Exposure Settings Set camera exposure modes, shutter and automatic gain control (AGC) and other exposure parameters. Effect Settings Menu Adjust, Brightness, Contrast, Saturation, Hue, Sharpness, Gamma values etc. ...
- Page 22 White Balance Settings Adjust White Balance parameters and set Modes (Auto, Manual, Sunlight, Cloudy, Incandescent, Fluorescent, Sodium, AWC, Indoor, Outdoor) Reset Reset camera parameters / video exposure settings etc to factory defaults ...
- Page 23 Video & Audio Menu: Video Settings Define encoder types, resolution. Frame rate, I-Frame, I-Frame Rate, Bitrate, Image Quality and Bitrate - Per Stream (Main, Sub, MJPEG) Resolution Options: Main Stream Resolution Options: Sub Stream Character Display Parameters Set On Screen Text Field Parameters / Font Size, Position, and Content (Camera Name etc) ...
- Page 24 Motion Detection Define Motion Detection Zone, Motion Sensitivity, and enable/disable Motion Detection feature. Privacy Mask Define and name up to four privacy mask zones. Path Menu Define paths and formats to save snapshot photos and video recordings.
- Page 25 PTZ Function Menu: Presets Set and Call (for test purposes) User Presets Positions and Speeds Auto Tour Menu Configure Automated Tours (1~4). Each tour can support 10 presets. Assign Presets to tour as required. When operated, tour will cycle through presets assigned to each specific tour. PTZ Protocol Menu Define PTZ Protocol and Protocol Values (Baud Rate, Address etc).
- Page 26 Autofocus Menu Define Minimum Distance for Autofocus feature (0.1m to 2m) ...
- Page 27 Alarm Configuration Menu Configure Alarm settings and actions and define alarm schedule. Manage Users Configure Users, Set Access Rights and Configure Passwords Log View System Event Log ...
-
Page 28: Essential Safety Notices
Innovations supports the WEEE policy and politely request you observe correct disposal methods. For further information on how to correctly dispose of this product please contact Iris Innovations. Please recycle unwanted packaging and documentation. The cardboard carton, all paper manuals and documents and the protective plastic bag in which the camera is shipped are widely recyclable.
Need help?
Do you have a question about the IRIS4106 and is the answer not in the manual?
Questions and answers