Table of Contents
Advertisement
Quick Links
Please read this manual and save it with your
original sales receipt.
Leer este manual y guardarlo con el
comprobante de venta original.
Lire le présent guide et le conserver avec le
reçu de caisse original.
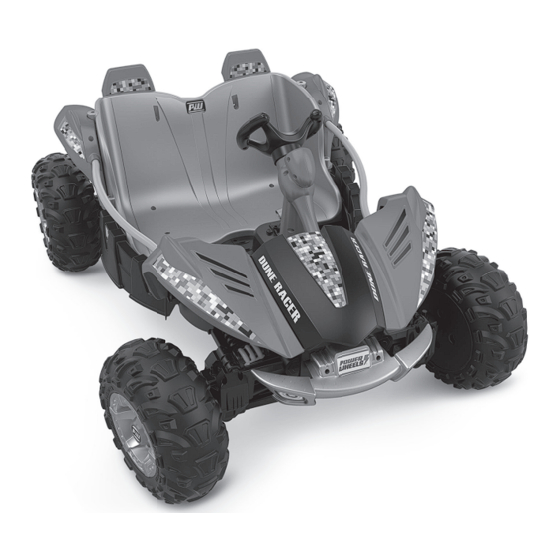
Product features may vary from the picture above.
Las características del producto pueden variar de las mostradas arriba.
Le produit peut varier par rapport à l'illustration ci-dessus.
Adult assembly is required.
Tools needed for assembly: assembly wrench
(included), Phillips screwdriver and adjustable
wrench (both not included).
Requiere montaje por un adulto. Herramientas
necesarias para el montaje: llave hexagonal
(incluida), desatornillador de cruz y llave inglesa
(no incluidas).
Doit être assemblé par un adulte. Outils requis
pour l'assemblage : clé hexagonale (fournie),
tournevis cruciforme et clé à molette
(non fournis).
FLP27
Owner's Manual
Manual del usuario
Guide de l'utilisateur
incluant les instructions d'assemblage
Requires 1 - 12V, 12 Ah, non-spillable, sealed
lead acid battery (included).
Requires 1 - 12V charger (included).
Before first time use, you must charge the
Funciona con 1 batería de 12V, 12 Ah de plomo
ácido sellada que no derrama líquido (incluida).
Funciona con 1 cargador de 12V (incluido).
Antes del primer uso, cargar la batería durante
Fonctionne avec une batterie au plomb à bac
hermétique de 12 V, 12 Ah (fournie).
Fonctionne avec un chargeur de 12 V (fourni).
Avant le premier usage, la batterie doit être
chargée pendant au moins 18 heures.
with Assembly Instructions
con instrucciones de montaje
12V
12V
battery at least 18 hours.
por lo menos 18 horas.
Advertisement
Table of Contents

Related Manuals for Power Wheels FLP27


Summary of Contents for Power Wheels FLP27
- Page 1 Fonctionne avec une batterie au plomb à bac tournevis cruciforme et clé à molette hermétique de 12 V, 12 Ah (fournie). (non fournis). Fonctionne avec un chargeur de 12 V (fourni). Avant le premier usage, la batterie doit être chargée pendant au moins 18 heures. FLP27...
-
Page 2: Consumer Information
• Le chargeur de batterie n’est pas un jouet. the vehicle is overloaded or the driving conditions dispositivo de seguridad que se restablece • La batterie Power Wheels de 12 V est munie d’un too severe. Once a fuse has “tripped”, remove por sí solo y automáticamente bloquea fusible thermique intégré. -
Page 3: Vehicle Use
VEHICLE USE USO DEL VEHÍCULO UTILISATION DU VÉHICULE ADVERTENCIA WARNING AVERTISSEMENT Prevent injuries and deaths Evitar lesiones y la muerte Prévenir les blessures et la mort • Direct adult supervision required. • Utilizar bajo la vigilancia de un adulto. • N’utiliser que sous la surveillance •... - Page 4 • Use only a Power Wheels • Nunca modificar el sistema ® chargeur ou la batterie. battery and charger. Other eléctrico.
-
Page 5: Battery Charging
CHARGE DE LA BATTERIE • S’assurer de charger la batterie pendant au moins 18 heures avec le chargeur Power Wheels de 12 V fourni avant d’utiliser le véhicule pour la Adults note: Periodically examine première fois. Après chaque utilisation, charger la batterie durant au moins 14 heures. - Page 6 PARTS PIEZAS PIÈCES • If you are missing a part, please call us at • Si falta alguna pieza, llámenos al • S’il manque des pièces, composer le 1-800-348-0751 (US and Canada), 1-800-348-0751 (EE.UU. y Canadá), 1-800-348-0751 (Canada et États-Unis) ou le 59-05-51-00 Ext.
- Page 7 PARTS PIEZAS PIÈCES Steering Wheel 2 Sidebar Covers (Left and Right) Steering Wheel Cap 4 Hubcaps Volante 2 cubiertas de barras laterales (izquierda y derecha) Tapa del volante 4 tapones Volant 2 garnitures de barre (gauche et droite) Garniture du volant 4 chapeaux de roue Rear Axle 2 Drivers...
-
Page 8: Montaje
ASSEMBLY MONTAJE ASSEMBLAGE WARNING ADVERTENCIA AVERTISSEMENT • • • Children can be harmed by small Los niños se pueden lastimar con las Les petites pièces et les bords parts, sharp edges and sharp points piezas pequeñas y con los bordes y tranchants ou les extrémités in the vehicle’s unassembled state, puntas filosas de las piezas individuales... - Page 9 ASSEMBLY MONTAJE ASSEMBLAGE Rear Axle Eje trasero Essieu arrière Rear Wheel • Slide the rear axle through the gear boxes. Rueda trasera Roue arrière • Introducir el eje trasero en los compartimentos de engranaje. • Faire passer l’essieu arrière dans les boîtes d’engrenages. SIDE VIEW VISTA DEL LADO VUE DE CÔTÉ...
- Page 10 ASSEMBLY MONTAJE ASSEMBLAGE Wire Clip Clip del cable Pince CORRECT CORRECTO CORRECT • Insert the straight side of the clip through the holes in the axle. Hint: The wavy side of the clip should be facing away from the vehicle. •...
- Page 11 ASSEMBLY MONTAJE ASSEMBLAGE Hubcap Front Axle Fastener Cap Front Axle Fastener Cap Tapón Tapa de sujeción del eje delantero Tapa de sujeción del eje delantero Chapeau de roue Capuchon de fixation de l’essieu avant Capuchon de fixation de l’essieu avant Front Axle Eje delantero Essieu avant...
- Page 12 ASSEMBLY MONTAJE ASSEMBLAGE Bushing Cojinete Front Rim Bague Rin delantero Jante avant Washer Arandela • First, align the notches on a front rim with the grooves in the wheel. Rondelle Then, slide the rim, indented side out, onto the front axle. •...
- Page 13 ASSEMBLY MONTAJE ASSEMBLAGE CORRECT CORRECTO CORRECT Hubcap Tapón Chapeau de roue • Fit the tabs on the hubcap into the slots in the front wheel. Push to “snap” into place. • Repeat steps 13-18 to assemble the remaining washer, bushing, front wheel, front rim, wire clip and hubcap to the other front axle.
- Page 14 ASSEMBLY MONTAJE ASSEMBLAGE Seat Asiento Banquette Valve Covers Cubiertas de válvula Cache-soupapes 2 Headrests 2 reposacabezas 2 appuie-têtes BACK VIEW VISTA DE ATRÁS VUE ARRIÈRE • Fit the headrests to the back of the seat. • Ajustar los reposacabezas en el respaldo. •...
- Page 15 ASSEMBLY MONTAJE ASSEMBLAGE Rear Fenders Guardabarros traseros Ailes arrière FRONT VIEW • Insert a M4,5 x 1,3 cm screw into a hole in the front of the seat back. VISTA DEL FRENTE • Insertar un tornillo M4,5 x 1,3 cm en un orificio en el frente VUE AVANT del respaldo.
- Page 16 ASSEMBLY MONTAJE ASSEMBLAGE FRONT VIEW BACK VIEW VISTA DEL FRENTE VISTA DE ATRÁS VUE AVANT VUE ARRIÈRE • While holding the acorn nut in place with the adjustable wrench, tighten the screw with a Phillips screwdriver. • Repeat assembly steps 24-26 to assemble the remaining M4,5 x 1,3 cm screw and M4,5-32 acorn nut to the seat back.
- Page 17 ASSEMBLY MONTAJE ASSEMBLAGE Sidebar Cover Cubiertas de las Tabs barras laterales Lengüetas Garniture de barre Languettes Sidebar with Curve Out Barra lateral con curva hacia afuera Barre latérale courbée vers l’extérieur • Fit the sidebar covers onto the sidebars with the smooth side facing the inside of the vehicle.
- Page 18 ASSEMBLY MONTAJE ASSEMBLAGE Hood Cofre Capot Pegs Clavijas Tiges • Fit the tabs on the hood onto the pegs on the front fenders. TOP SIDE VIEW • Ajustar las lengüetas del cofre en las clavijas de los guardabarros delanteros. VISTA LATERAL DE ARRIBA VUE DE DESSUS •...
- Page 19 ASSEMBLY MONTAJE ASSEMBLAGE ASSEMBLAGE Steering Column Steering Post Steering Post Columna de mando Poste de mando Poste de mando Colonne de direction Tube de direction Tube de direction Bend in Steering Column Doblez de la columna de mando Partie courbée de la colonne de direction Slot Lock Nut...
- Page 20 ASSEMBLY MONTAJE ASSEMBLAGE Steering Wheel Steering Wheel Cap Volante Tapa del volante Volant Garniture du volant INSIDE VIEW VISTA DEL INTERIOR VUE DE L’INTÉRIEUR • Turn the vehicle upright. • Fit the steering wheel onto the steering column assembly. Hint: The steering wheel is designed to fit the steering column one way. If it does not seem to fit, turn it around and try again.
- Page 21 DECORATION DECORACIÓN DÉCORATION • Place the labels exactly as shown in the illustrations. For best results, avoid • Apposer les autocollants exactement comme indiqué dans les illustrations. repositioning a label once it has been applied to the vehicle. Pour de meilleurs résultats, éviter d’apposer un autocollant plus d’une fois sur le véhicule.
- Page 22 DECORATION DECORACIÓN DÉCORATION FRONT VIEW VISTA DEL FRENTE VUE DE L’AVANT BACK VIEW VISTA DE ATRÁS VUE DE L’ARRIÈRE Troubleshooting • Solución de problemas • Guide de dépannage service.fi sher-price.com...
- Page 23 BATTERY INSTALLATION COLOCACIÓN DE LA BATERÍA INSTALLATION DE LA BATTERIE Motor Harness Arnés del motor Câble du moteur • Plug the motor harness connector into the battery. Push firmly. • Enchufar el conector del arnés del motor en la batería. Empujar con firmeza.
-
Page 24: Safe Driving Rules
SAFE DRIVING RULES NORMAS DE SEGURIDAD PARA CONDUCIR RÈGLES POUR UNE CONDUITE EN TOUTE SÉCURITÉ WARNING ADVERTENCIA AVERTISSEMENT Prevent injuries and deaths Evitar lesiones y la muerte Prévenir les blessures et la mort • Direct adult supervision required. • Utilizar bajo la vigilancia de un adulto. •... - Page 25 VEHICLE OPERATION VEHICLE CARE FUNCIONAMIENTO DEL VEHÍCULO MANTENIMIENTO FONCTIONNEMENT DU VÉHICULE ENTRETIEN DU VÉHICULE Advanced Use – High Speed (8 km/h - 5 mph) Avanzados – Velocidad rápida (8 km/h) • Check all screws, fasteners and their protective Conducteurs expérimentés – coverings regularly and tighten as required.
-
Page 26: Limited Warranty
Power Wheels vehicle. Six vehicle during the warranty period, do not return date d’achat pour le véhicule Power Wheels month limited warranty from the date of purchase the vehicle to the store. Mattel Canada Inc. has Garantie limitée de six (6) mois à partir de la on the 6 or 12 volt battery. - Page 27 CONSUMER INFORMATION 12V BATTERY CARE AND DISPOSAL INFORMACIÓN PARA EL CONSUMIDOR MANTENIMIENTO RENSEIGNEMENTS POUR LES Y ELIMINACIÓN DE CONSOMMATEURS LA BATERÍA DE 12V FCC STATEMENT (UNITED STATES ONLY) ÉNONCÉ DE LA FCC (ÉTATS-UNIS SEULEMENT) ENTRETIEN ET MISE This equipment has been tested and found to Cet équipement a été...
- Page 28 Mattel South Africa (PTY) LTD, Office 102 I3, 30 Melrose Boulevard, Johannesburg 2196. ©2018 Mattel. ® and ™ designate U.S. trademarks of Mattel, except as noted. ® et ™ désignent des marques de Mattel aux États-Unis, sauf indication contraire. FLP27-3A70-G2 PRINTED IN MEXICO/IMPRIMÉ AU MEXIQUE 1101656456-3LA...
Need help?
Do you have a question about the FLP27 and is the answer not in the manual?
Questions and answers