Table of Contents

Related Manuals for usi SmartStep X Series


Summary of Contents for usi SmartStep X Series
- Page 1 ™ SmartStep Actuators 100% Continuous Duty Cycle, 100% Modulation, ON/OFF, DC Brushless, Modular, Hazardous Location Rated Electric Actuators X-Series & S-Series IN DEVELOPMENT Installation, Operation, and Technical Reference Manual...
-
Page 2: Table Of Contents
Table of Contents Safety Ratings 10.3 MODBUS Opt Setup Screen 10.3 MODBUS MAC Setup Screen Certifications 10.3 MODBUS Register Map Section 1: SmartStep Introduction Section 11: Status Relay Setup Tree 1.1 The Actuators & Module Options 11.1 Error Status Relay Setup Screen Section 2: Mechanical Overview 11.2 Open Status Relay Setup Screen 11.3 Close Status Relay Setup Screen... - Page 3 Document History Revision Date Notes April 14, 2020 Initial Release. Support of Firmware Version 1.4.1 April 29, 2020 Added Information to support Firmware Version 1.4.2 May 12, 2020 Added Information to support Firmware Version 1.5.1 Sep 23, 2021 Added Information to support Firmware Version 3.4.1 Jan 26, 2022 Added Information to support Firmware Version 3.5.0 Sep 19, 2022...
-
Page 4: Safety Ratings
Safety Ratings Failure to comply with the following limits may result in physical damage to actuator or possible harm to installation technician. It may also result in voided warranty and incur additional repair/shipment costs. Mechanical Cover Bolts: ¼-20 18-8 Stainless Screw (installed at factory). Should not be tightened with anything greater than 75 in-lbs of torque Module Screws: 6-32 18-8 Stainless Screws (installed at factory). -
Page 5: Section 1: Smartstep Introduction
Warranty All SmartStep actuators and modules are covered by a 2-year warranty that covers standard actuator operation and workmanship. The warranty expires 24 months from delivery date. If an actuator is not operating in the expected manner, please reference the trouble-shooting section of this document. If further assistance is needed contact your local distributor or nickn@update-systems.com If an actuator has failed under normal operation you may request a return material authorization through the distributor... -
Page 6: Section 2: Mechanical Overview
Section 2: Mechanical Overview 2.1 X-Series Mechanical and Install Dimensions Front Rear 3.14 11.25 [286mm] [80mm] 2.88 [73mm] Bottom X-Series Mounting Detail 2.84 4.82 1.65 M10x1.5 thread [72.13mm] [122.6mm] [41.9mm] 18mm deep 4 places 1.95 [49.5mm] 4.12 [104.6mm] 1.06 [27mm] 1/2x14 NPT Standard 3.13... -
Page 7: S-Series Mechanical And Install Dimensions
2.2 S-Series Mechanical and Install Dimensions 9.19 3.01 [233.37mm] [76.55] 2.89 [73.53] 8.44 [214.32mm] 1.95 [49.5] 1.39 1.85 [35.36] [63.5] [46.94] M8x1.25 thread 15mm deep [17.1] 4 places 8.03 1.95 1.39 [204] [17.1] [49.5] [35.36] M6x1 thread 4.93 15mm deep 3.84 [125.26] 4 places... -
Page 8: Section 3: Interface, Home, And Diagnostic Screens
Section 3: Interface, Home, and Diagnostic Screens 3.1 XCTRL/SCTRL Interface XCTRL Module Keypad SCTRL Module Keypad Buttons Use to navigate menus and set values Store Values/Confirm Cancel Entry/Back out of Menu During position calibration, press to set direction valve moves to open when in settings Manual Mode Hold or press to move in the direction of calibrated open position... -
Page 9: Xctrl Port/Connection Reference
3.2 XCTRL Port/Connection Reference Acceptable Wire Gauge Sizes for All Wire-to-PCB terminals: 14-28 AWG Input. Size wire appropriately for length of run Port & Functionality Port Rating Pin Description OPEN: +120 VAC Signal applied when valve needs 24-48 VDC to move to OPEN position J1 - Open/Close Control: offers three modes of operation. -
Page 10: Basic User Menu Map
3.3 Basic User Menu Map 3.4 MAIN Screen Elements 100.0%OPEN 100%CHRG Starting from the MAIN screen, basic status and RUN:2-WIRE OPN CLS diagnostic information about the module may be obtained by using the Up/Down or Right/Left Arrow A: 90.0° C:-------- buttons as shown to the right. -
Page 11: Super Cap Voltage Screen
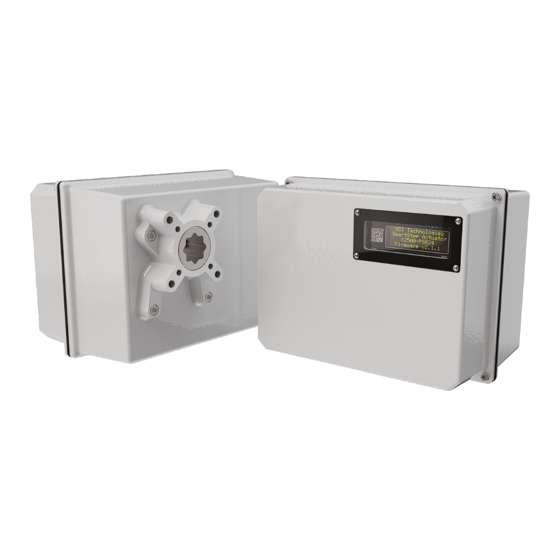
#MS: Motor Stalls #CS: Cycle Stalls C: Cycle number of last stall 3.5 Diagnostics 3 Screen 3.8 Device Information Screen %O: Last stall position in % open DIAGNOSTICS-3- ←↑ ↓ USI Technologies Max: 96°F SC:114°F SmartStep Actuator Mtr Starts: --80000 X2500-PS024-EPB... -
Page 12: Restore Defaults Screen
Use the UP and DOWN arrows to change the field parameter. These should not be changed unless the control module is being put on a different base! USI Technologies is not responsible for potential damage caused if the parameters are changed. -
Page 13: Section 4: Standard Operational Modes & Wiring
Section 4: Standard Operational Modes & Wiring 4.1 Manual Mode To operate the SmartStep actuator in Manual mode, simply press the MAN button on while on the home screen. While in manual mode the actuator will move when pressing either the OPEN or CLOSE buttons on the keypad. Manual Override Control using dry contacts on the J3 port will also move the actuator in this mode. -
Page 14: Auto Mode: 2-Wire Control Signal
4.3 Auto Mode: 2-Wire Control Signal 2-Wire mode is accessed by repeatedly pressing the AUTO button on the home screen until 2-WIRE is shown. Press ENT to select that mode. 2-Wire mode is wired using the J1 port on the XCTRL. Positive control wires are inserted into both the OPEN and CLOSE ports of J1. -
Page 15: Auto Mode: 4-20Ma Signal Control
4.4 Auto Mode: 4-20mA Signal Control 4-20mA mode is accessed by repeatedly pressing the AUTO button on the home screen until 4-20mA is shown. Press ENT to select that mode. 4-20mA mode is wired using J2. Insert 4-20 mA or 0-10 V control signal into IN+ terminal. Insert COM wire into IN- terminal. Valve moves to X% OPEN based on calibrated control signal values 4-20mA powered loop feedback is also available by connecting an ammeter to the OUT+ and OUT- terminals. -
Page 16: Auto Mode: Modbus Rtu
4.5 Auto Mode: MODBUS RTU MODBUS RTU mode is accessed by repeatedly pressing the AUTO button on the home screen until MB-RTU is shown. Press ENT to select that mode. Standard MODBUS operation. Default device ID is 1, BAUD is 38400, and timeout is 10s. MODBUS RTU mode is wired using the J5 Port. -
Page 17: Auto Mode: Modbus Tcp
4.7 Auto Mode: MODBUS TCP MODBUS TCP mode is accessed by repeatedly pressing the AUTO button on the home screen until MB-TCP is shown. Press ENT to select that mode. Standard MODBUS operation sent via TCP service. IP Address, Port, Gateway, and DHCP all need to be configured to match the site’s existing network to properly function. -
Page 18: Auto Mode: On-Off
4.7 Auto Mode: On-Off NOTE: This option is only available if your SmartStep actuator has a SuperCap module installed. Reference the device label or the device information screen if unsure if the option is installed. If the option is installed, then the part number will end in -EPB. For example, X2500-PSUNI-EPB and X0400-PS024-EPB have SuperCap modules. -
Page 19: Override Mode
4.8 Override Mode Manual Override is accomplished using the J3 Port using external relays or switches. The OVR terminal must be shorted to MC COM to enable the mode. Then CLOSE or OPEN need to be shorted to MC COM as well to override the actuators movement in the proper direction. -
Page 20: Status Relay Wiring
4.9 Status Relay Wiring The status relays are low current solid state relays used to connect inputs to PLC for position and fault notification. By default the relays make contact when the valve is at 0% OPEN, 100% OPEN, and if there is not currently and fault. When there is a fault, that relay will break contact. -
Page 21: Section 5: Initial Setup / End Point Calibration
Section 5: Initial Setup / End Point Calibration 5.1 Initial Setup 5.3 Failsafe Setup Once the SmartStep actuator is properly mounted on the valve and has been verified to be wired properly, apply By default the Failsafe position for a SmartStep actuator is power. -
Page 22: Advanced Configuration Access
Section 6: Advanced Configuration Map **Note: Where applicable the mock screens in the following 6.1 Advanced Configuration Access sections are all shown with the DEFAULT values in the controller when the actuator is shipped from the factory Just like performing the End Point Calibration, all advanced unless a different option is requested upon order such as configuration on the actuator may be accessed from the Power Save Mode. -
Page 23: Section 7: Position Setup Tree
Section 7: Position Setup Tree Refer to Section 6 on the steps needed to take to access this configuration tree 7.3 Range Control Screen 7.1 Position Setup Screen As shown in section 5.2, this screen is used to calibrate the The Range Control screen is the last screen in the Position Setup tree. -
Page 24: Section 8: 4-20Ma Setup Tree
Section 8: 4-20mA Setup Tree Refer to Section 6 on the steps needed to take to access this Calibration: configuration tree 1) Press to enable the screen 8.1 4-20mA Control Calibration Screen 2) Hook up meter to read the current output to J2 OUT+ and OUT- This screen allows you to calibrate the mA values that determine the %OPEN that the actuator will move the valve. -
Page 25: Section 9: Speed Control Tree
Section 9: Speed Control Tree Refer to Section 6 on the steps needed to take to access this configuration tree 9.1 Speed Control Screen By default the SmartStep Actuator is set to 70% speed. Use this screen to change the speed if a faster or slower speed is needed. -
Page 26: Section 10: Modbus Setup Tree
Section 10: MODBUS Setup Tree Refer to Section 6 on the steps needed to take to access this 10.3 MODBUS Opt Setup Screen configuration tree *Note: Even if not using MODBUS to control the actuator, MBUS-OPT-SETUP ←↑↵ → status information is available via the MODBUS ports with Port: 0502 proper setup. -
Page 27: Modbus Register Map
10.3 MODBUS Register Map Table Name Coil/Register Numbers Data Addresses Type Discrete Output Coils 1-9999 0000-270E Read/Write Discrete Input Coils 10001-19999 0000-270E Read Only Analog Input Registers 30001-39999 0000-270E Read Only Analog Output Holding Registers 40001-49999 0000-270E Read/Write Coil/Register Address Size Mode (R/W) Data Type Description bool OPEN/CLOSE Forced Coil output (1= “OPEN”... -
Page 28: Section 11: Status Relay Setup Tree
Section 11: Status Relay Setup Tree Refer to Section 6 on the steps needed to take to access this 11.3 Close Status Relay Setup Screen configuration tree STAT-RELAY-CLS ←↑↵↓→ The Status Relays are made to make low-current Mode: Make on Event connections to light towers or equivalent status indicators. -
Page 29: Section 12: Temperature Degree Unit Tree
Section 12: Temperature Degree Unit Tree Refer to Section 6 on the steps needed to take to access this configuration tree 12.1 Temperature Degree Units Screen The units that the actuator will display temperature in. Options are Fahrenheit (°F) or Celsius (°C) TEMP-DEG-UNITS ←... -
Page 30: Section 13: Open/Close Setup Tree
Section 13: OPEN/CLOSE Setup Tree Refer to Section 6 on the steps needed to take to access this position in FAILSAFE SETUP configuration tree ▪ PERCENT OPEN - Valve moves to X percent open 13.1 1-Wire Setup Screen 2. ONE-SHOT - If this option is chosen, instead of sending a continuous signal to keep the actuator in the CLOSE or For more information on how 1-Wire functions refer back to OPEN position, you can send a pulse or use a button... -
Page 31: Oc Timer Control Setup Screen
Section 13: OPEN/CLOSE Setup Tree Press the button to enter edit mode. Use Arrows 13.4 OC Timer Control Setup Screen to move between the editable fields. Use Arrows to OC-TIMER-CTRL- ←↑↵↓→ change each field’s value. Press again to save settings. Override J1 Input: 13.5 OC Input Delay Setup Screen This screen allows for a timer to be set that will automatically... -
Page 32: Section 14: Digital Noise Input Filter Tree
Section 14: Digital Noise Input Filter Tree Refer to Section 6 on the steps needed to take to access this configuration tree 14.1 Digital Noise Filter Screen The Digital Noise filter applies a filter to any digital input into the actuator. By default it’s set to MED or 300ms. If seeing random glitches/inputs you may change the setting to HIGH to increase the delay to 500ms. -
Page 33: Section 15: Power Management Tree
Section 15: Power Management Tree Refer to Section 6 on the steps needed to take to access this configuration tree 15.1 Power Management Screen Power management controls the conditions that the actuator will keep motor torque enabled. If current draw is an issue, this is one setting that will help lower the standby power of the actuator. -
Page 34: Section 16: Xctrl Fault Codes
Section 16: XCTRL Fault Codes 16.1 Error fault codes Fault Code Cause Options to Remedy 1. Verify valve/shaft movement. If no movement ensure there is no blockage in the valve. All of these errors relate to the XCTRL MAGNET–RANGE 2. Verify model on SmartStep label being able to see movement on the matches model set in XCTRL by pressing shaft when sending an output to the... -
Page 35: Section 17: Troubleshooting
Section 17: Troubleshooting 17.1 General Issues Symptom Possible Causes/Remedies 1. Ensure voltage is within range on label and present at terminal block on the PS024 or PSUNI. Actuator won’t power on 2. Unplug power connector from bottom right hand corner of XCTRL. With voltage applied to the PSUNI/PS024 the voltage on this plug should be 48VDC. -
Page 36: 4-20Ma/0-10Vdc Issues
17.3 4-20mA/0-10VDC Issues Symptom Possible Causes/Remedies My panel is outputting More likely than not this is just a long wire run issue. It can be solved by simply performing a 20mA/4mA but the 4-20mA calibration as shown in section 8.1. If the SmartStep OPEN or CLOSE position is SmartStep is showing less calibrated to what your panel is supplying, it will treat that signal as a full 4mA or 20mA so that than that...
Need help?
Do you have a question about the SmartStep X Series and is the answer not in the manual?
Questions and answers