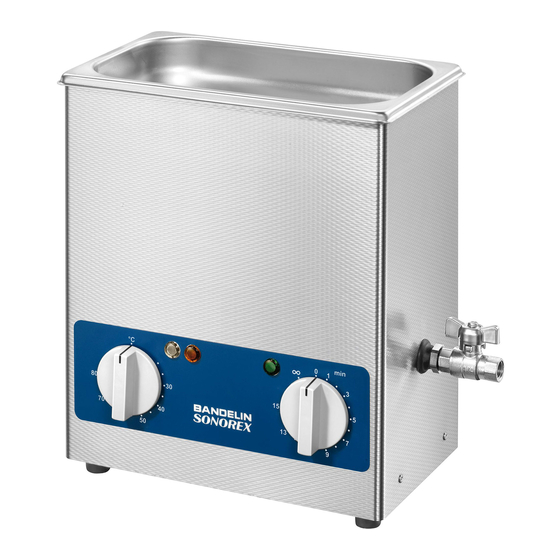
BANDELIN SONOREX RK 31 Service Instructions Manual
Compact ultrasonic cleaning units
Hide thumbs
Also See for SONOREX RK 31:
- User instructions (36 pages) ,
- Operating manual (52 pages) ,
- Operating instructions manual (50 pages)
Table of Contents
Advertisement
1
55 years of experience in ultrasound technology
3
RK 31, RK 31 H
RK 52, RK 52 H, RK 52 CH
RK 100, RK 100 H, RK 100 SH, RK 102 H, RK 102 CH RK 100, RK 100 H, RK 100 SH, RK 102 H, RK 102 CH
TK 100, TK 100 H
RK 103 H, RK 103 CH
RK 106
RK 156, RK 156 BH
RK 158 S
RK 170, RK 170 H
RK 255, RK 255 H, RK 255 CH
RK 510, RK 510 H
RK 512 H, RK 512 CH
RK 513
RK 514, RK 514 H, RK 514 BH
RK 515 CH
RK 517 H
RK 1028, RK 1028 H, RK 1028 BH, RK 1028 C,
RK 1028 CH
RK 1029, RK 1029 H
RK 1040
RK 1050, RK 1050 H, RK 1050 BH, RK 1050 CH
1217u e/2008-09
Service Instructions
Compact Ultrasonic Cleaning Units
230 V
Type
RK 31, RK 31 H
RK 52, RK 52 H, RK 52 CH
TK 100 H
RK 103 H, RK 103 CH
RK 106
RK 156, RK 156 BH
RK 255, RK 255 H, RK 255 CH
RK 510, RK 510 H
RK 512 H, RK 512 CH
RK 513
RK 514 H, RK 514 BH
RK 515 CH
RK 1028, RK 1028 H, RK 1028 BH, RK 1028 C,
RK 1028 CH
RK 1040
RK 1050, RK 1050 CH
115 V
Advertisement
Table of Contents

Subscribe to Our Youtube Channel
Related Manuals for BANDELIN SONOREX RK 31


Summary of Contents for BANDELIN SONOREX RK 31
- Page 1 55 years of experience in ultrasound technology Service Instructions Compact Ultrasonic Cleaning Units Type 230 V 115 V RK 31, RK 31 H RK 31, RK 31 H RK 52, RK 52 H, RK 52 CH RK 52, RK 52 H, RK 52 CH RK 100, RK 100 H, RK 100 SH, RK 102 H, RK 102 CH RK 100, RK 100 H, RK 100 SH, RK 102 H, RK 102 CH TK 100, TK 100 H TK 100 H...
-
Page 2: Table Of Contents
Contents Overview of possible faults, causes and remedies ..............3 Repair advices ........................5 Disassembly of unit ......................... 5 Repairs ........................... 6 4. 1 Check of transistors ......................6 4. 2 Exchange of transistors ....................... 6 4. 2. 1 Transistors in insulated case (Isowatt 218) ................6 4. -
Page 3: Overview Of Possible Faults, Causes And Remedies
BANDELIN Compact Ultrasonic Cleaning Units for aqueous cleaning liquids are efficient and failsafe. The performance of the units depends on a number of factors, e.g. • the cleaning liquid used • the filling-level in the oscillating tub or in the inserted beaker •... - Page 4 Faults Possible causes Tests and Remedies Unsatisfactory cleaning - Unsuitable cleaning agent? Use TICKOPUR, TICKOMED, STAMMOPUR, STAMMOSEPT or ask results for advice. - Overloaded with items to be Reduce amount to be cleaned. cleaned? - Fill-height of cleaning liquid Make sure it is 2/3rds full, goods to be in oscillating tub or inserted cleaned must be completely covered beaker too low?
-
Page 5: Repair Advices
Repair advices Repairs must only be carried out by authorised personnel. Replace defective parts with SONOREX original parts only. It is recommended to limit the repair of the units to the exchange of fuses, transistors, generator PCB with base plate, the heater, transducers (without new bonding), as well as the timer. The parts mentioned are supplied as replacement parts. -
Page 6: Repairs
Repairs Check of transistors Check the transistors before exchanging, in order to save unnecessary costs. The transistors can be checked in the inserted condition: Check of the bipolar transistors (generators without ICs): 1) Diode behaviour of the paths B-E, B-C and E-C: in forward direction approx. -
Page 7: Transistors In Plastic Case (To-220) And Synthetic Material Press-On Plate
4. 2. 2 Transistors with plastic case (TO-220) and synthetic material press-on plate Exchange the transistor as follows: Loosen the self locking nuts and the countersunk screws M3 and remove the transistor holder. Cut off the transistor connections just below the transistor using side cutting pliers. The transistors are attached to the mica disc with heat conducting paste. -
Page 8: Transistor In Plastic Case And Metal Clip(S)
4.2.4 Transistor in plastic case and metal clip(s) Before changing the transistors verify the shunt of the current measurement. shunt for current measurement The value (imprinted) should be between 0,5 and 10 Ω. If this resistor has blown, further damages are probable and the equipment must be returned to the supplier for repair. -
Page 9: Exchanging The Generator Pcb Including The Base Plate
4. 3 Exchanging the generator PCB including the base plate Return ultrasonic cleaners RK 1028 C and RK 1050 /CH for repair to the supplier. The following repair instructions are not applicable for this type of units. 4. 3. 1 With original generator of older type and supply of a replacement generator without ICs The generator PCB with base plate is preadjusted. - Page 10 In case of change of wiring at timer 1-pole timer (N) 2-pole timer (L) lamp lamp remove this line connect with: X3 connect with: X3 to the generator to the generator Wiring of FH1-2 for older equipment with heating mains plug or mains cable heating HF-line to the oscillating...
-
Page 11: Repairing The Heating
4. 4 Repairing the heating 4. 4. 1 Checking the heating elements and data Check the heater fuses for conductivity in accordance with wiring diagram in appendix 3. Check the dry-run protector for conductivity. Check the heating for conductivity. Check the heating for faulty insulation against tub. Check the heater resistance. -
Page 12: Separating The Oscillating Tub From The Housing
4.4.2 Separating the oscillating tub from the housing 4.4.2.1 Disassembly of screwed drain Remove the base plate, see item 3. Disassemble the drain: Cut the silicon rubber seal between the edge of the tub and the housing with a sharp knife and push out the tub. Pull the thermostatic sensor out of the push-in link or remove the regulating thermostat completely, see item 4. -
Page 13: Exchanging A Defective Heating
4. 4. 3 Exchanging a defective heating Separate the connections of the defective heater and if necessary from the dry-run protector thermostat or the flat plugs on the PCB. Remove defective heating element(s). It may be necessary to remove the perforated attachment plate for the dry-run protector thermostat. -
Page 14: Exchanging The Regulating Thermostat
4. 4. 6 Exchanging the regulating thermostat Remove knob. Older units are equipped with housing silicone rubber turning knobs incl. threaded bolt. Loosen it before exchanging. attachment screws push-in link Unscrew the attachment screws from the regulator thermostat. turning knob Mark the pin connections of the thermostat in accordance with the pin number and then disconnect. -
Page 15: Replacement Parts For The Heating
Welded drain - Screw on the locking nut 3. Wind the white PTFE tape clockwise around the screw neck (approx. 10 turns). Screw the ball cock 4 onto the screw neck approx. 5 turns. Attention: Hold the screw neck with the spanner and locking nut 3, to take stress off the tub. Do not over-tighten the ball cock, do not unscrew it, the sealing will be damaged. -
Page 16: Repair Of Oscillating Systems
4. 5 Repair of oscillating systems Return ultrasonic cleaners TK 100 and TK 100 H for repair to the supplier. The following repair instructions are not applicable for flat oscillating systems. The oscillating systems are located under the bottom of the tub. Depending on the type of unit, oscillating systems with one or two PZT-rings are used. -
Page 17: Oscillating Systems With Two Pzt-Rings
4. 5. 2. 1 Oscillating systems with two PZT-rings Replacement parts: 2 PZT-rings, diam. 38mm, SW 004 2 Cu-Be disc with soldered squarehead screw, TS-0152-LM (Cu-Be = copper- beryllium) 2 angles, RK 539 2 spring washers, DIN 127 B 4, NU 101 2 nuts, DIN 934 M 4, NM 303 1 hexagon socket head screw, DIN 912-M 10 ×... -
Page 18: Oscillating Systems With One Pzt-Rings
4. 5. 2. 3 Oscillating systems with one PZT-ring Replacement parts: 1 PZT-ring, diam. 38mm, SW 004 1 insulating disc* IS 013 white ring 2 Cu-Be disc with soldered squarehead screw, TS-0152-LM (Cu-Be = copper- beryllium) 2 angles, RK 539 2 spring washers, DIN 127 B 4, NU 101 2 nuts, DIN 934 M 4, NM 303 2 insulating bushes, 11 ×... -
Page 19: Exchanging The Timer
4. 6 Exchanging the timer - Pull the mains plug! - Remove the screws from the base plate (see point 3). - Lift the base plate carefully. - Remove knob. Older units are equipped with turning knobs incl. threaded bolt. Loosen it before exchanging. -
Page 20: Exchanging The Pilot Lamps
4. 8 Exchanging the pilot lamps Pull the mains plug! Remove the screws from the base plate along the case’s rim and if necessary slotted head screws in the feet. Lift the base plate carefully. Pull out the defective lamp. Remove the clamping plugs with silicone hose from the contacts of the defective lamp. -
Page 21: Data For Current Consumption
RK 1050 CH 11,1 A 22,2 A manufacturer: 1 2 GmbH & Co. KG 55 years of experience in ultrasound technology Certification Heinrichstraße 3-4 Tel.: +49-30-768 80-0 info@bandelin.com EN ISO 9001:2000 12207 Berlin Fax: +49-30-772 20 14 www.bandelin.com EN ISO 13485:2003...
Need help?
Do you have a question about the SONOREX RK 31 and is the answer not in the manual?
Questions and answers