
Related Manuals for Sanus Cadenza 61


Summary of Contents for Sanus Cadenza 61
- Page 1 Cadenza Instruction Manual Cadenza 61 Cadenza 75 We’ll Make It Stress-Free If you have any questions along the way, just give us a call. 1-800-359-5520. We’re ready to help!
-
Page 2: Weight Limits
IMPORTANT SAFETY INSTRUCTIONS – SAVE THESE INSTRUCTIONS – PLEASE READ ENTIRE MANUAL PRIOR TO USE Weight Limits 5 lbs 2.3 kg 5 lbs 2.3 kg 150 lbs BACK VIEW FRONT VIEW 68.0 kg 30 lbs 50 lbs 50 lbs 13.6 kg 22.7 kg 22.7 kg 10 lbs... - Page 3 Required Tools Supplied Parts and Hardware WARNING: This product contains small items that could be a choking hazard if swallowed. Before starting assembly, verify all parts are included and undamaged. If any parts are missing or damaged, do not return the damaged item to your dealer;...
- Page 4 Dimensions 61.0 1549 20.1 Cadenza 61 19.2 24.9 [mm] 22.4 19.4 21.2 (11U) 23.0 14.5 21.8 19.0 18.0 11.3 75.0 1905 34.1 Cadenza 75 19.2 24.9 [mm] 22.4 19.4 21.2 (11U) 23.0 14.5 21.8 19.0 18.0 11.3...
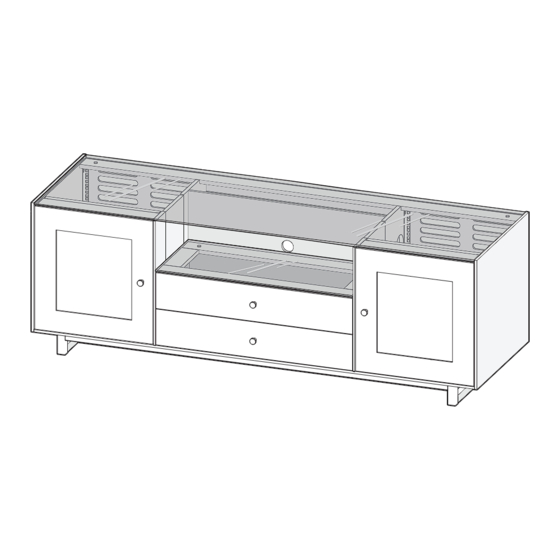
- Page 5 Feet Parts and Hardware for STEP 1 End Foot Center Foot End Cap End Foot Screw Center Foot Screw Cabinet Carefully lift the cabinet and lay it on its back onto a protective surface. Slide the end feet into the square tubing and secure using eight end foot screws Press the end caps into the end feet Install the center foot...
- Page 6 Soundbar Preparation (optional) To make room for a soundbar or other long equipment: Remove the dividers on one or both sides of cabinet Remove the support pins from cabinet NOTE: See STEP 5 on PAGE 9 to switch the front door panels with mesh screens to accommodate the speakers.
-
Page 7: Glass Panels
Glass Panels Parts for STEP 3 Top Glass Panel Glass Shelf Set the glass shelf into place so the recessed holes in the glass line up with the glass supports . Set the top glass panel into place so the recessed holes in the glass line up with the glass supports . -
Page 8: Shelf Adjustment
Shelf Adjustment Remove the door and rail cover by removing the three mounting screws on each side of the cabinet Mounting Screw Door Rail Cover Remove the four rack screws holding the shelf in place. Reposition the shelf and secure with the four rack screws. Rack Reattach the door and rail cover using the mounting six screws. - Page 9 Door Screens (optional) Parts for STEP 5 Screen Panel To utilize speakers behind the doors, inside the cabinet: Pull the 4 retaining strips from the back of the door frame. Remove the solid panel. Install the screen panel into the door. Replace the 4 retaining strips to secure the screen in place.
-
Page 10: Operation
Operation REMOVING THE BACK PANELS Remove the magnetic back panels of cabinet by pulling away from the cabinet. Replace by lining up the panels and allowing the magnets to catch the cabinet CABINET DOORS AND DRAWERS The doors and drawers include an automatic closing mechanism. - Page 11 ELM701 Anti-tip Strap (Sold Separately)
- Page 12 ©2013 Milestone AV Technologies, a Duchossois Group Company. All rights reserved. Sanus is a division of Milestone. All other brand names or marks are used for identifi cation purposes and are trademarks of their respective owners.
Need help?
Do you have a question about the Cadenza 61 and is the answer not in the manual?
Questions and answers